Configure Contract-Based Pricing
Learning Objectives
After completing this unit, you’ll be able to:
- Create Contract Item Prices.
- Associate a Contract Item Price Adjustment Tier with a Contract Item Price record.
- Build a pricing procedure to implement contract-based pricing.
The Need For Contract-Based Pricing
Imagine you've secured a fantastic deal with a long-term customer by offering them a specific discount. Without contract-based pricing, every time that customer places a new order, your sales team would have to:
- Manually recall the terms of the original agreement.
- Double-check the prices and discounts.
- Add the details manually to the new quote or order.
This approach is prone to error, can easily frustrate customers if a negotiated price is overlooked, and is a major time sink. Contract-based pricing in Agentforce Revenue Management removes these headaches. Once the negotiated pricing is defined within a contract record, it becomes an automated process. When your sales rep selects the customer's account and the defined contract for a transaction, the system automatically applies all agreed-upon prices and discounts. It's streamlined, accurate, and ensures your customers always get the deal they signed up for.
This unit guides you through the key steps involved in implementing contract-based pricing using Salesforce Agentforce Revenue Management.
Define Contracted Prices
A sales rep at InfinitraBytes has just negotiated a new contract with EdgeMX for headset purchases. This contract includes two crucial pricing deals:
- A flat base price of $40 dollars for every headset purchased.
- An additional 10% volume discount if EdgeMX purchases more than 100 headsets in a single order.
Richa, our pricing admin, needs to make sure these negotiated prices are accurately reflected and automatically applied for EdgeMX.
Follow along in your Developer Edition org as she adds these custom pricing terms to EdgeMX’s contract record.
- From the App Launcher, find and select Contracts.
- Click New.
- Add these details:
- Account Name: EdgeMX
- Contract Start Date: Today’s date – 3 days. So, if today’s date is 6/25/2025, you need to select 6/22/2025.
- Contract Term (months): 12
- Click Save.
- On the Related tab, for Contract Item Prices, click New.
- For Item, select Product and then in the adjacent search bar select Headset.
- Next, add these details to create a contracted price for the headset product:
- Product Selling Model: One Time
- Price:
40 - Start Date: Select Date = Today’s date – 1 day and Time = 12:00 PM
- End Date: Select Date = Today’s date + 90 days and Time = 12:00 PM
- Adjustment Method: Range
- Click Save.
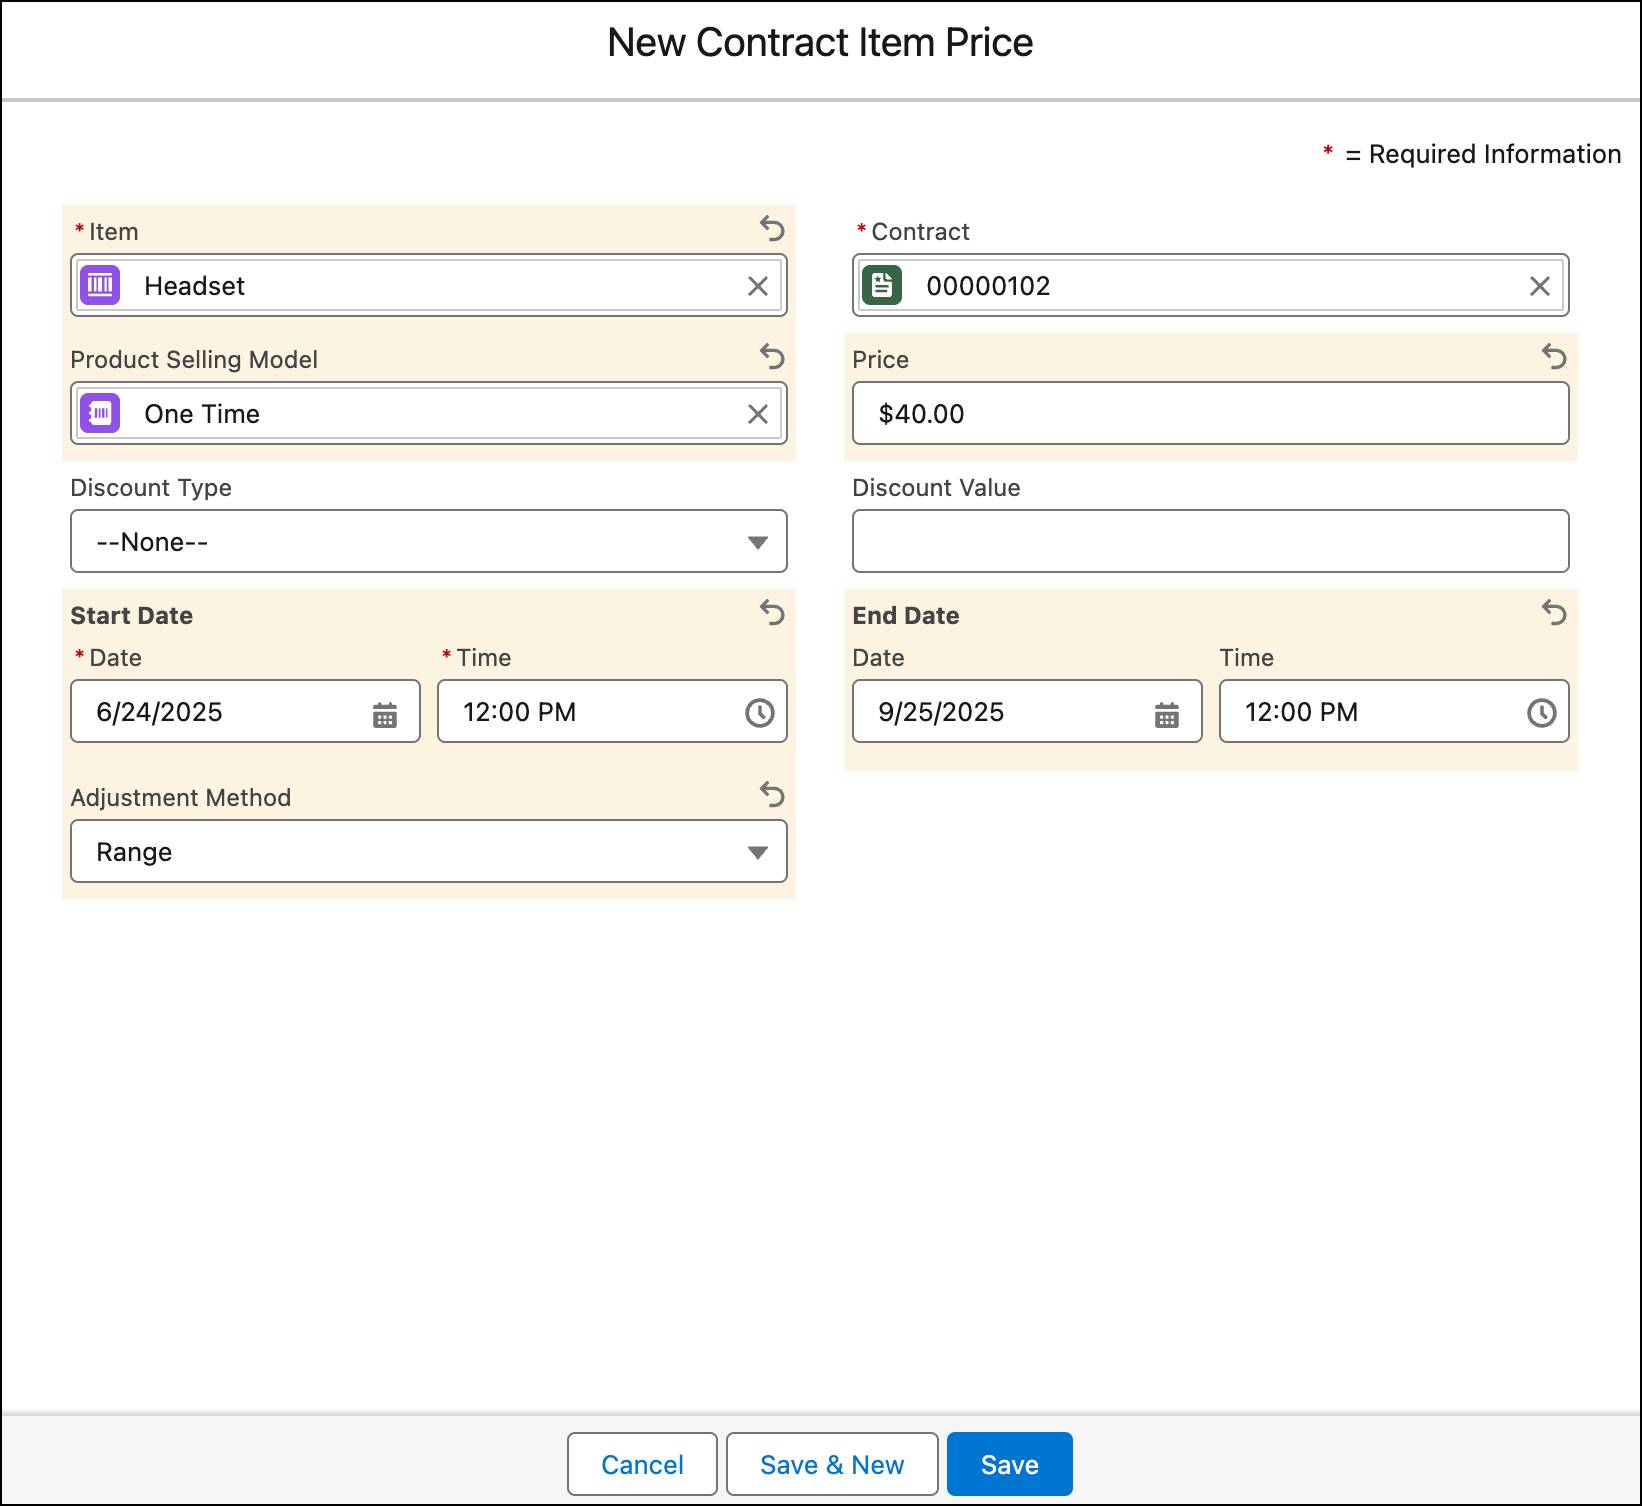
You’ve successfully created a contracted base price of $40 for the headset product. This price replaces the standard list price in the system.
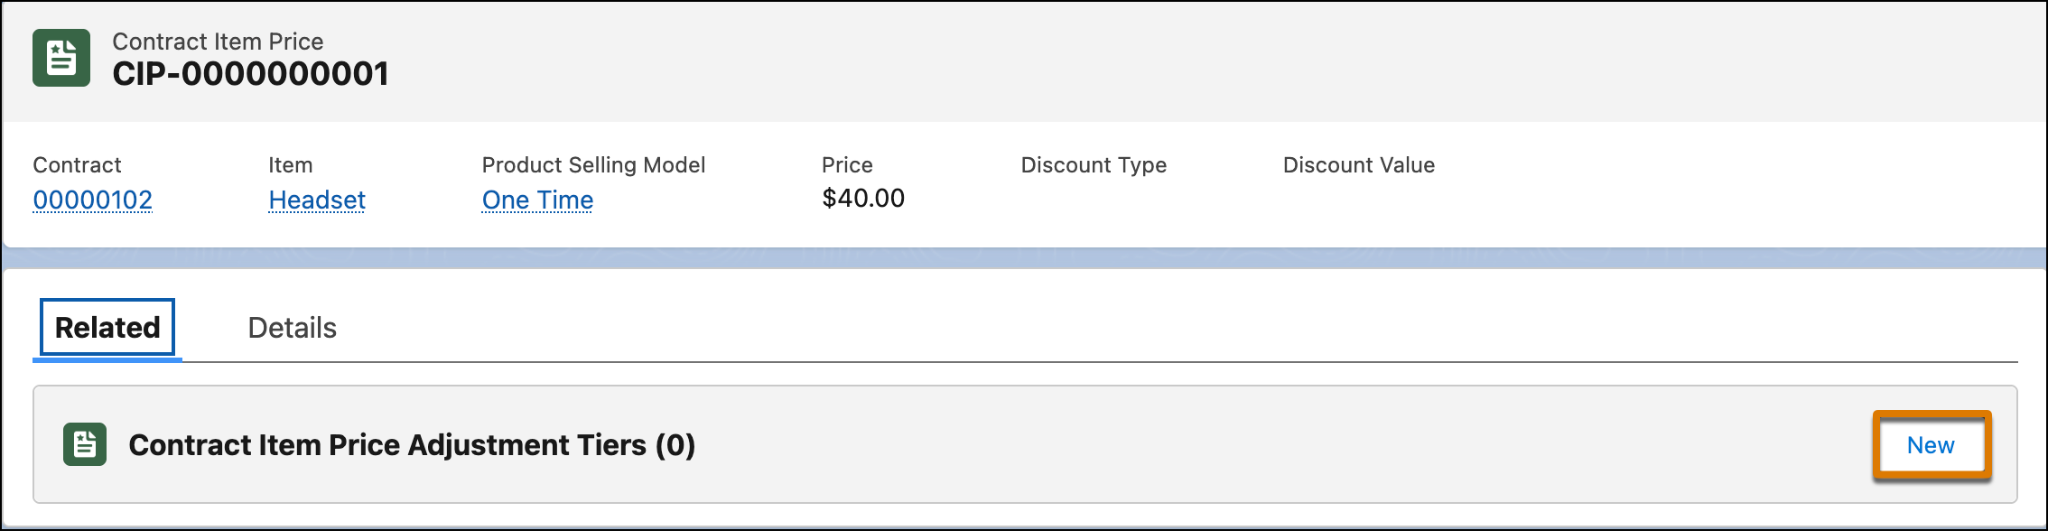
Next, you associate a Contract Item Price Adjustment Tier to this Contract Item Price record.
Create Contract Item Price Adjustment Tiers
Use a Contract Item Price Adjustment Tier in conjunction with a Contract Item Price record to add dynamic, volume-based discounts to the contracted base price. Essentially, the adjustment tier defines how the negotiated $40 base price for the headset product changes based on its purchase quantity.
Follow the steps to create a Contract Item Price Adjustment Tier.
- On the newly created Contract Item Price page, navigate to the Related tab.
- For Contract Item Price Adjustment Tiers, click New.
- Add these details:
- Tier Type: Percentage
- Lower Bound:
101 - Tier Value:
10
- Click Save.
You've successfully created a Contract Item Price Adjustment Tier to give EdgeMX an additional 10% volume discount whenever they buy more than 100 headsets in a single order.
Next, activate the contract.
- On the Contract page, select Activated from the approval flow.
- Click Mark as Current Status.
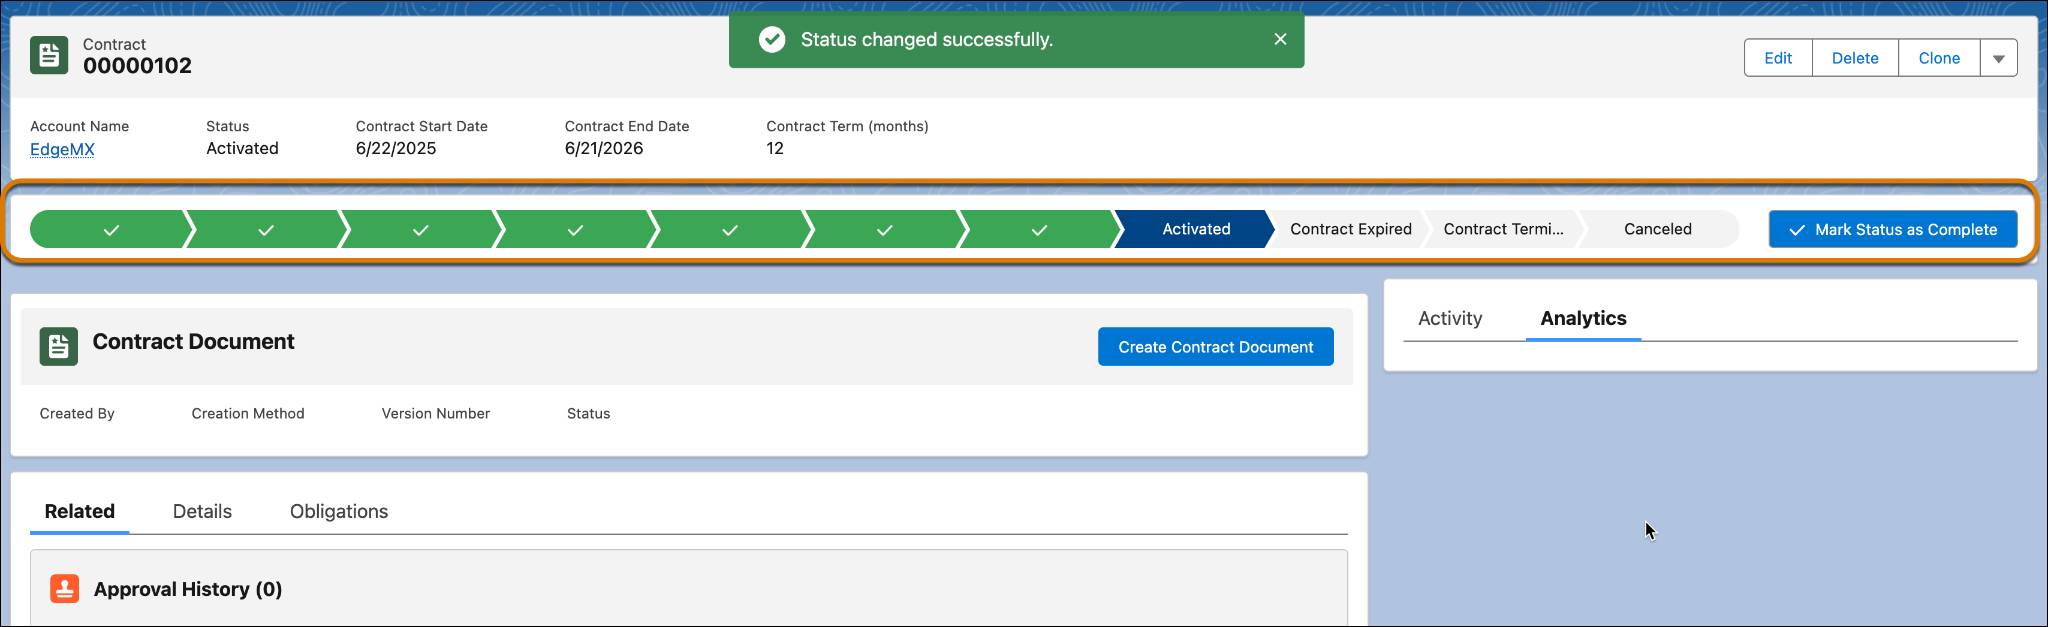
Your contract is now active.
Refresh the Decision Tables
Finally, refresh the Contract Pricing Entries and the Contract Pricing Volume Tiers decision tables in your org. To do this, follow the same steps from the Price Management with Agentforce Revenue Management module.
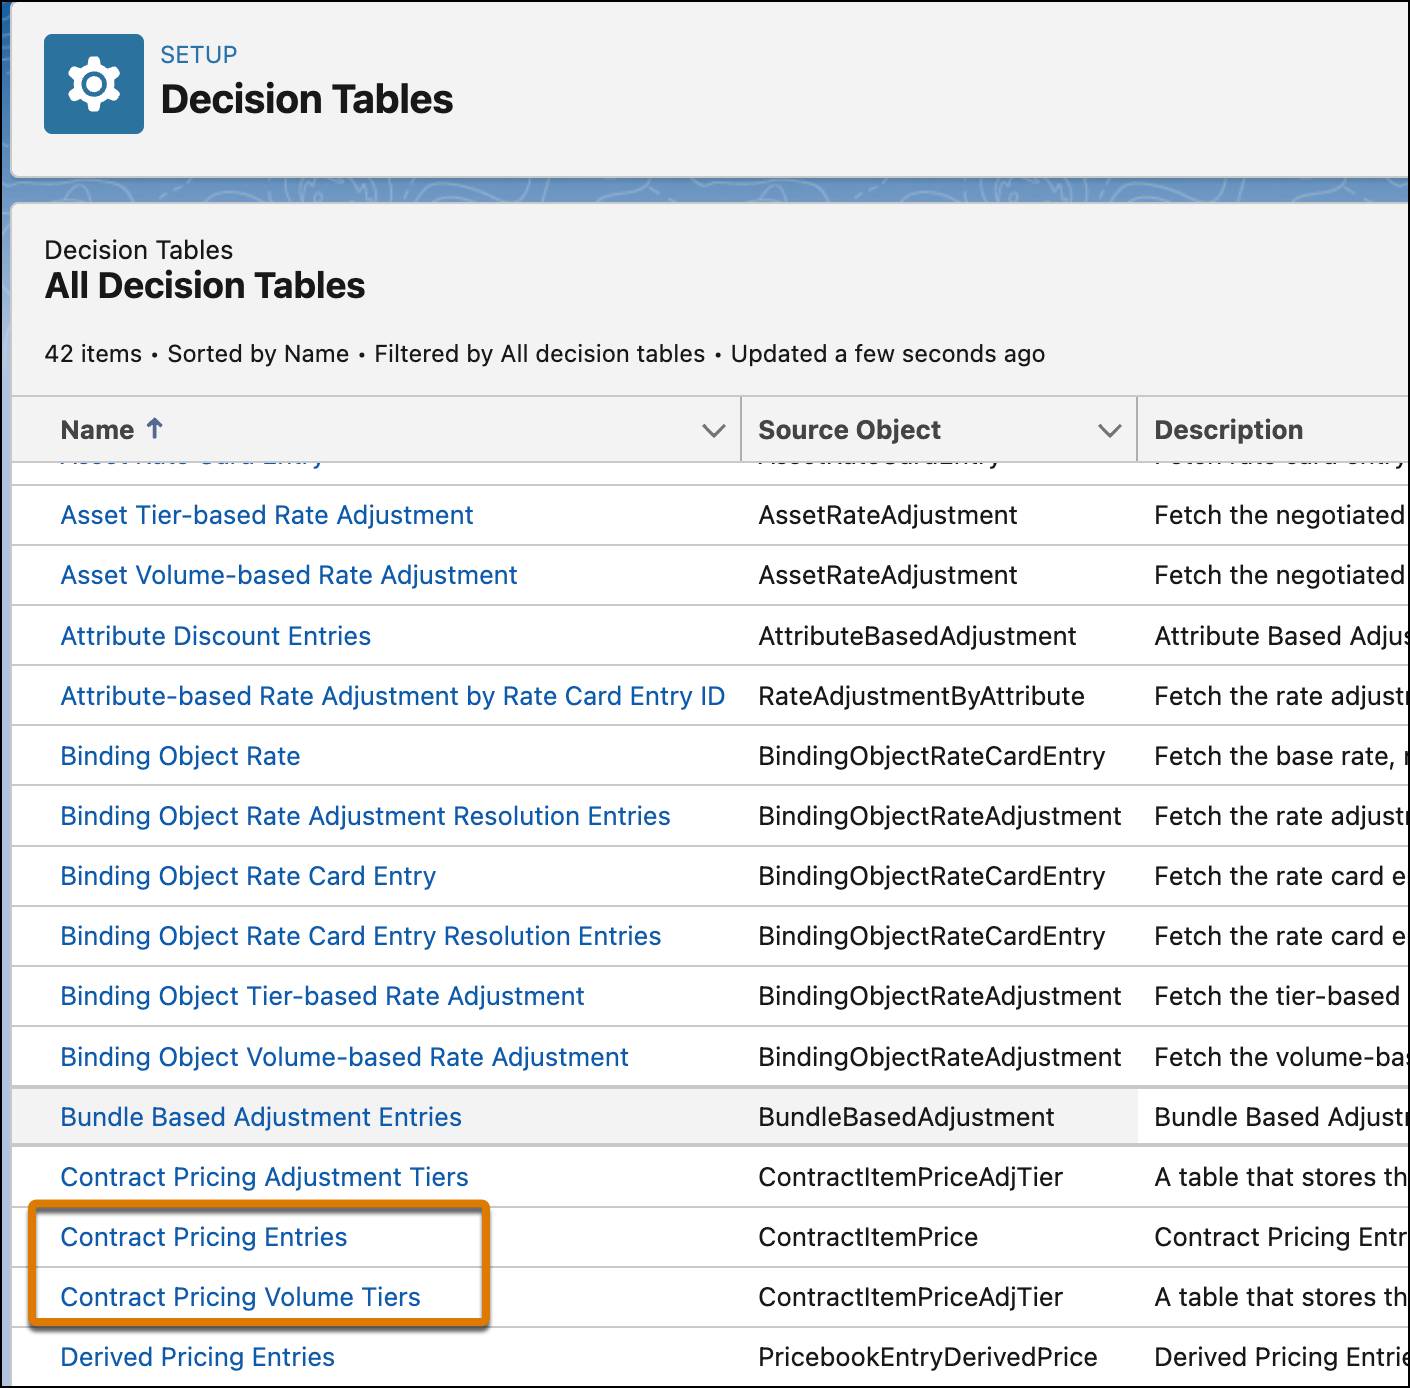
This makes sure that the latest pricing data is available in these decision tables.
Build the Pricing Procedure
Having captured the negotiated prices for EdgeMX Technologies using the Contract Item Price and the Contract Item Price Adjustment Tiers entities, Richa moves on to the next step, which is to configure the pricing procedure.
To do this, she uses a pricing procedure named Pricing Procedure Demo_5. It already includes the Pricing Setting, List Price, and the Volume Discount elements. However, the existing List Price and Volume Discount elements are set up for standard, non-contracted prices. To handle EdgeMX's special deal, Richa needs to add new List Price and Volume Discount elements to this procedure that’s configured to pull in the contracted prices.
Follow along on your Developer Edition org.
- From the Price Management application, select Pricing Procedures from the navigation pulldown menu.
- Change the list view to All Pricing Procedures.
- Click Pricing Procedure Demo_5.
- Under Pricing Procedure Versions, click Pricing Procedure Demo_5 V1. The Pricing Procedure Builder opens in a new browser tab.
- Expand the Pricing Setting element and under Input Variables, complete this mapping:
- Contract Id:
ItemContract
- Contract Id:
- Expand the the existing List Price and Volume Discount elements and notice that the Use contract-based pricing checkbox isn't selected.
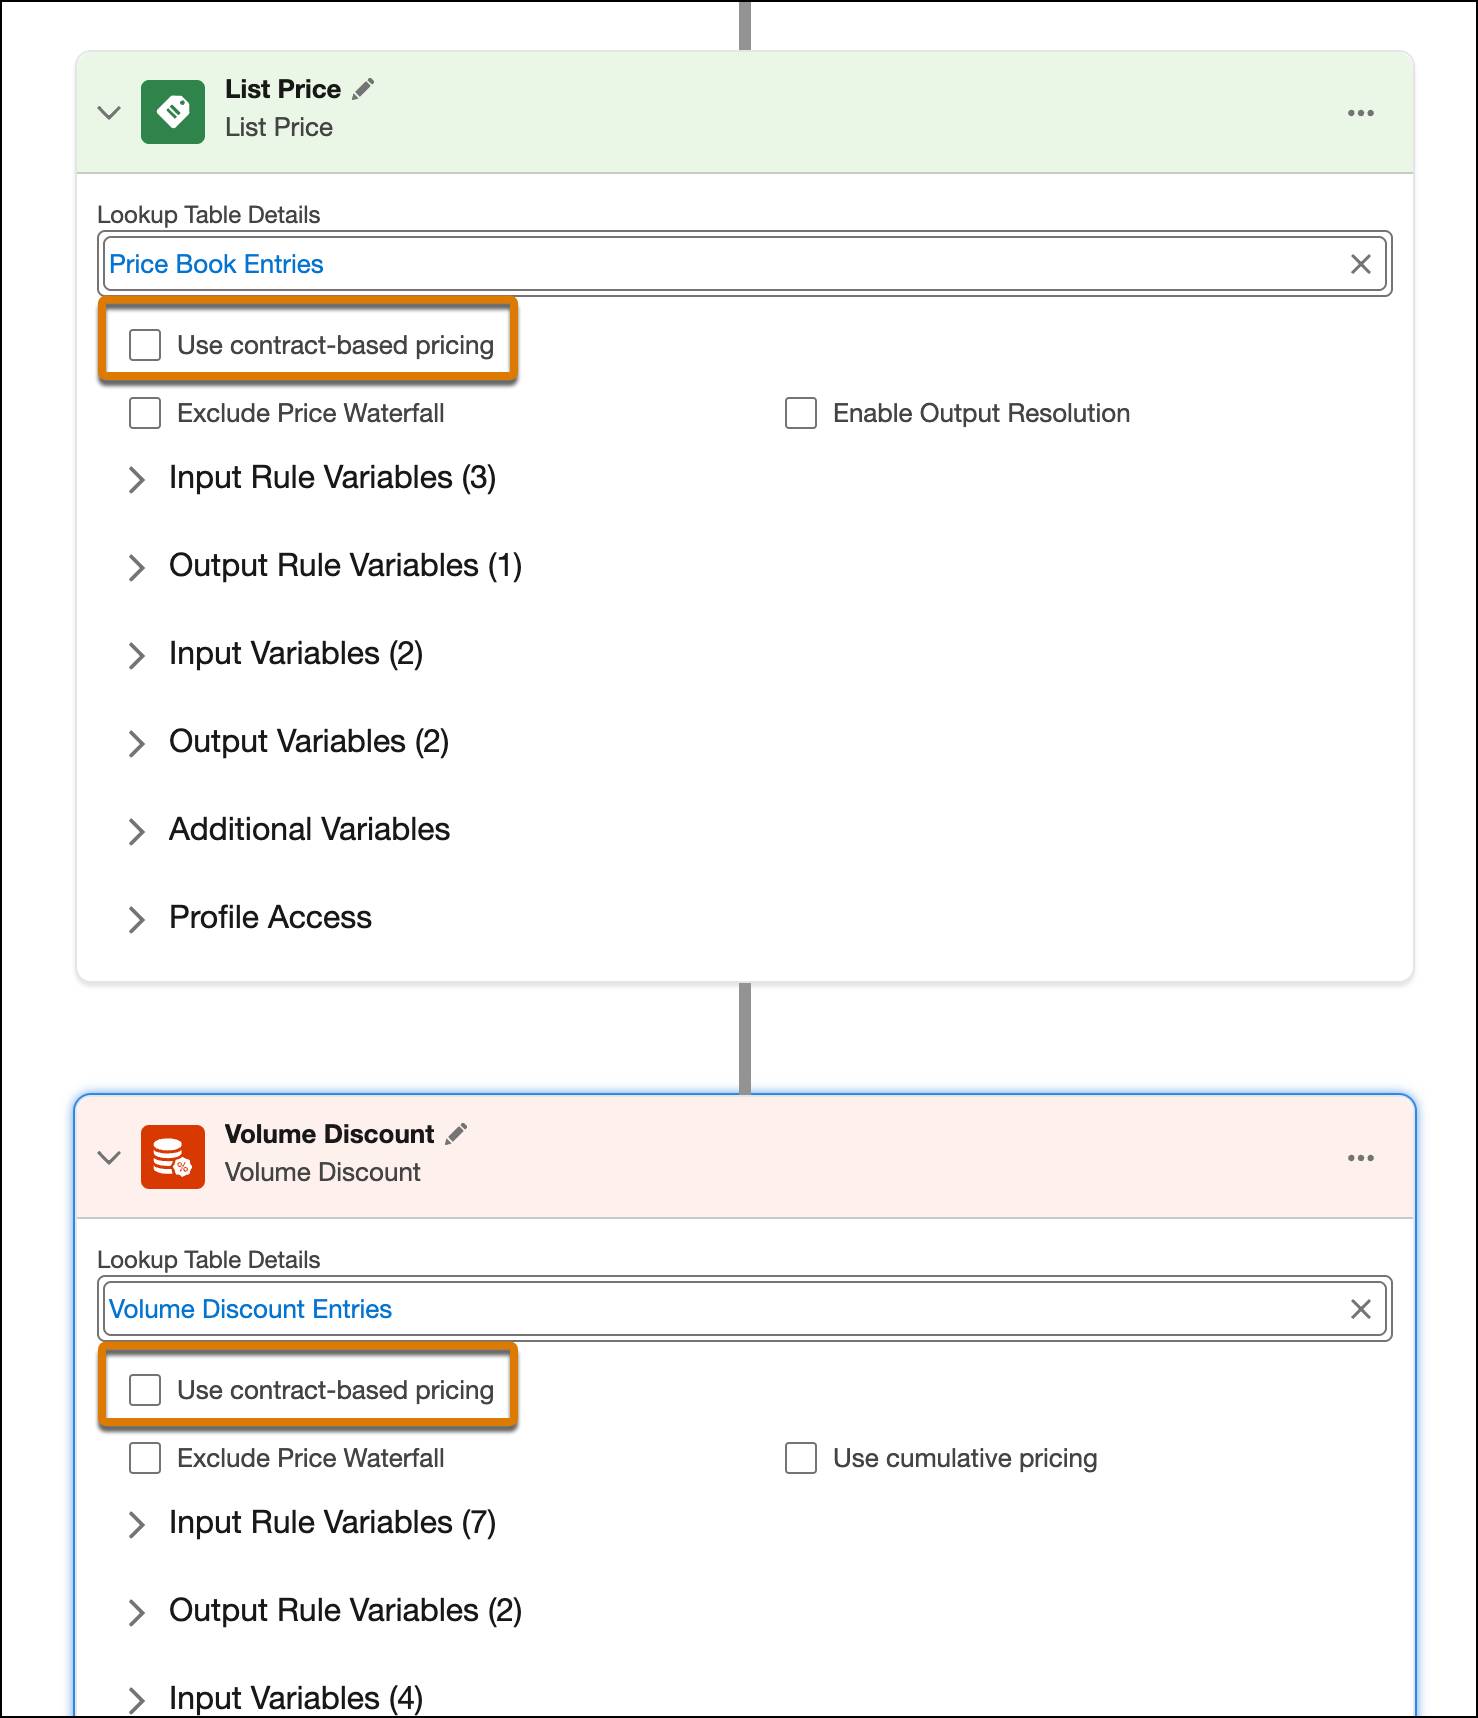
These two pricing elements identify and apply the standard, non-contracted prices or discounts.
Add Another List Price element
Next, you add a new List Price element to this pricing procedure and ensure that the Use contract-based pricing checkbox is selected. This checkbox instructs the pricing engine to look for a Contract Item Price directly linked to the active contract for that customer and product. If found, the pricing engine uses that negotiated price instead of the standard list price.
- Under the Volume Discount element, click the + symbol.
- Search for and select List Price from the Add Element menu.
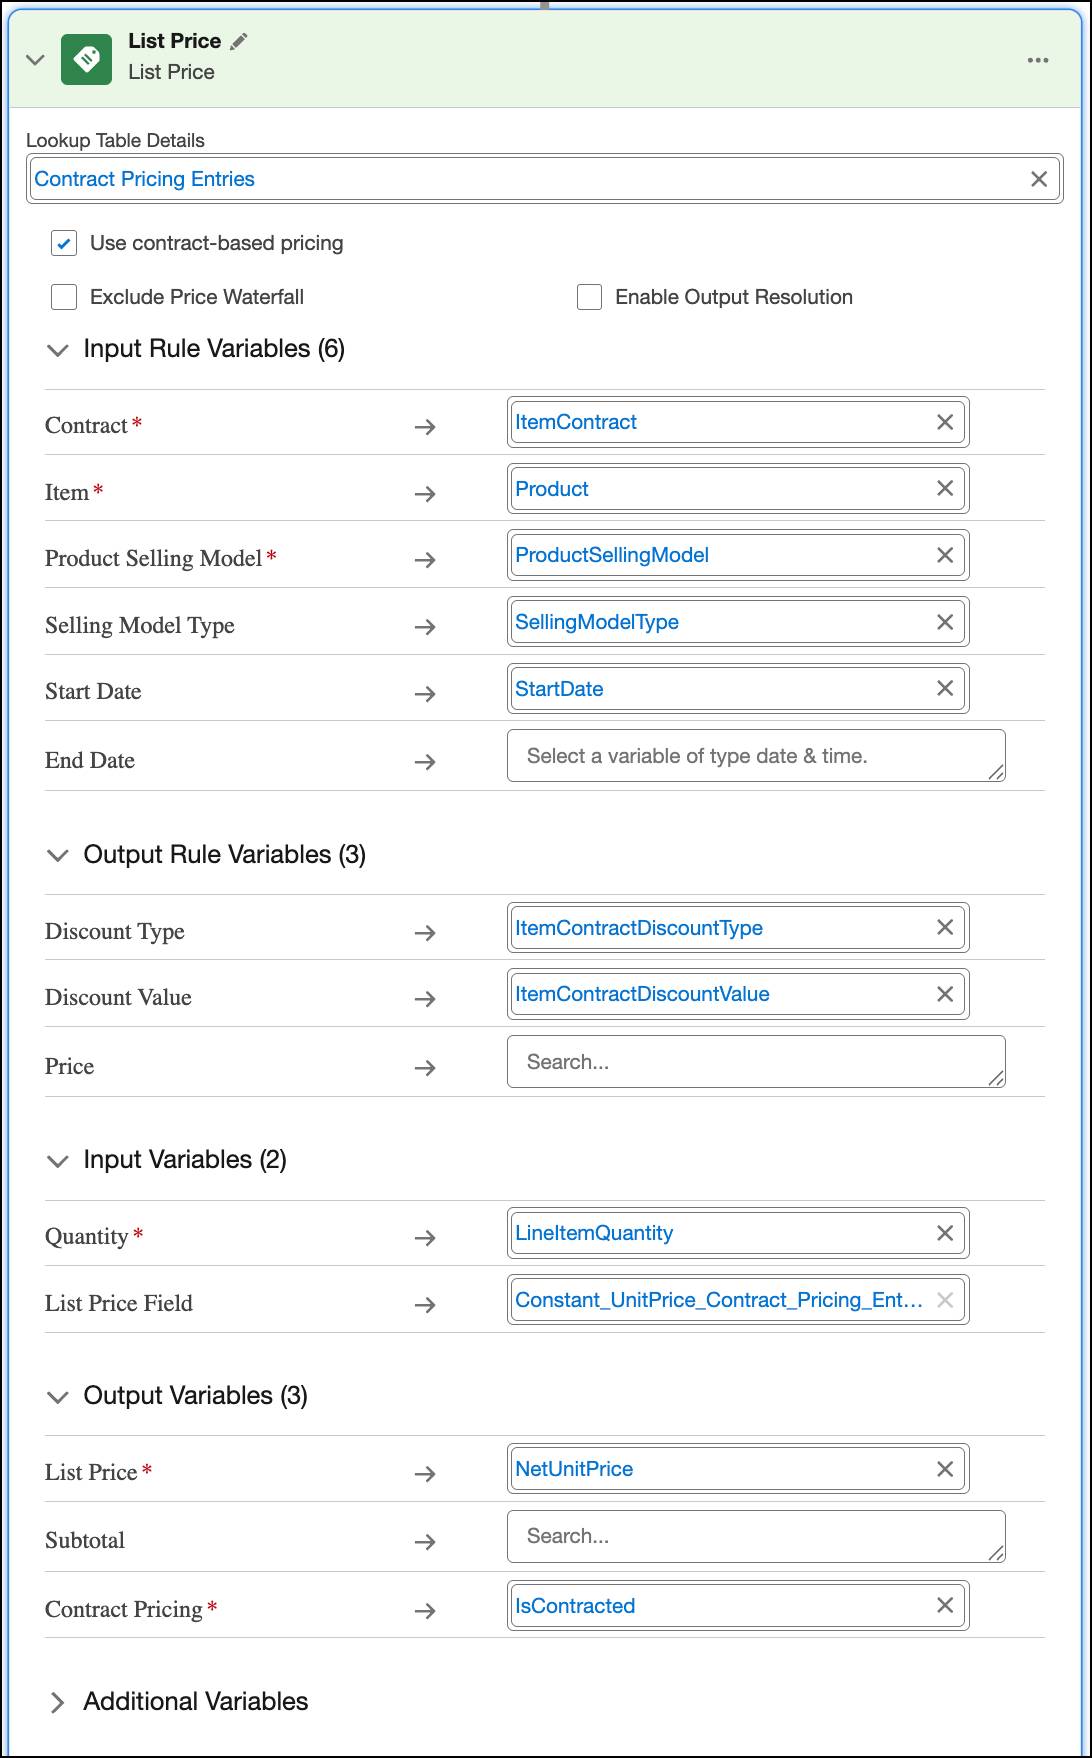
- Under Lookup Table Details, search for and select Contract Pricing Entries.
- Select the Use contract-based pricing checkbox.
- Expand the Input Rule Variables section and map the variables to these context tags:
- Contract:
ItemContract - Item:
Product - Product Selling Model:
ProductSellingModel - Selling Model Type:
SellingModelType - Start Date:
StartDate
- Expand the Output Rule Variables section and map the variable to this context tag:
- Discount Type:
ItemContractDiscountType - Discount Value:
ItemContractDiscountValue
- Expand the Input Variables section and map the variable to this context tag:
- Quantity:
LineItemQuantity
- In the Output Variables section, add the mappings:
- List Price:
NetUnitPrice - Contract Pricing:
IsContracted
- On the left panel of the Pricing Procedure Builder, click
 .
.
- Select the Include in Output checkbox.
- Save your work.
Add a List Group Element
Next, you define a condition for the pricing engine that specifies if a contracted base price is found, then look for a contract-based volume discount and apply it. To achieve this, use the List Group feature.
- Under the newly added List Price element, click the + symbol.
- Search for and select List Group from the Add Element menu.
- For Filter Condition Requirements, select All Conditions Are Met (AND).
- For condition, enter these details:
- Resource: IsContracted
- Operator: Equals
- Value: true
- Under the condition, within the List Group element, click the + symbol.
- Search for and select Volume Discount from the Add Element menu.
- Under Lookup Table Details, search for and select Contract Pricing Volume Tiers.
- Select the Use contract-based pricing checkbox.
- Expand the Input Rule Variables section and map the variables to these context tags:
- Contract Contract ID:
ItemContract - Contract Item Price Item ID:
Product - Contract Item Price Product Selling Model ID:
ProductSellingModel - Lower Bound:
LineItemQuantity - Upper Bound:
LineItemQuantity - Contract Item Price Start Date:
PricingDate - Contract Item Price End Date:
PricingDate
- Expand the Input Variables section and map the variables to these context tags:
- Quantity:
LineItemQuantity - Input Unit Price:
NetUnitPrice
- Expand the Output Variables section and map the variable to this context tag:
- Contract Pricing:
IsContracted
- Under the Volume Discount element, within the List Group element, click the + symbol.
- Search for and select Stop Pricing from the Add Element menu.
- Click Save.
- Click Activate.
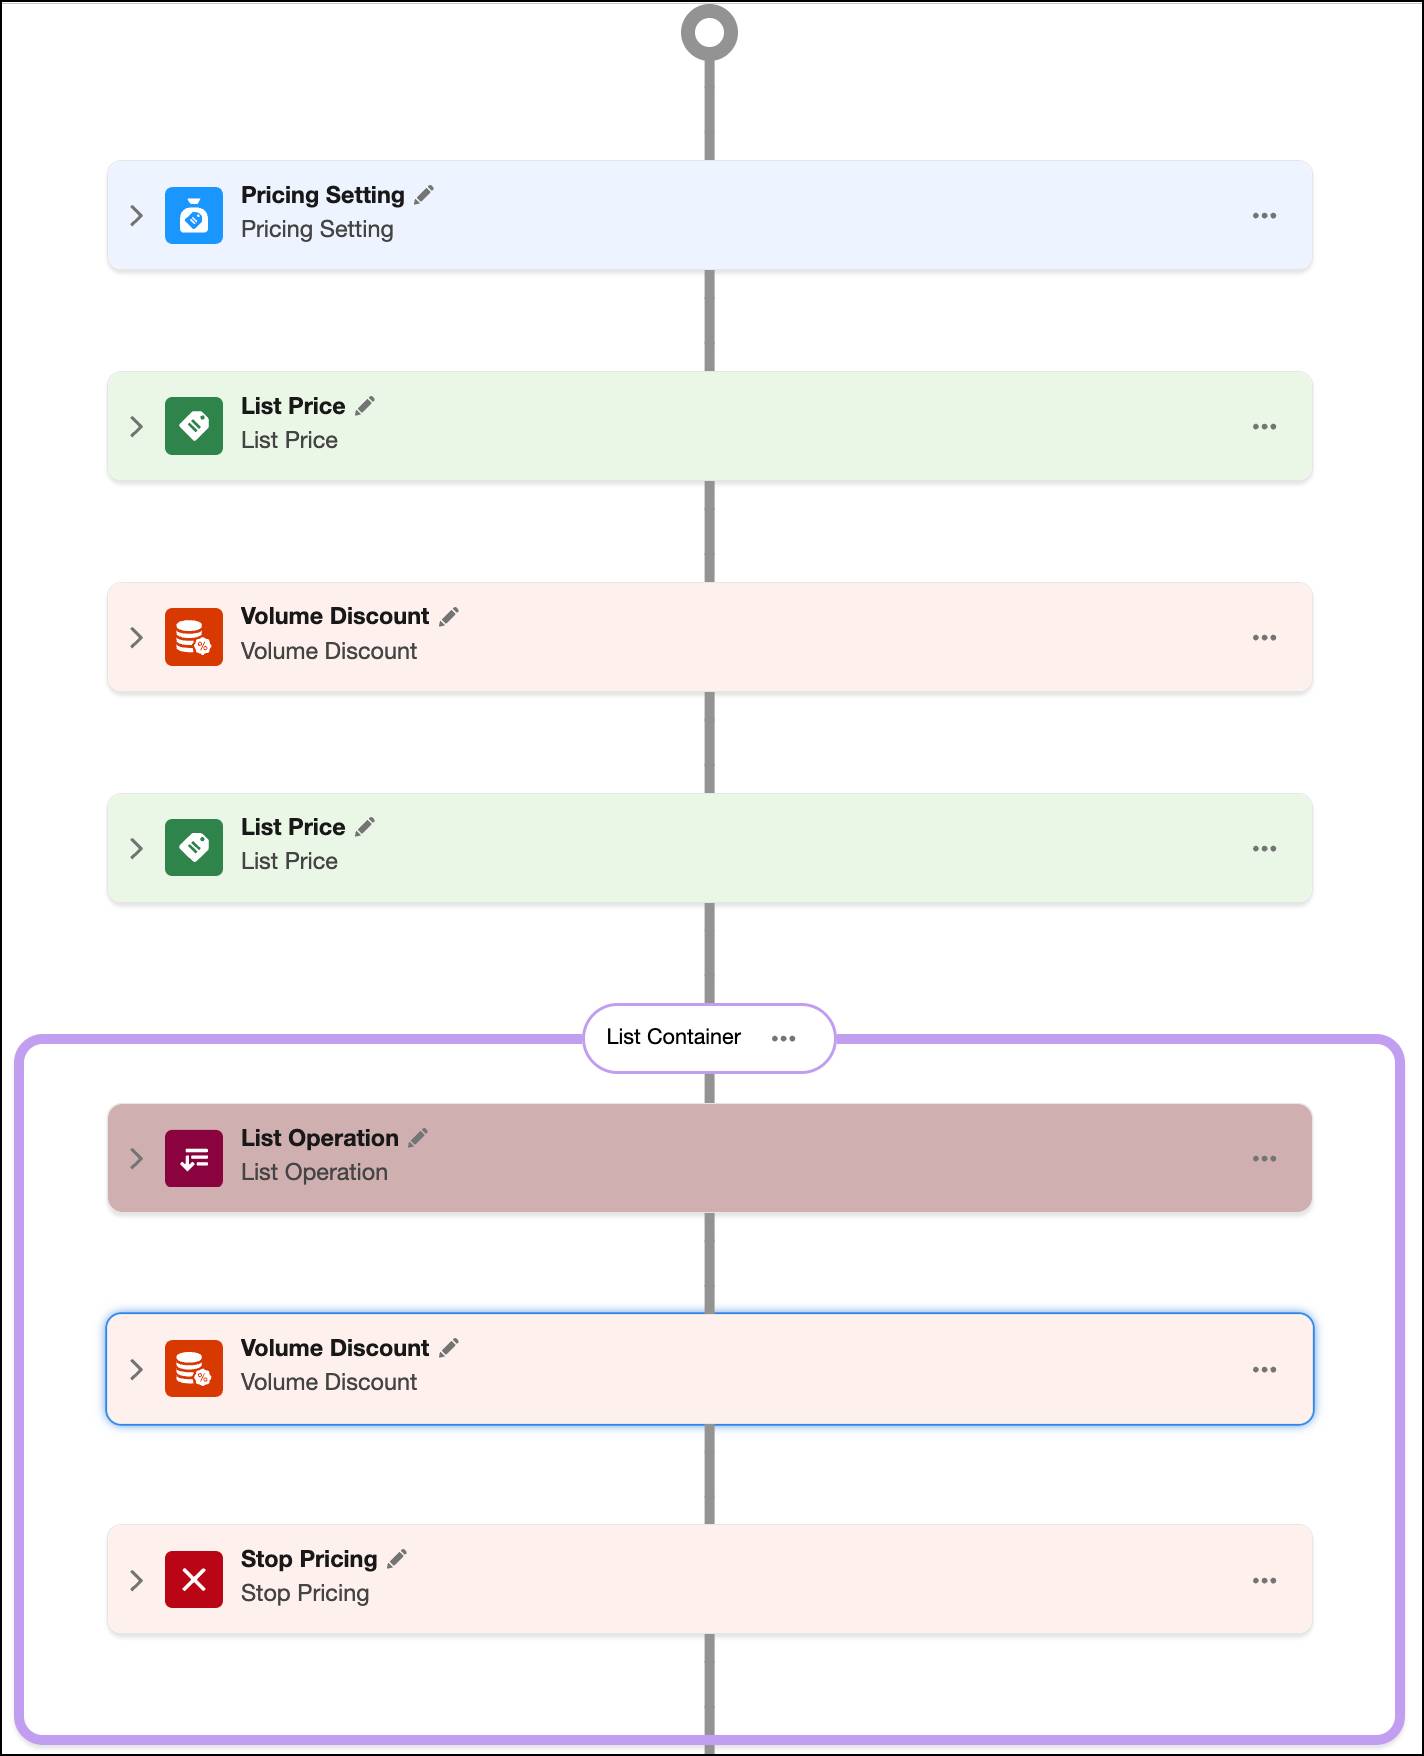
Nice work! You've successfully added and configured new List Price and Volume Discount elements to your pricing procedure. Now it can pull in those important contracted prices.
Test the Pricing Procedure on a Quote
As best practice, it’s important to try everything out. Richa tests the pricing procedure on a quote to confirm it works in real-time. To prepare, she updates the pricing procedure name in her org setup, which involves changing it in two specific locations.
- From Setup, in the Quick Find box, search for and select Revenue Settings.
- Under Set Up Salesforce Pricing, click the remove icon on the current pricing procedure. Remember, you may have to hold your mouse pointer still to see the icon.
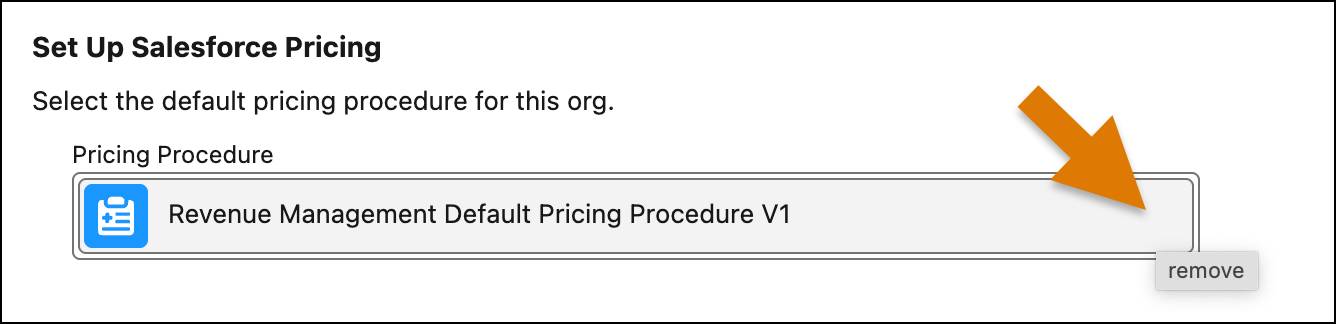
- From the dropdown menu, select Pricing Procedure Demo_5.
Now you’re all set to test your product pricing on a quote.
- From the App Launcher, find and select Quotes.
- Click New Quote.
- Enter these details:
- Quote Name:
Contract Pricing Demo - Account for Quote: EdgeMX
- Contract: Select the contract you created for EdgeMX.
- Click Save.
- From the quote page, click Browse Catalogs.
- Make sure Standard Price Book is selected and click Save.
- In the All Catalogs list, select Hardware Catalog, and click Next.
- From the available product list, select the checkbox for Desktop and Headset.
- Click Add Selection to Quote.
- Click Save Quote.
- Increase the quantity of the Headset product to
150.
Here’s how your quote should look.
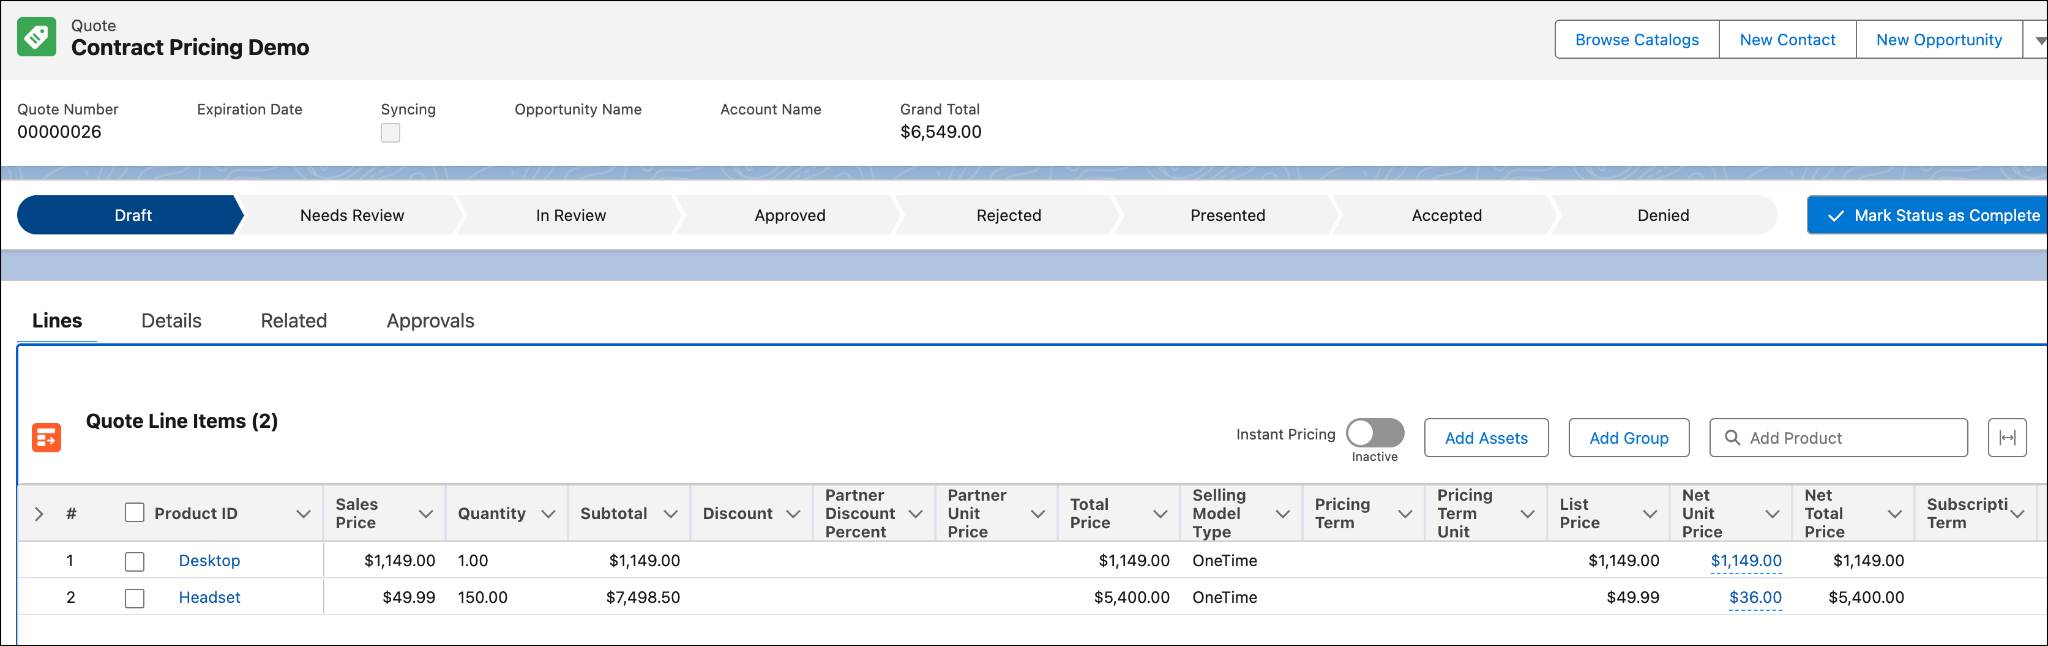
Hover your mouse over the Net Unit Price field for the Desktop product. The base price appears as listed in the standard price book because the Desktop product doesn't have a contracted price.
Next, validate the contract-based pricing that you set up. Hover over the Net Unit Price field for the Headset product.
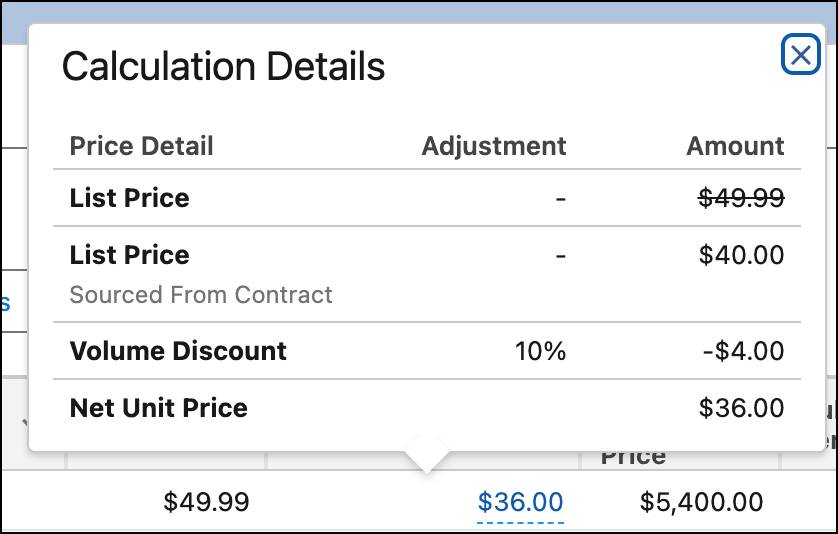
The price waterfall displays the new contracted base price and the additional volume discount, as per the negotiated contract. Woohoo! Your contract pricing is working as expected.
Wrap Up
Congratulations! You've successfully completed this module and now have a solid grasp of advanced pricing strategies, from derived pricing to contract-based pricing. Your company and customers will definitely appreciate streamlined and accurate pricing, and you’re now ready to tackle any pricing scenario that comes your way.