Track Customer Assets
Learning Objectives
After completing this unit, you’ll be able to:
- Create assets in Salesforce to represent customers’ purchased products.
- Describe the purpose of asset hierarchies.
- Track the replacement of a customer’s asset.
What Are Assets?
An asset in Salesforce represents a specific purchased or installed product. For example, if you sell robots, you can create a Robot product in Salesforce, and then create multiple assets representing the robots you’ve sold. Each customer’s robot would be tracked in its own asset record that’s linked to the Robot product.
So where do assets fit into field service? Well, the products you sell and service likely require visits from service technicians. By tracking your customers’ assets in Salesforce, you can easily view and log each asset’s purchase timeline, maintenance history, and more.
You can associate assets with various Salesforce records in addition to products.
- Cases
- Locations, like a customer site or warehouse
- Maintenance plans
- Work orders or work order line items
- Entitlements
- Service contracts or contract line items
You can also create hierarchies of assets to represent those not-so-simple products. Asset hierarchies help you track related assets, like components of a machine, as a unit. To define hierarchical relationships, use the Parent Asset field and Child Assets related list.
Now that we’ve introduced assets, it’s time to create one!
Housekeeping
Before you get started, ensure that you have enabled Field Service in your Trailhead playground org. Then you can perform the steps in this module and complete the hands-on challenge at the end.
- From Setup, enter
field servicein the Quick Find box, then select Field Service Settings.
- To enable Field Service, click the toggle.
Set up the page layouts you'll be using in this module.
- Add the Assets related list to the Account page layout.
- From the Object Manager in Setup, click Account, then click Page Layouts.
- Click Account Layout.
- Click Related Lists.
- Drag Assets to the Related Lists section.
- Click the wrench icon on the Assets related list.
- Use the UP arrow to move the Status field right after Asset Name. Click OK.
- Save your changes. If a dialog asks if you want to overwrite users’ related list customizations, click Yes.
- Following the same steps, navigate to the Asset object and add the following related lists to the Asset page layout. You don’t need to click the wrench icon on any of the related lists or move any fields.
- Maintenance Plans
- Primary Assets
- Related Assets
- Work Orders
- Add fields to the Work Order page layout.
- From the Object Manager in Setup, click Work Order, then click Page Layouts.
- Click Work Order Layout.
- Drag the Generated from maintenance plan field to the Information section.
- If it’s not already there, drag the Work Type field to the Information section.
- Save your changes.
Feeling pleasantly productive? Let’s move on to the fun stuff.
Create an Asset
Ursa Major Solar, a supplier of solar energy components, is getting new customers every day. Its solar panel systems are selling like hotcakes, and the company’s founder and CEO, Sita Nagappan-Alvarez, needs a way to track her customers’ products in Salesforce. She hears that assets might be just what she needs.
One of Ursa Major’s new customers, DreamHouse Realty, just purchased a solar panel system for its office. Let’s create an asset to track DreamHouse’s system in Salesforce.
- Every asset must be linked to an account, a contact, or both. To get started, let’s create an account for DreamHouse Realty.
- Click the Accounts tab, then click New. (Don’t see the Accounts tab? From the App Launcher, find and select Accounts.)
- Enter the following details:
- Account Name:
DreamHouse Realty - Type: Customer - Direct
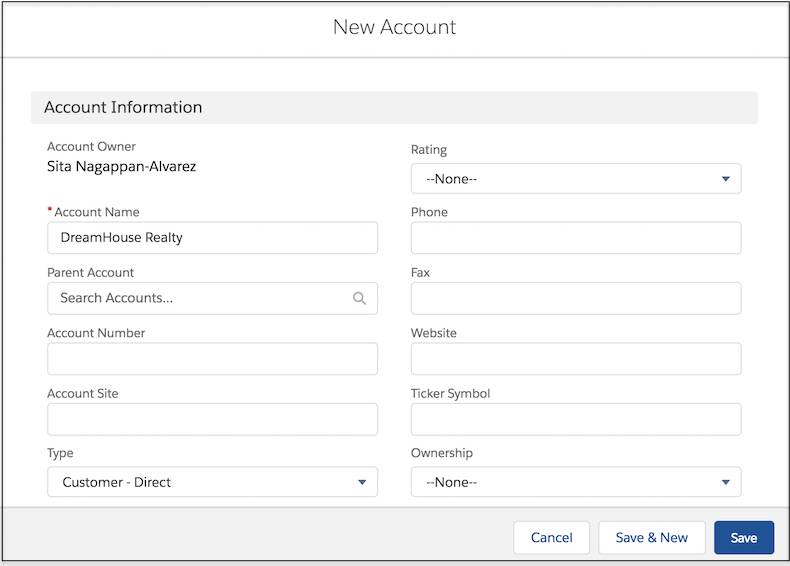
- Leave the rest of the fields blank, and click Save.
- Next, create a product to represent the type of solar panel system that DreamHouse Realty purchased. You don’t have to link every asset to a product. But when you do, it’s easy to check the Assets related list to see which customers have purchased the product.
- From the App Launcher, find and select Products.
- Click New and enter the following details.
- Product Name:
Solar Panel System 4000 - Active: Checked

- Leave the rest of the fields blank, and click Save.
- Now, create an asset to represent DreamHouse’s new solar panel system.
- From the App Launcher, find and select Assets.
- Click New and enter the following details.
- Asset Name:
Solar Panel System 4000 - Product: Solar Panel System 4000
- Account: DreamHouse Realty
- Install Date: Today’s date
- Quantity:
1 - Status: Installed
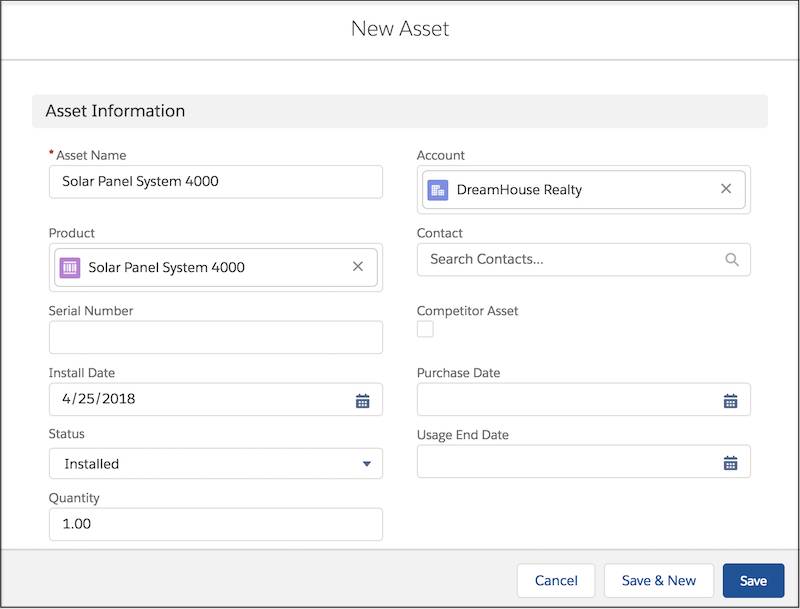
- Leave the rest of the fields blank, and click Save.
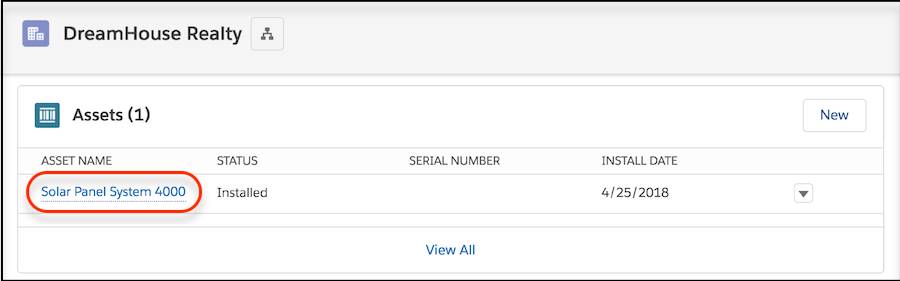
Asset created! Now put yourself in the stylin’ shoes of an Ursa Major support agent. If someone from DreamHouse calls, you can quickly see which system they purchased (and when) by consulting the Assets related list on the DreamHouse account.
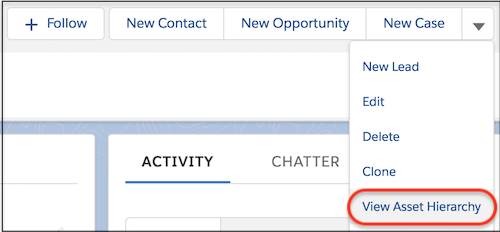
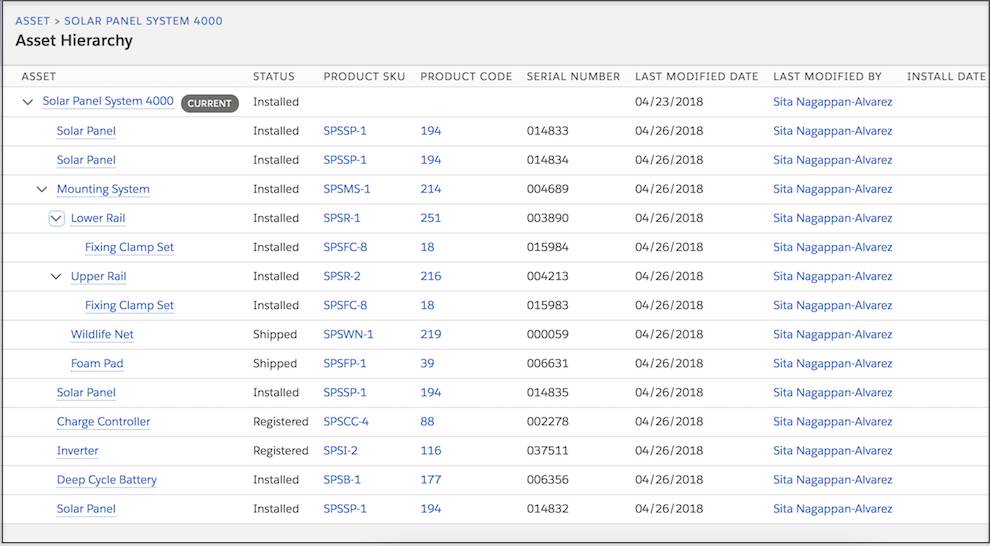
As we mentioned earlier, you can create hierarchies of assets to show how assets are related. To view an asset hierarchy in a nifty collapsible tree grid, click View Asset Hierarchy in the dropdown action menu on any asset record home page.
We imagine you have more rewarding things to do than churn out a family of asset records in your Trailhead Playground. So here’s what the Solar Panel System 4000 asset hierarchy might look like.
Ready for bigger and better challenges? Let’s learn how to track an asset’s replacement.
Replace an Asset
So, what happens if a customer’s asset needs to be replaced? Whatever the reason, Salesforce has your back! You can add the new asset to the customer’s account in Salesforce, and link the old and new asset for tracking purposes.
Ursa Major Solar has just released a new, more efficient model of its best-selling solar panel system. As a promotion, the company will replace any customer’s system with the new model at half the cost. The folks at DreamHouse Realty have jumped at the opportunity, so let’s find out how to track their replacement in Salesforce.
To show that one asset has replaced another, create an asset relationship with the help of two related lists on asset record home pages.
- The Primary Assets related list shows assets that replaced the current asset.
- The Related Assets related list shows assets that the current asset replaced.
Here’s how to show that DreamHouse’s Solar Panel System 4000 was replaced by the new Solar Panel System 6000.
- Create an asset to represent the new model.
- From the Products tab, create a product record with these details.
- Product Name:
Solar Panel System 6000 - Active: Checked
- From the Assets tab, create an asset record with these details.
- Asset Name:
Solar Panel System 6000 - Product: Solar Panel System 6000
- Account: DreamHouse Realty
- Install Date: Today’s date
- Quantity:
1 - Status: Installed
- Navigate to the Solar Panel System 4000 asset record, and change the Status to Obsolete.
- In the Primary Assets related list on the Solar Panel System 4000 asset, click New.
- In the Asset field, select the Solar Panel System 6000 asset that you just created. The Related Asset field auto-populates to list Solar Panel System 4000.
- In the Relationship Type field, select Upgrade.
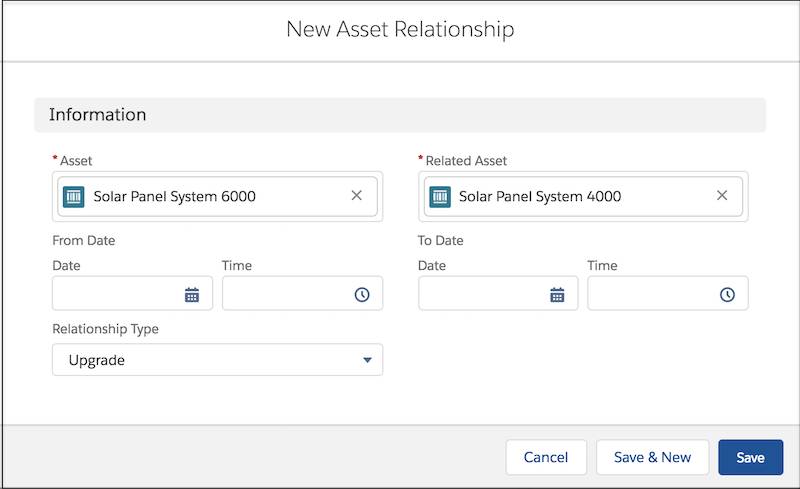
- Save your changes.
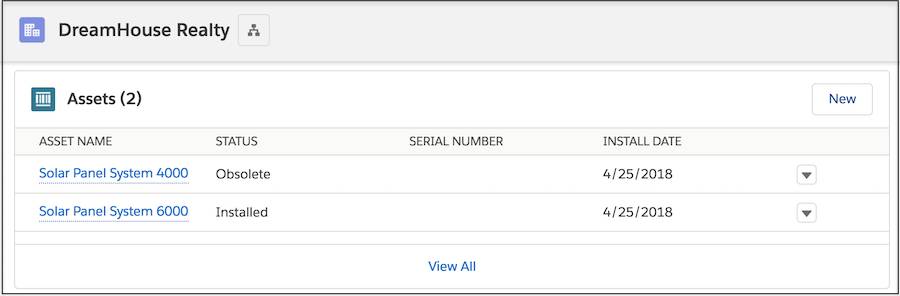
Now anyone on the Ursa Major support team can see this asset relationship in two places.
- The Primary Assets related list on the Solar Panel System 4000 record
- The Related Assets related list on the Solar Panel System 6000 record
The DreamHouse Realty account record also shows both assets in the Assets related list.
If this sort of replacement happens regularly, it’s a good idea to create a flow to automate these steps. We’ve walked you through it the old-fashioned way so you understand what’s happening.
Resources
- Salesforce Help: Relationships Between Assets
- Salesforce Help: Track Asset Replacements
- Salesforce Help: Asset Fields