Use Advanced Mapping to Populate Contact Address Fields
Check Addresses in Gift Entry
As your team enters gifts, they can also check existing details about a donor—such as their address.
Gift Entry can automatically populate address fields with existing data when you select a contact. This setting isn’t enabled by default, which you might have noticed when you tested your templates in the last unit.
Configure Advanced Mapping and our Gift Entry templates to add this helpful feature. You complete that process in this step, using all of the skills you’ve learned in this project so far.
Remove Address Fields from Templates
To begin, you need to take the existing address fields off our Gift Entry templates.
For this project, you change only the Default Gift Entry Template, but you must remove these fields from every template you use in your Salesforce instance if you’re setting up auto-populated contact address fields.
- From the App Launcher (
 ), find and select Gift Entry.
- Click the Templates tab.
- Select Default Gift Entry Template from the table.
- Click Next: Form Fields.
- Click
 on these fields in the Add or Edit Contact section:
-
Address: Mailing Street
-
Address: Mailing City
-
Address: Mailing State/Province
-
Address: Mailing Zip/Postal Code
-
Address: Mailing Country
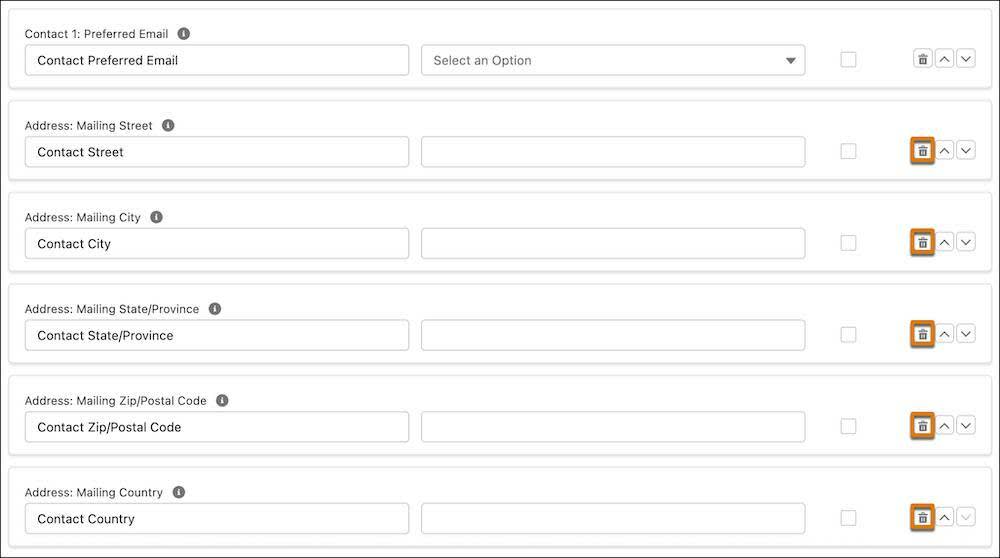
- Save your work.
Adjust Addresses in Advanced Mapping
With those fields removed, you need to change Advanced Mapping to point to the correct address fields.
- From the App Launcher (
 ), find and select NPSP Settings .
- Select System Tools in the menu, then select Advanced Mapping for Data Import & Gift Entry.
- Click Configure Advanced Mapping. It may take a minute to load.

- Click
 in the Address row of the table.
- Select View Field Mappings.
- Click
 then Delete, on each of these fields:
-
Home City
-
Home Country
-
Home State/Province
-
Home Street
-
Home Zip/Postal Code
- Click Back to Object Group.
- Click
 in the Contact1 row of the table.
- Select View Field Mappings.
- Click Create New Field Mapping.
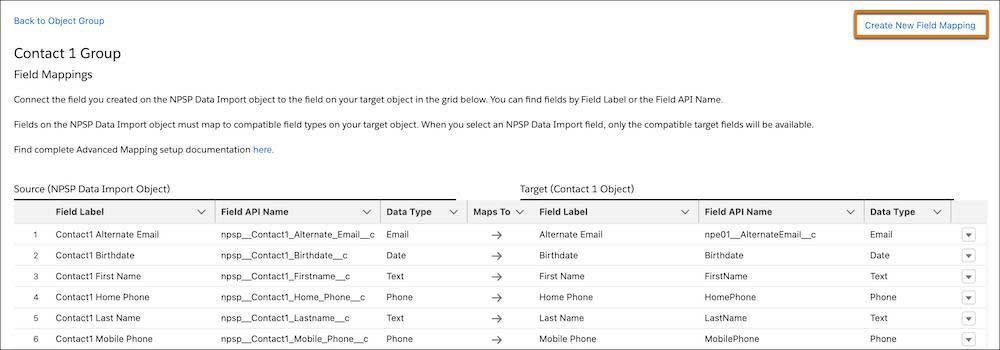
- Map these home address fields on the NPSP Data Import object to the Contact object’s mailing address fields. Click Save and repeat for each mapping.
-
Home City (npsp__Home_City__c) maps to Mailing City (MailingCity)
-
Home Country (npsp__Home_Country__c) maps to Mailing Country (MailingCountry)
-
Home State/Province (npsp__Home_State_Province__c) maps to Mailing State/Province (MailingState)
-
Home Street (npsp__Home_Street__c) maps to Mailing Street (MailingStreet)
-
Home Zip/Postal Code (npsp__Home_Zip_Postal_Code__c) maps to Mailing Zip/Postal Code (MailingPostalCode)
Add New Address to Gift Entry Templates
With the new fields in place, you now need to add them to our template. Remember, you’re only updating the Default Gift Entry Template in our Trailhead Playground for this project. In your own Salesforce instance, you would have to repeat this process for every template.
- From the App Launcher (
 ), find and select Gift Entry.
- Click the Templates tab.
- Select Default Gift Entry Template from the table.
- Click Next: Form Fields.
- Select the Add or Edit Contact section of the template, where you need to add the fields.
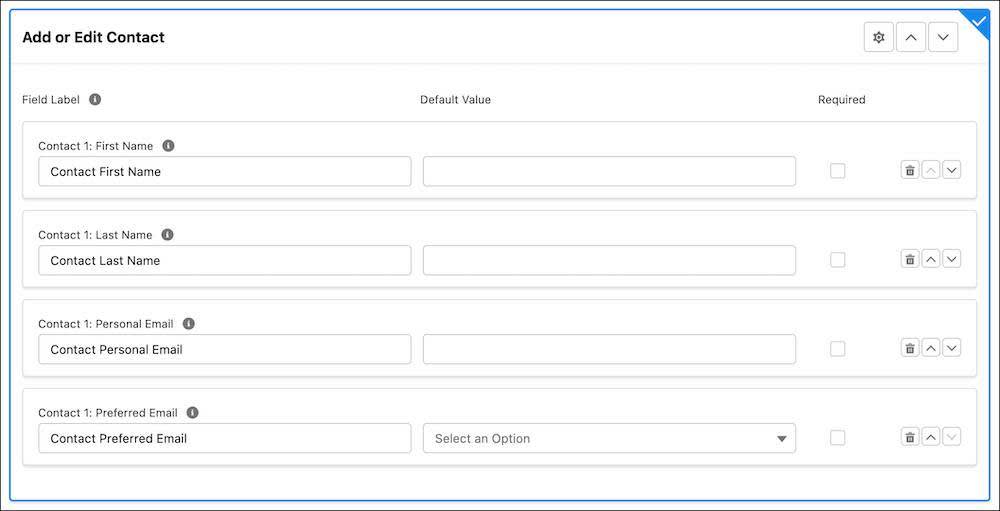
- In the Form Fields & Field Bundles menu, select the Contact 1 section under Form Fields. If the new fields aren’t yet there, refresh your browser once or twice until they appear. It may take some time for the fields to appear.
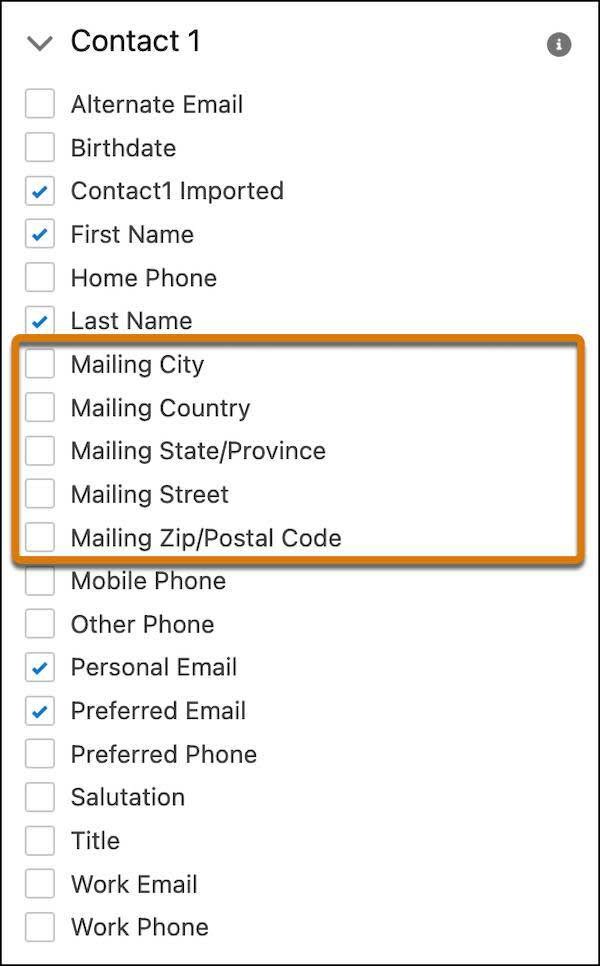
- Select these address fields to add them to the template:
-
Mailing Street
-
Mailing City
-
Mailing State/Province
-
Mailing Zip/Postal Code
-
Mailing Country
- Save your work.
Test the Fields
One last step! You need to check out our new fields and how they work.
- In Gift Entry, click New Single Gift.
- For Donor Type, select Contact 1.
- In Existing Donor Contact, find and select Alexi Nazarian.
- Check out the Add or Edit Contact section to see the address fields automatically populated with the existing data. Update the Mailing Street field to
2595 Montauk Ave E.(Or, just change the W to an E.)
- Select today’s date in the Donation Date field.
- Enter
150in the Donation Amount field.
- Save your work.
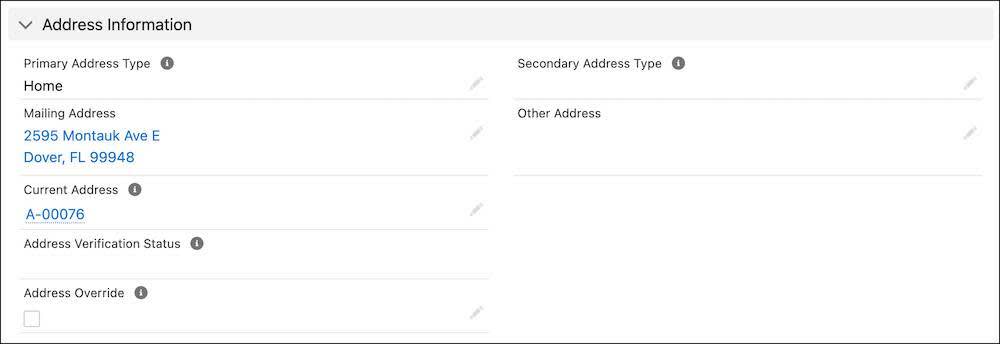
After a short time processing, the new opportunity appears on the screen. Check it out, then click Alexi Nazarian in the Primary Contact field. On Alexi’s contact record, check the Address Information section to see the new street address.
In this project, you’ve customized Gift Entry to make it more useful for your development team with custom fields, multiple templates, and automatically populating fields to check data. How will you put these tools to use in your organization? To share successes, post about best practices, and ask and answer questions about customizing Gift Entry, join the Gift Entry group in the Trailblazer Community.
Verify your work on this unit, then get out there and meet with your development staff on how you can make the most of Gift Entry at your organization.
Resources
- Salesforce Help: Configure Gift Entry
- Trailhead: Import Data with Nonprofit Success Pack (NPSP)
- Trailblazer Community: Gift Entry Group
