Create a Loyalty Program
Get Started Creating a New Loyalty Program
With a plan in place, you’re ready to set up a loyalty program for En Mode. Mary decides to call the program LevelUp. For the best customer experience, LevelUp will credit loyalty points in real time instead of holding them in escrow. Sometimes loyalty programs use escrow as a temporary holding period to prevent the misuse of points. After a set number of days, the program releases the points automatically. It can be a useful option, but to keep the program simple for new members, you’ll hold off on using escrow or any of the advanced currency features for the new LevelUp program.
To learn more about the advanced currency features, check out the Loyalty Management in Marketing Cloud Next: Basics Trailhead module.
Now follow the steps in your Developer Edition org.
- From the App Launcher (
 ), find and select Loyalty Management.
- Use the dropdown
 to show the Navigation Menu, and select Loyalty Program Simplified Setup.
- On the Loyalty Program Simplified Setup page, click Create Program.
- Add these details.
- Program Name:
LevelUp
- Description:
Loyalty program for engaging En Mode customers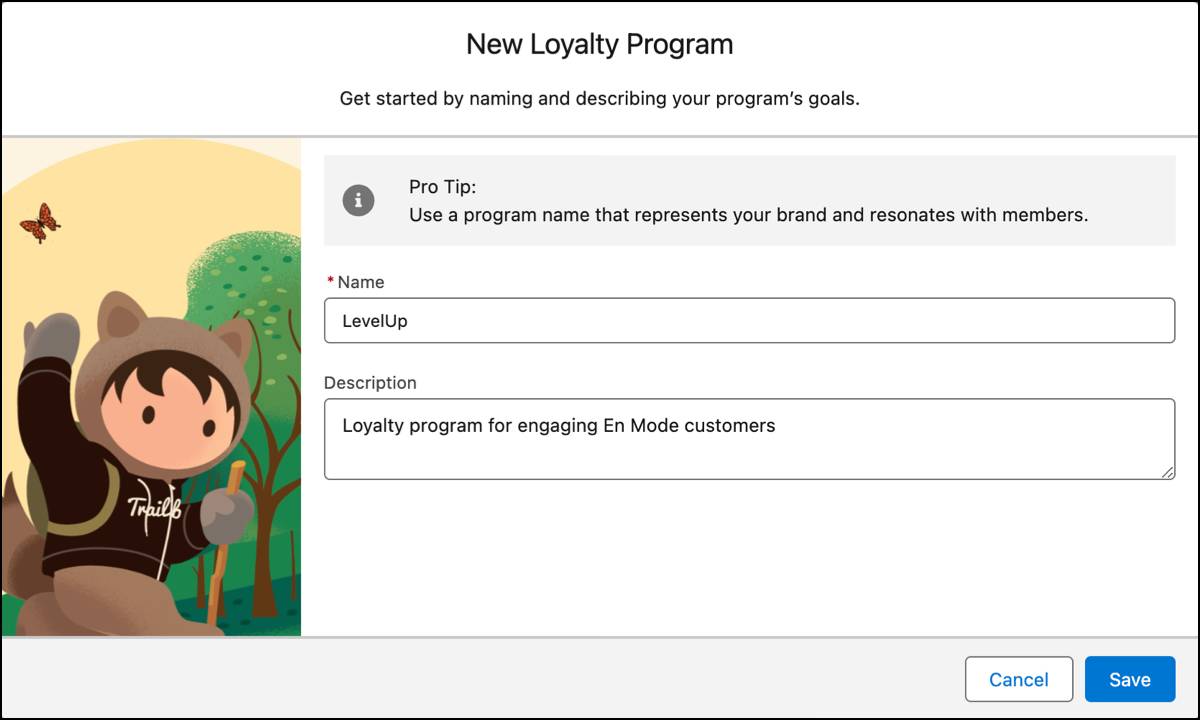
- Program Name:
- Save your work.
To bring the program to life, you’ll add various components to it, such as tiers, points, and rewards.
Add a Redeemable Currency
Points and tiers are important for a successful loyalty program. Members earn points—also known as currency—through various engagement activities such as purchases, social media mentions, product reviews, and referrals. And points come in two varieties: qualifying and non-qualifying points. Points that make members eligible for higher tiers are qualifying points, while non-qualifying points are those members can redeem to buy products or services.
For the new LevelUp program, start by setting up a non-qualifying currency called Member Points, with an expiration period of 3 years from the date of accrual. To do this, you navigate to the program summary and open the Guided Setup for the loyalty program.
- Click Add Redeemable Points.
- In the Name field, enter
Member Points.
- Expand Settings and add these details.
- Expiration Model: Fixed
- Expiration Period: Years and
3
- Extend Expiration Period: No extension
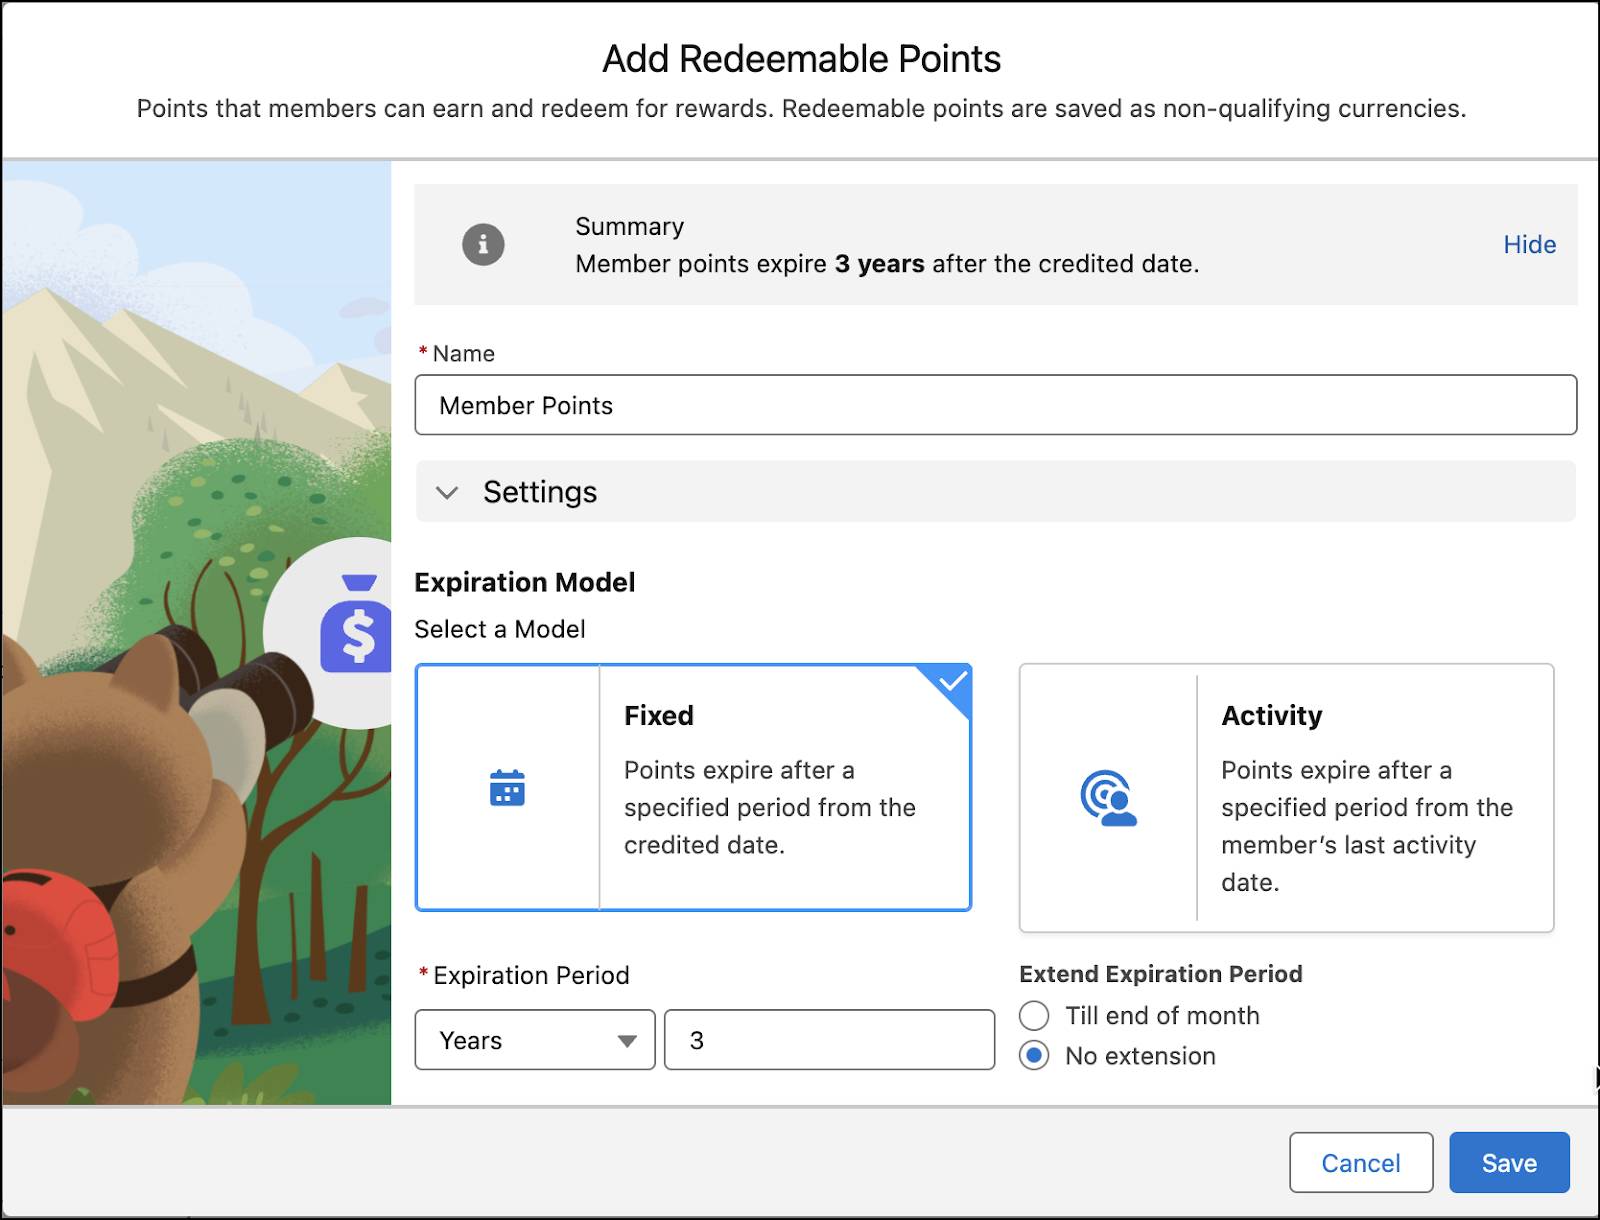
- Expiration Model: Fixed
- Save your work.
Great, you’ve set up the redeemable points. Next, you set up the tier group and tiers in Loyalty Management.
Set Up Tier Groups and Tiers
With retailers competing for customers’ attention and loyalty, the LevelUp program must stand out. To this end, a tiered system where members enjoy different program benefits depending on their rank makes sense.
The program evaluates the points earned during a qualifying period to upgrade a member’s tier. The tier upgrade gives members access to more benefits, while tier groups define the hierarchy of tiers.

Here are some related key terms.
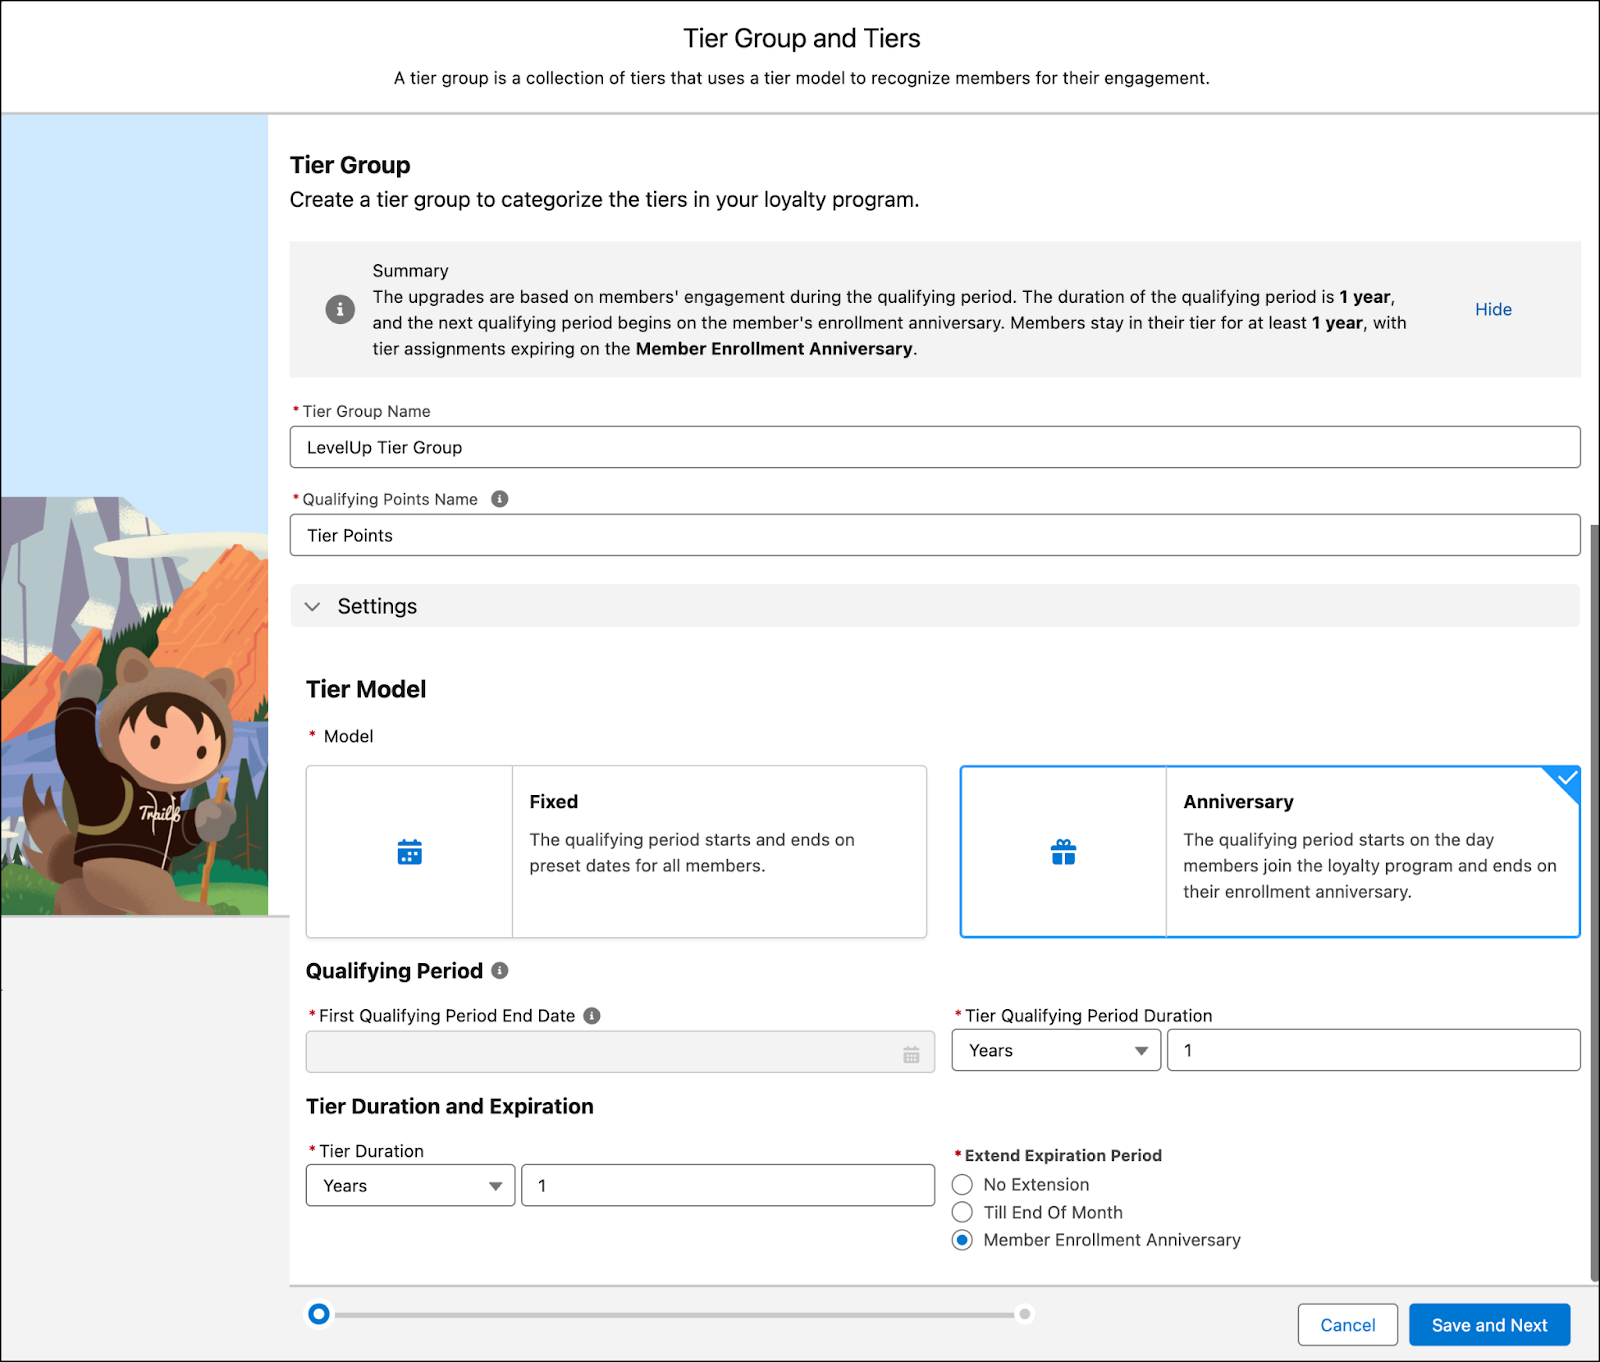
- The tier model influences the start date of the qualifying period. Mary chooses the anniversary tier model, which means the qualifying period starts on the day the member joins the loyalty program and ends on their enrollment anniversary.
- The tier period defines the duration of the tier, which Mary sets to one year. When a member moves to a new tier, they stay in that tier for at least a year. After one year, on their enrollment anniversary, they become eligible for tier evaluation. At this point, they can move up or down a tier.
- The qualifying period is when a member’s qualifying point balance resets to zero and they start earning qualifying points from scratch. Mary sets the qualifying points to reset after a year.
Use your Developer Edition org to create the tier group and qualifying points by completing these steps in the Loyalty Management app.
- In the Loyalty Program Setup window, click Add Tier Group.
- For Tier Group Name, enter
LevelUp Tier Group.
- For Qualifying Points Name, enter
Tier Points.
- Expand Settings and specify these details.
- Tier Model: Anniversary
- Tier Qualifying Period Duration: Years and
1 - Tier Duration: Years and then
1
- Extend Expiration Period: Member Enrollment Anniversary
- Tier Model: Anniversary
- Click Save and Next.
Next, you’ll add tiers to tier groups.
Add Tiers to Tier Groups
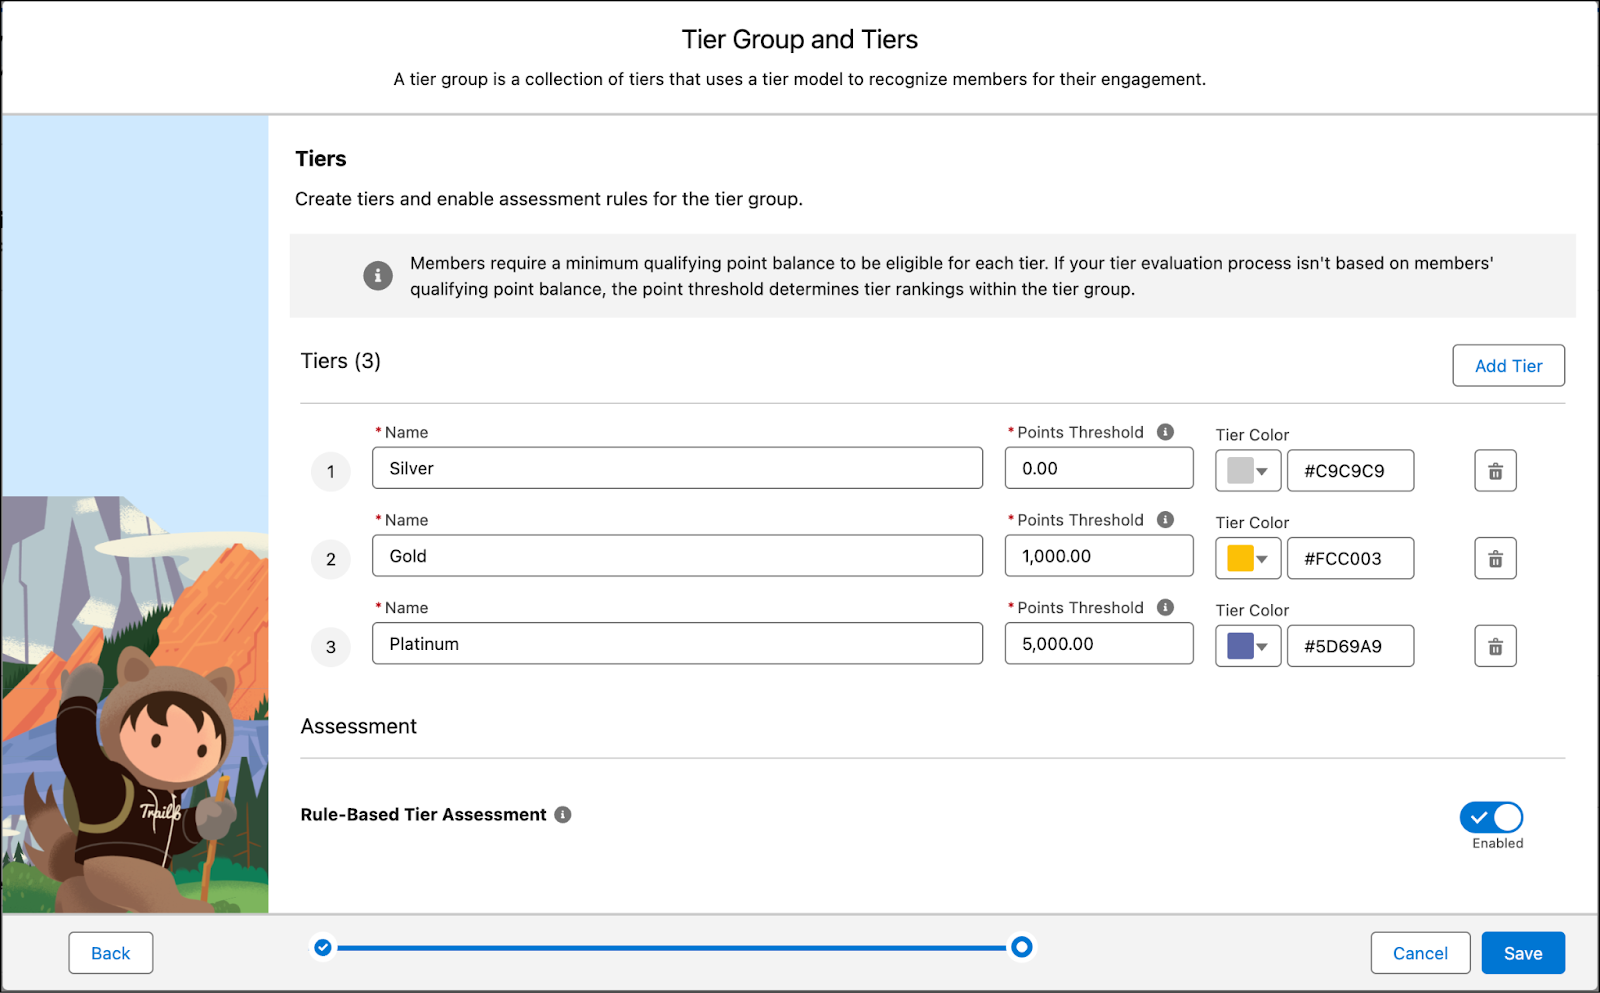
Mary wants to give the program three tiers.
-
Silver: The default, base tier. Silver-tier members are promoted to Gold when they earn enough points.
-
Gold: The middle tier. Gold-tier members move up to Platinum once they earn enough points
-
Platinum: The top tier, where members enjoy exclusive benefits.
Follow the steps to create the tiers.
In the Tiers section, specify these details.
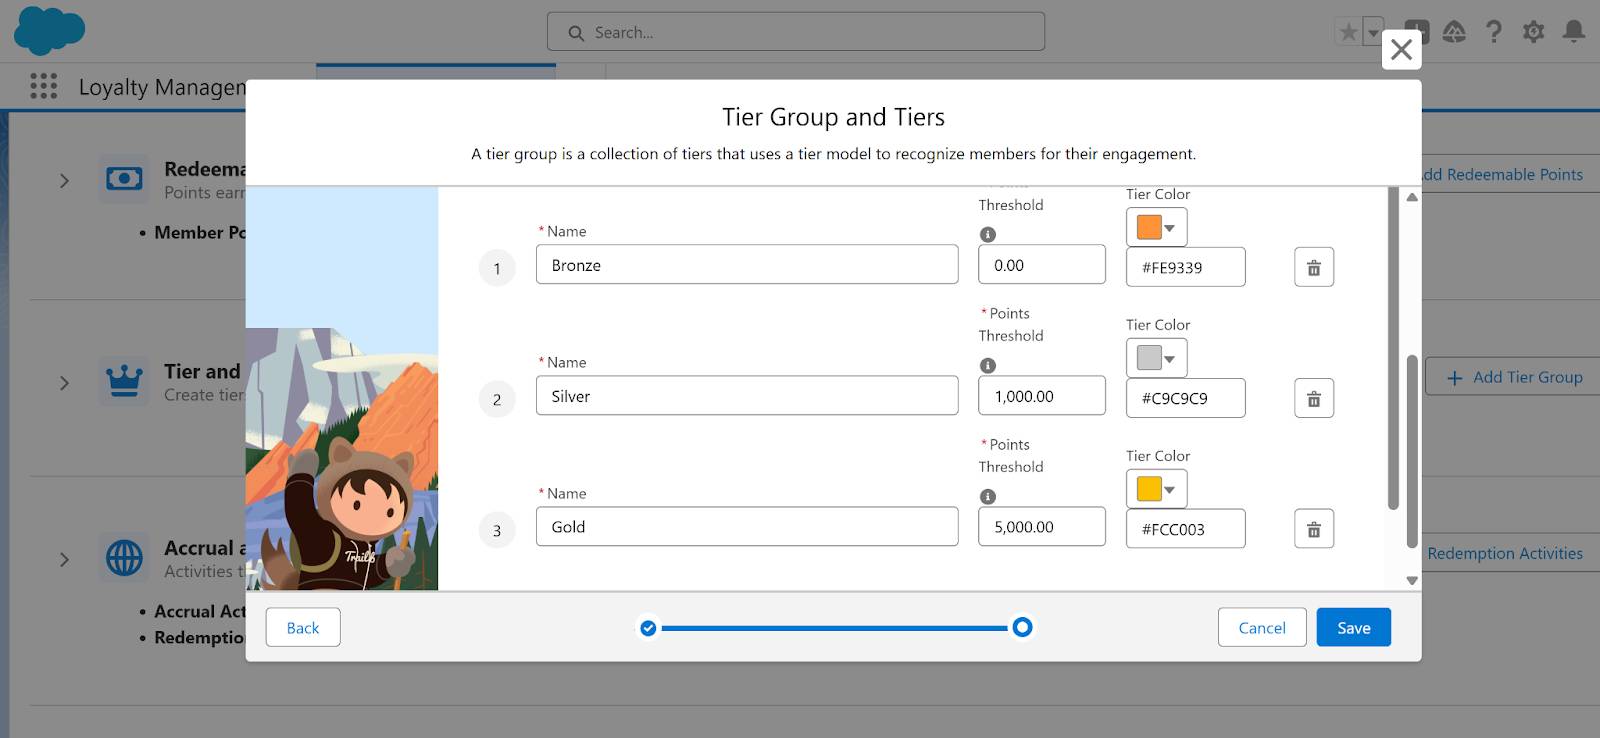
Update the tier names, and ensure the points thresholds are as follows.
Name |
Points Threshold |
|---|---|
Silver |
0 |
Gold |
1,000 |
Platinum |
5,000 |
- Leave the colors as is, or choose different colors. We don’t check your color selections.
- Ensure Rule-Based Tier Assessment is enabled.
- Save your work.
Good job. You’ve set up the tier group for the loyalty program with three tiers. Next up, you assign benefits to those tiers.