Import Data to Create a Custom Object
Introduction
As the sales manager at the Ursa Cloud Motors car dealership, you’ve instructed your team to ask each visiting customer to fill out a form that captures their contact information and some basic vehicle preferences. This information is saved to a spreadsheet and used by your sales team to alert their contacts when vehicles are added to the inventory that match their preferences.
Now you want to get all the information from the spreadsheet into Salesforce. You could manually enter the information (noooooooo!) or you could use Lightning Object Creator.
Lightning Object Creator is one of the newest low-code app development tools on the Salesforce Lightning Platform. With just a few clicks, Lightning Object Creator allows any user to quickly turn spreadsheets—such as Microsoft Excel, Quip Spreadsheets, Google Sheets, and comma-separated value (.csv) files—into modern, cloud-based apps.
Time to test drive Lightning Object Creator!
Update Your Playground Password
Let's get started by opening your Trailhead Playground. Scroll to the bottom of this page and click Launch. If you see a tab in your org labeled Get Your Login Credentials, great! Follow the steps below.
If not, from the App Launcher  , find and open Playground Starter and follow the steps. If you don’t see the Playground Starter app, check out Find the Username and Password for Your Trailhead Playground.
- Click the Get Your Login Credentials tab and take note of your username.
- Click Reset My Password. This sends an email to the address associated with your username.
- Click the link in the email.
Enter a new password, confirm it, and click Change Password.
Upload Your Spreadsheet
Now it’s time to kick the tires of Lightning Object Creator. Get things rolling by uploading the spreadsheet to your Salesforce org.
- Open this spreadsheet and save it. Make sure it’s saved as Vehicle_Interest.csv.
- Click the setup gear
 and select Setup.
- Click the Object Manager tab.

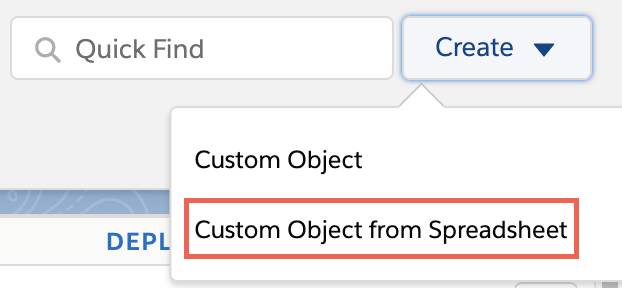
- Click Create.
- Select Custom Object from Spreadsheet. Note: If you get an error, try opening via an incognito window.

- Click Log in with Salesforce.
- Enter your Trailhead Playground username (listed in the email you just received) and password that you reset in the previous section.
- Click Log In.
- Click Allow.
- Click Upload.
- Navigate to the Vehicle_Interest.csv file you downloaded and upload.
Map the Fields
Time to pull over to make sure you properly map the spreadsheet data to the Salesforce data. As you may have noticed, Lightning Object Creator inspected the spreadsheet and made a best guess about the field names and types. Don’t worry, field names and types can be edited.
- Scroll down to the Type row (3rd row) and click the Salesforce Field Type selector to change the field type.

- Select Picklist.
- Click the Salesforce Field Type selector for the Exterior Color row (4th row) and select Picklist (Multi-Select).
Note: Picklist (Multi-Select) is selected here so if a prospect has interest in more than 1 exterior color, multiple colors can be selected.
- Click the Preview icon
 to see your data.
- Click Next.
- Change the Label to Vehicle Interest. Note the removal of the underscore.
- Change the Plural Label to Vehicle Interests. Note the removal of the underscore and addition of the s.
- Ensure API Name is Vehicle_Interest.
- Click Advanced Settings to expand the menu.
- Note all of the options. Ensure all features are checked.
- Click Finish.
- Once the “Nice Work!” screen appears, close the object creator tab.
You should still have your Trailhead Playground open. You’ll receive an email to your associated email address confirming your Custom Object has been created.
So far, you’ve created a populated Custom Object in just a few clicks. If you chose to enter all of this vehicle information manually, you’d still be typing! (You’re welcome.) But there’s more road to cover. Cruise into the next step, and ensure the sales team can see your new Custom Object in the Sales App.