Import the Records
Start The Import
It’s time to send your imported records to their final homes in Salesforce by creating or updating new contacts, accounts, and opportunities.
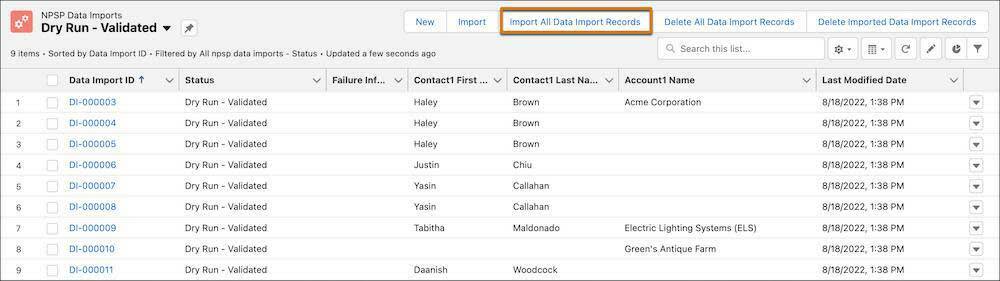
Start on the NPSP Data Imports page again, on the Dry Run - Validated list view. Don’t worry that you don’t see the record that you fixed in the last step in this list view. It'll still be processed without any problems because you fixed the error.
- Click Import All Data Import Records.
- Verify that your Configuration Options are the same as for your dry run in step 4. They should be:
- Batch Process Size is 50
- Contact Matching Rule is Firstname,Lastname,Email
- Donation Matching Behavior is Do Not Match - No matching is attempted; new records are created.
- Click Begin Data Import Process.
Just like with the dry run, you see a status page to show you how many records are imported and if there are any errors.

You should have imported 10 records with zero errors. If not, go back and make sure you have followed the instructions in this step, and previous steps, correctly.
Click Close and check some of the records you imported.
Review The Imported Records
Look at the contact you created back in step 2 to see how NPSP Data Importer updated the records.
Using Global Search, find and select Haley Brown. Click her contact to open her record.
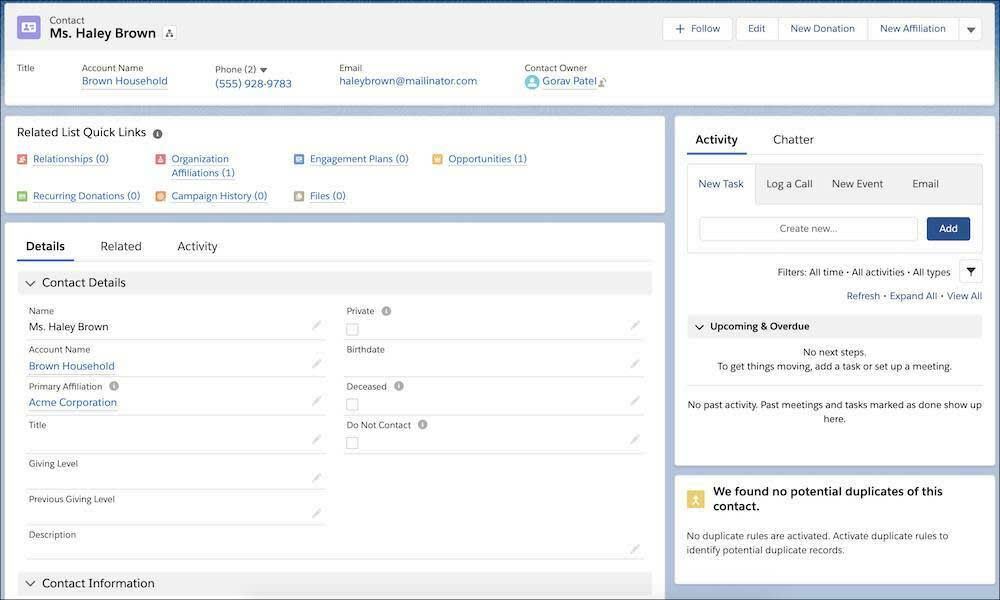
The utility has updated her contact information with an affiliation to her employer, a home address, phone numbers, and email preference.
Click on the Brown Household account from Haley’s contact record to see that NPSP Data Importer created contact records for her husband, Jake, and kids, and associated them to the household account.

Don’t forget about the donation record that was created, as well.

Now check out the record for Amer Shakil—the record with the error—by searching for it in Global Search.
You’ll notice that it created a new contact for Amer and associated it with his company, Edge Communications, with a primary affiliation. It also imported his donation.

Take a minute to open the CSV in another window, then use global search to find a few of the records in Salesforce to see how NPSP Data Importer brought that information in to your org. Understanding how the template translates to records in Salesforce is key to taking on more complicated imports.
Wrap Up
If you followed along with all five steps of this project, you’ve laid the foundation of knowledge to get contact, account, and donation data from other systems into Salesforce and NPSP. This is just the beginning of what you can do with NPSP Data Importer, but key to unlocking Advanced Mapping and other features. Check out the Resources section if you want to learn more.
Now all that’s left to do is select the Trailhead Playground in which you followed along with the steps and click Verify to finish this project and earn your badge!
Resources
- Salesforce Help: Process Your Import
- Salesforce Help: Configure NPSP Data Importer
- Trailhead: Import and Export with Data Management Tools
- Video: How To Import Data into Salesforce Series
- Trailhead: Data Management
- Trailblazer Community: Data Quality & Management