Build a Preference Form
Customize the Form Details
Next, Calvin builds a preference form using the detailed consent template he just created. To do this, he uses Preference Builder. He’s automatically taken to the Preference Builder when he opts to create a new form from the Preference Manager dashboard.
Each consent template type has different form customization options in Preference Builder. For example, Calvin can add a unique title and description to a template type that users see when they access the form. This is a great opportunity to add character to a preference form that reflects his company’s voice and tone.
Calvin can also set an internal expiration date for the consent preferences Zephyrus is gathering. After all, does Zephyrus really want to contact customers about housing availability for a whole year? Hopefully, the company helps customers find housing faster than that, so Calvin can set their consent to expire after a few months as a reminder to gather customer preferences again.
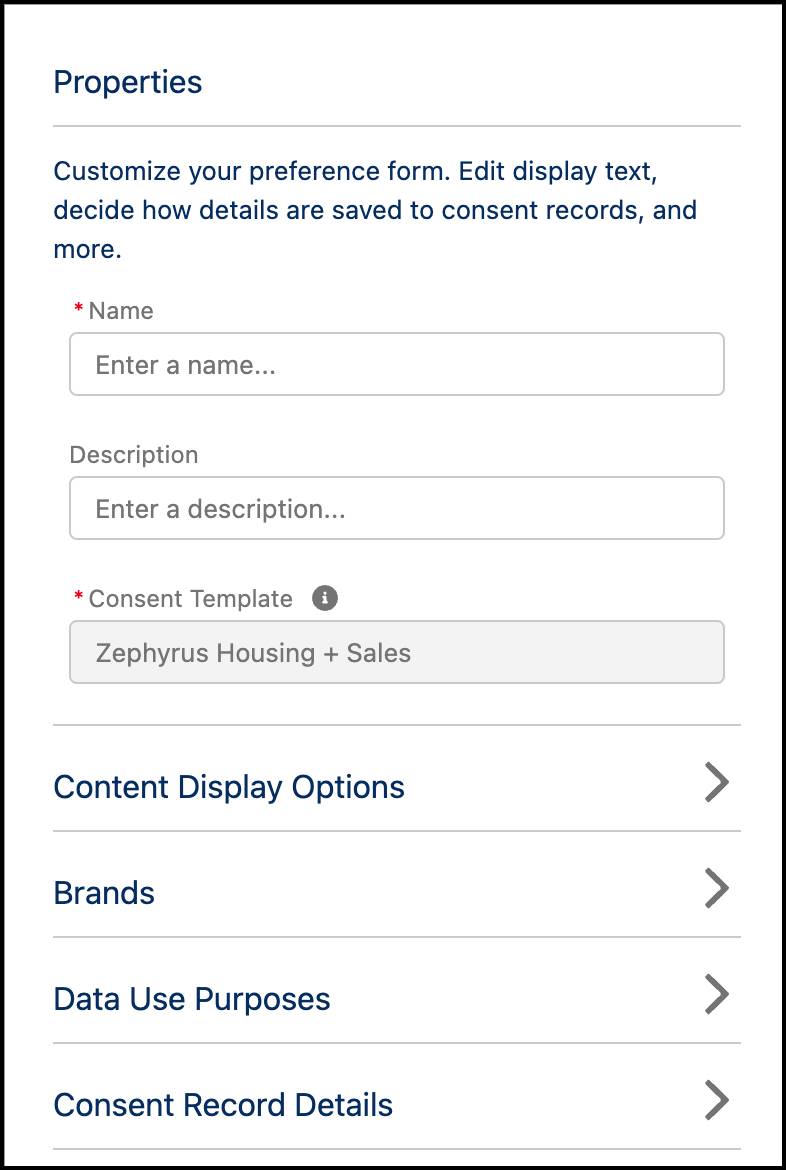
He can change the order in which certain elements, like brands and data use purposes, appear in the form. He can even change the text of the button users click to submit their preferences. Each section of the Properties panel offers different customization options.

An additional step that Calvin can take is to create custom text fields on the Business Brands and Data Use Purposes objects. The data entered into these custom fields is pulled into Preference Builder and become options to populate the display names and descriptions of the brands and data use purposes in the form. For the purposes of this project, Calvin uses the default options.
Follow along with Calvin as he creates a form for the Zephyrus housing and sales teams to collect customer preferences.
- From the Preference Manager dashboard, click Forms.
- Click New Form.
- New Preference Form Method: Consent Template.
- Select the consent template you made in the previous step: Zephyrus Housing + Sales.
- Click Next.
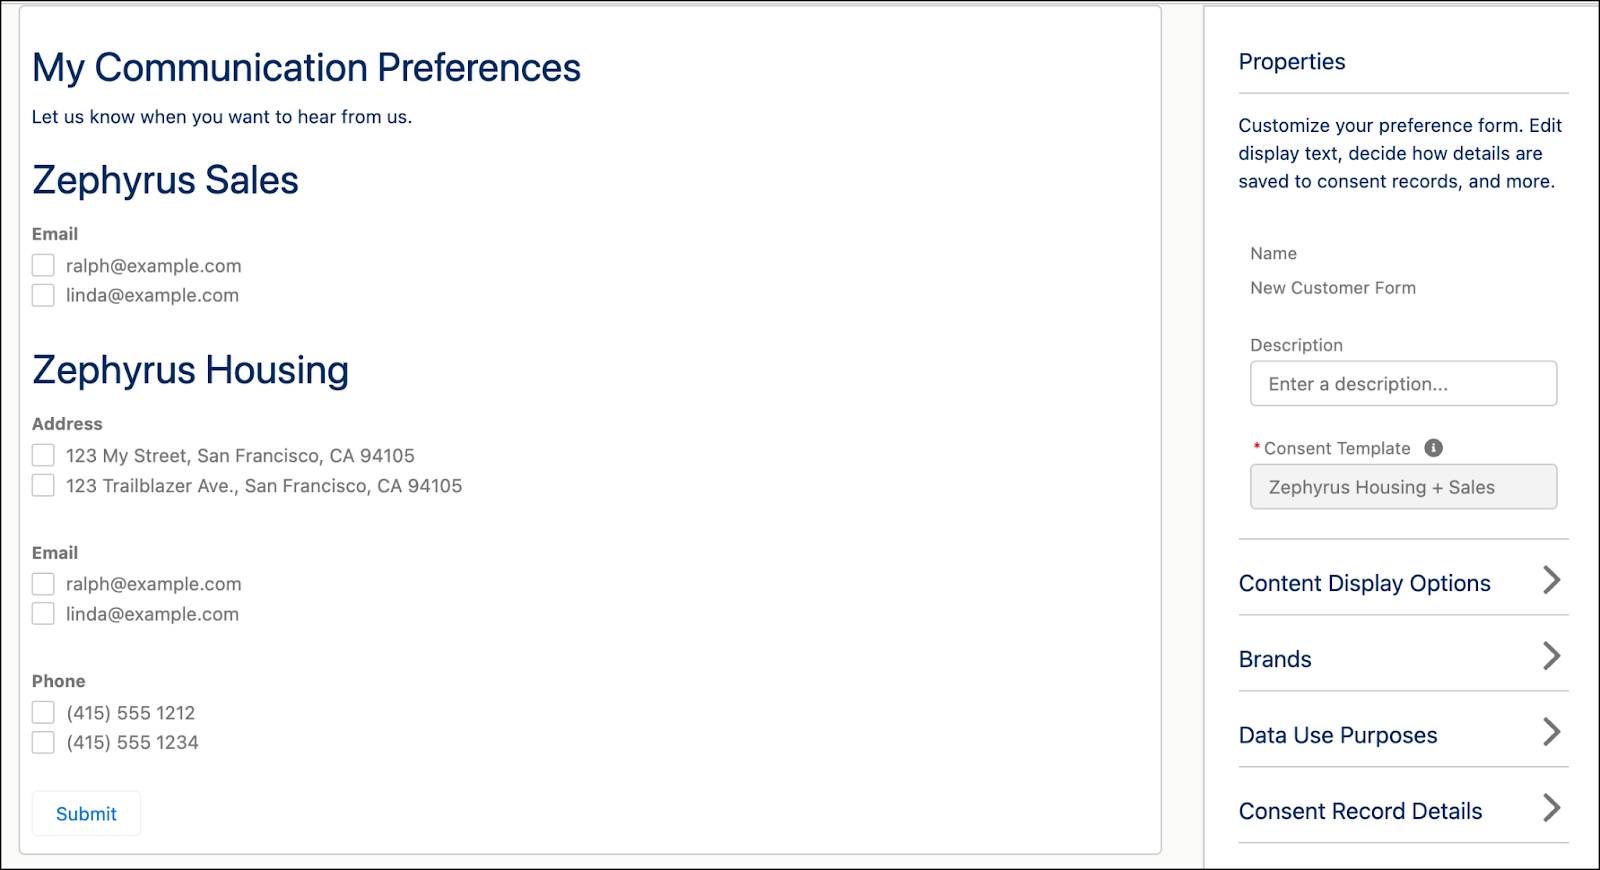
- From the Preference Builder, customize the form using the panel on the right.
- Properties
- Name:
New Customer Form.
- Description:
Housing + Sales New Customer Preference Form.
- Consent Record Details
- Consent Record Name:
Zephyrus Housing + Sales - Capture Contact Point Type:
Web.
- Consent Capture Source:
Online Form.
- Consent Expiration Date: Relative Date
- Range: Months
- Months Until Expiration:
4
- Content Display Options
- Display Title:
My Communication Preferences.
- Description:
Let us know when you want to hear from us.
- Submit Button Text:
Submit My Preferences.
- Brands
- Display Name: Name.
- Display Description: None.
- Data Use Purposes
- Display Name: Name.
- Display Description: None.
- Click Save & Publish.

As Calvin edits the properties, he can see a preview of the form in the workspace. Mock data populates to represent the type of customer information that is pulled into the form. In real time, customer information is pulled into the form when a logged-in user accesses the form on your Experience Cloud site. Or, he can create a unique access token for each user that coordinates to, and therefore populates information from, their data records in his org. This method works for both Experience Cloud sites and external sites. No matter which method he chooses, every customer sees a preference form with their own contact information.
Calvin’s final step is to incorporate his form into Zephyrus’s site so that customers can see, fill out, and submit the form. Preference forms are compatible with Experience Cloud sites and external sites, and can be published in just a few steps. See the Help site for instructions on how to configure and embed your form to a site. Remember that a form must be published in Preference Manager in order to be hosted and accessible online.
That’s it! We won’t check any of your setup, so click Verify Step to complete the last step of this project and earn your badge.
Resources
Salesforce Help: Customize Template-Based Forms in Preference Builder