외부 데이터를 연락처 페이지 레이아웃으로 가져오기

Salesforce를 완벽한 데이터용 솔루션으로 만들기
Becca는 Data 360과 AI를 결합한 첫 번째 프로젝트를 시작하게 되어 즐겁습니다. Becca는 시작하기 전에 현재 시스템 및 프로세스를 파악하는 것이 중요하다는 것을 알고 있습니다. 체크인 간소화에는 Coral Cloud의 현재 예약 시스템인 Reserv-o-matic이라는 다소 구식의 솔루션이 포함되어 있습니다. 이러한 외부 시스템을 사용하면 방문객이 하나의 프로필로 예약을 여러 개 할 수 있습니다.
방문객은 각자의 이름, 이메일 주소, 전화번호 등의 정보를 저장할 수 있는 여러 필드가 있습니다. 이러한 방문객 중 한 명인 Sofia Rodriguez는 객실 유형 및 예약 상태와 함께 체크인 및 체크아웃 날짜가 각각 포함된 예약을 몇 개 했습니다.
현재 이러한 모든 정보는 Coral Cloud의 Salesforce org와 완전히 분리되어 있습니다. 해당 조직에는 Sofia의 Contact(연락처) 레코드와 수많은 기존 관련 데이터가 있습니다. Data 360은 Salesforce의 Sofia와 Reserv-o-matic의 Sofia를 연결할 수 있습니다. 이렇게 연결되면 Becca는 모든 종류의 흥미로운 작업을 수행할 수 있습니다. 예를 들어 Becca는 Contact(연락처) 페이지 레이아웃에 예약 관련 목록을 바로 넣을 수 있게 됩니다.

이렇게 하려면 Becca는 세 단계를 완료해야 합니다.
- Data 360이 Reserv-o-matic 데이터를 인식하도록 설정합니다.
- 외부 방문객과 내부 연락처 간의 일치 항목을 찾습니다.
- 외부 예약을 표시하도록 Contact(연락처) 페이지를 업데이트합니다.
계획을 수립했으니 이제 설정을 시작할 차례입니다. 그런데 Trailblazer 여러분, 먼저 한 가지 알아둘 것이 있습니다. 짐작하셨겠지만, Reserv-o-matic은 실제로 존재하지 않습니다. 이 뱃지에서 사용할 수 있는 외부 데이터 소스가 없다는 뜻입니다. 따라서 Trailhead 팀은 ‘외부’ 방문객과 ‘외부’ 예약 데이터를 특수 조직에 있는 사용자 정의 개체에 넣었습니다. 따라서 이 뱃지 전반에서는 데이터가 조직 외부에 존재한다고 가정할 것입니다. 이해하셨나요? 그럼 이제 원래 하던 작업으로 돌아가겠습니다.
기존 Coral Cloud 데이터의 데이터 스트림 활성화
이 시점에서 Trailhead 팀은 이미 Data 360과 Reserv-o-matic을 연결하여 약간의 시간을 절약했습니다. 하지만 Data 360은 데이터가 내부 개체와 어떻게 연결되지는 물론이고 아직 외부 시스템에 어떤 데이터가 존재하는지도 인식하지 못합니다. 그래서 Becca가 가장 먼저 해야 할 작업은 Data 360으로 가져와야 할 데이터를 식별하도록 하는 것입니다. 이는 Data 360 관리의 핵심 부분인 데이터 스트림을 만드는 것을 의미합니다.
데이터 스트림은 주어진 연결 내에서 데이터를 찾을 수 있는 위치를 설명합니다. 각 데이터 스트림은 데이터 스트림 소스에서 가져오는 데이터를 위한 저장소 컨테이너인 관련 데이터 레이크 개체(DLO)를 만듭니다. 하지만 새로운 DLO가 Data 360에 이미 존재하는 다른 모든 데이터와 어떻게 연결될까요? 그 답은 데이터가 어떻게 구조화되는지 설명하는 일종의 메타데이터인 데이터 모델 개체(DMO)의 형태입니다. 예를 들어 Contact Point Email(연락관 이메일)이라는 DMO에는 이메일 주소의 출처에 관계없이 이메일 주소를 올바르게 저장하는 방법에 대한 세부 사항이 포함되어 있습니다. 따라서 Becca는 외부 방문객 데이터의 이메일 열을 DMO의 이메일 주소 필드에 매핑할 수 있습니다.

이 매핑으로 Data 360은 똑똑한 방식으로 데이터를 사용할 수 있습니다. 이 뱃지에서는 Data 360이 이메일 주소를 사용하여 Reserv-o-matic의 Sofia가 Salesforce의 Sofia와 동일하다는 것을 알고 있습니다.
데이터 스트림 생성 및 매핑은 그 자체만으로도 상당히 방대한 주제입니다. 이 뱃지에서는 모든 Coral Cloud 데이터 스트림과 매핑을 특수 조직에 이미 로드되어 있는 데이터 키트로 패키징하여 작업을 간소화했습니다. 따라서 데이터 스트림을 활성화하기만 하면 됩니다. 먼저 Data 360과 Agentforce Playground를 실행합니다.
데이터 스트림 활성화
- 아직 실행하지 않았다면 Data 360과 Agentforce Playground를 실행합니다.

-
 아이콘을 클릭하여 App Launcher(앱 시작 관리자)를 열고, Data Cloud를 검색하여 선택합니다.
-
Data Streams(데이터 스트림) 탭을 클릭합니다.
-
New(새로 만들기)를 클릭합니다.
이제는 역할극을 해야 할 시점으로, 외부 데이터 대신 내부 데이터 소스를 선택해야 합니다.
-
Salesforce CRM을 클릭합니다.

-
Next(다음)를 클릭합니다.
- Custom Bundles(맞춤형 번들)까지 아래로 스크롤한 다음 AIPlusData를 클릭합니다.

-
Next(다음)를 클릭합니다.
- 필드가 미리 선택되어 있고 번들에 포함된 모든 필드가 나열됩니다. 선택 항목을 그대로 두고 Next(다음)를 클릭합니다.
-
Deploy(배포)를 클릭합니다. 이 작업에는 몇 분 정도 걸릴 수 있습니다. 데이터 스트림을 배포할 수 없다는 오류 메시지가 표시되는 경우 다시 Deploy(배포)를 클릭하세요.
- 브라우저에서 페이지를 새로 고칩니다.
- 각 데이터 스트림의 오른쪽에 있는 드롭다운 화살표를 클릭하고 Refresh Now(지금 새로 고침)를 선택합니다.
-
Full Refresh(전체 새로 고침)를 선택하고 Refresh Now(지금 새로 고침)를 클릭합니다.
- 새 스트림에 대해 Success(성공)를 확인합니다.
모든 스트림의 Last Run Status(마지막 실행 상태)에 Success(성공)라고 표시되어야 하고 Total Records(총 레코드) 열에 숫자(0 제외)가 표시되어야 합니다. 시간이 다소 걸릴 수 있으므로 기다려야 합니다.
잘하셨습니다. 데이터 스트림을 활성화하여 중요한 데이터 소스를 식별했습니다. 앞으로 몇 분 동안 데이터가 데이터 레이크 개체에 수집됩니다. 그리고 데이터 모델 개체와 매핑이 이미 존재하므로 곧 데이터를 사용할 수 있습니다.
ID 확인 설정
Becca는 Reserv-o-matic의 많은 방문객이 Salesforce의 Contact(연락처) 레코드에 있는 사람과 동일하다는 것을 알고 있습니다. 게스트와 연락처 모두 공통 데이터 모델 개체에 매핑되어 있으므로 Becca는 Data 360의 강력한 기능을 사용하여 Salesforce의 Sofia와 Reserv-o-matic의 Sofia를 하나의 통합 Sofia로 만들 수 있습니다. 이를 ID 확인이라고 하며, Salesforce Contacts(Salesforce 연락처)와 외부 예약 데이터 간의 차이를 메울 수 있는 핵심적인 요소입니다. 먼저 Identity Resolutions(ID 확인) 탭으로 이동하여 ID 확인 규칙 집합을 만듭니다.
-
Identity Resolutions(ID 확인) 탭을 클릭합니다.
-
New(새로 만들기)를 클릭합니다.
-
Create New Ruleset(새 규칙 집합 만들기)을 클릭한 다음, Next(다음)를 클릭합니다.
- Data Space(데이터 공간) 메뉴에서 기본값이 선택된 상태로 둡니다.
- Primary DMO(기본 DMO)에서 Individual(개별)을 선택합니다.
- Ruleset ID(규칙 집합 ID)에
ccid를 입력합니다. (ccid는 Coral Cloud Identification(Coral Cloud 식별)을 의미합니다.)
-
Next(다음)를 클릭합니다.
- Ruleset Name(규칙 집합 이름)에
Guest Name and Email(게스트 이름 및 이메일)을 입력합니다.
- Description(설명) 필드에
Reconcile Reserve-o-matic contact data with Salesforce contact data(Reserve-o-matic 연락처 데이터를 Salesforce 연락처 데이터와 조정하기)를 입력합니다.
-
Run jobs automatically(자동으로 작업 실행)를 비활성화합니다.
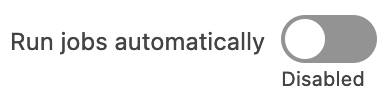 참고: 나중에 작업을 수동으로 시작합니다.
-
Save(저장)를 클릭합니다. 규칙 집합의 프레임워크가 저장되었으니 이제 일치 방식을 설정할 차례입니다.
-
Configure(구성)를 클릭합니다.

-
Next(다음)를 클릭합니다(또는 여기서 잠시 멈추고 Match Rule Instructions(일치 규칙 지침)를 읽습니다).
-
Configure(구성)를 클릭합니다.
-
Fuzzy Name and Normalized Email(퍼지 이름 및 정규화된 이메일)을 선택합니다. 이에 따라 일치에 사용되는 기본 데이터가 결정됩니다.
-
Next(다음)를 클릭합니다. 일치시키는 방식을 미세 조정하는 정교한 방법이 몇 가지 있지만, 지금은 기본값을 사용하겠습니다.
-
Next(다음)를 클릭합니다.
-
Save(저장)를 클릭합니다.
- 오른쪽 상단 모서리에 있는 Run Ruleset(규칙 집합 실행)을 클릭합니다.
- 브라우저를 새로 고쳐 Last Job Status(마지막 작업 상태)가 In Progress(진행 중) 또는 Succeeded(성공)로 표시된 것을 확인합니다.
좋습니다. 이제 Data 360은 규칙 집합을 사용하여 두 개인이 실제로 동일 인물인지 파악하는 방법을 알고 있습니다. 조직에는 이 규칙 집합을 사용할 때 일치하는 방문객과 연락처가 수십 개 있습니다.
규칙 집합을 실행하는 데 시간이 조금 걸리는 경우도 있습니다. 조직에 레코드가 수십 개 밖에 없기 때문에 빨리 끝날 수 있지만, 그래도 처리하는 동안 다른 일을 할 수 있습니다. Data Cloud Related List(Data Cloud 관련 목록) 만들기 같은 일 말이죠!
외부 예약 관계 인증
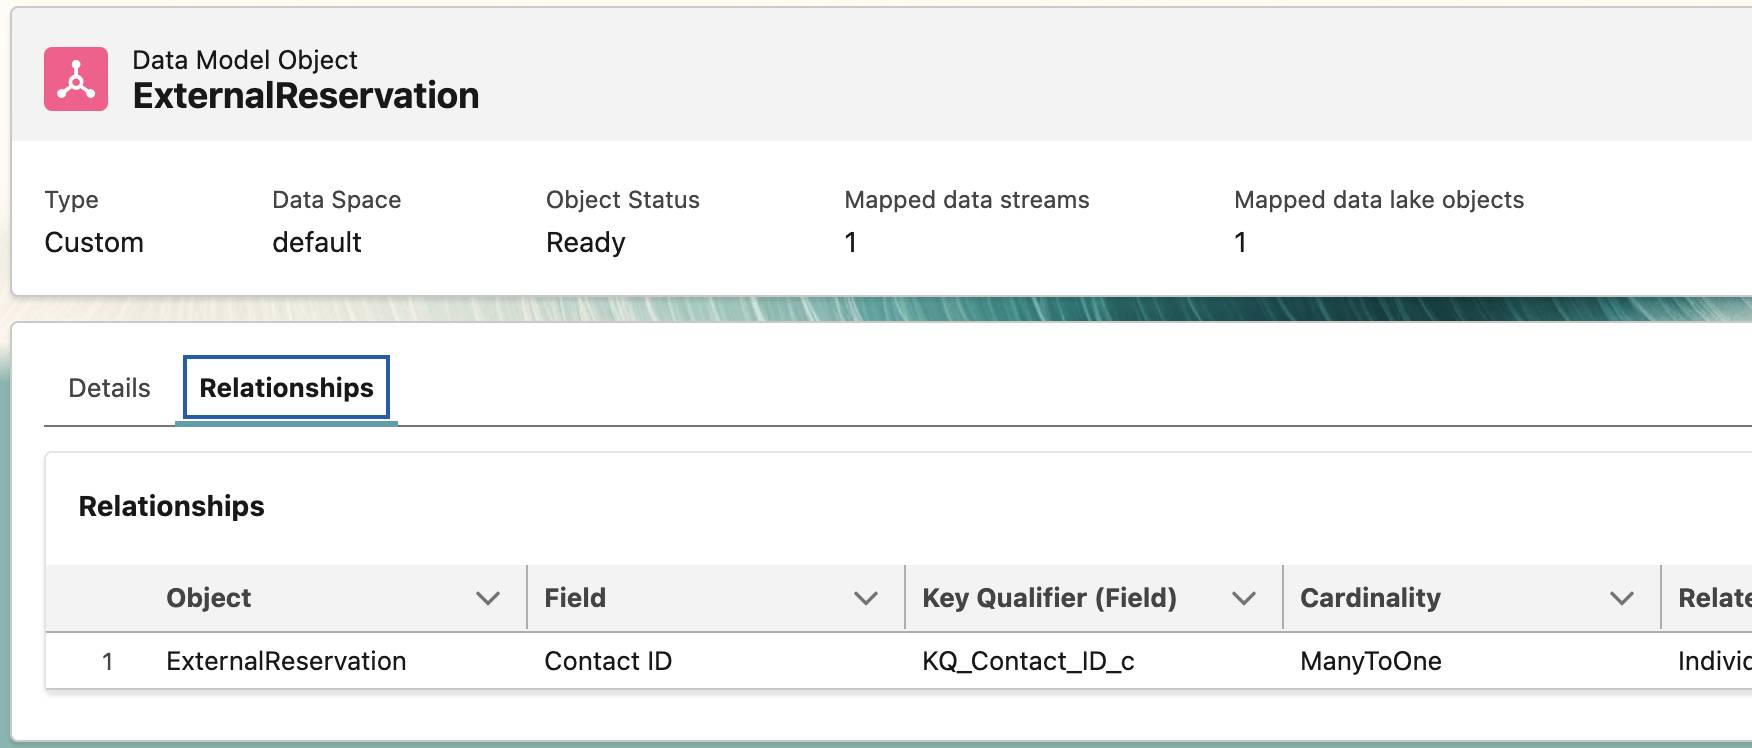
ExternalReservation 데이터 모델에 다음 관계가 추가되어 있고 활성화 상태인지 확인합니다.
-
Data Model(데이터 모델) 탭을 클릭합니다.
-
ExternalReservation을 클릭합니다.
-
Relationships(관계) 탭을 클릭합니다.
- 관계가 있는지 확인하고, 있는 경우 Connect Data 360 and CRM with Enrichment(Data 360과 CRM을 Enrichment로 연결)로 건너뜁니다.
- 만일 목록에 어떤 관계도 없다면 Edit(편집)을 클릭합니다.
-
Show inactive relationships(비활성 관계 표시) 확인란을 체크합니다.
- 비활성 상태의 ExternalReservation Contact ID가 나타나면 Active(활성) 토글을 켭니다.
- 아무것도 표시되지 않으면 New Relationship(새 관계)을 클릭하고 다음 정보를 입력하여 새로운 관계를 추가합니다.
- 필드: Contact ID(연락처 ID)
- 카디널리티: N:1
- 관련 필드: Individual(개인)
- 관련 필드 Individual Id(개인 Id)
- 필드: Contact ID(연락처 ID)
- 비활성 상태의 ExternalReservation Contact ID가 나타나면 Active(활성) 토글을 켭니다.
-
Save & Close(저장 및 닫기)를 클릭합니다.
Data 360과 CRM을 Enrichment로 연결
한 곳에서 모든 데이터에 액세스할 수 있을 경우 놀라운 장점 중 하나는 모든 소스의 데이터를 원활하게 결합하는 환경을 만들 수 있다는 점입니다. Coral Cloud의 경우 Becca는 호텔 직원이 방문객에 대한 다른 관련 정보를 찾는 장소인 Contacts(연락처) 페이지에 외부 예약 데이터를 표시하려고 합니다.

잘 모르면 이 스크린샷이 일반적인 관련 목록이라고 생각하기 쉽습니다. 그럴듯해 보이거든요! 하지만 이는 사실 Data Cloud Related List(Data Cloud 관련 목록)라는 특별한 종류의 관련 목록입니다. 이 목록은 Setup(설정)에서 만들 수 있습니다. (나머지 단계를 완료하면 많은 팝업 창이 표시됩니다. 팝업 창을 닫아도 됩니다.)
-
Setup(설정) 아이콘
 을 클릭한 다음 Setup(설정)을 선택합니다.
-
Object Manager(개체 관리자)를 클릭합니다.
-
Contact(연락처)(Contract(계약 아님))를 클릭합니다.
-
Data Cloud Related List(Data Cloud 관련 목록)를 클릭합니다.
-
New(새로 만들기)를 클릭합니다.

- Data Cloud Object(Data Cloud 개체)에서 ExternalReservation을 선택합니다.
-
Next(다음)를 클릭합니다.
- Child Relationship Name(하위 관계 이름)을
Reservations(예약)로 업데이트합니다.
-
Next(다음)를 클릭합니다.
- Related list(관련 목록) 레이블을
Reservations(예약)로 업데이트합니다.
-
Next(다음)를 클릭합니다.
좋습니다. Data Cloud Related List(Data Cloud 관련 목록)가 존재하지만 아직 페이지 레이아웃에 표시되지 않습니다. 그래서 Becca는 Contact(연락처)에 대한 Lightning 레코드 페이지를 업데이트하고 표시 방식을 구성합니다.
- 왼쪽 메뉴에서 Lightning Record Pages(Lightning 레코드 페이지)를 클릭합니다.
-
Contact Record Page(연락처 레코드 페이지)를 클릭합니다.
-
Edit(편집)을 클릭합니다.
-
Dynamic Related List - Single(동적 관련 목록 - 단일)을 Related(관련) 탭의 Opportunities(기회) 위에 끌어서 놓습니다.

- 오른쪽 메뉴의 Related List(관련 목록) 아래에서 Reservations(예약)를 선택합니다.

- Related List Fields(관련 목록 필드)에서 Add Field(필드 추가)를 클릭합니다.
-
Check-in Date(체크인 날짜)를 찾아서 선택합니다.
-
Done(완료)을 클릭합니다.
-
Check-out Date(체크아웃 날짜), Room Type(객실 유형), Reservation Status(예약 상태)에 대해 6~8단계를 반복합니다.
-
X를 클릭하여 목록 맨 위에 있는 Record ID(레코드 ID) 필드를 삭제합니다.
- Related List Filters(관련 목록 필터)에서 Add Filter(필터 추가)를 클릭합니다.
- Field(필드)에서 Check-in Date(체크인 날짜)를 선택합니다.
- Operator(연산자)에서 not equal to(같지 않음)를 선택합니다. 이는 체크인 날짜가 비어 있지 않으면 예약이 표시된다는 의미입니다. 필터를 추가하지 않으면 지난 7일 동안의 데이터만 표시됩니다. 여러분 조직의 데이터는 그보다 오래 되었을 가능성이 높습니다.

-
Done(완료)을 클릭합니다.
-
Save(저장)를 클릭합니다.
- Lightning App Builder(Lightning 앱 빌더) 브라우저 탭을 닫고 Data Cloud 앱으로 돌아갑니다.
잘 하셨습니다. Data Cloud Related List(Data Cloud 관련 목록)가 준비되었습니다. Sofia의 Contact(연락처) 레코드를 확인하여 예약이 목록에 있는지 확인합니다.
-
Identity Resolutions(ID 확인) 탭을 클릭한 다음, Guest Name and Email(방문객 이름 및 이메일) 규칙 집합을 클릭합니다. 브라우저를 새로 고치고 Last Job Status(마지막 작업 상태) 필드에 Succeeded(성공함)라고 표시되는지 확인합니다. 또한 Total Unified Profiles(통합 프로필 총합)에 결과 숫자가 표시되는지 확인하세요. 그렇지 않은 경우 잠시 기다렸다가 다시 새로 고칩니다.

-
App Launcher(앱 시작 관리자)에서 Sales(영업 담당자)를 검색 및 선택합니다.
-
Contacts(연락처) 탭을 클릭합니다.
-
List View(목록 보기)(맨 오른쪽)를 클릭한 다음, Recently Viewed(최근 조회 항목)를 클릭하고 All Contacts(모든 연락처)를 선택합니다.
-
Search this list...(이 목록 검색...)에서 Sofia Rodriguez를 검색하고 선택합니다.
이제 Sofia의 연락처 페이지 레이아웃 바로 안쪽에 3개의 예약이 표시되어야 합니다.
계획한 일이 잘 진행되는 것 만큼 좋은 것은 없습니다. 데이터 스트림을 만들고, ID를 확인하고, 페이지 레이아웃을 개선했습니다. 좋은 출발입니다. 다음으로 Becca는 예약 데이터를 사용하여 Agentforce에게 새로운 기술을 가르칩니다.