Deploy and Launch Your Service Process
Learning Objectives
After completing this unit, you’ll be able to:
- Associate a request form with an Action Launcher deployment.
- Add the Case Details component to a Case record page.
- Launch a service process to fulfill a customer request.
Associate a Request Form with an Action Launcher Deployment
In the previous unit, you learned how to configure and activate a service process definition. Now that your service process definition is live, it’s time to make it accessible to your service reps so that they can order new check books for customers.
First, make sure your users have the correct permissions to run processes built with Service Process Studio and the objects you are using, such as Case. Check out Service Process Studio Permissions in Salesforce Help for details.
With permissions in place, you link the request form associated with your activated service process definition to the Action Launcher component. Service reps can then use the Action Launcher to find and select the process to launch the Omniscript and begin the service process.
Here’s how to add a new Action Launcher deployment for the Check Book Order service process definition to launch from an Account record.
- From Setup, in the Quick Find box, enter
Action Launcherand select Deployments under Action Launcher.
- Click New Deployment.
- In the New Deployment window, click Next.
- Specify information about the action.
- Label:
Check Book Order - API Name:
CheckBookOrder(This will automatically be generated.)
- Guidance to show: Omniscripts.
- Label:
- Click Next.
- Select Account from the list of Available Objects and click
 to add it to the list of Selected Objects, then click Next.
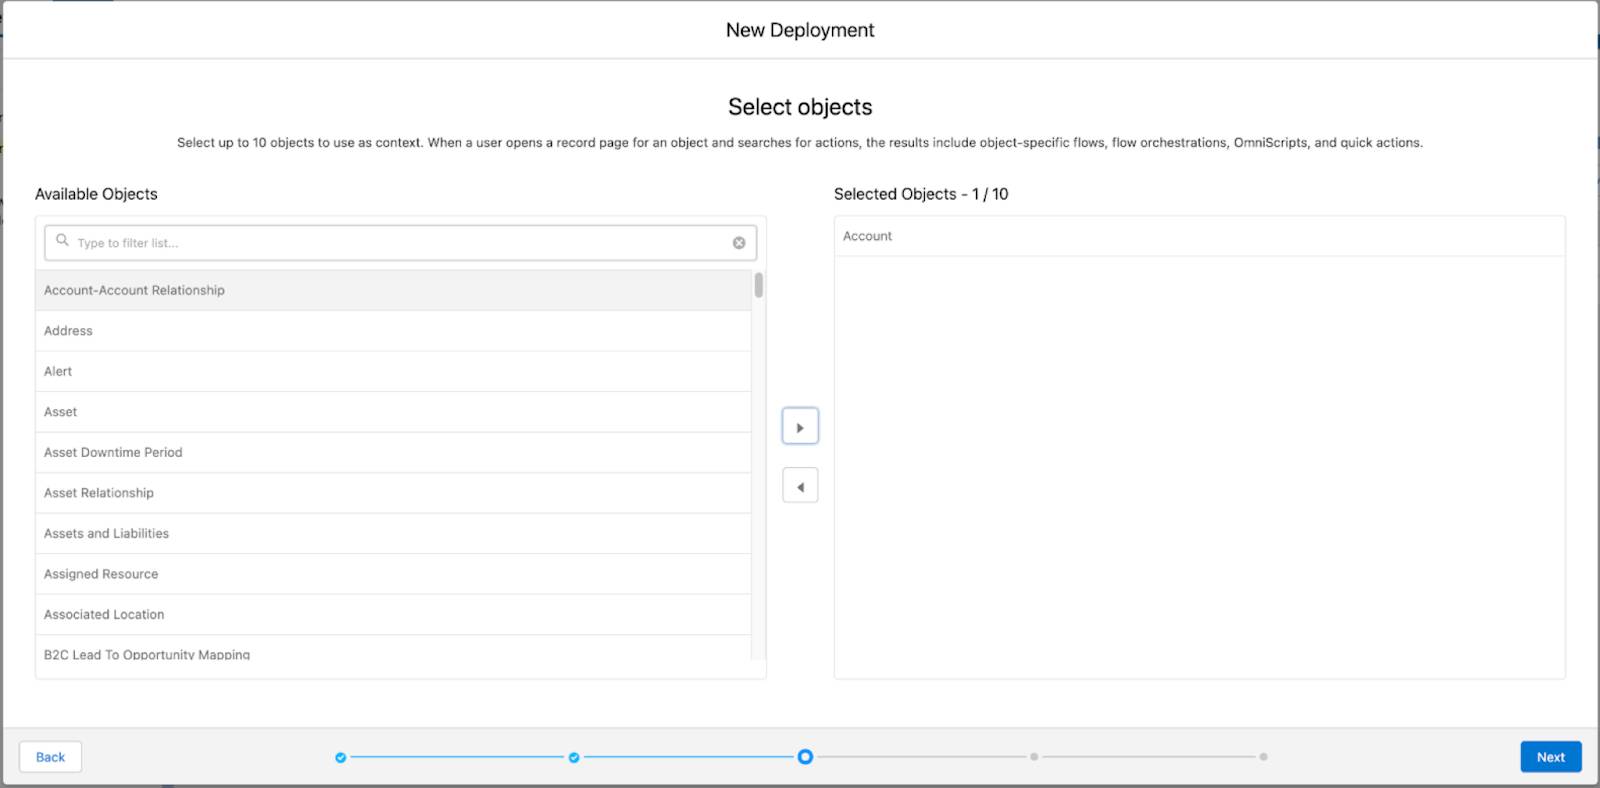
- Select the Check Book Order Omniscript from the list, then click Next.
- Finally, add the Check Book Order Omniscript for display as an action button in the Action Launcher, click
 in its row.
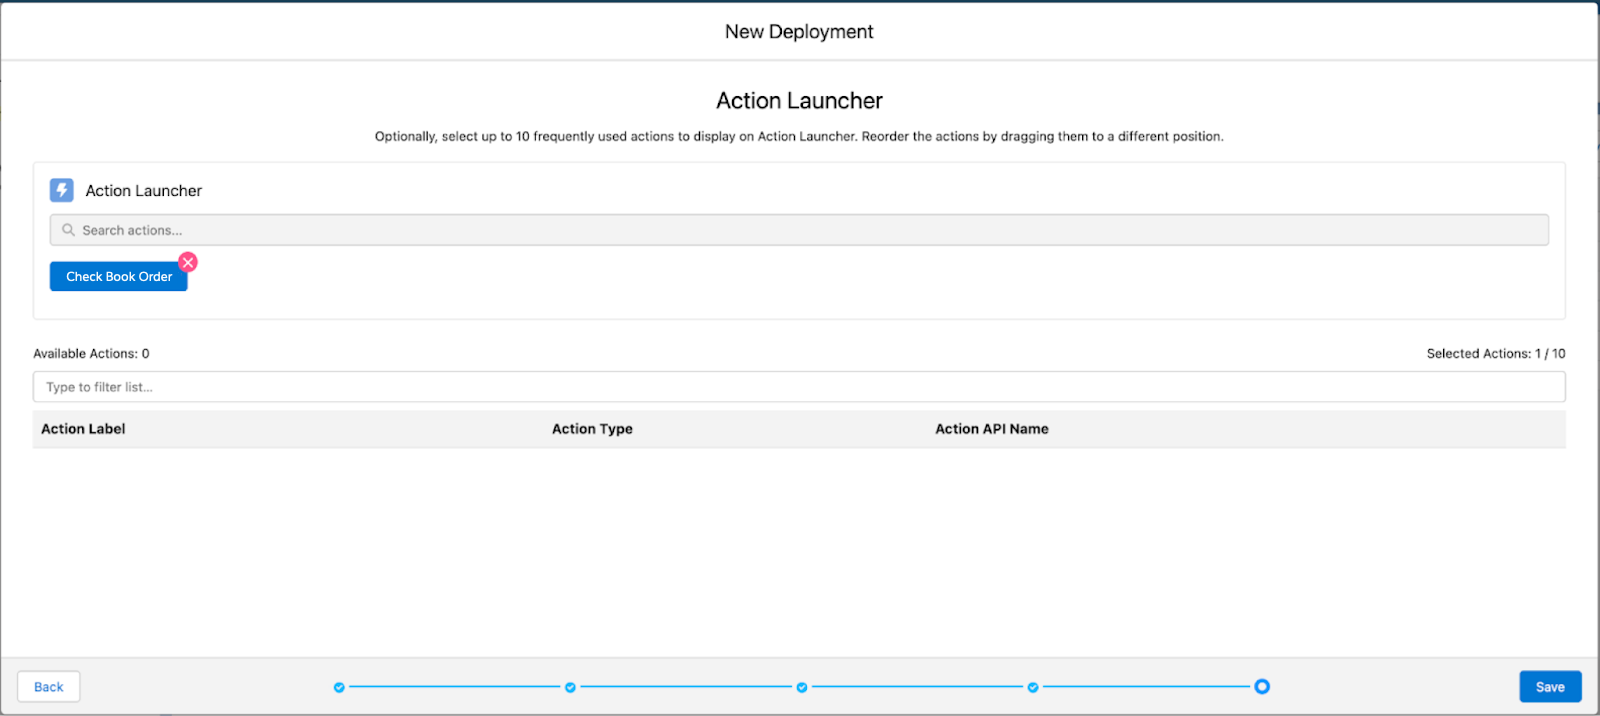
- Save your work.

The action launcher deployment is ready to go.
Add the Action Launcher Component to a Page Layout
Make sure to add the Action Launcher component to the Account page. To specify the actions that users can search for and initiate from the component, in the component properties pane, from the Action Launcher Configuration dropdown, select an option: Action Launcher deployment or Service Catalog.
What’s the Service Catalog? Service Process Studio works with Product Catalog Management to determine access and visibility for service processes based on a service catalog. Using these tools together, you can determine which service reps can launch service processes for which customers.
Configure your Action Launcher with the Service Catalog and the Qualification Rules Procedure in the component properties. Then, when a user accesses the page, Action Launcher uses that service catalog and qualification rules to display only the relevant service processes in Action Launcher search results. We won’t cover that in more detail here, so see Eligibility Rules and Access Control for Service Processes in Salesforce Help.
Add the Case Details Component to the Case Record Page
The last step is to add the Case Details component to the case page to view the details you collect in the intake form.
The Case Details component displays the data attributes associated with your specific service process requests, organized by the sections you configure in Service Process Studio.
For example, in the Check Book Order, Case Details will display the Check Book Details, Financial Account, Tracking Details sections, and all of the attributes included in each. Service reps use the component to view and verify the captured data.
Here’s how to add the component to the page.
- On a Case, click Setup and select Edit Page.
- Drag Case Details from the Components list to the page layout.
- Save your work.
Now everything is ready for service reps to use.
Launch the Check Book Order Service Process
The Check Book Order service process definition is activated and ready to launch from the Action Launcher. When Cumulus receives a check book order request from a customer, the service rep goes to the customer’s account record and selects Check Book Order from the Action Launcher.
This launches the Omniscript intake form, where they collect details.

After the rep completes the intake form Omniscript, a case is created and a reference number is generated. The rep clicks the reference number link in the confirmation step.

This takes the service rep to the case page, where they can verify the information they collected.
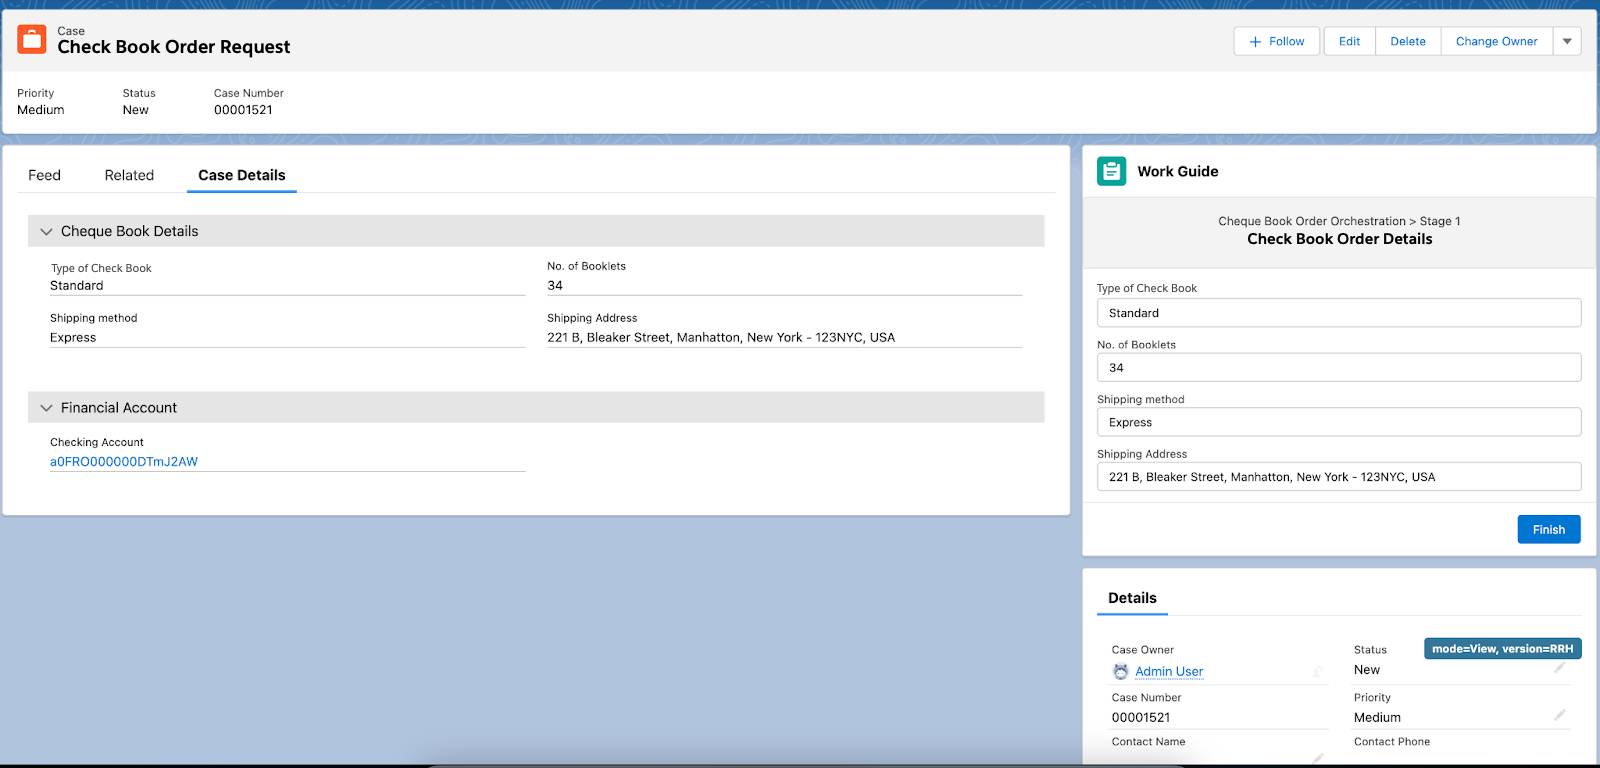
The order orchestration on the page uses this information to automatically send the check book request to the connected system for fulfillment.
This service rep—and all of their Cumulus service colleagues—are thrilled that they can fulfill the previously complex check book order request in a timely and effective way. No more complex steps because the entire process is automated. Most importantly, the top-quality service has customers singing Cumulus’s praises to friends and family.
Add Process to Your Self-Service Portal
Your service reps aren’t the only ones who can use these processes, though—customers can also use them to manage their financial services needs through a self-service portal.
Set up an Experience Cloud portal using the Financial Services Client Portal template and then configure these self-service capabilities. On the portal, clients can create and track their own service requests, schedule and manage appointments, and more. You can use the Experience Cloud portal on its own or embed it into existing internet and mobile banking systems through single sign-on.
For details on how to set up these features, see Self-Service Capabilities in Financial Services Client Portal in Salesforce Help.
Wrap Up
In this badge, you learned about Service Process Studio for Financial Services.
You know how to design and run service processes by creating service process definitions. You understand the roles of data attributes, intake forms, preprocessors, integration definitions, and flow orchestrations—and the technologies that power them. Plus, you can deploy and launch service processes using Action Launcher and the Case Details component.
Now you can put these tools to work at your institution. How can you use Service Process Studio to streamline operations, improve customer service, and automate complex tasks?
Resources
- Salesforce Help: Service Process Studio Permissions
- Salesforce Help: Provide Access to Omniscripts
- Salesforce Help: Launch Service Processes with Action Launcher
- Salesforce Help: Action Launcher
- Salesforce Help: Add the Action Launcher Component to a Page
- Salesforce Help: Add the Case Details Lightning Component to the Case Record Page
- Trailhead: Service Excellence with Agentforce Financial Services