Display a Flow on a Page Outside Your Salesforce Org
Learning Objectives
After completing this unit, you’ll be able to:
- Describe use cases for displaying a flow outside your Salesforce org.
- Create a new Experience Builder page and add a flow to it.

For users logging in to a Salesforce org, you’ve got lots of options: Lightning pages, flow actions, and the utility bar. But what if you want to open up access to the flow to folks without a Salesforce license?
Luckily, you can add flows to your org’s Experience Builder sites. Putting a flow on a site is just as easy as putting a flow on a Lightning page. Here are some examples of flows that are perfect for sites built on Experience Builder, whether the site is geared toward customers, partners, employees, or some other group altogether.
- Surveys
- Registration forms
- Interest forms
- Quote generators, such as for a car sale
Beyond the Basics
If you don't use Experience Builder sites, there is another option, but it requires development skills. You, or your developer, can embed the lightning:flow component in your external app by using Lightning Out. The Use Components Outside Salesforce with Lightning Out help article and Lightning Web Component Flow component reference are great starting points.
Experience Builder Pages
One of the first tasks for creating an Experience Builder site is selecting the template. Each template comes with a specific set of Experience Builder pages. All Experience Builder pages fall into one of these categories.
-
My Pages: The standard pages that you create. (The object pages that you create appear under Objects.)
-
Template Pages: The default pages that come with the site template.
-
Objects: The pages of the objects in your site, which include the object’s record detail, list, and related list pages.
-
Generic Record Pages: These generic pages are used to display record information for a Salesforce object when custom object pages don’t exist.
-
Login Pages: The default login pages that come with the site template.
Add Your Flow to an Experience Builder Page
It takes a lot of planning and know-how to set up a site for users. But if you don’t have a site, we can’t show you how to add a flow to one. So let’s breeze through creating a site, and then add a flow. We’ve learned about elements and components used for building flows, but within Experience Builder, flows are visible through the Flow component.
- Enable Digital Experiences for your Trailhead Playground. (If it’s already enabled, skip to step 2.)
- From Setup, in the Quick Find box, enter
digitaland then click Settings under Digital Experiences.
- Click Enable Digital Experiences.
- Click Save.
- From Setup, in the Quick Find box, enter
- Create a site.
- You should have been redirected to the All Sites page in Setup. If not, or if you skipped step 1, enter
Digital Experiencesin the Quick Find box, and select All Sites.
- Click New.
- Select the Customer Service template, then click Get Started.
- Enter a name for the site and then click Create.
- You should have been redirected to the All Sites page in Setup. If not, or if you skipped step 1, enter
- Now that you’ve built a fresh site, add your flow to its home page.
- From the My Workspaces page, click Builder to open Experience Builder.
- In the top-left corner, click Components to open the Components pane.

- Search for
Flowto find the right component.
- Drag the Flow component onto the Experience Builder page.

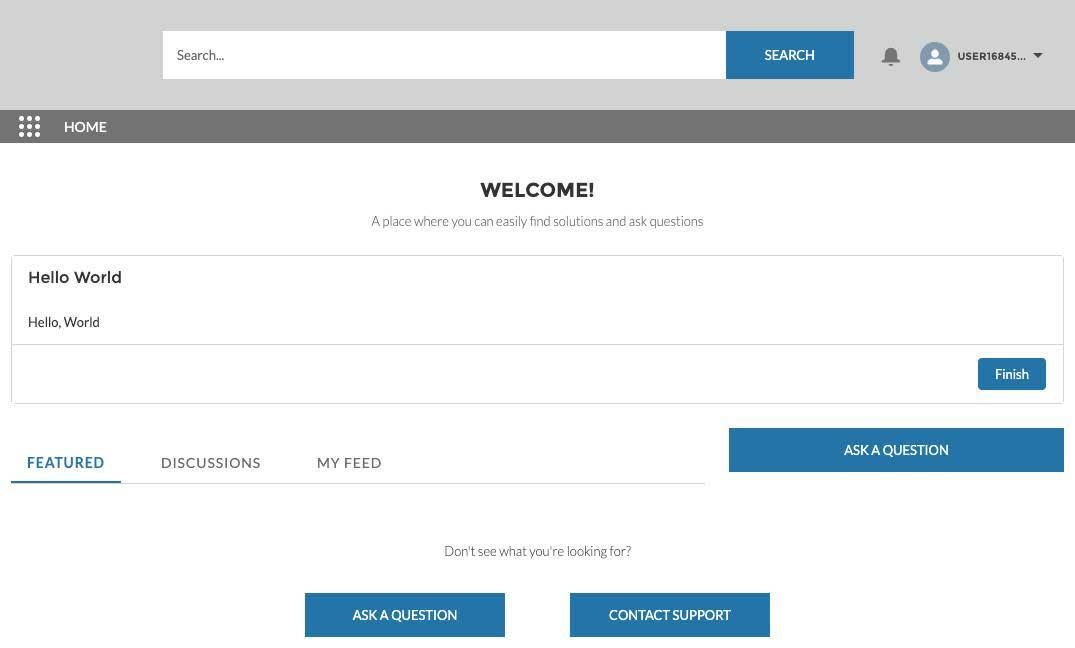
- In the properties pane for Flow, select Hello World.

- From the My Workspaces page, click Builder to open Experience Builder.
Test Your Flow
All done! Let’s see how the flow works in a real live site.
- In the top-right corner of the Experience Builder, click Publish, and then Publish again.
If this is the first time you’re publishing this site, it’ll take a few minutes. While you wait for the confirmation email, why not grab a cup of coffee? Typically, you’d preview the site before you publish it, but the Flow component doesn’t display the flow in design or preview mode. That’s a fail-safe to prevent the flow from performing an action (like creating a bunch of records) before the first screen.
- In the “Site Published Successfully” confirmation email, click the link to the site.
- If you aren’t logged in, under the login fields, click Are you an employee? Login here.
If you need to enter the username and password for your Trailhead Playground, check out the Get Your Trailhead Playground Username and Password unit of the Trailhead Playground Management module, which shows you how to find them.
That’s it! Your flow is now live, and available to site users.