Add a Flow as an Action on a Record
Learning Objectives
After completing this unit, you’ll be able to:
- Describe use cases for adding a flow as an action.
- Create a flow action, and add it to a page layout.
With Lightning App Builder and Record pages, you can add flows to any record. But, remember that when you add a flow to a page, the flow runs its first screen every time the page loads. There are some situations where it makes sense to have the user decide when they’re ready to launch a flow. Here are some use cases.
Use Case |
Example |
|---|---|
|
The first element in the flow isn’t a screen. The power of a flow is that it can do a lot of things behind the scenes, with the user none the wiser. But that can also make the flow a little bit dangerous, especially if it does those powerful, behind-the-scenes things before the first screen. |
You built a flow that creates a task before displaying a screen to the user. If you put that flow on, say, the Account page, that flow would create a task every time a user loaded an account. That could result in lots of unnecessary tasks being created each day. |
The flow isn’t used often enough to be expanded by default. |
You created a flow for your office managers to order new supplies. The office managers need to be able to access that flow easily. But they don’t need to order supplies every day, so it would be a waste of space to put the flow directly on a record page. |
Flow Actions
A flow action is a custom action that renders a flow, and as such it’s perfectly suited to these kinds of use cases. Once you create a flow action and add it to a page layout, it appears in the associated record’s page-level action menu where users can find it to launch the flow.

Similarly, a flow action can be placed in the record's action menu in the Salesforce app. Flow actions aren’t supported in Salesforce Classic.

Create a Flow Action
Let’s quickly create a flow action. We’re doing this for contacts, but you can create actions for most objects.
- From Setup, click the Object Manager tab. Click Contact, then click Buttons, Links, and Actions.
- Click New Action and set these values:
- For Action Type, select Flow.
- For Flow, select Hello World.
- For Label, enter
Flow Action.
The name of the action uses this label instead of the flow label.
- Save the action.
- For Action Type, select Flow.
- Just like any other action, creating a flow action gets you only halfway there. Don’t forget to add it to the appropriate page layout. Otherwise, your users can never reap the benefits of your labors. The horror!
- From Setup, click the Object Manager tab.
- Click Contact, then click Page Layouts.
- Click Contact Layout.
- In the Salesforce Mobile and Lightning Experience Actions section, click override the predefined actions if present.
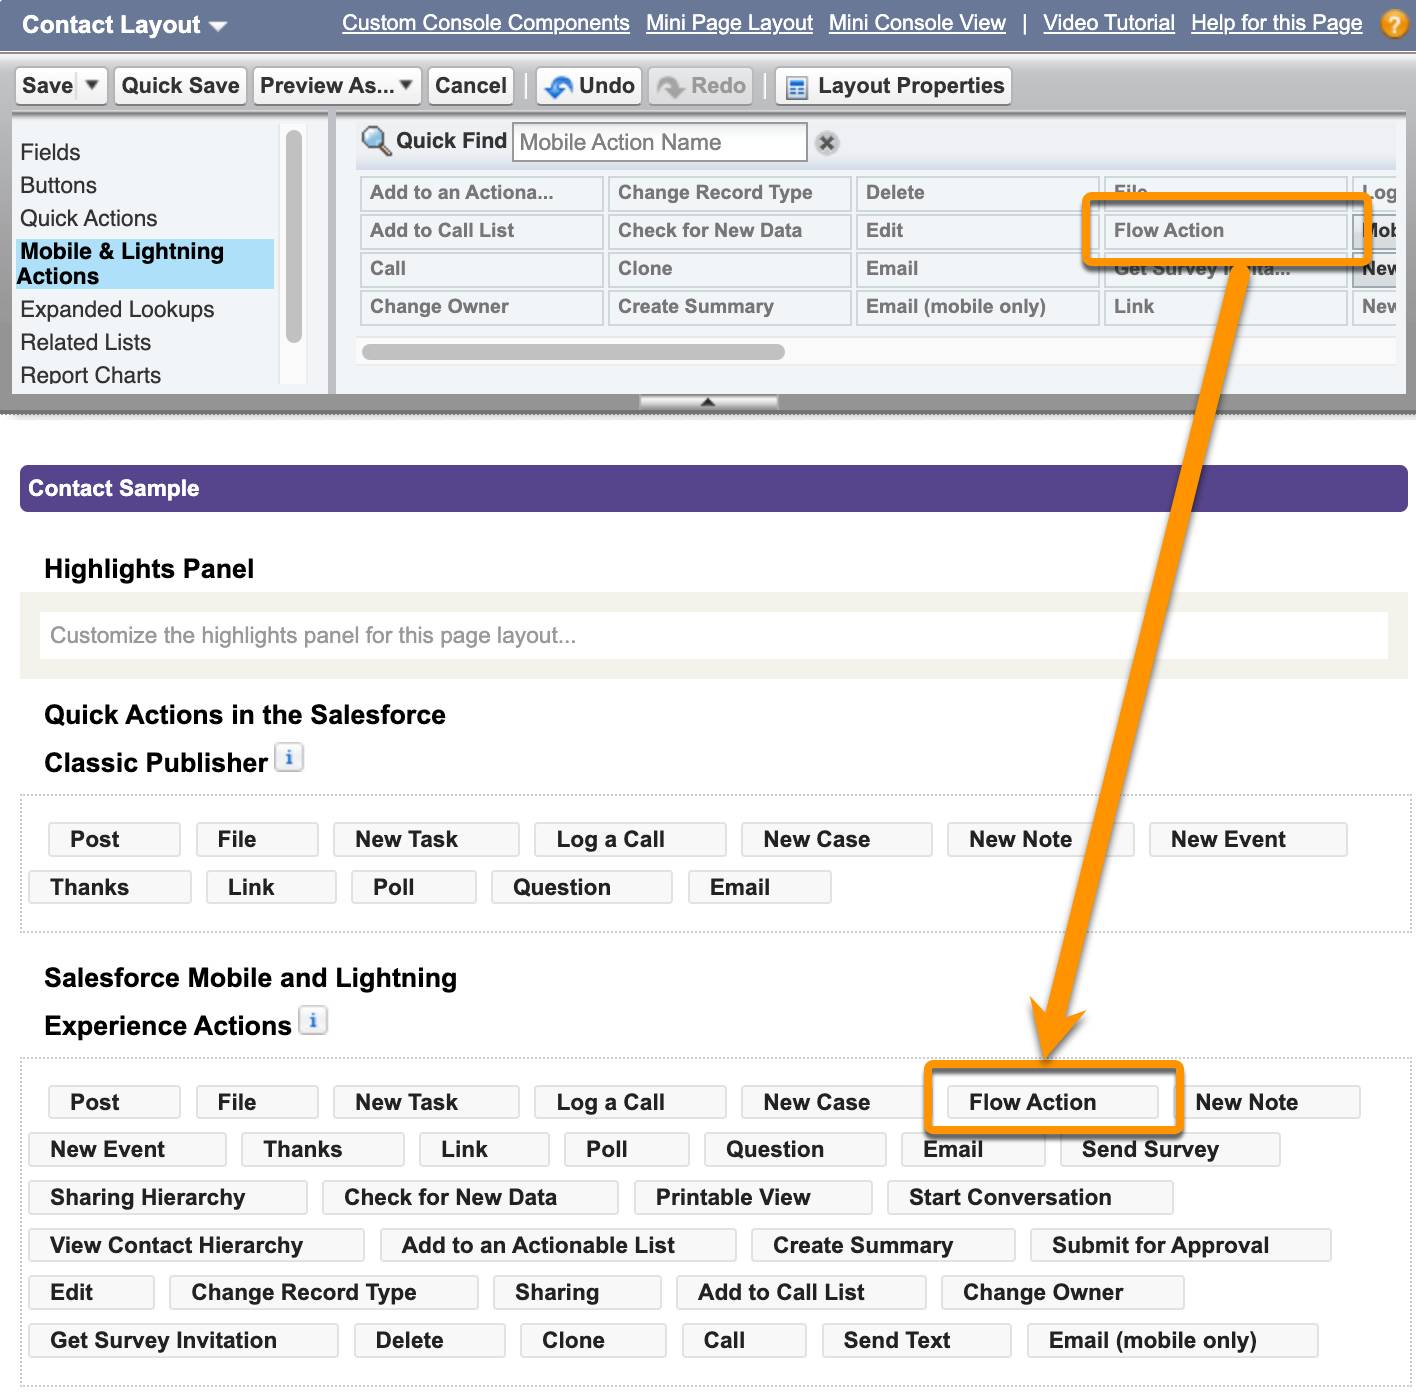
- Select Mobile & Lightning Actions in the palette, and then drag Flow Action to the Salesforce Mobile and Lightning Experience Actions section.

- Click Save.
- From Setup, click the Object Manager tab.
Test Your Flow
Now let’s make sure everything’s working as expected.
- From the App Launcher (
 ) find and select the Sales app.
- Click Edge Communications.
- Open a contact record.

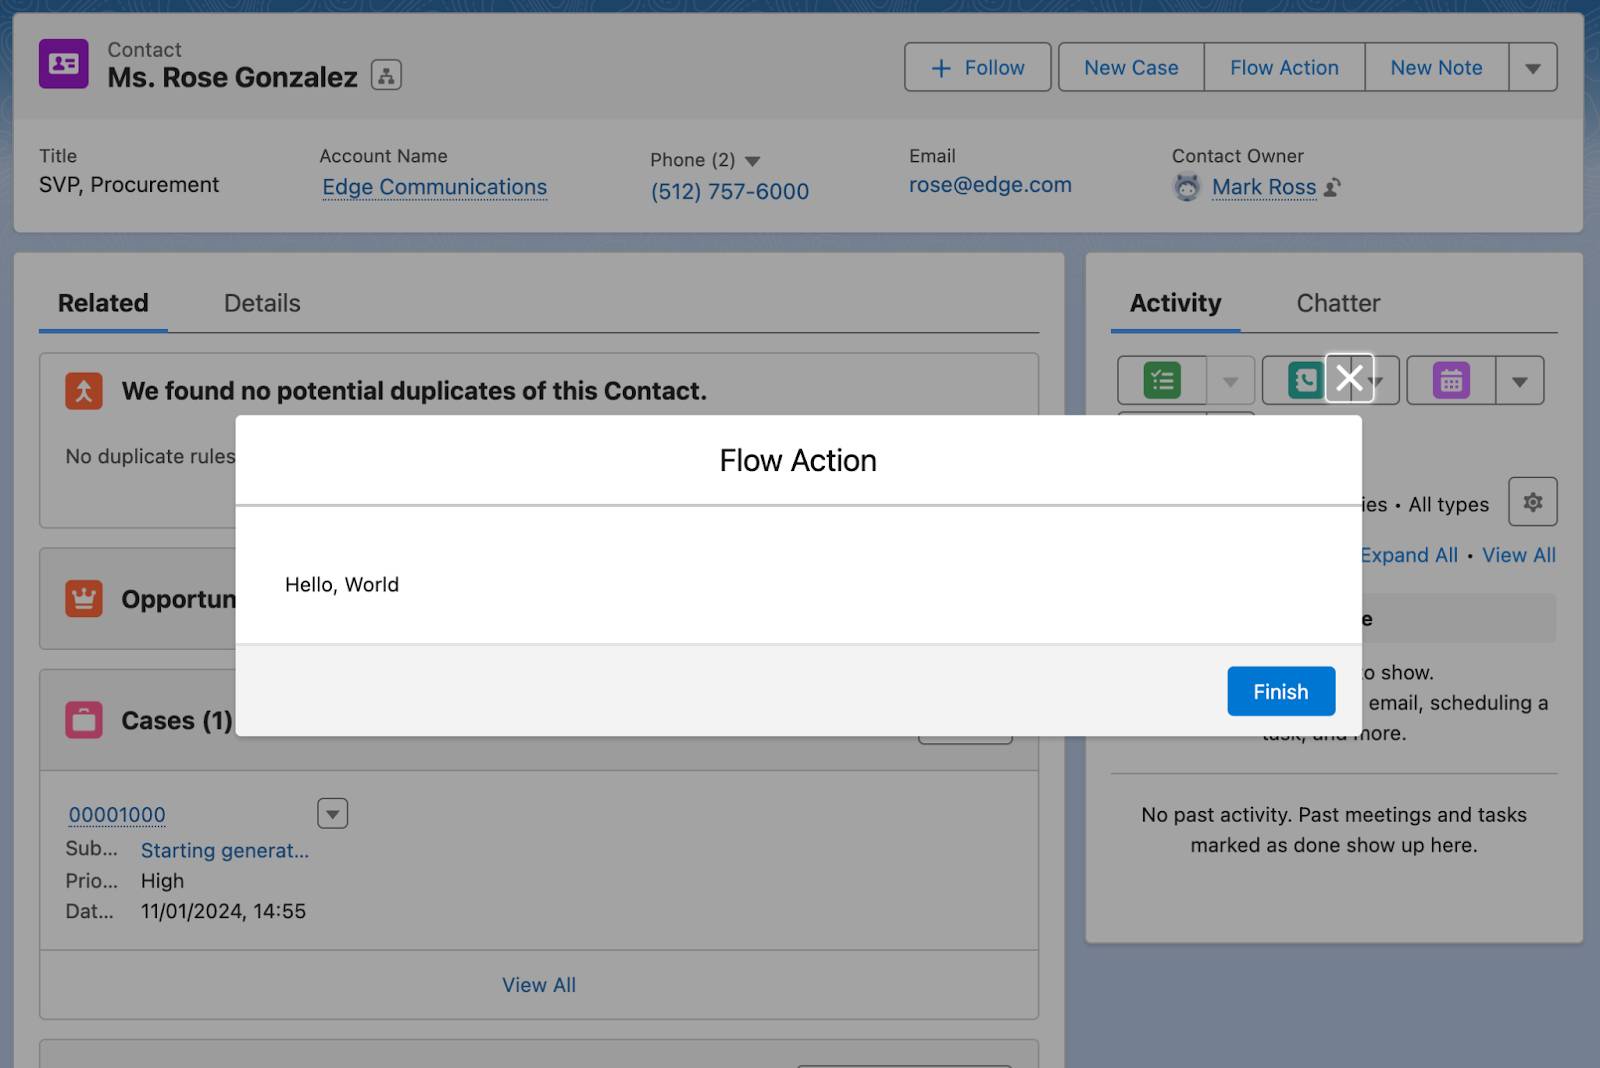
Notice that the page-level action menu includes Flow Action. (You may need to click the down arrow to see Flow Action.) That’s the one you created. Let’s see the flow action... in action.
- Click Flow Action.

The flow opens up in a separate window. Notice that the title shown isn’t the name of the flow (Hello World). The title is the label you gave the action (Flow Action). We kept the names different here to show you what’s what. When you create flow actions for your own use cases, we recommend making the action label match the flow label.
