Create Sorting Rules
Learning Objectives
After completing this unit, you’ll be able to:
- Configure a sorting rule by using single attributes.
- Preview a category sorting rule.
- Configure a hybrid sorting rule.
- Configure a storefront sorting option by using a dynamic attribute.
Create Sorting Rules
If you’re just getting started with sorting rules, it’s best to start small and add more granularity as you gain confidence. In this unit, you create sorting rules for three scenarios.
- A sorting rule with a single attribute
- A hybrid sorting rule
- A storefront sorting option with a dynamic attribute
Create a Sorting Rule with a Single Attribute
Creating a sorting rule with one attribute in Salesforce Agentforce Commerce for B2C is a straightforward way to control the order in which shoppers see products on the storefront. It’s also an easy way to get started working with sorting.
For this demonstration, you want to boost high-inventory products in the Sales category to the top of the search results. There are many ways that you can configure sorting rules to sort product ranking. Here are some ranking attribute options to consider.
|
Goal
|
Attribute to Use
|
Attribute Type
|
|---|---|---|
Keep out-of-stock products online. |
Availability Rank |
Standard Attribute |
Configure base products with multiple variations that have varying stock across the range of sizes, colors, and materials. |
SKU Coverage |
Availability Model |
Boost products that have multiple units left. |
ATS |
Availability Model |
Boost products with a good range of stock across all variations. |
Combine ATS and SKU Coverage in a dynamic attribute |
Availability Model |
Boost slow-sellers. |
Sales Velocity or Time To Out Of Stock (TTOS) |
Active Data |
The available to sell (ATS) attribute is perfect for this outcome. Our sorting rule uses ATS first (from highest to lowest). For any products with the same score, the rule shows the ones with higher revenue first.
Here’s how to create this sorting rule.
- In Business Manager, click App Launcher, and select Merchant Tools | Site | Search | Sorting Rules.
- Click New.
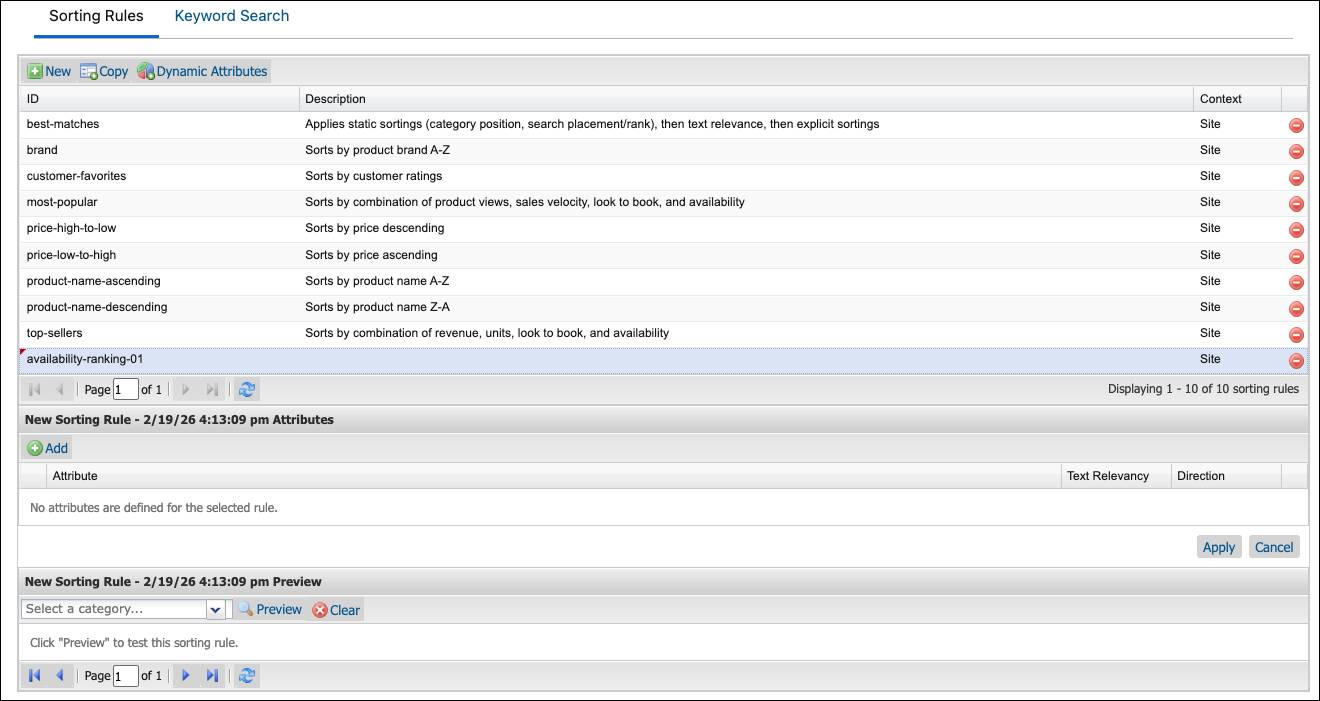
The page has three sections: Sorting Rules, Attributes, and Preview.
- Enter a unique rule ID and description for example:
availability-rank-01 - Click Add in the Attributes section.
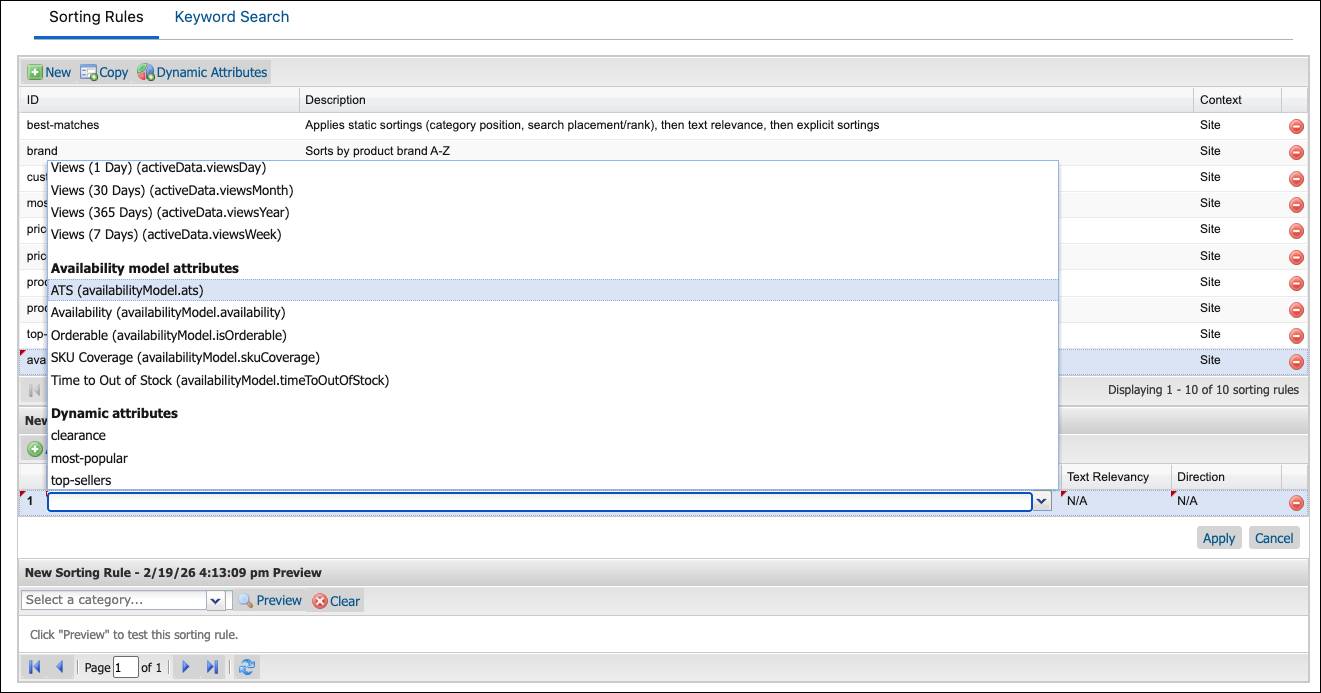
- From the dropdown, scroll to the section you want, and select: ATS
- Click Apply.

- Keep the text relevancy settings to No for the attribute.

- In the Direction column, leave the attribute Descending.
Add a Second Attribute to Break Ties
The sorting rule with a single attribute lists products with the highest available inventory in descending order. To break ties and further define the product order, you can add a second attribute.
- Click Add in the Attributes section.
- From the dropdown, scroll to the section you want, and select:
-
Revenue (30 days) (activeData.revenueMonth)
-
Revenue (30 days) (activeData.revenueMonth)
- Keep the text relevancy settings to No for the attribute.
- In the Direction column, leave the attribute Descending.
- Click Apply.
Preview Sorting Rules
Here’s how you preview the sorting rule.
- In Business Manager, click App Launcher, and select Merchant Tools | Site | Search | Sorting Rules.
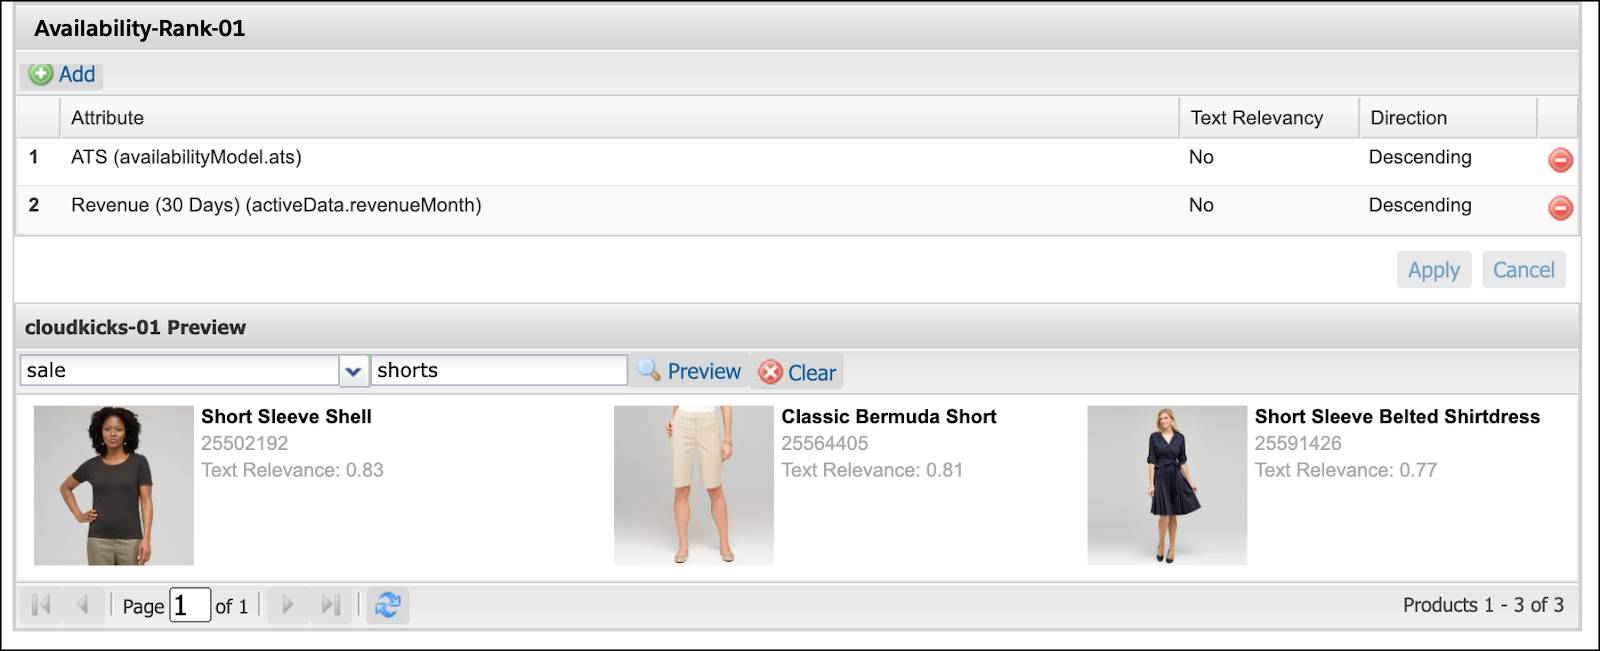
- Select the sorting rule that you created: Availability-Rank-01
- In the Preview section, select Sale from the category list.
- Enter a search term:
shorts - Click Preview.
Products appear based on the search term. If no products meet the specific attribute requirements, you still see products in the preview category that have the search term in the product name.
You can use the Storefront Toolkit to examine search results. The tool shows the sorting rule used to determine search results, the sorting criteria within the rule, and the sorting criteria values for each search result.
Create a Hybrid Sorting Rule
In the previous unit, you created a custom product attribute called isSale. In this example, you create a hybrid sorting rule that pushes sales items to the bottom of the search results. The sorting rule is a combination of category position and a custom product attribute.
- In Business Manager, click App Launcher, and select Merchant Tools | Site | Search | Sorting Rules.
- Click New.
- Enter a unique rule ID:
rule-03-hybrid
- Enter a description: Push to bottom.
- Click Add in the Attributes section and select from the dropdown:
- Standard attribute: Category Position
- Product attribute: On sale?
- Active data attribute: Views (30 Days)
- Click Apply.

- Keep the text relevancy settings to No for all attributes.
- In the Direction column, leave them set to
AscendingandDescending, respectively.
- Click Apply.
Create a Storefront Sorting Option with a Dynamic Attribute
In the previous unit, you learned that dynamic attributes make near real-time sort adjustments based on storefront activity and sales, for both category and keyword search.
In this demonstration, you use a dynamic attribute to configure a new storefront option for a dropdown that shows a combination of new arrivals and bestsellers. To set up this sorting option, complete this process.
- Create a dynamic attribute.
- Create a sorting rule that uses the dynamic attribute.
- Create a storefront option that uses the sorting rule.
Create a Dynamic Attribute
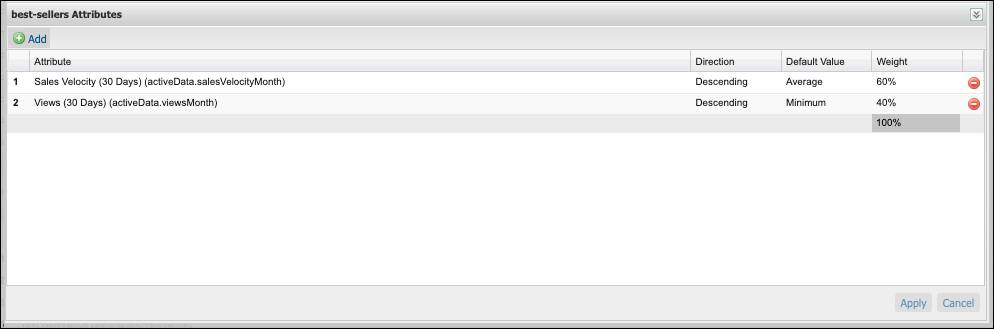
You want the new dynamic attribute, called bestSellers, to blend sales velocity (descending, average, 60% weighting) and views (descending, minimum, 40% weighting). Agentforce Commerce for B2C calculates the sales velocity and days available, with the search results now showing a blend of both.
- In Business Manager, click App Launcher, and select Merchant Tools | Site | Search | Sorting Rules.
- Click Dynamic Attribute.
- Click New.
- Enter a unique attribute ID:
bestSellers
- Enter a description: Blend sales velocity and views
- Click Add in the Attributes section.
- Select active data attributes from the dropdown:
-
Sales Velocity (30 Days)
-
View (30 Days)
- Select the settings for each attribute:
-
Descending, Average,
60% weighting
-
Descending, Minimum,
40% weighting
- Click Apply.
Create a Sorting Rule for the Dynamic Attribute
- In Business Manager, click App Launcher, and select Merchant Tools | Site | Search | Sorting Rules.
- Click New.
- Enter a unique rule ID:
sorting-02-dynamic
- Enter a description: Dynamic rule
- Click Add in the Attributes section.
- Select the dynamic attribute from the dropdown: bestSellers
- Click Apply.
- Set text relevancy (No) and Direction (Descending). If you set text relevancy to Yes, Agentforce Commerce for B2C multiples the sorting attribute score by the text relevancy score.

Configure a Storefront Option for the Sorting Rule
Here are the steps you use to configure a storefront option so that the new sorting rule shows at the top of the Top Sellers list and at the top of the storefront option dropdown.
- In Business Manager, click App Launcher, and select Merchant Tools | Site | Search | storefront sorting options.
- Click New.
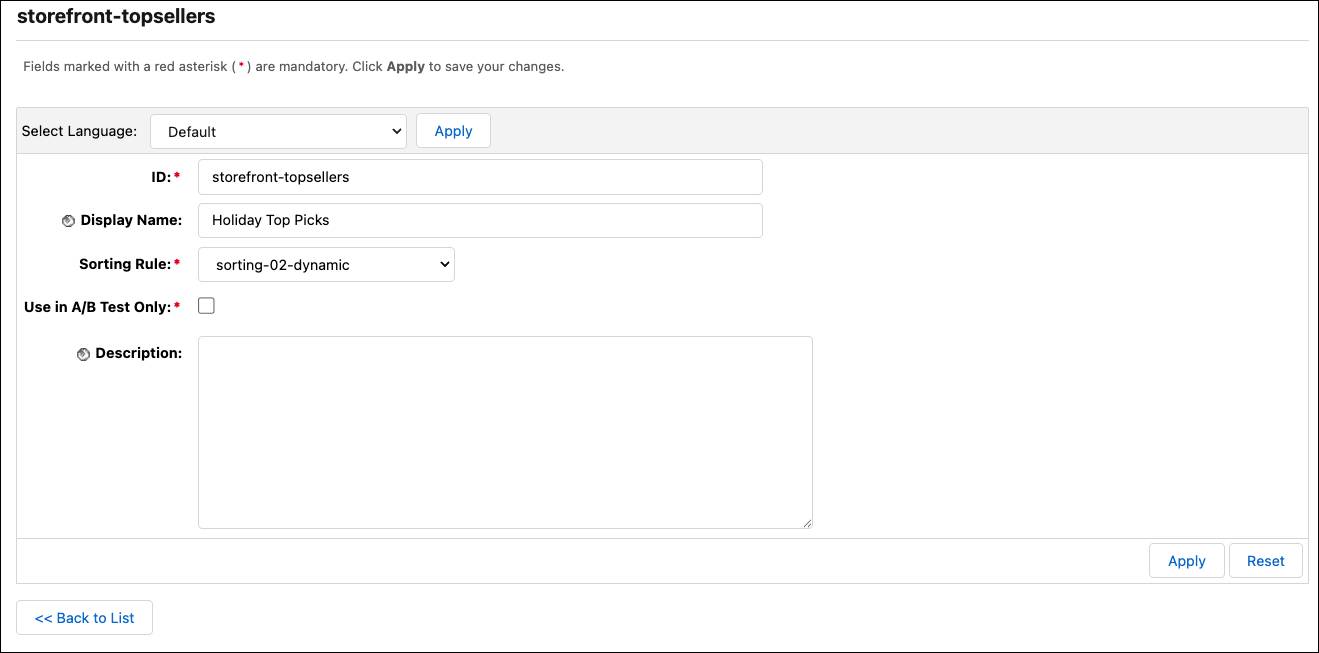
- Keep the site language: Default
When you select a new language to configure, the values for the Display Name clear for that language. If you don't have sites in different languages, select Default or the locale for the current site.
- Enter a unique ID:
storefront-topsellers
- Enter a Display Name:
Holiday Top PicksThis is the name that shows in the storefront.
- Select a sorting rule from the dropdown: sorting-02-dynamic.
- Click Apply.
- Click <<Back to List.
- Select storefront-topsellers.
- Click the sorting arrow
 to make this option a priority.
- Click Apply.
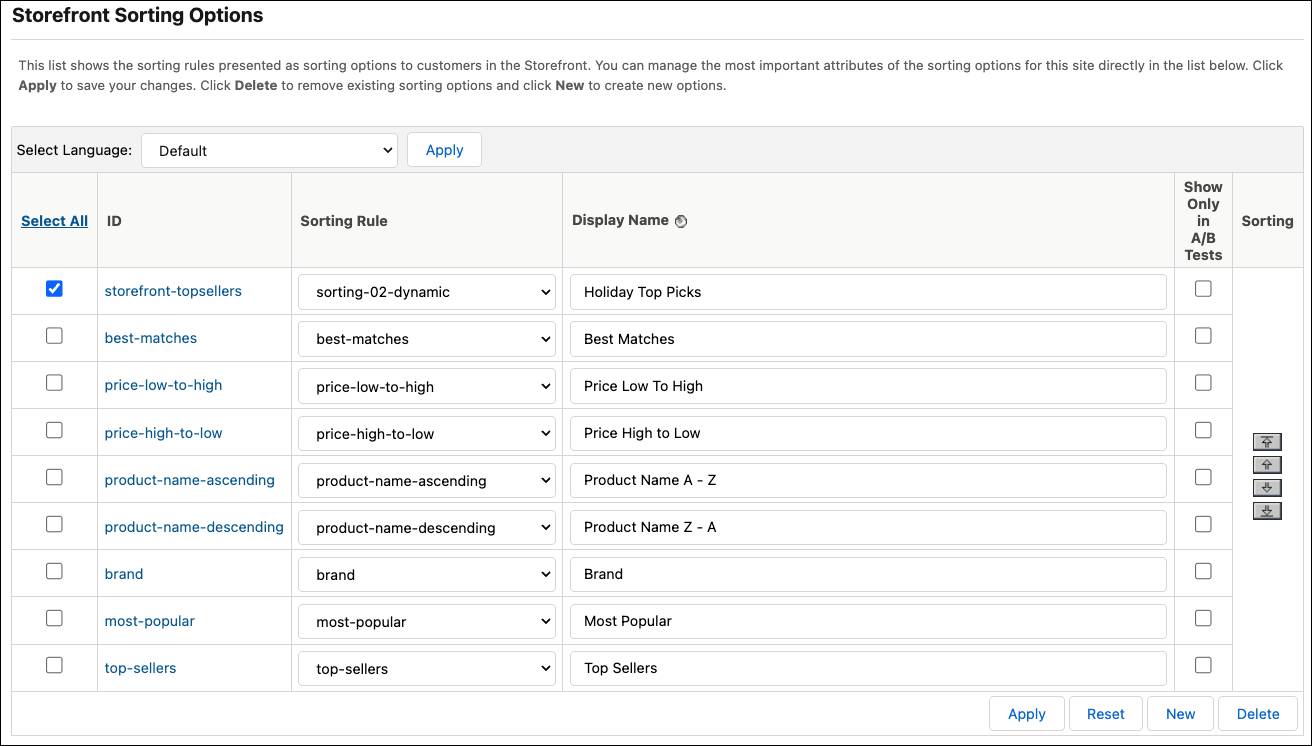
The new rule shows at the top of the list and at the top of the storefront option dropdown.
Let’s Wrap It Up
In this unit, you created a sorting rule with a single attribute, a storefront sorting option with a dynamic attribute, and a hybrid sorting rule.
In this badge you learned that Agentforce Commerce for B2C sorting rules are essential tools for managing search results and category pages to drive higher conversion rates. You explored the three primary rule types, the inheritance model for rule processing, and how to leverage manual, product, and dynamic attributes to execute your storefront merchandising strategy.
Resources
- Salesforce Help: Sorting Rules
- Salesforce Help: Availability Ranking
- Salesforce Help: Examine Search Results with the Search Information Tool