Configure Roles and Permissions
Learning Objectives
After completing this unit, you’ll be able to:
- Explain what a role is in Business Manager.
- Explain the difference between functional and module permissions.
- List three types of permissions that admins can grant.
- Explain how each of the permissions work.
Assign Business Manager Roles and Permissions
The Business Manager admin assigns and restricts access to Business Manager modules based on job tasks. Admins can make these assignments by using predefined roles. Business Manager can have multiple roles that apply to common job tasks. Users can have multiple roles and these predefined roles help you get users set up quickly. Using predefined roles improves your efficiency as an admin, and protects your site’s data security.
Roles
Roles contain Business Manager module permissions and functional permissions.
-
Module permissions: Grant access to Business Manager modules.
-
Functional permissions: Grant permission to perform certain tasks.
-
WebDav permissions: Grant access controls to interact with the WebDAV interface.
-
Local permissions: Grant site level permissions to manage products, processing orders, or configuring site-specific settings.
Module Permissions
You grant module permissions in the context of a site or organization, depending on the module’s functionality. For example, if you have users who manage orders in the context of a site, you grant them permission on the Ordering module within that site’s context.
Module permissions can prevent programmatic access by unauthorized users, and they include the ability to transfer, replicate, and edit the respective storefront data. Permissions are additive. When you assign a user multiple roles, the user has all of the permissions of all the assigned roles.
Functional Permissions
Functional permissions grant the user the ability to perform certain tasks. For example, you can specify that a role allows users to:
- Manage a library and its assets for the selected site.
- Delete an order.
- Add or delete a price adjustment at the item level.
Functional permissions vary by context. Some are only available at the site or organizational level and not both.
WebDAV Permissions
These permissions ensure that only authorized users or systems can perform actions like reading, writing, or deleting files. Using WebDAV permissions, you can:
- Control user and system actions on the WebDAV interface through Business Manager permissions.
- Manage and edit files on a remote server using the WebDAV protocol.
- Facilitate the upload and download of code, images, and data feeds within Agentforce Commerce for B2C.
- Restrict or grant access to specific directories and files via Business Manager configurations.
- Ensure only authorized entities perform read, write, or delete operations.
- Define granular permissions, such as allowing file uploads in one directory while preventing deletions in another.
Local Permissions
These permissions refer to the specific access rights assigned to users or roles for a particular site or set of sites. Local permissions are distinct from global permissions, which apply across all sites in an instance. When you assign local permissions, you ensure that users only have access to the resources and functionalities relevant to their specific site responsibilities, which enhances security and prevents accidental changes to other sites.
For example, a user with local permissions for Site A might be able to manage the product catalog for that site but would not have access to Site B unless explicitly granted permissions for it.
Add a Role
For this example, you add a merchandiser role to a storefront. This table lists the storefront roles and permissions currently assigned to users.
Role |
Module Permissions |
Functional Permissions |
|---|---|---|
admin |
Organization permissions:
Cloud Kicks site:
|
|
developer |
Cloud Kicks site:
|
|
The merchandiser’s job requires that they create and edit storefront data, such as products and content. The merchandiser needs these permissions.
Module |
Functional |
|---|---|
|
|
Here’s how you create a new merchandiser role.
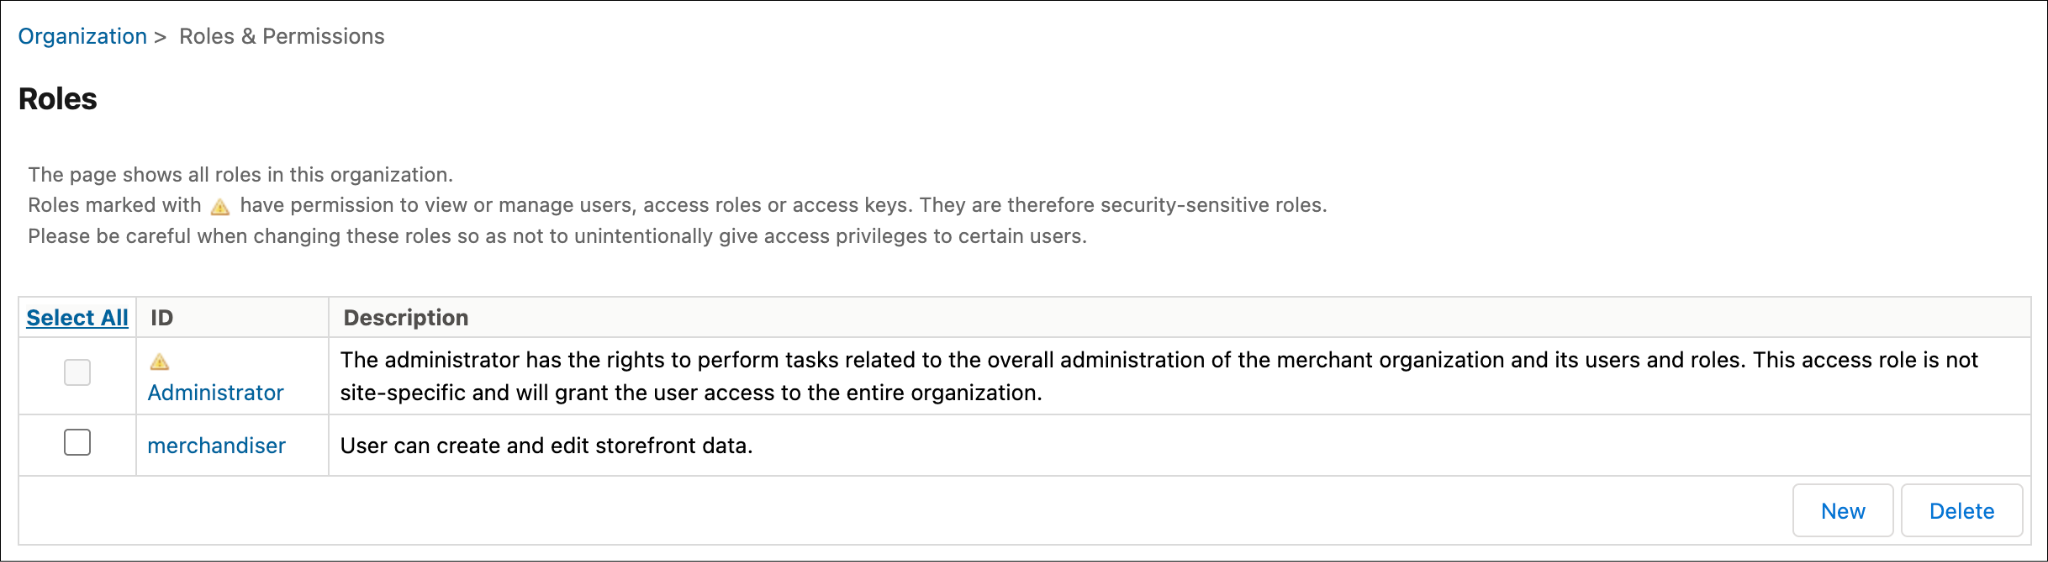
- In Business Manager, click App Launcher, and select Administration | Organization | Roles & Permissions.
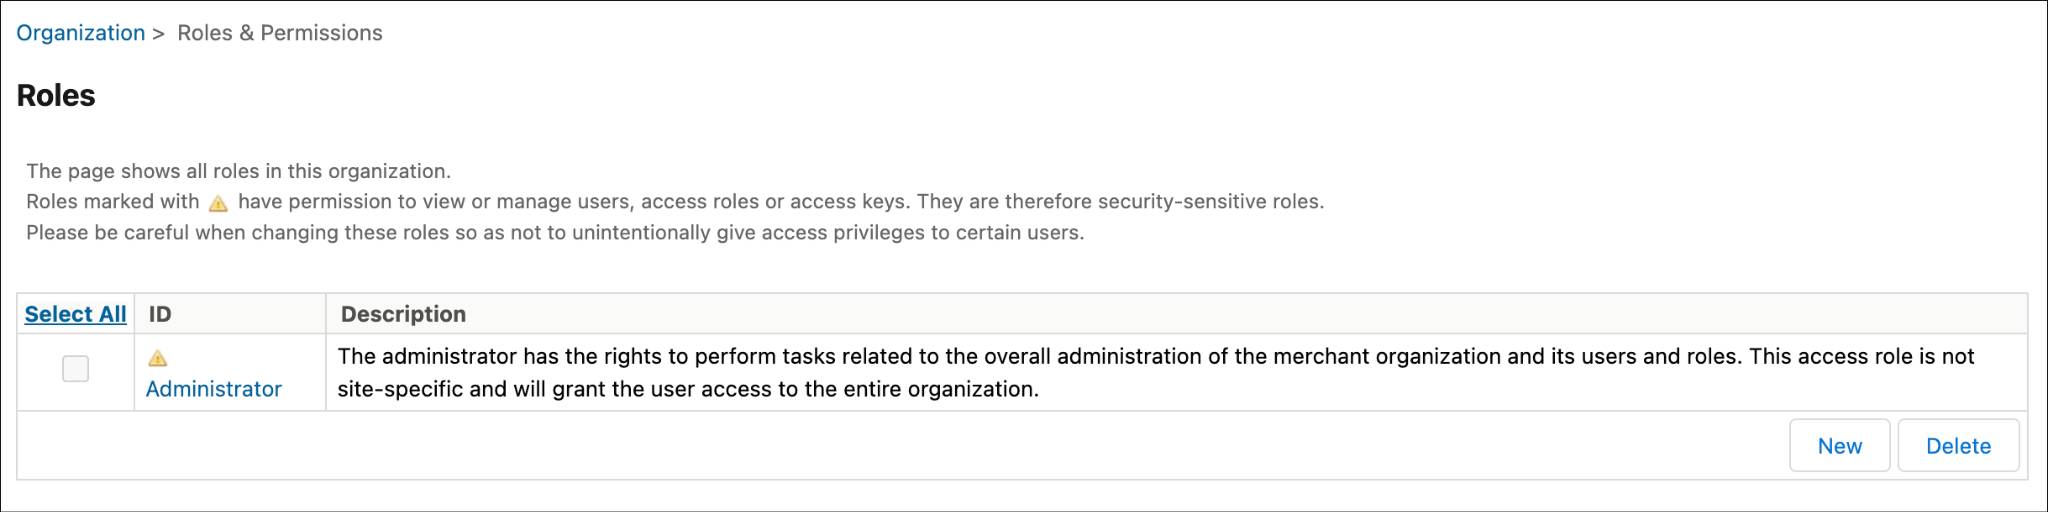
The yellow triangle on the admin role identifies the role as security-sensitive. This role is what grants you the permissions to manage users and access roles.
- To create a new role, click New.

- Enter merchandiser and click Apply.
- To add permissions, click the Business Manager Modules and Functional Permissions tabs.
Add Permissions
Now, add permissions to this role.
- In Business Manager, click App Launcher, and select Administration | Organization | Roles & Permissions.
- Click the Business Manager Modules tab.
- Select your site and click Apply.
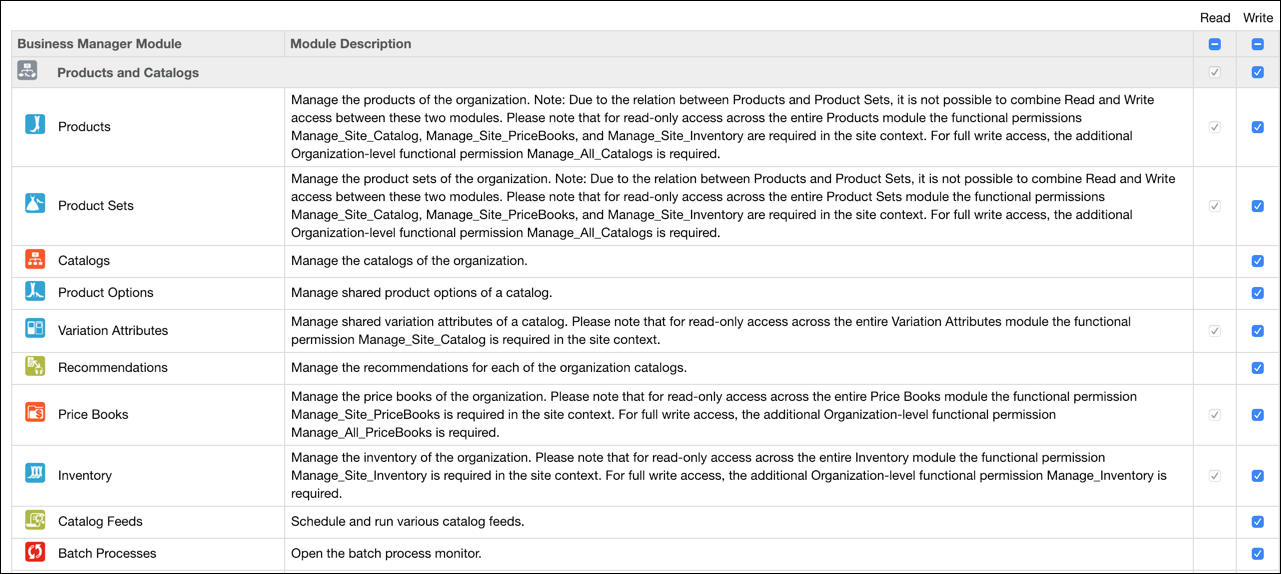
- Select the modules for:
- Products and Catalogs
- Content
- Search
- Online Marketing
- Ordering
- Analytics
- Click Update.
- Click the Functional Permissions tab.
- Select your site and click Apply.
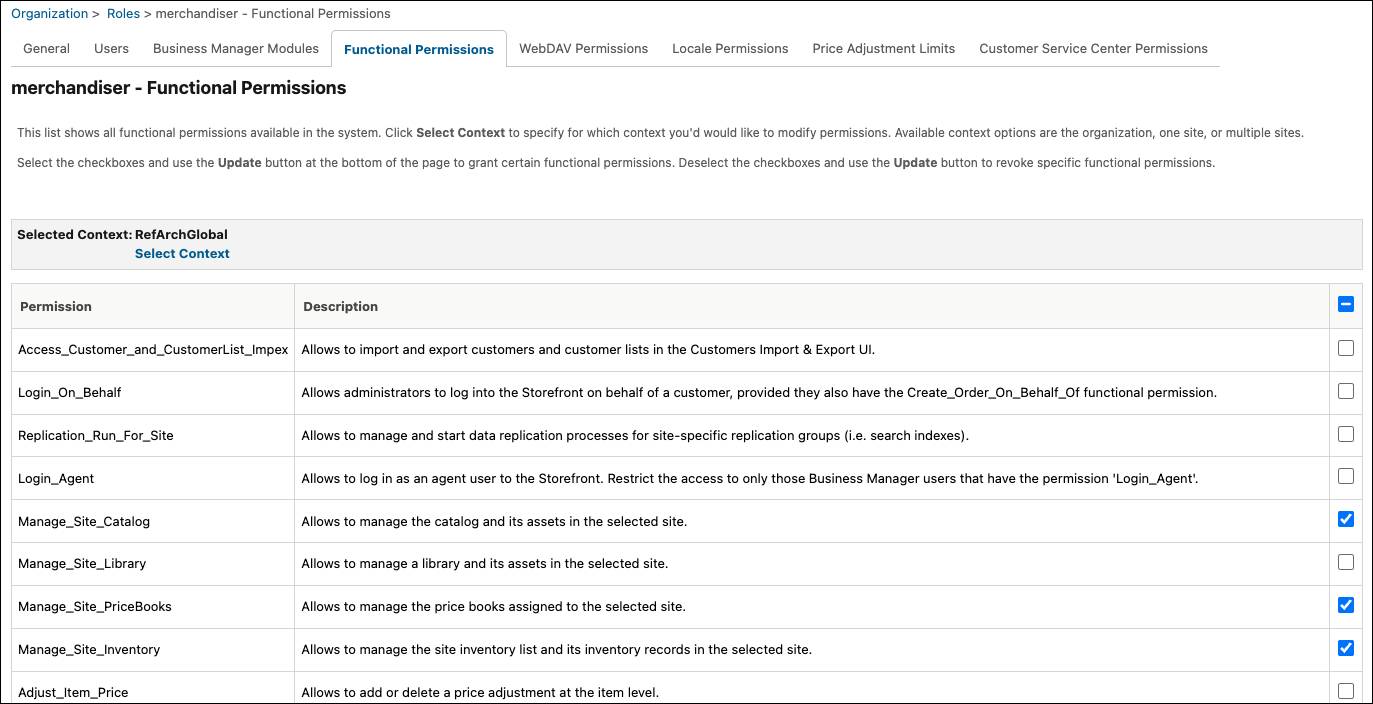
- Assign these functional permissions:
- Manage_Site_Catalog
- Manage_Site_PriceBooks
- Manage_Site_Inventory
- Click Update.
Assign Locale Permissions
You now assign permissions on the English locale to the merchandising role. The merchandiser needs this permission so they can view or edit localized English attributes and create English storefront data.
- From the merchandiser role, click the Locale Permissions tab. You now assign permissions on the English locale to the merchandising role. The merchandiser needs this permission so they can view or edit localized English attributes and create English storefront data.
- Click the checkbox to grant write access to the English locale.
- Click Apply.
Assign WebDAV Permissions
Next, your manager wants you to add WebDAV permissions to the existing developer role.
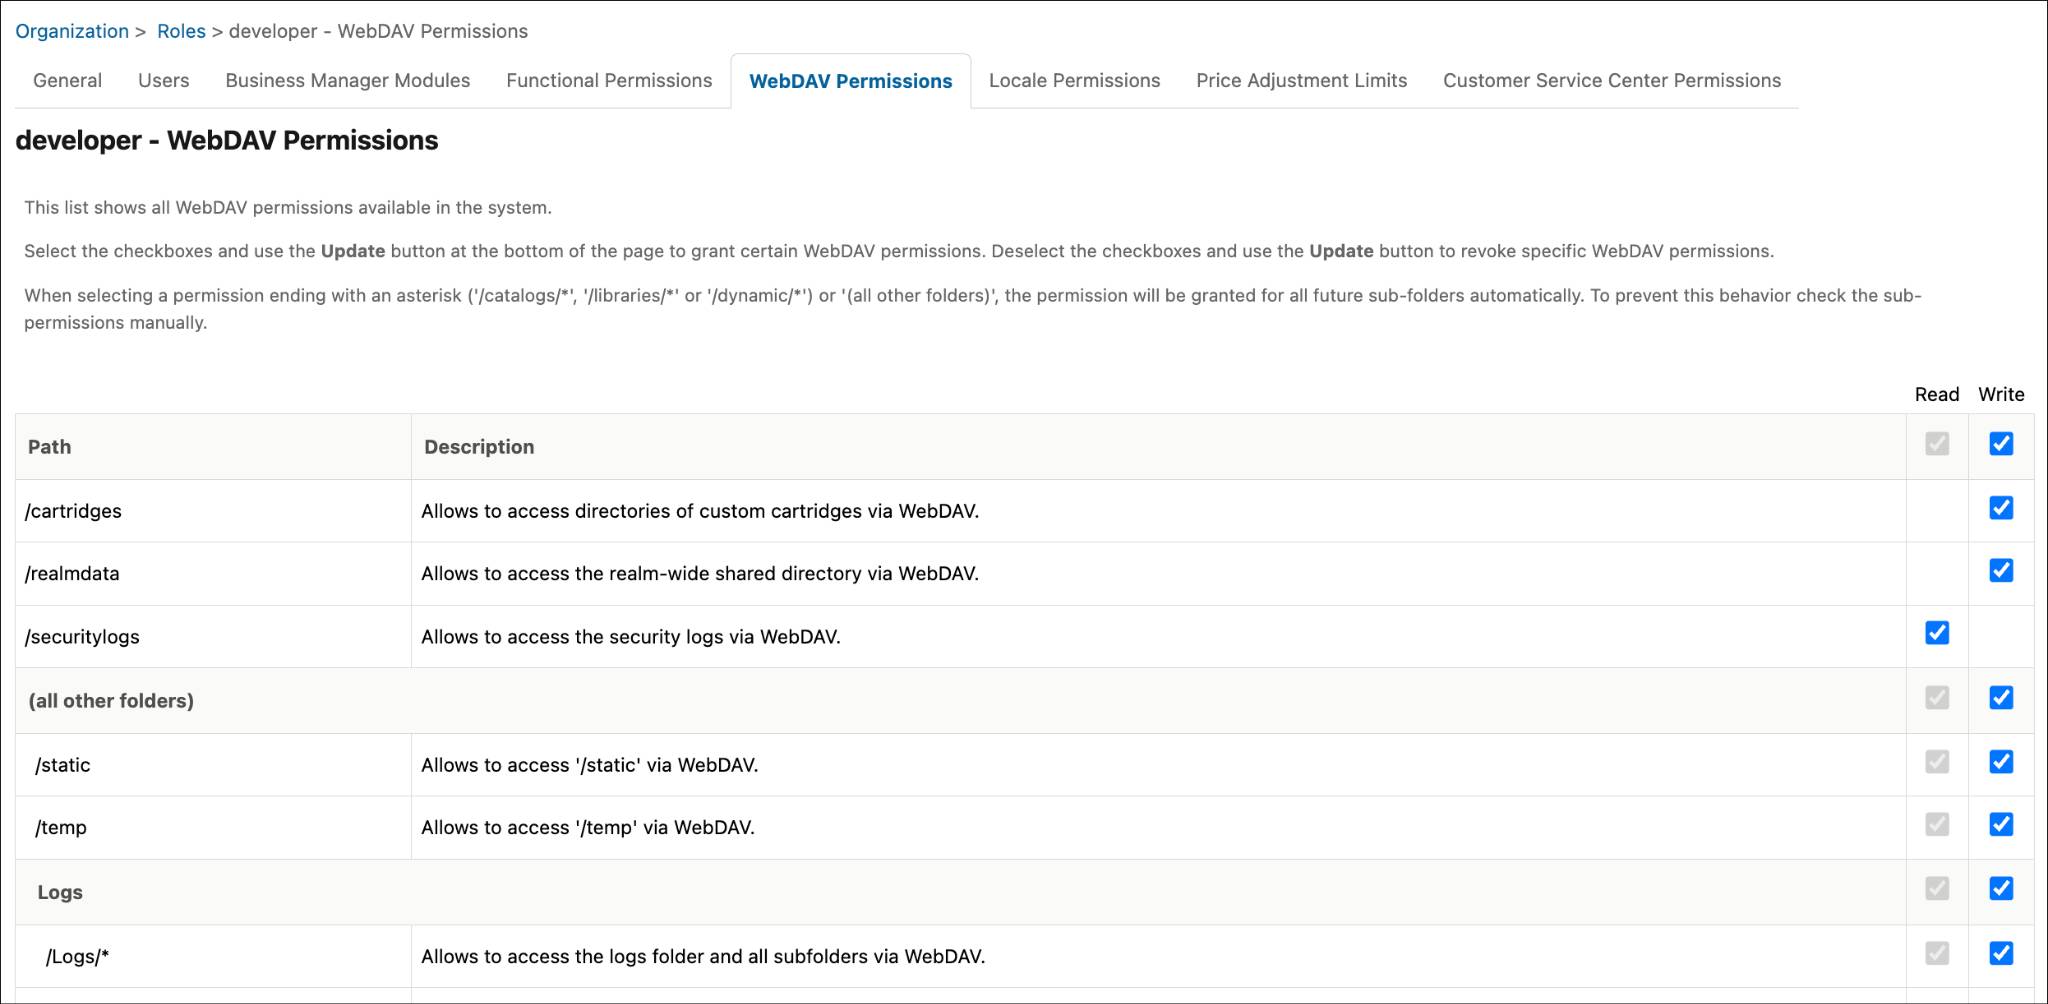
- In the Roles & Permissions module, select the developer role.
- Click the WebDAV Permissions tab.
- Grant write access to all the folders.
- Update the role.
Assign Users to Roles
Now, you can assign the merchandiser role to a user so they can do their job. A merchandiser edits the site catalog, pricing, and inventory.
- On the Roles & Permissions page, select the merchandiser role.
- Click the Users tab, and click Assign.
- Select the user ID and click Assign.
You follow the same steps to assign the admin role to another user.
Assign WebDAV Permissions
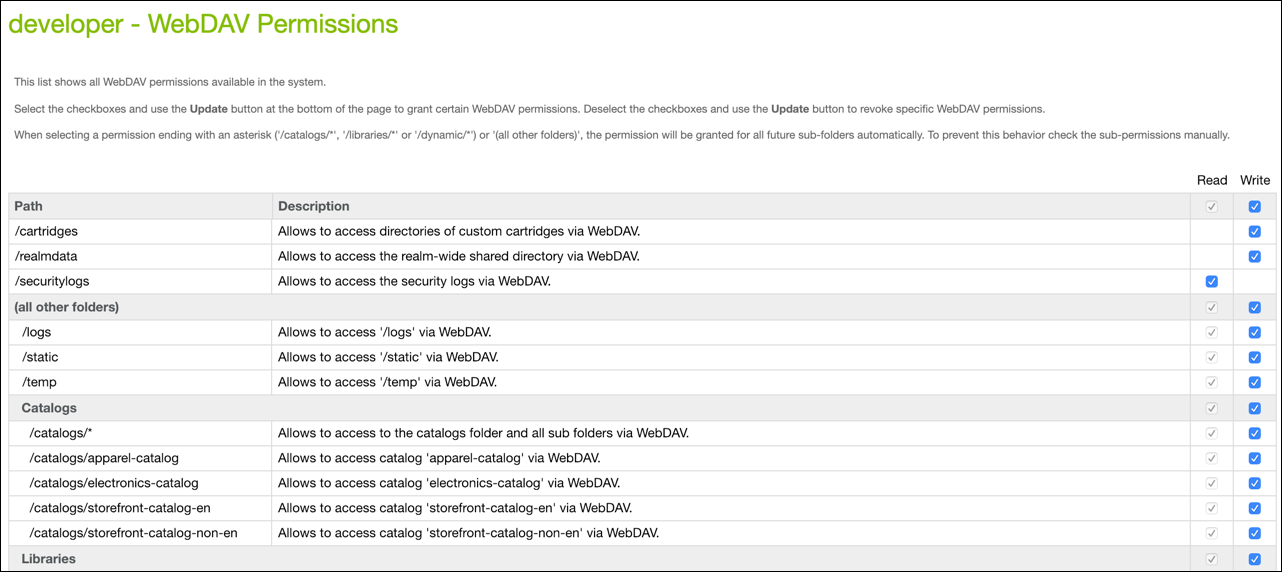
You occasionally grant developers access to WebDAV folders. These folders can contain code or data such as:
- /cartridges
- /realmdata
- /securitylogs
For this demonstration, you add WebDAV permissions to the existing developer role.
- In the Roles & Permissions module, select the developer role.
- Click the WebDAV Permissions tab.
- Grant write access to all the folders.
- Update the role.
Wrap It Up
In this badge, you created new user records in Account Manager and a merchandiser role in Business Manager. You also assigned permissions to the merchandiser role. Additionally, you added WebDAV permissions to an existing developer role and added password protection to an underconstruction storefront.
Resources
- Trailhead: Salesforce B2C Commerce for Developers
- Salesforce Help: Permissions, Users, and Roles in B2C Commerce