Engage Buyers and Close Sales with B2B Commerce
Learning Objectives
After completing this unit, you’ll be able to:
- Explain how the B2B Commerce templates improve site development and shorten time to value.
- Explain how the new B2B components impact the user experience.
- List the search components that differentiate the B2B Commerce search feature from competitors.
- Describe how merchandisers manage products in the Commerce app.
- Explain the relationship between buyers, buyer groups, entitlements, and price books.
- List the promotion types merchandisers can set up in the Commerce app.
B2B Commerce Merchandising Tools
B2B merchandisers are focused on presenting the right products to the right buyers at the right time and at the right price. Salesforce B2B Commerce offers easy-to-use merchandising tools that help merchandisers deploy a B2B store that quickly adapts to swiftly moving revenue streams.
The B2B Commerce merchandising tools help stores succeed in these areas of ecommerce specialization.
- User experience
- Commerce components
- Cart and checkout service
- Search and recommendations
- Buyer management
- Pricing
- Promotions
User Experience
To craft an easy-to-use and engaging online experience, merchandisers and administrators consider several elements. The customer experience includes everything from site branding, to how customers place orders, select shipping, and make payments.
Here are a few of the B2B Commerce UI tools and features that help you create highly engaging user experiences.
Page Templates
Commerce app page templates include:
Commerce Page Templates | |
|---|---|
Home |
Order Confirmation |
Cart |
Order Lookup |
Category |
Order Summary Details |
Checkout |
Order Summary List |
Login |
Payment Processing |
My List |
Product Search |
My Profile |
Split Shipment |
Each template is intelligently designed and responsive. The templates are built on best practices and contain only the best user experience approaches. Each template comes with a set of standard components and customizable layouts. The page templates offer modern web design, are responsive, are easy to customize, and make page creation a breeze.
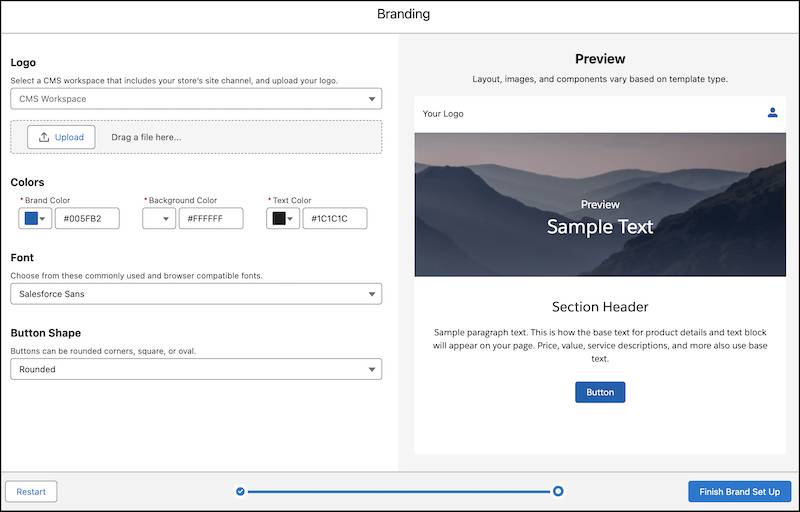
Site Branding
With B2B Commerce, site branding is automated. You provide the URL to your business website, and the Commerce app designs the store template pages to match your brand.
Commerce Components
Components are custom HTML elements built for the Salesforce Lightning Platform, following modern web standards like HTML, CSS, and JavaScript. The efficiency of Commerce components comes from their lightweight framework, which leads to enhanced performance.
You can use components to drive user engagement and improve sales and transaction efficiency. Here’s a look at the newest set of components for B2B stores.
Component |
Description |
|---|---|
Carousel component |
Use the Carousel component to visually showcase content on your B2B store. Choose between two visual styles: the slider style, ideal for displaying single page-width items like banners, and the reel style, perfect for showcasing multiple repeated items such as product recommendations. |
Social Links component |
Integrate links to popular social media platforms into your store with the Social Links component. This versatile component automatically recognizes and displays the logos of many social media sites (such as X, Facebook, Instagram, and more), making it simple to connect with your audience across various platforms. |
Order History component |
Help your customers track their purchases with the Order History component that features product images. Customers can view their order history and filter results for a selected time frame. |
Commerce Cart and Checkout Services
An easy checkout experience helps minimize the number of abandoned carts on your site and increases revenue. The commerce cart and checkout services do just that. You can quickly configure checkout services for a site and offer customers a streamlined checkout experience that includes precise pricing, a cart summary, and shipping details.

Here’s a summary of the cart and checkout service features available to B2B stores.
Service |
Description |
|---|---|
Add-to-cart message |
Keep shopping flowing and your buyers engaged with a simple add-to-cart message. The message lets customers know they’ve successfully added an item to their cart so they can continue shopping. |
Cart summary |
Show the precise price breakdown in carts so buyers know exactly what they’re paying for. |
Guided flow |
Make it easier for buyers to complete their purchases with a guided flow and a dynamic cart summary displayed at checkout. |
Estimated delivery dates |
Keep buyers informed by offering shipping options with estimated delivery dates at checkout. |
Cart recovery |
Customers can leave and log back into your store without losing their cart. |
Split order shipments |
Create split orders that ship to multiple locations or fulfill an order from multiple locations. |
Large orders |
Customers can place large orders. |
Search and Recommendations
The primary goal of an effective search strategy is to make it easy for buyers and shoppers to find the products they want and the products they didn’t know they want by returning intelligent and relevant search results.
Salesforce Commerce search is more than just simple keyword matching. It incorporates advanced search capabilities that enable your customers to filter and refine their search results based on their criteria.
What makes Commerce search so effective? It’s configurable and it uses Einstein.
Configurable Search
Search filters enable buyers and shoppers to search for products based on their search criteria.
Commerce supports these configurable search entities.
-
Searchable fields: Product fields that are set as searchable.
-
Search results filters: Searchable product fields that are used to refine and narrow search results.
-
Sort rules: Rules that determine how search results are listed.
Einstein Search Suggestions
With Einstein search suggestions, customers see relevant search terms before they finish entering their own. Relevance is based on a customer’s recent search history and the popular search terms that similar customers used. Customers see search suggestions when they click the Search field and as they type in a search term.
Einstein Generative AI
Commerce Einstein generative AI enhances merchandising tools that personalize the customer shopping experience by automating product discovery on your storefront. When you enable Commerce Einstein, it gathers client- and server-side customer activity on your storefront. Commerce Einstein uses these metrics as real-time input for personalizing the shopper experience.
Product Management
B2B Commerce provides all the tools you need to organize and manage products. These tools include:
-
Products editor: Edit product details, assign product media, and manage related product entities.
-
Categories editor: Add and delete categories, edit category details, and assign media and SEO URLs.
-
Product descriptions: Create or revise descriptions for products in English or multiple languages.
-
Product fields: Revise product text fields for multiple products at once.
Use these tools to streamline your product management processes, drive sales, and enhance your revenue growth.
Buyers, Buyer Groups, Entitlements, and Price Books
Successful online B2B businesses develop finely targeted buyer engagement strategies. With B2B Commerce, you can configure the relationship between Buyer, Buyer Group, Entitlement Policy, and Price Book objects to configure a compelling buyer strategy that attracts buyers and closes sales.
For example, you can establish relationships to:
- Offer incentive tiered pricing.
- Offer buyer-specific pricing.
- Limit access to some products and prices based on negotiated contracts.
Together, these objects help businesses tailor the purchasing experience for different segments of their customer base.
Deliver a Personalized Customer Experience Using Data 360 Segments
A Data 360 segment in Salesforce is a collection of data that's grouped based on specific criteria or attributes. You can use Data 360 segments to improve buyer engagement in B2B Commerce by combining them with buyer groups. This allows you to target and personalize your customers' shopping experience.
You can also use segment data to enhance the relevance and effectiveness of your entitlement policies and promotions. Create buyer group profiles using the wide range of customer data available in Data 360 to deliver personalized shopping experiences, content, and promotions tailored to your buyer groups.
Promotions
Promotions help provide a steady stream of revenue for your business. They’re like a little jolt of energy that helps to fill buyer’s carts.
From discounts and bulk pricing to loyalty programs and bundled offers, B2B Commerce has click-based tools to set up and deploy promotions that engage customers and drive sales. The Commerce app enables marketers and merchandisers to manage campaigns, promotions, product catalogs, inventory, and pricing all in one place, at one time, across all your sites.
Here’s a list of the latest B2B Commerce promotion tools.
Promotion Tool |
Description |
|---|---|
Smart Promotions |
Use natural language processing and Einstein generative AI technology to quickly create promotions. |
Promotion Template |
Save time setting up promotions with predesigned promotion templates designed to help you quickly create and activate a promotion. |
Shipping Promotions |
Offer shipping promotions in your store to encourage customers to complete their purchase. |
Flexible Promotion Segments |
Associate a promotion segment with either a store or a buyer group. Plus, exercise the flexibility to update the Active, Commerce Promotion, and Automatic Promotion fields when the promotion is associated with a segment. |
Promotional Pricing Highlights |
Help buyers find promotional pricing on the Product Card component. Adjust the color of the text for extra flair. |
Next Steps
In this unit, you learned how B2B Commerce supports quick time-to-value and buyer engagement. Next, learn more about the generative AI tools in B2B Commerce.
Resources
- Salesforce Help: LWR and Aura Store Templates
- Salesforce Help: Commerce Store Components
- Salesforce Help: Configure Checkout for a Commerce Store
- Salesforce Help: Store Search
- Salesforce Help: Products and Pricing
- Salesforce Help: Manage Buyer Access to B2B Stores
- Salesforce Help: Commerce Promotions