Manage Customer Asset Amendments
Learning Objectives
After completing this unit, you’ll be able to:
- Sign up for a special Developer Edition org for Agentforce Revenue Management.
- Describe the process of amending existing customer assets to reflect updated needs or corrections.
Your Assets Are Dynamic
Assets are more than just products or services. They’re proof of a successful deal. The customer signs, the order is fulfilled, and there’s a celebration. But what happens next? The customer hires new staff and needs more licenses. Or the company downsizes, no longer needing half of what it bought. Maybe it’s thrilled and wants to renew for another year. These shifts are the reality of every customer relationship, and managing relationships is what asset management is all about. Agentforce Revenue Management is built to guide you through every change.
Before you explore how asset management works, here are the three most common types of real-time asset updates.
-
Manage Amendments: Update existing assets to reflect changes in customer needs, such as adding users, upgrading services, or changing start dates.
-
Manage Renewals: Extend contracts before they expire to ensure continued service and revenue.
-
Handle Cancellations: End agreements cleanly and accurately when services are no longer needed.
Sign Up for a Developer Edition Org with Agentforce Revenue Management
To complete this module, you need a special Developer Edition org that contains Agentforce Revenue Management and our sample data. Get the free Developer Edition and connect it to Trailhead now so you can complete the challenges in this module. Note that this Developer Edition is designed to work with the challenges in this badge, and might not work for other badges. Always check that you’re using the Trailhead Playground or the special Developer Edition org that we recommend.
- Sign up for a free Revenue Cloud Developer Edition org.
- Fill out the form.
- For Email, enter an active email address.
- For Username, enter a username that looks like an email address and is unique, but it doesn’t need to be a valid email account (for example, yourname@example.com).
- For Email, enter an active email address.
- After you fill out the form, click Sign me up. A confirmation message appears.
- When you receive the activation email (this might take a few minutes), open it and click Verify Account.
- Complete your registration by setting your password and answering the challenge question. Tip: Save your username, password, and login URL in a secure place—such as a password manager—for easy access later.
- You’re logged in to your Developer Edition Org.
Now connect your new Developer Edition org to Trailhead.
- Make sure you’re logged in to your Trailhead account.
- In the Challenge section at the bottom of this page, click the playground name and then click Connect Org.
- On the login screen, enter the username and password for the Developer Edition you just set up.
- On the Allow Access? screen, click Allow.
- On the Want to connect this org for hands-on challenges? screen, click Yes! Save it. You’re redirected back to the challenge page and ready to use your new Developer Edition to earn this badge.
Enable Pricing
Now that your org is connected, make sure it’s ready to use.
- From Setup, in the Quick Find box, find and select Salesforce Pricing Setup.
- Under the Sync Pricing Data section, click Sync, and then Confirm.
Wait a few minutes for the pricing data sync to complete.
Activate Assets
The final setup step is to activate the asset order so it’s available for management under the customer’s account. We have already created this order for you. Follow these steps to activate the assets.
- Click
 , then find and select Revenue Lifecycle Management.
- Click Recently Viewed and select All Accounts.
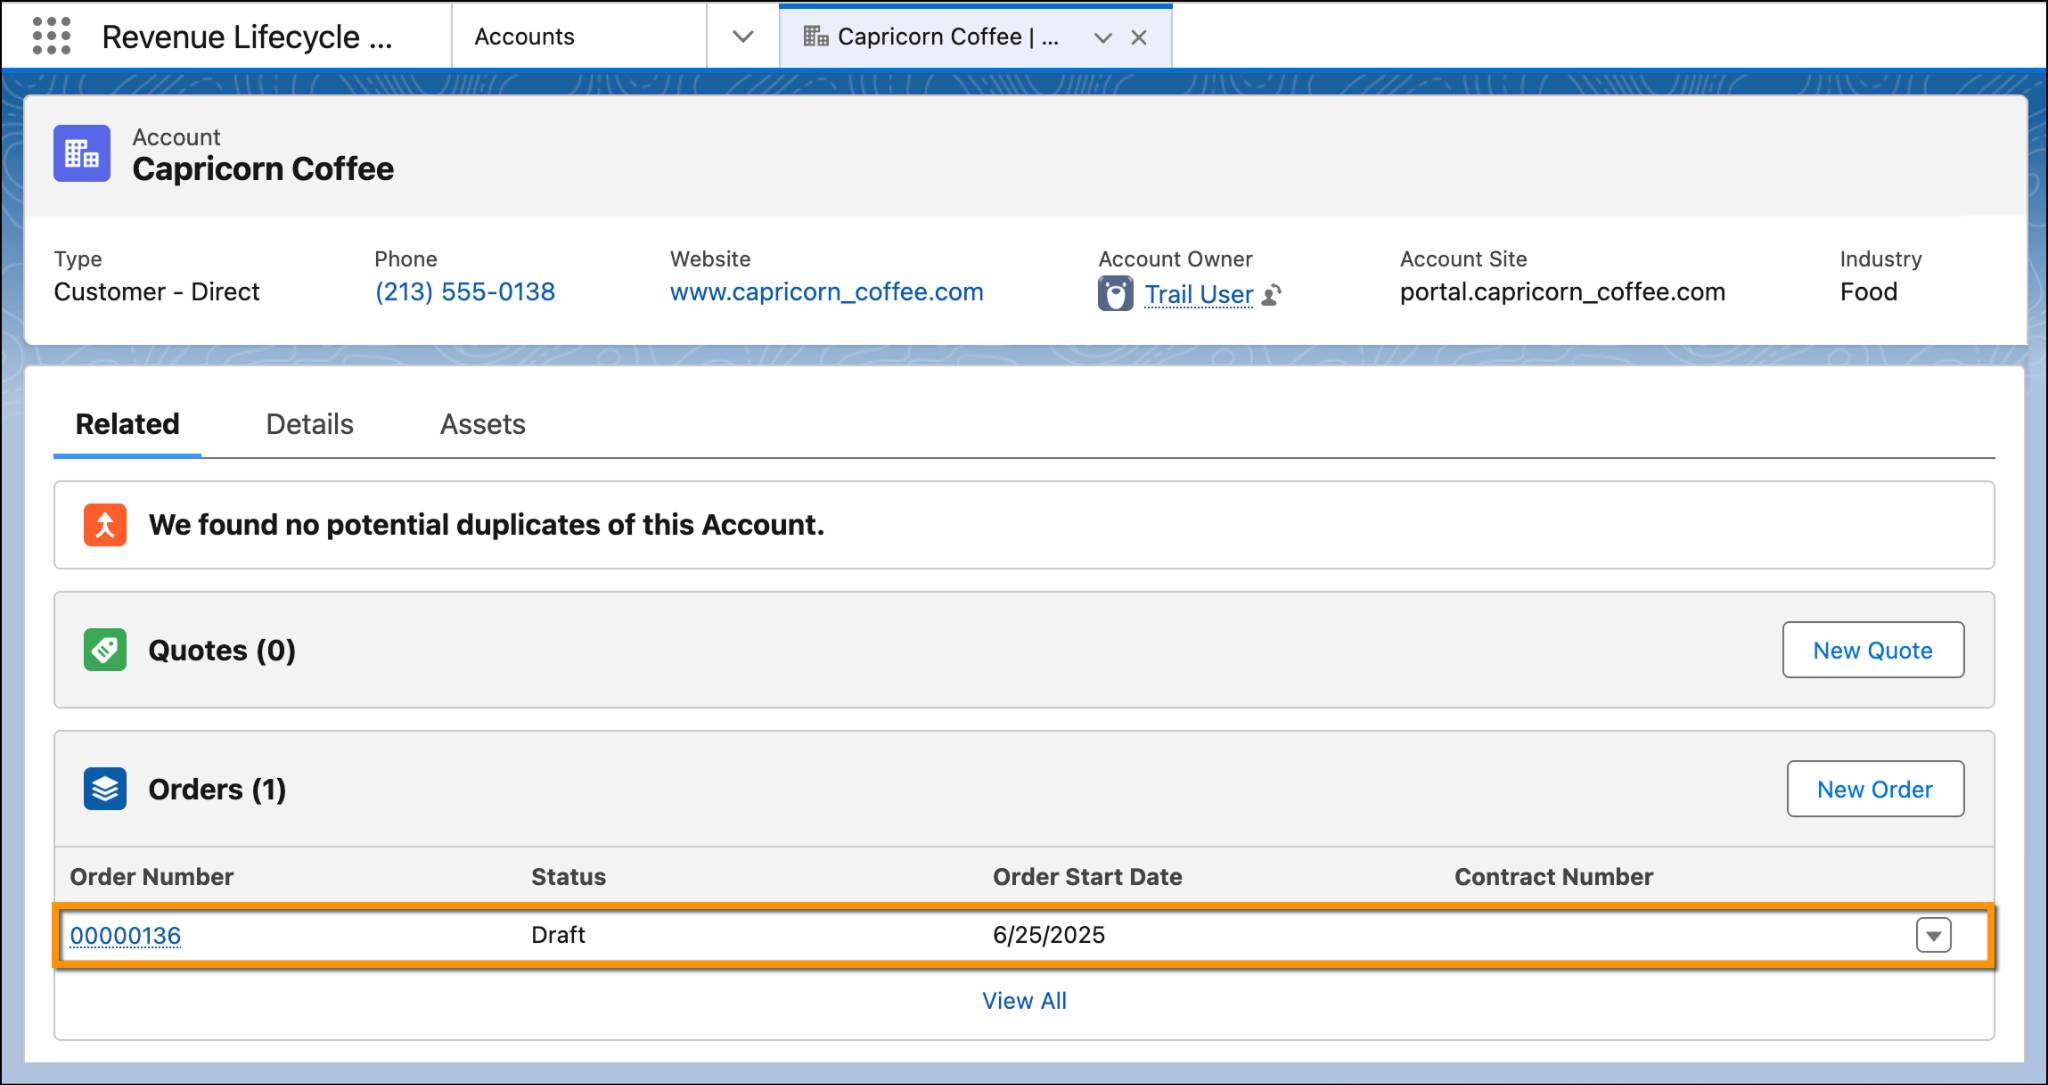
- Select Capricorn Coffee.
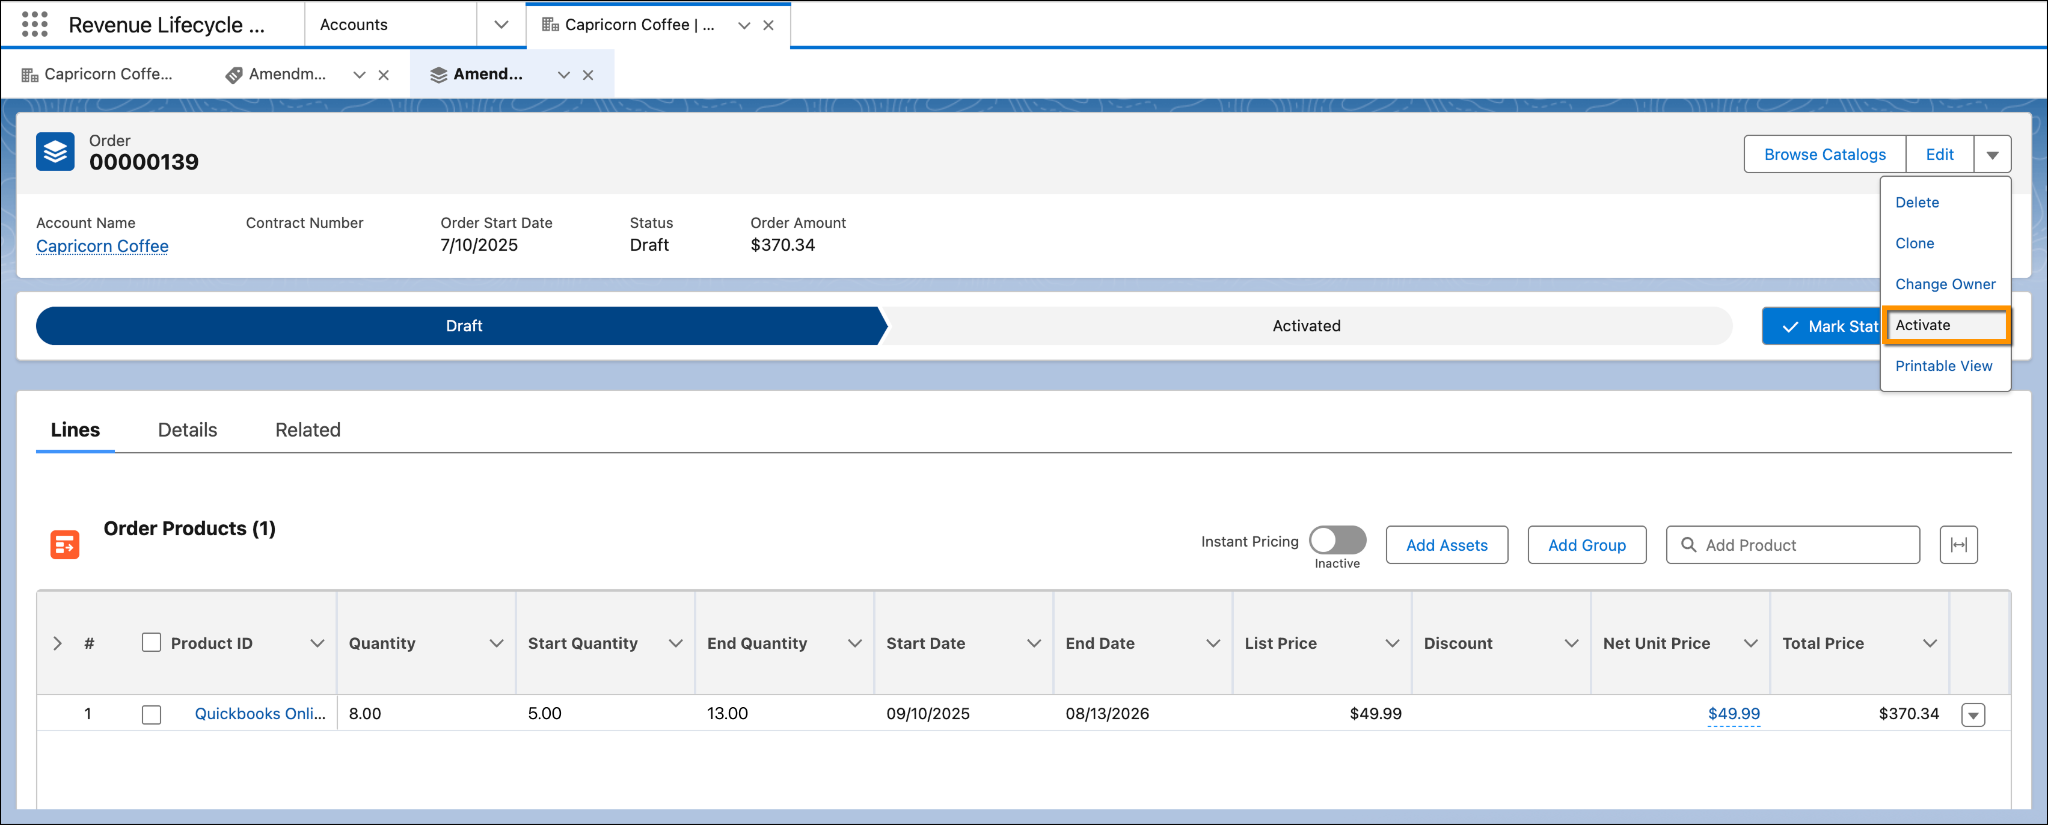
- Scroll down to the Orders section, and click the order with the Draft status.
- Click
 and select Activate.
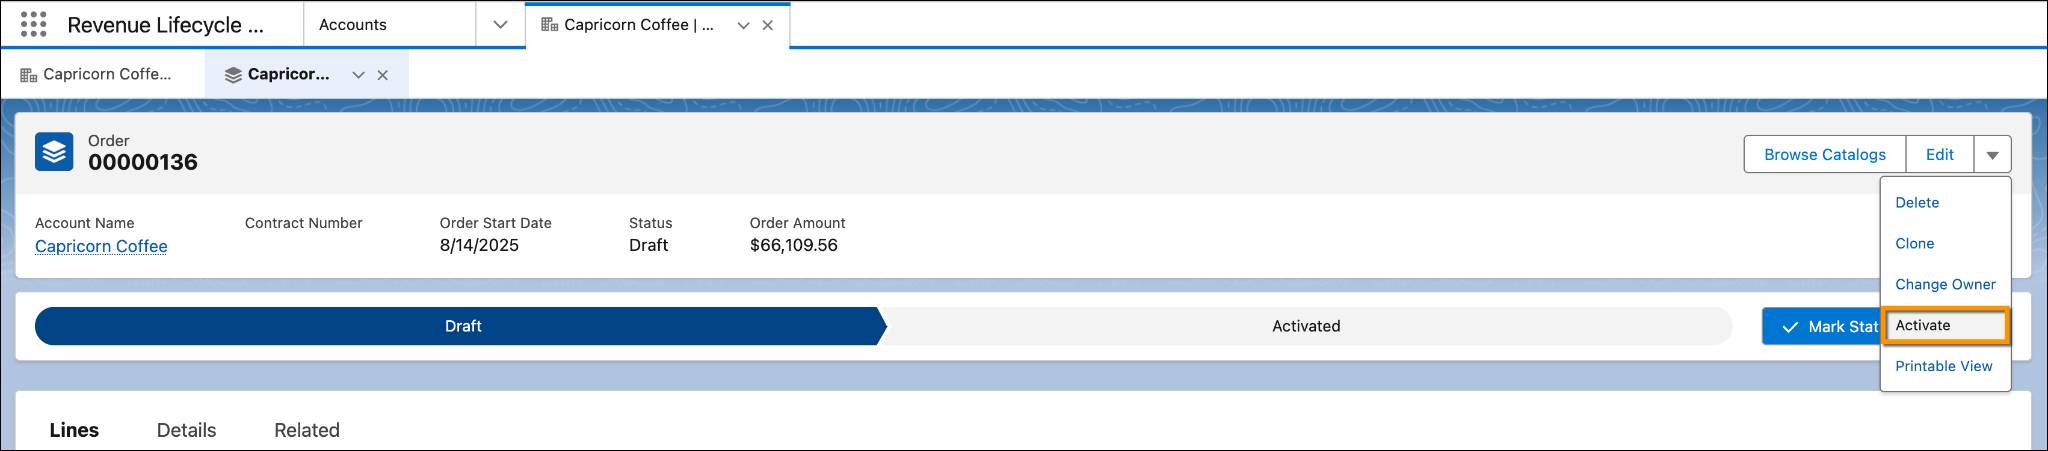
- Click Activate.
The order is now successfully fulfilled, and the assets are available under the customer account. You use these assets to complete the rest of the badge.
Manage Amendments
With a surge in new locations, Capricorn Coffee recently opened several new offices to manage roasting, production, tasting, and quality control. But as the operation expands, so do the demands on their systems.
Not long after setup, Chris gets an email from them about one of their assets, QuickBooks Online. As of now, they have five licenses, but they need eight more. Why the change? As their backend teams grow, they need more users managing costs and reporting.
This is a classic amendment scenario. Instead of canceling the original order or creating a new one, Chris can simply amend the existing asset to reflect the updated quantity. It keeps the process efficient and the records clean, all without missing a beat.
Follow along with Chris and complete the steps in your own Developer Edition org.
Schedule Amendment
- If you’re not on the Accounts page already, click
 , then find and select Revenue Lifecycle Management.
- Click Recently Viewed and select All Accounts.
- Select Capricorn Coffee.
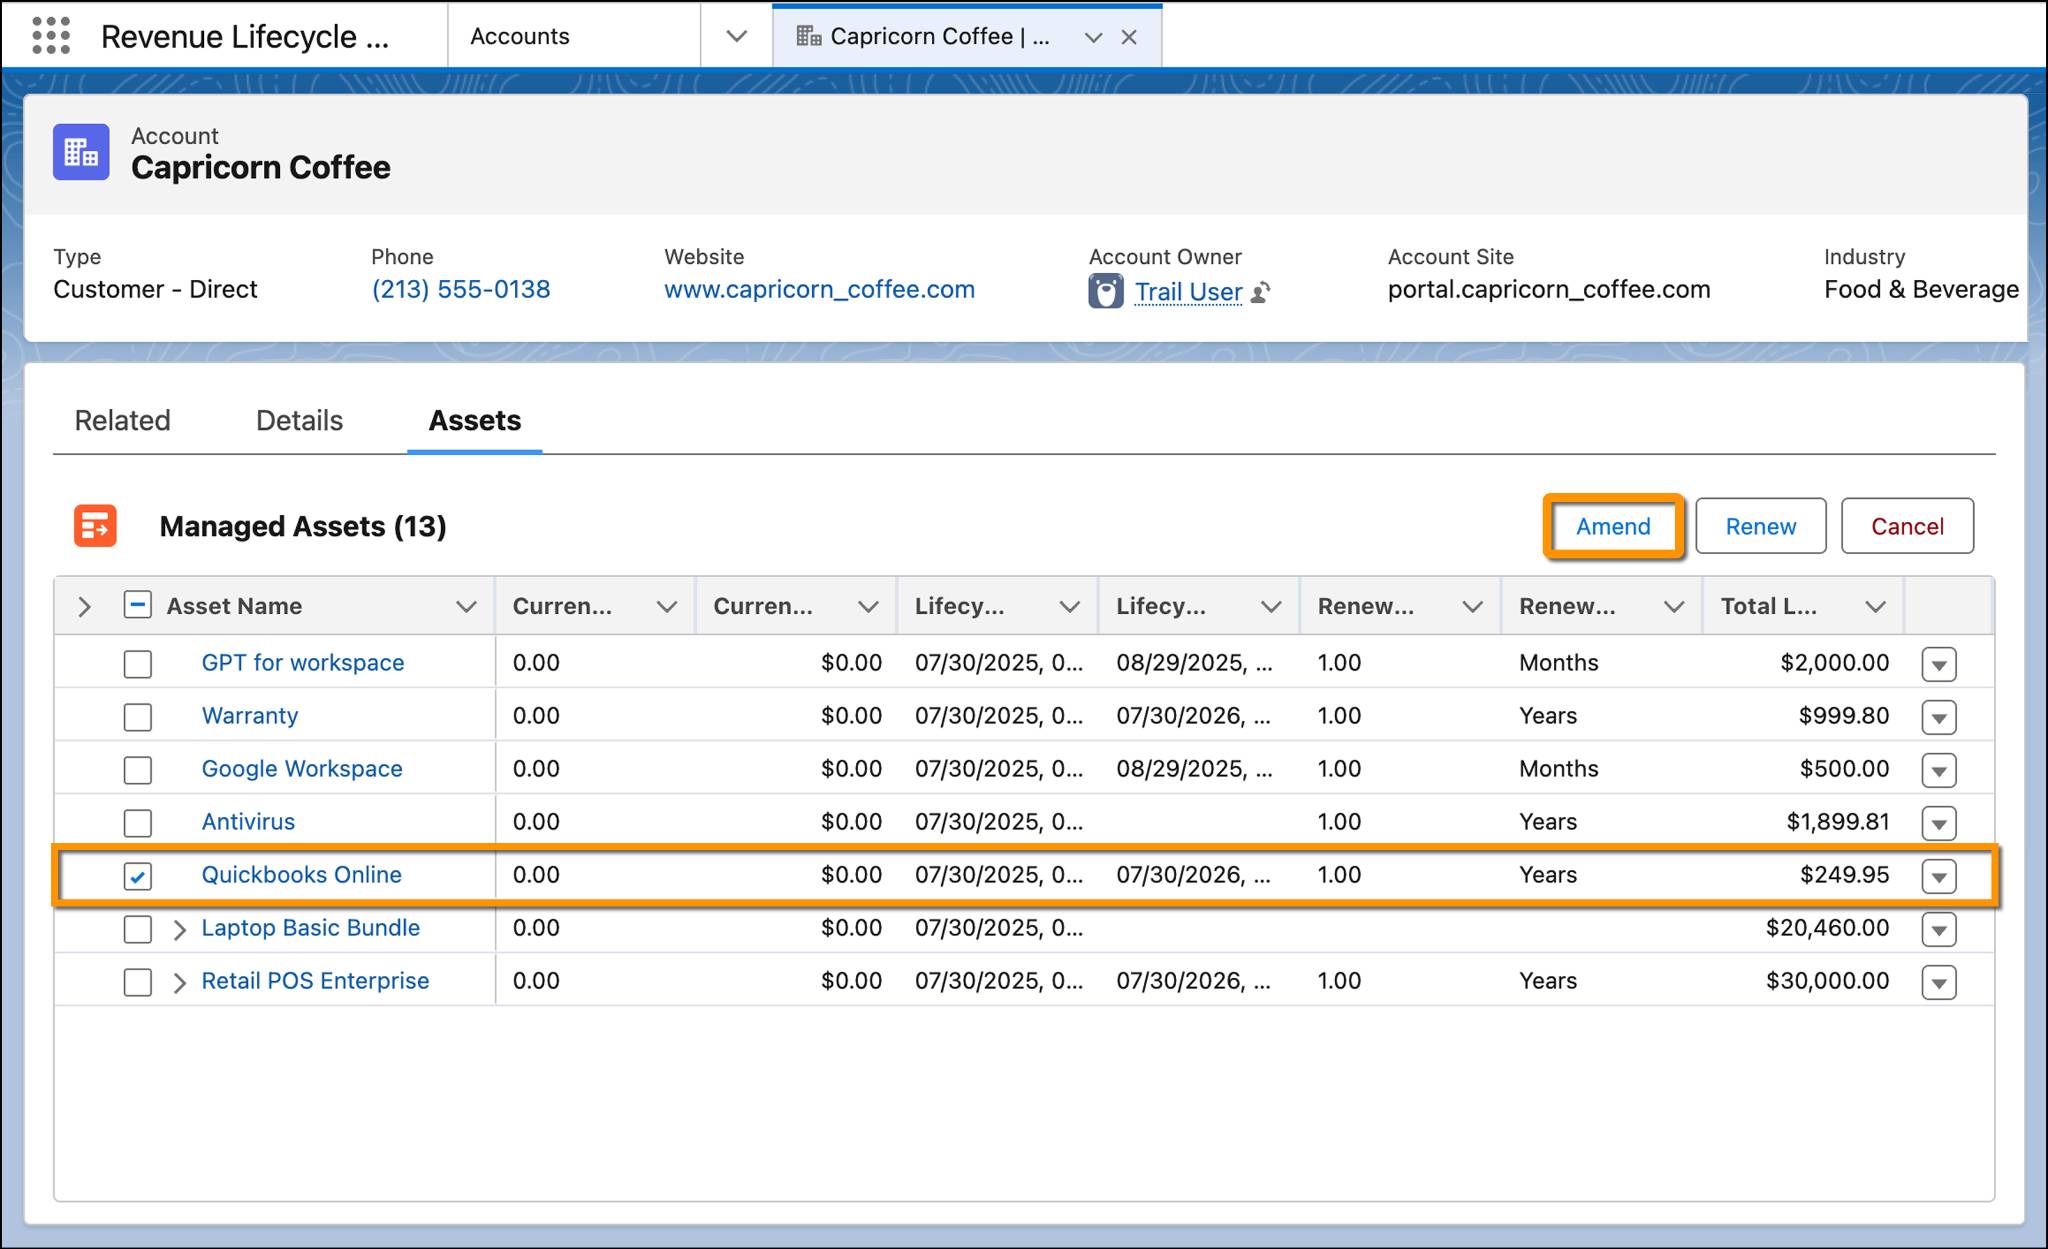
- Go to the Assets tab. The Managed Assets section lists all the assets currently tied to the account.
- Select Quickbooks Online, and Click Amend.
- On the Set Amendment Date window, select a date that is two months from today. This is the date when the change takes effect.
- Click Submit.
- Click Schedule Amendment.
This action sets the amendment process in motion and generates an amendment quote.

Create and Activate Amendment Order
If you have completed the Efficient Sales with Agentforce Revenue Management badge, you already know how to use the Transaction Line Editor to update and personalize line items. That process remains the same here. What changes is how you update your line items, depending on what you’re trying to achieve.
In this case, focus on the amendment scenario. When you select an asset and schedule an amendment, a quote is generated for that asset.
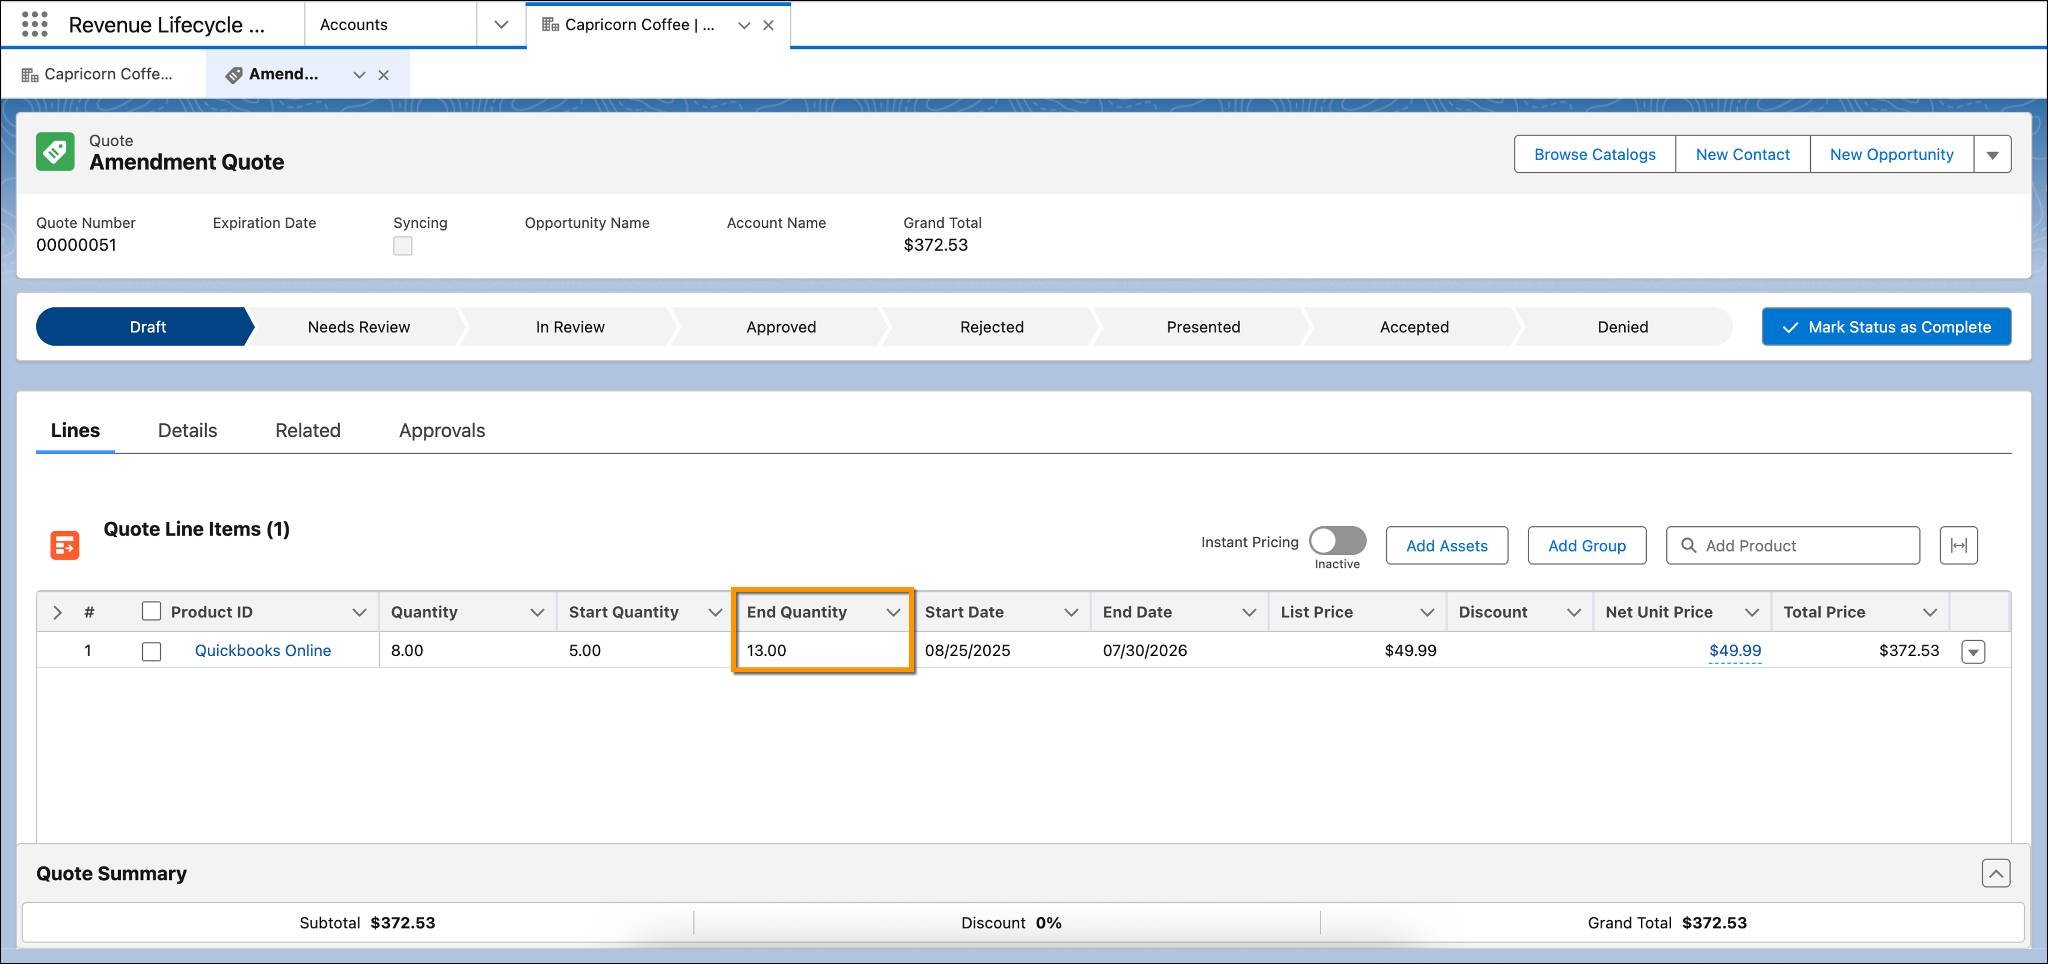
In this case, Chris plans to add eight more licenses to the existing five licenses for Quickbook Online. The Start Quantity (1) field shows the original quantity. The Quantity (2) field represents the difference between the current and the updated quantities. Make that change now.
- On the Amendment Quote page, double-click in the Quantity field for Quickbooks Online, add
8, and press Enter. If you’re on Mac, press Return.
- Click Save and wait for a few moments. Because you entered 8 as the delta, the End Quantity increased by 8. If the amendment is removal of three licenses, enter
-3as the delta instead.
- Click
 , and select Create Order.
- Select Create Single Order and click Finish.

Hold on! The CPQ system is generating your order. You see your order number in a few moments.

- Click the order number to open the new order. Alternatively, click the Related tab in the quote page and scroll down to the Orders section to find your new order.
- Click
 on the order page, and select Activate.
- Click Activate.
Whether you’re fulfilling a new order or making updates to an existing one, the process is the same: Generate a quote and activate the order. Agentforce Revenue Management streamlines this flow to ensure consistency, making the experience predictable and efficient.
Before Chris replies to the email confirming the addition of eight QuickBooks Online licenses, he checks the corresponding asset page. He wants to make sure the order is updated successfully and all details are captured accurately.
- Open the Capricorn Coffee account page.
- Go to the Assets tab.
- In the Managed Assets section, click
 next to Quickbooks Online and select View. If you don’t see the button, scroll to the side and try again. This step opens up the asset page, which offers a complete view of the asset’s lifecycle and all associated changes.

- Click Related.
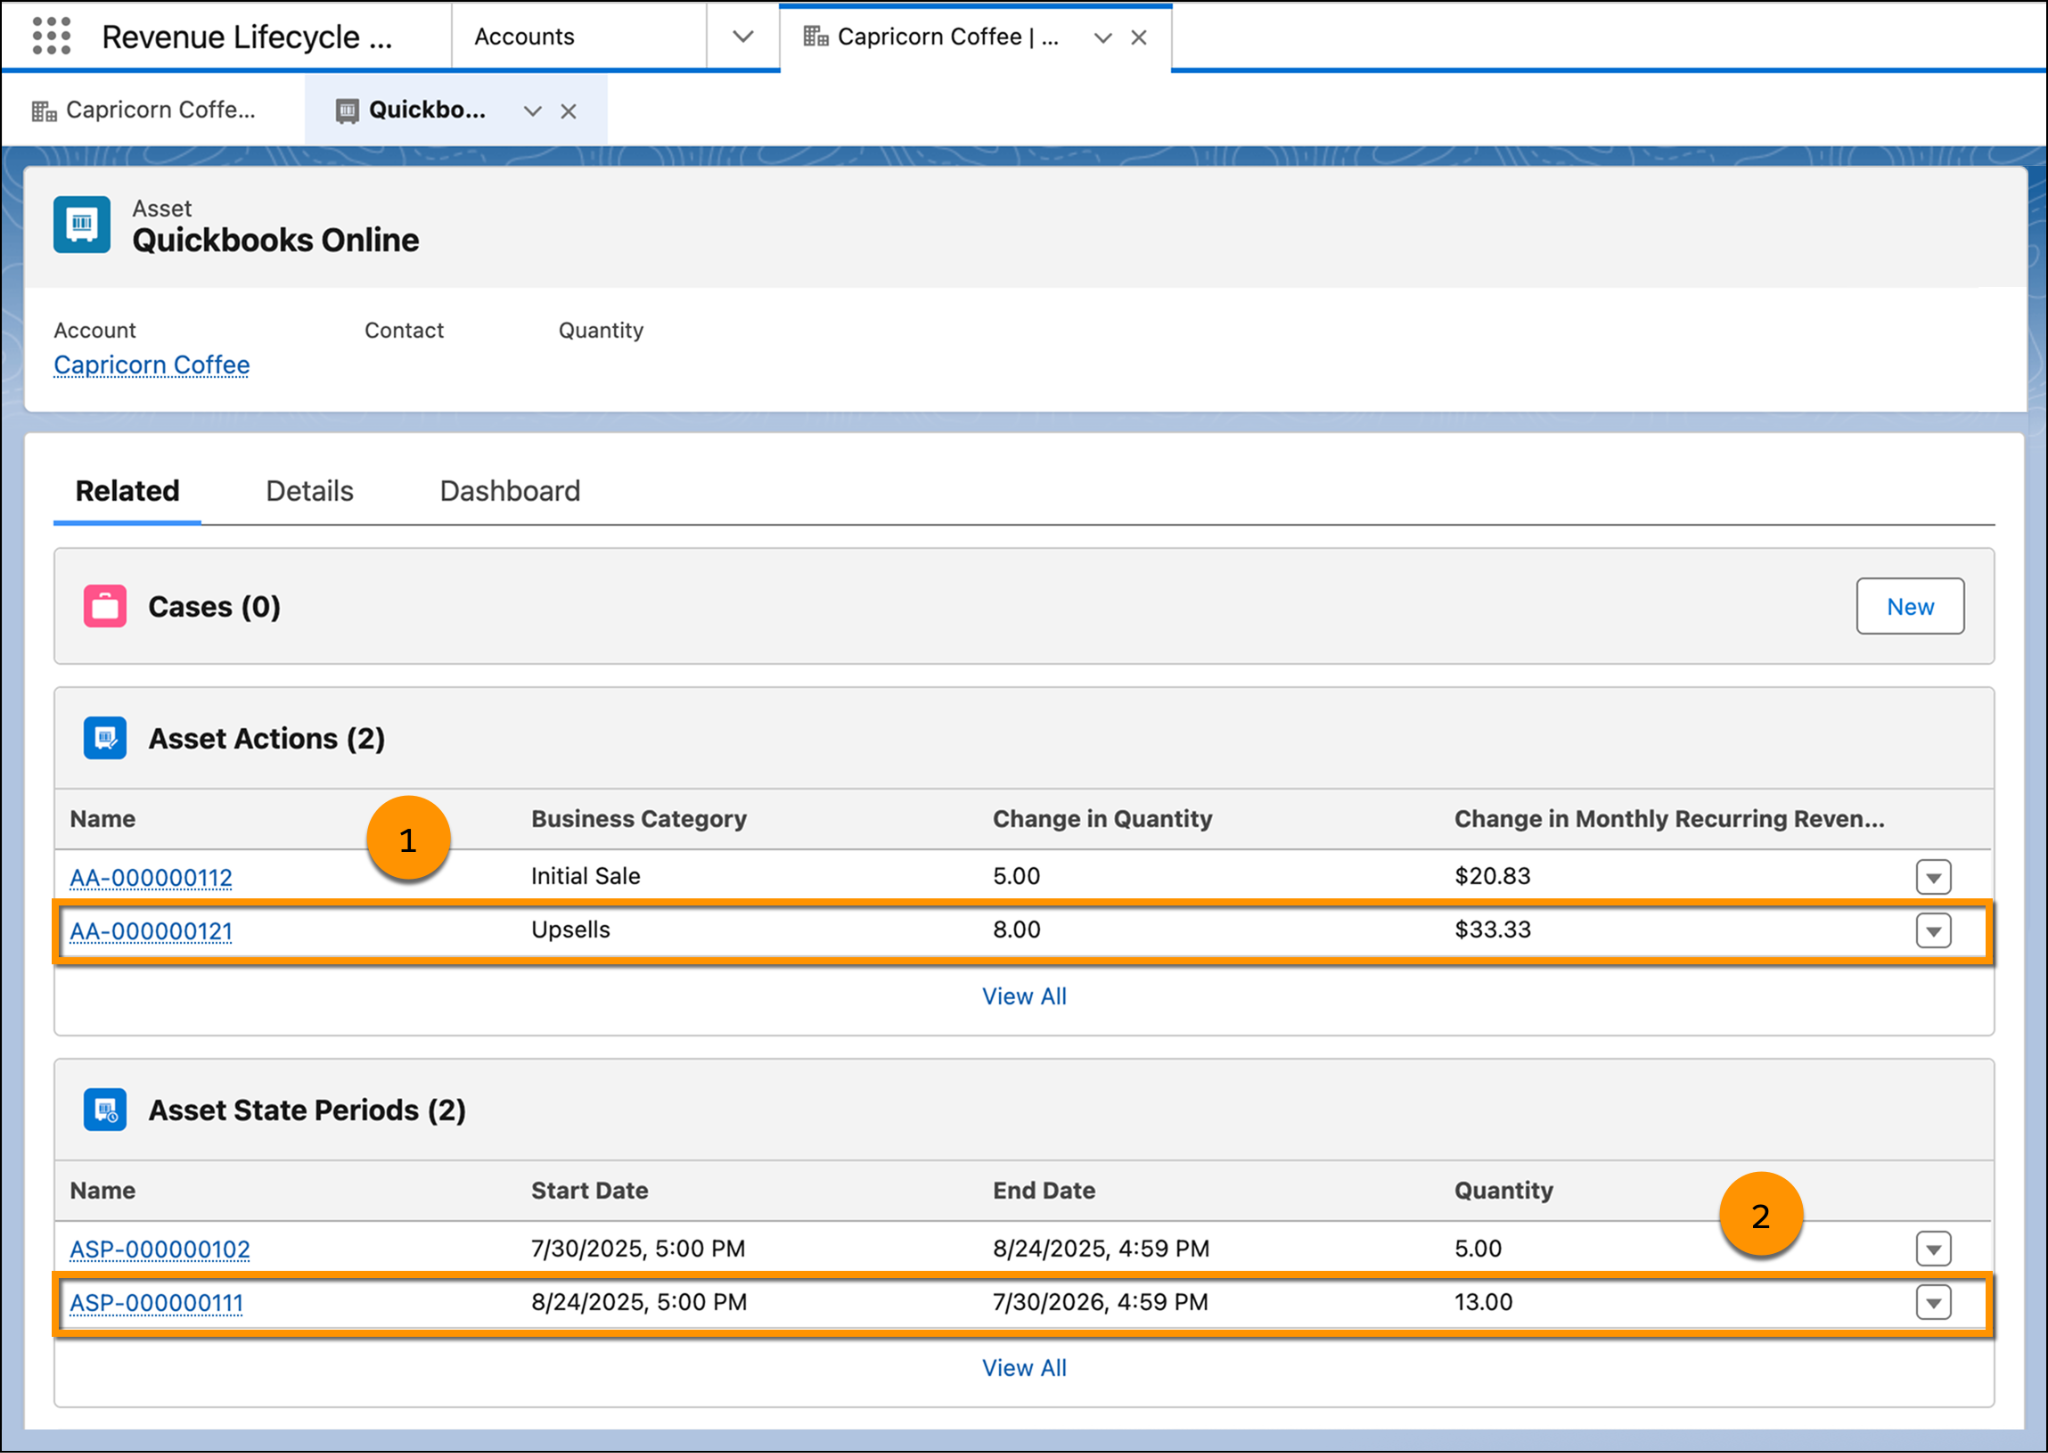
As expected, under the Related tab of the asset, a new asset action appears with the business category set to Upsells (1). This indicates that after the initial sale, an amendment was made in the form of an upsell. You also see a new asset state period (2) that reflects the updated quantity for the current period. The asset page offers a complete view of the asset’s lifecycle and all associated changes, providing all related details in one place.
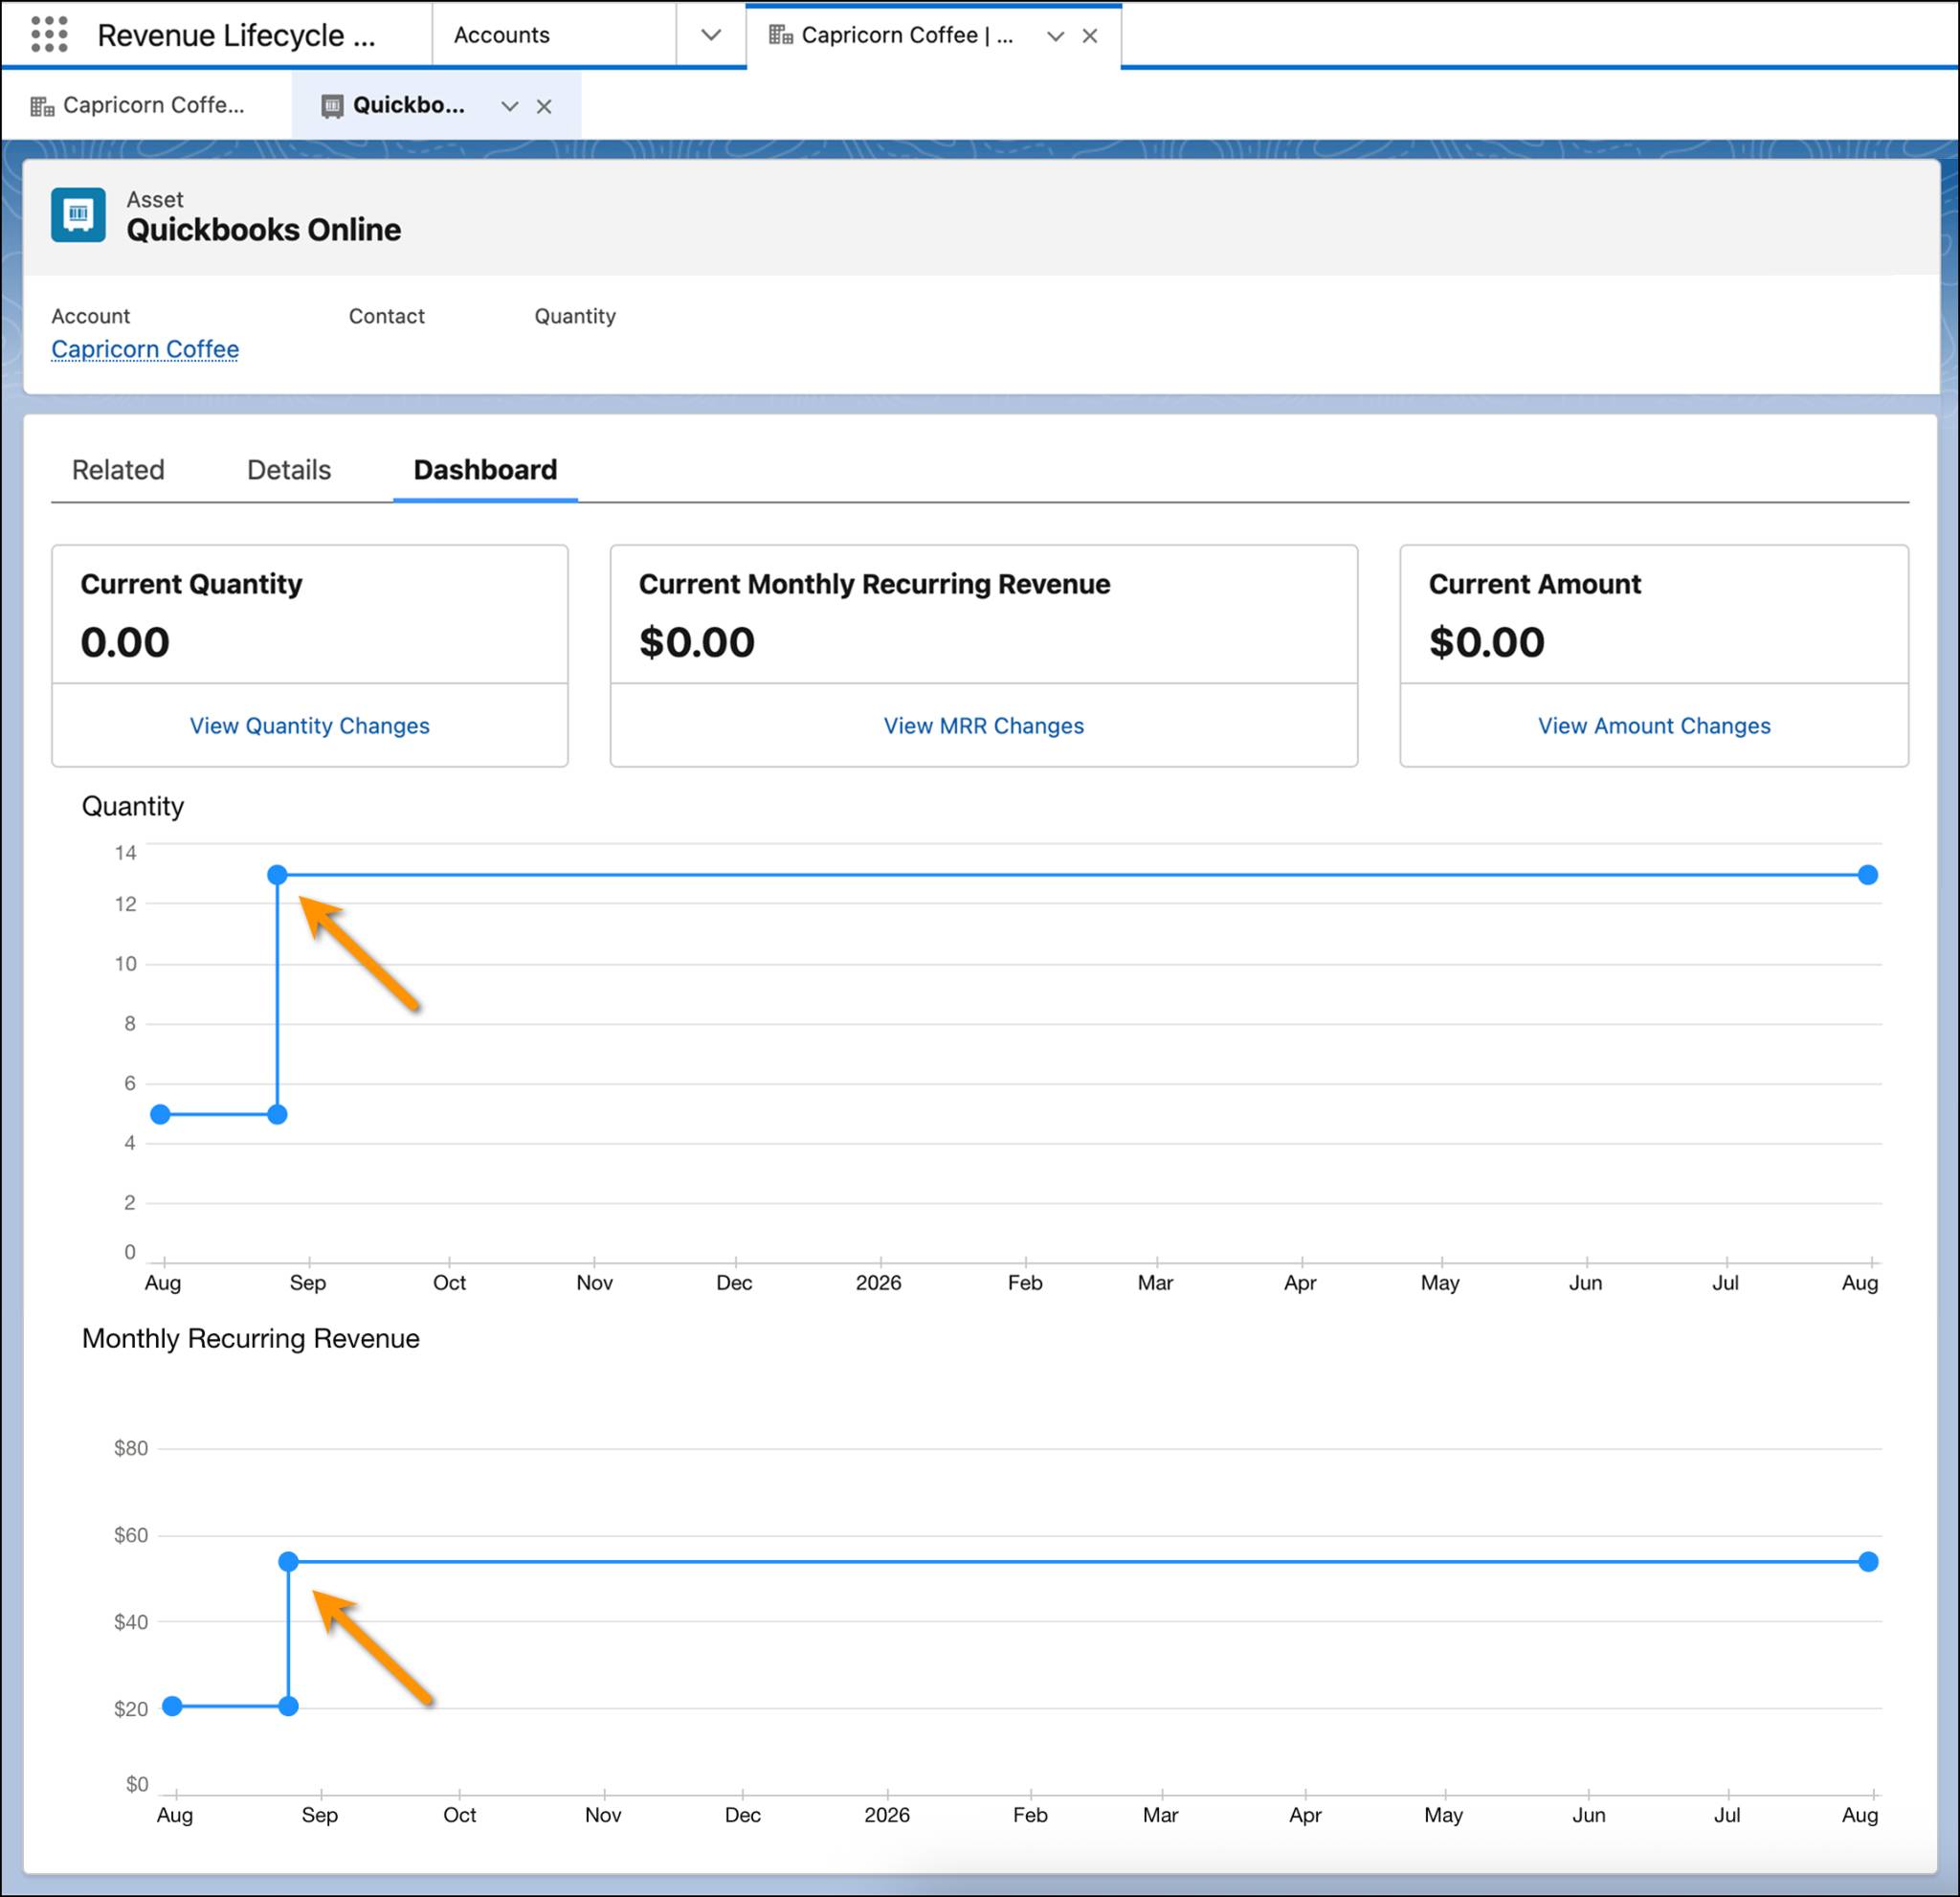
The Dashboard tab adds even more context. It helps you visualize the asset’s journey over time. According to the Quantity graph, starting 2 months from today, eight additional licenses will be activated.
With everything confirmed, Chris sends out the update. Thanks to Agentforce Revenue Management, he completed the amendment in just a few clicks.
In the next unit, follow along with Chris to manage customer asset renewals and cancellations.