Set Up the Site
Introduction
Ursa Major Solar, Inc., a growing supplier of solar components and systems based in the Southwest US, has recently started working with partners.
The leadership of Ursa Major Solar realizes they need a way to share CRM data with their partners to drive channel sales and marketing. Partner site in Experience Cloud to the rescue! With partner sites, companies can publicly share information that they want all partners to see in a single location. They can also share data privately with specific partner users in the same community and restrict access with the security built into Salesforce.
As Ursa Major Solar’s admin, you’re in charge of creating the company’s first partner site.
Launch Your Trailhead Playground
You'll be completing this hands-on project in your own personal Salesforce environment, called a Trailhead Playground. Get your Trailhead Playground now by first logging in to Trailhead, and then clicking Launch at the bottom of this page. Your playground opens in a new browser tab or window. Keep the playground window open while you do this project. After you complete the project steps in your playground, come back to this window and click Verify step at the bottom of this page.
Create a Custom Profile
First, clone a standard profile that gives proper access by creating a custom partner profile. Using standard external profiles for self-registration, user creation, and updates to user records isn’t a Salesforce security best practice.
- Click the gear icon
 and select Service Setup.
- Enter
Profilesin the Quick Find box and select Profiles.
- Click P in the alphabet bar across the top to jump to the current partner profiles.
- Click Clone next to Partner Community User.
- In Profile Name, enter
Partner User.
- Click Save.
Create a Permission Set
Next, set the proper access permissions by creating the Partner Site permission set.
- From Service Setup, enter
Permissionin the Quick Find box and select Permission Sets.
- Click New.
- For Label, enter
Partner Site Permission Set.
- Click in the API Name for the API Name to be auto-generated.
- In the License menu, select Partner Community.
- Click Save.
Set the Admin’s Role
In the next step of this project, a partner user is created. Before that can be done, the admin (you) must have a higher role than the new partner user.
- From Service Setup, enter
Usersin the Quick Find box and select Users.
- Click Edit next to your name (the System Administrator).
- For Role, select CEO.
- Click Save.
Enable Digital Experiences
Now it’s time to turn on the site functionality in your org.
- From Service Setup, enter
Experiencesin the Quick Find box and select Settings.
- Select the Enable Digital Experiences checkbox.
- Click Save.
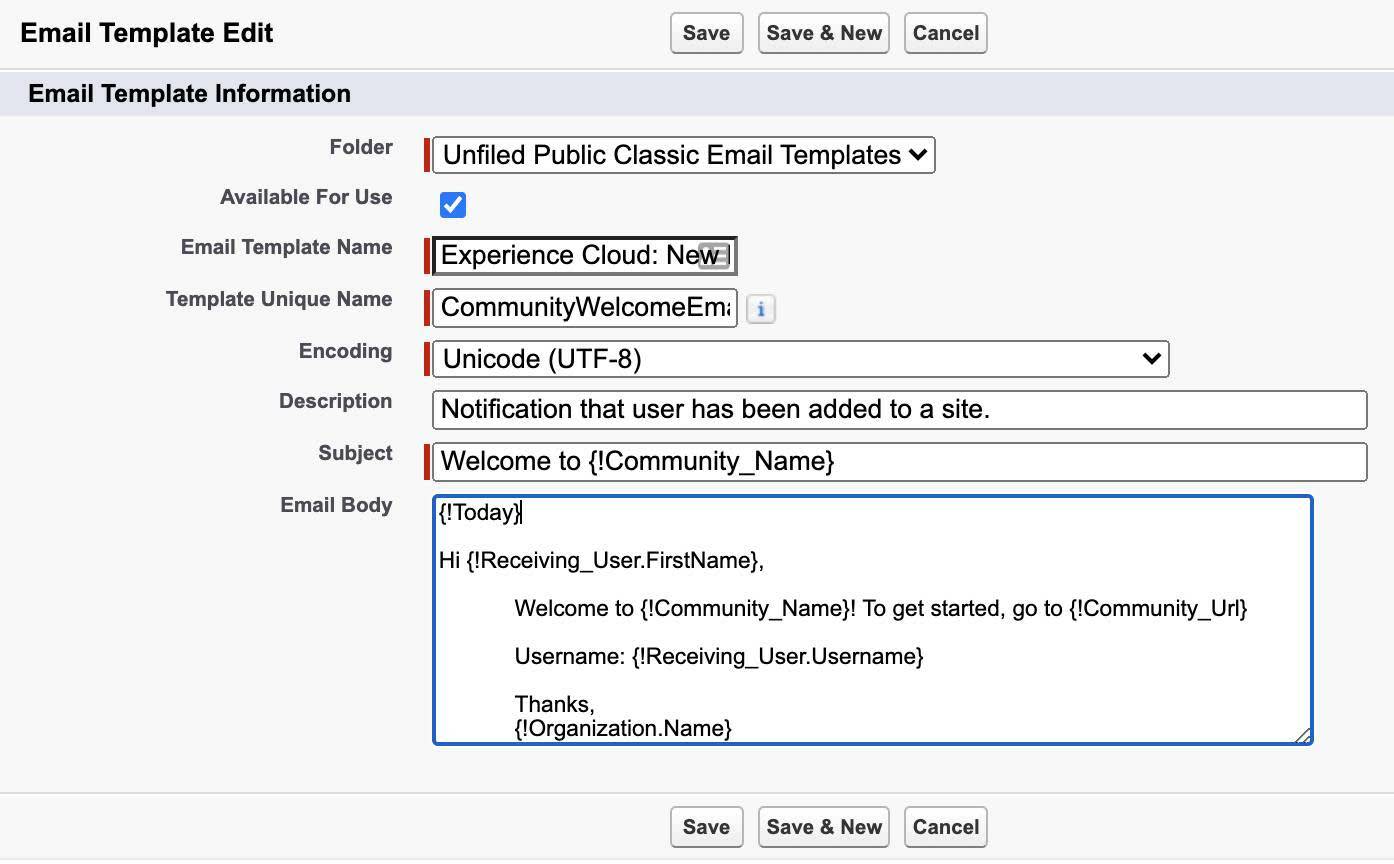
Edit an Email Template
Later in the project, a welcome email is sent to all new partner users. To prep for that, create a customized email template.
- Enter
Email Templatein the Quick Find box and select Classic Email Templates.
- Click Edit to the left of the Experience Cloud: New Member Welcome Email.
- In the Email Body, click Enter/Return twice before “Hi {!Receiving_User.FirstName}”.
- Add
{!Today}to the first blank line of the email.
- Click Save.
Create the Site
Digital Experience functionality is enabled and permissions are set. The next step is to create the Ursa Major Solar Partner site.
- From Service Setup, enter
All Sitesin the Quick Find box and select All Sites.
- Click New.
- Click the Partner Central template. Note: Not the Partner Central Enhanced template.
- Click Get Started.
- In the name field, enter
Ursa Major Solar Partner Site.
- In the optional box, enter
partner.
- Click Create.
Add a Permission Set to Site Members
Next, set which profiles and permission sets have access to the new partner site.
- Click the Administration tile.
- On the sidebar on the left, click Members.
- In the Available Permission Set list, select Partner Site Permission Set.
- Click the Add button to the right of the list.
- Click Save.
In this step, you successfully adjusted the permissions, edited the welcome email, and created a partner site for Ursa Major Solar. Next up, create a partner account and user.