Archive Records
Learning Objectives
After completing this unit, you’ll be able to:
- Describe how Spiff uses a soft delete to archive records.
- Archive Spiff records synced from Salesforce.
- Archive manually imported records.
Before You Start
Before you start this module, consider completing the following recommended content.
Maintain Data Through Changes
Your sales data is always changing—in Spiff, Salesforce, and other data sources. However, for audits, record-keeping purposes, and maintenance of frozen commission statements, it’s important to maintain your past data.
In this module, you learn how to archive records that are synced with Salesforce, records that are manually imported, and user accounts. You also learn how to find archived records and why it’s important to keep them in Spiff.
Let’s start with records synced from Salesforce.
Archive Synced Salesforce Records
Imagine your team closed a deal a few months ago that showed up in that month’s commission statement. That statement is now locked because the period is over. This week, however, the corresponding deal record in Salesforce is removed during a routine data cleanup. What happens now?
If Spiff’s Salesforce API doesn’t return the record during a sync, the record is automatically archived in Spiff.
Why archive the records and not delete them from Spiff? Frozen statements in Spiff often require records to exist in Spiff even if they are deleted on the Salesforce side. Plus, soft deleting is better than permanently deleting records from the system for audit purposes.
You archive a record using the soft_deleted field. You can set this field to true or false, and Spiff automatically sets the same value during a sync.
Here’s how to view archived records.
- From Spiff navigation, select Data Sources.
- Select a Salesforce object. For example, select Account.
- Hover over the Archived column header and click
 .
.
- Select Show Archived Records.

The Show Archived Records setting is off by default. When you enable it, archived records appear in your list of records. To search for archived records, turn on the Archived Records setting.
Archive Manually Imported Records
Not all of your records come directly from Salesforce—you can manually upload them to Spiff. You can also soft delete and archive those records.
As with Salesforce records, the soft deleted records you uploaded remain in the system but aren’t available for use in commission calculations.
Here’s how to soft delete records.
In this module, we assume you are a Spiff administrator with the proper permissions to manage data. If you’re not an administrator for Spiff, that’s OK. Read along to learn how your administrator would take the steps in a production org. Don't try to follow these steps in your Trailhead Playground. Spiff isn't available on the Trailhead Playground.
- Add a column to the spreadsheet that contains the records you want to delete. To make sure that the system recognizes the column, enter
soft_deletedexactly in the column header. It doesn’t matter where the column is placed, but be careful of leading or trailing spaces that can break the upload.
- Enter values in the soft_deleted column.
- For every record that you want to soft delete, set the value in the corresponding soft_deleted cell as
TRUE.
- If there are records on the table that exist within Spiff that you don’t want to soft delete, set the value in the corresponding soft_deleted cell to
FALSE.
- If there are new records in the table, set the value for the corresponding soft_deleted cell to
FALSE.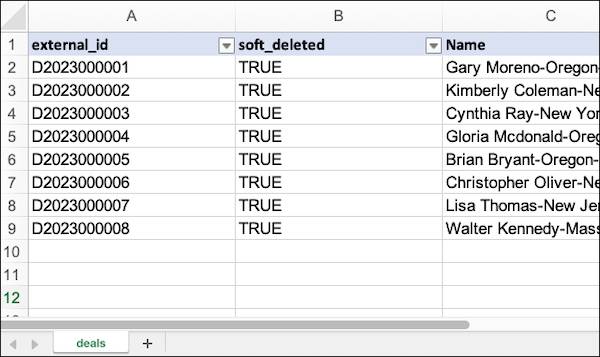
- For every record that you want to soft delete, set the value in the corresponding soft_deleted cell as
- Save your spreadsheet.
- From Spiff navigation, select Data Sources.
- Hover over Data Imports and click
 to upload a new file.
- Complete the import flow using your spreadsheet.
- In the Configure Fields step, if you’re uploading records with the soft_deleted column for the first time, set the data type of the column to Boolean.

- In the Fix Duplicates step, specify how Spiff processes duplicate records. Select either Override Existing Fields or Update Missing Fields. For this example, select Override Existing Fields to update the values.
- In the Configure Fields step, if you’re uploading records with the soft_deleted column for the first time, set the data type of the column to Boolean.
- Click Finish to complete the upload.
This process works for any manually imported data table, whether it be sales, accounts, invoices, or other custom objects.
A banner message on the page shows that duplicate records are overwritten. To make these records searchable, turn on Show Archived Records in the Archived column. If this setting isn’t enabled, soft deleted records are removed from the display in Data Sources, and they no longer appear as a result of any record search.
In this unit, you learned how to archive records synced from Salesforce and manually uploaded to Spiff. In the next unit, learn how to archive and unarchive user accounts.