Define Survey Triggers
Learning Objectives
After completing this unit, you’ll be able to:
- Set up invitation rules to automate surveys across the customer lifecycle.
- List the other options to automate surveys.
Configure Invitation Rules
Matt must now specify the trigger conditions for the surveys he has tied to each stage of the journey. To send out surveys after key interactions in the customer journey, Matt uses Salesforce Invitation Rules. Invitation rules can be configured to send surveys when a record is created or updated, and are easy to set up.
Here’s how Matt configures survey invitation rules for the customer acquisition stage.
- Click
 and select Setup.
- In the Quick Find box, enter
Mapsand select Customer Lifecycle Maps under Survey.
- In the map Cumulus Insurance NPS, select the Customer Acquisition stage.
- Click the dropdown menu next to Survey Questions and select Invitation Rules.
- In the Configure a survey trigger screen, click New Survey Configuration.
- In the new window, enter
Acquisition Experienceas the name. The API name is automatically set to Acquisition_Experience.
- In the description box, enter
Trigger condition for the Customer Acquisition survey.
- Under Action, select Create or update record.
- Click the Object field and select Opportunity as the object.
- Next, click Field and select Stage.
- In the Value field, select Closed Won.
- In the recipient tab, click Contact and then Contact ID. The value in the tab appears as Opportunity.Contact__r.Id.
- Click Save.
- Select the Acquisition Experience screen again and click Activate.
Next, Matt defines the invitation rules for the customer onboarding stage.
- In the map Cumulus Insurance NPS, select the Customer Onboarding stage.
- Click the dropdown menu next to Survey Questions and select Invitation Rules.
- In the Configure a survey trigger screen, click New Survey Configuration.
- In the new window, enter
Onboarding Experienceas the name. The API name is automatically set to Onboarding_Experience.
- In the description box, enter
Trigger condition for the Customer Onboarding survey.
- Under Action, select Create or update record.
- Click the Object field and select Contact as the object.
- Next, click Field and select Onboarding Status.
- In the Value field, select Onboarded Successfully.
- In the recipient tab, click Contact ID.
- Click Save.
- Select the Onboarding Experience screen again and click Activate.
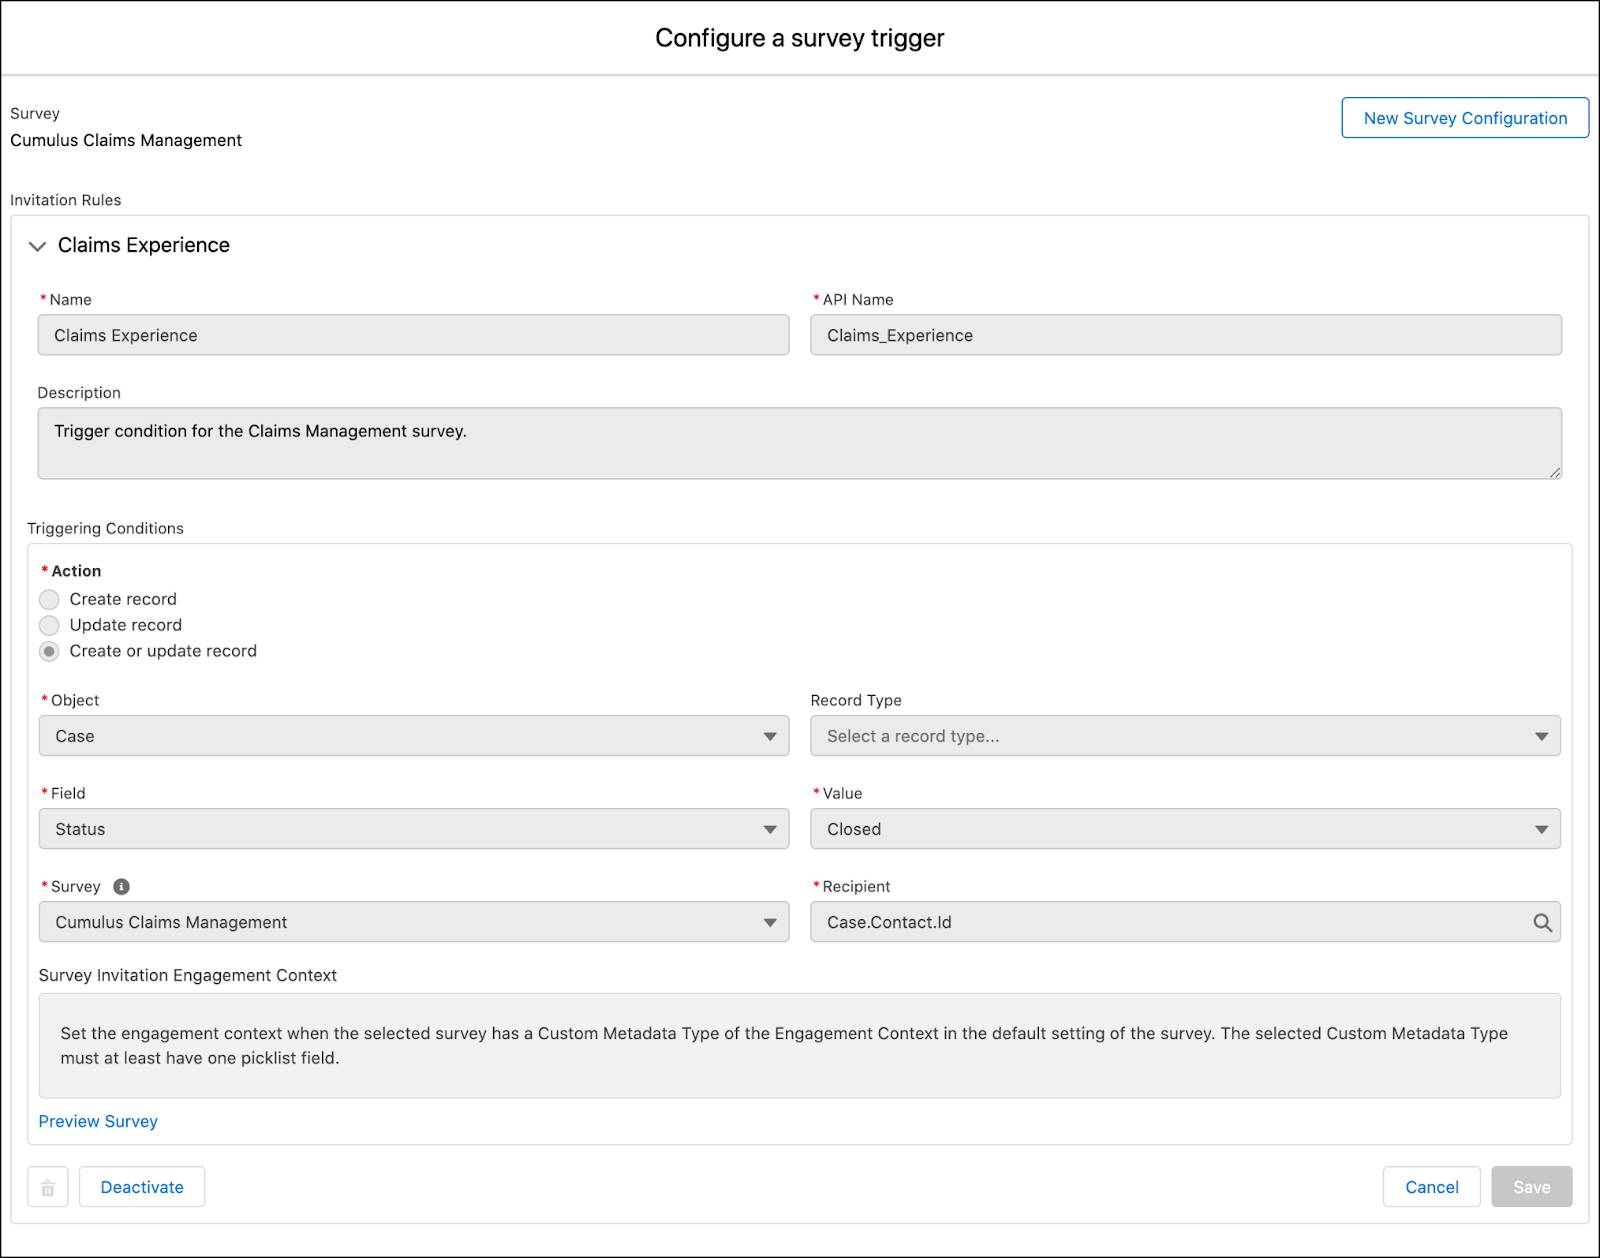
Likewise, Matt configures invitation rules for the other stages using the following information.
|
MapStage
|
Name
|
Action
|
Object |
Field |
Value
|
Recipient tab action
|
|---|---|---|---|---|---|---|
Claims Management |
Claims Experience |
Create or update record |
Case |
Status |
Closed |
Click Contact ID and then Contact ID again. |
Policy Renewal |
Renewal Experience |
Create or update record |
Account |
Renewal Status |
Renewed |
Click Contact and then Contact ID. |
More Options
To configure survey trigger conditions, Matt can also use Salesforce Flows. Flows are equally effective in automating survey invitations and you need no separate permissions or licenses to use them. Matt’s using Customer Lifecycle Maps because of the flexibility that he gets at the granular level of surveys, which helps him tailor solutions to business requirements.
In the next unit, we follow along as Matt creates a Customer Lifecycle Analytics app to analyze survey data.