Organize Code with Modules
Learning Objectives
After completing this unit, you'll be able to:
- Describe how support for modules has evolved over the years.
- Recognize the basic syntax used to define modules.
- Distinguish between different importing styles.
- Demonstrate how named exports results in read-only properties.
The Need for Better Modules
If you are a developer coming from another language, then you likely understand the importance of modular programming. Modular programming involves breaking your code up into logical chunks so that it's easier to access. Using modules generally results in code that is easier to read and maintain.
That's great, but up until ES6, creating modules in JavaScript wasn't easy. You either had to create an enclosed function and closure, or you could rely on one of the competing module specs like Asynchronous Module Definition (AMD) and Universal Module Definition (UMD), or CommonJS if you were doing Node.js development.
ES6 introduced a long-overdue native module system. But it was separate from all the other ES6 functionality and for a long time, no major browsers supported it. However, that's finally changed and now most browsers allow you to load ES6 modules with the type="module" attribute on the HTML5 script tag.
Module Basics
Modules are pretty simple to create and use. An ES6 module is essentially just a file containing some JavaScript. Everything inside the module is scoped to that module only. If you want to make something—like a function, a variable, or a class—available somewhere else, you need to use an export statement. You then use an import statement to specify what you want to use from the exported module.
- In your Google Chrome browser, navigate to https://playcode.io.
- Click Start Coding.
- Select JavaScript from the templates.
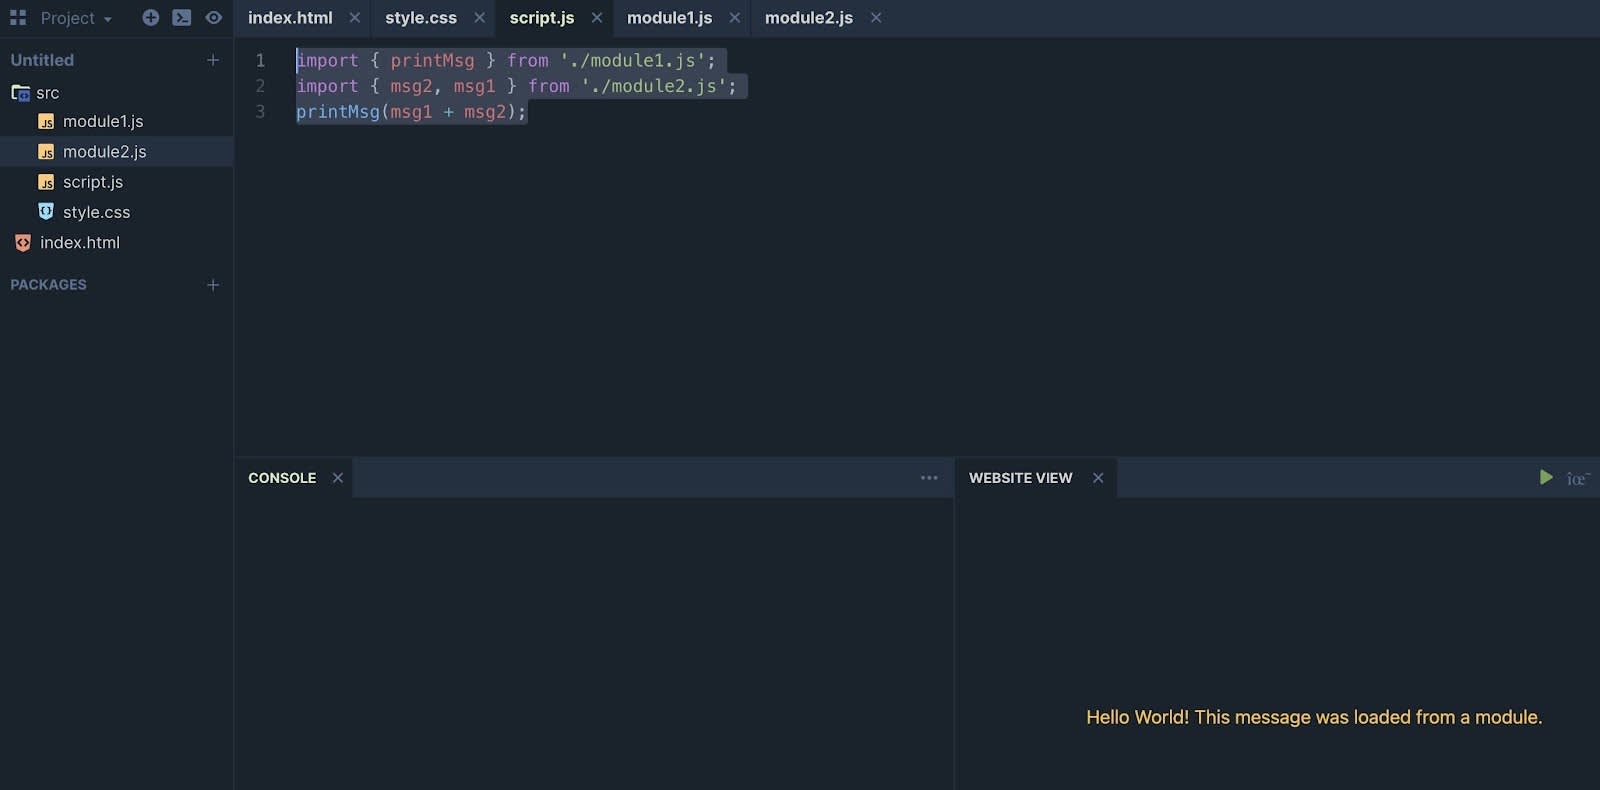
- Replace all the code in script.js with the following:
import { printMsg } from './module1.js'; import { msg2, msg1 } from './module2.js'; printMsg(msg1 + msg2); - From the Files pane, right-click the src folder and select New > JavaScript to add a new JavaScript file in the src folder.
- When prompted for the name, backspace and enter
module1.js.
- Enter the following code:
export function printMsg(message) { const div = document.createElement('div'); div.textContent = message; document.body.appendChild(div); } - Create another new file in the src folder named
module2.js.
- Enter the following code:
let msg1 = 'Hello World! '; let msg2 = 'This message was loaded from a module.'; export { msg1, msg2 }; - Select the index.html file.
- Scroll down in the file and look for the script tag that loads the
script.jsfile.
- Replace that line of code with the following.
<script type="module" src="./src/script.js"> </script>
Notice that all that was really done was to add thetype="module"attribute to the script tag.
- The preview window should display the text, “Hello World! This message was loaded from a module.” in the preview window.

Different Ways to Use Modules
In the code we've looked at so far, the function and variables exported were imported using the same names. That's fine. But what if you wanted to rename the functions and variables and use different names? You can do this using an alias. In the last example we used the following code to import the variables from the module2 file.
import { msg2, msg1 } from './module2.js';
printMsg(msg1 + msg2);
The concatenated value of those two variables was then passed as a parameter to the printMsg function using the same variable names (msg1 + msg2). But let's say that you want to use a different variable name for one of those variables. Something like msg3. You can just change the code like this:
import { msg2, msg1 as msg3 } from './module2.js';
printMsg(msg3 + msg2);
At this point if you try to use the msg1 variable name you get a reference error telling you that msg1 is not defined. So just remember that once you set an alias, always use that same name.
Let's consider another scenario. Assume now that you just want to import everything from a module and not worry about naming any of the exports. You can do that too. If you use an asterisk, everything is imported as a single object. You can see how this works if you change the code in script.js to be the following:
import { printMsg } from './module1.js';
import * as message from './module2.js';
printMsg(message.msg1 + message.msg2);
Notice how the newly created object was assigned an alias using the as keyword. Also notice how the object name message is now referenced when accessing the values of the variables. So even though you did not have to worry about specifying the names when importing, you still need to know what the names are before referencing them as a property of the imported object.
It's All in the Name
When referring to module exports, we call them named exports. But what do you think is actually being exported? Is it just a reference to the exported variable, function, or class? Or is it the actual variable, function, or class?
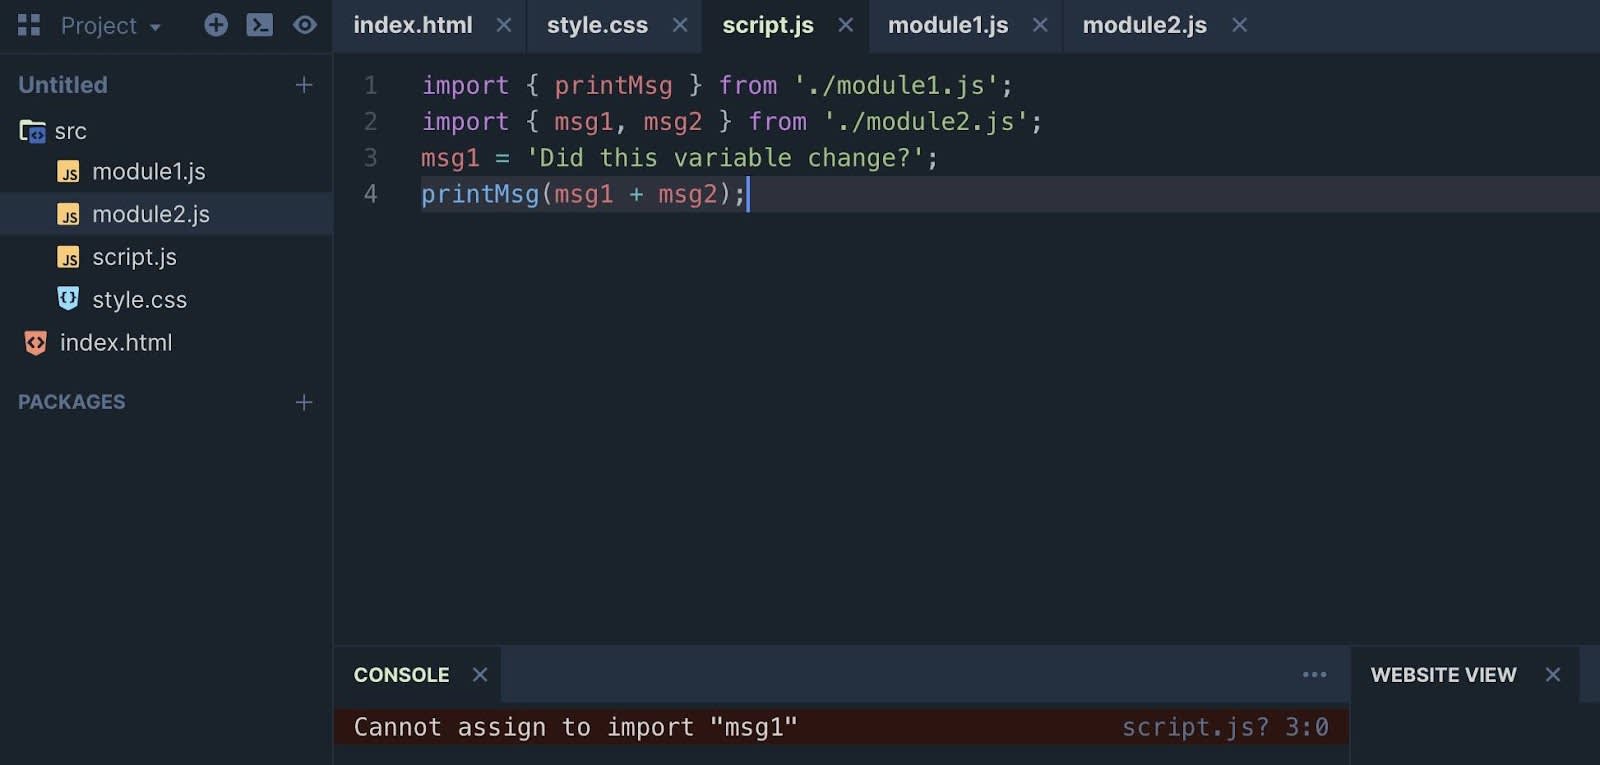
Just the name gets exported, and you can see this for yourself. If you export a variable and then try to change the value in the imported module, you get an error. Essentially, it's read-only. For example, if you change the code in script.js to the following and then save all the changes in PlayCode, you just get a blank preview window.
import { printMsg } from './module1.js';
import { msg1, msg2 } from './module2.js';
msg1 = 'Did this variable change?';
printMsg(msg1 + msg2);
The preview window is blank because the last line of code was never executed and an error was thrown, which you can see for yourself in the Console pane.

The thing to remember here is that you are not allowed to reassign the exported value. It can only be changed from inside the module it was exported from.
Tell Me More
- Modules always execute in strict mode, which means that variables need to be declared.
- They only get executed once, which is right when they are loaded.
- Import statements get hoisted, which means that all dependencies will execute right when the module is loaded.
Resources
- sitepoint: Understanding ES6 Modules via Their History
- Exploring JavaScript: Modules [ES6]
- MDN Web Docs: <script:>The Script Element
- MDN Web Docs: Import statement
- MDN Web Docs: Export statement