カスタムリレーショングラフを作成する
学習の目的
この単元を完了すると、次のことができるようになります。
- ARC リレーショングラフの計画を立てる。
- ARC リレーショングラフを作成する。
ARC リレーショングラフの計画を立てる
本質的なクライアントデータを捉えた ARC グラフを作成することは極めて重要です。Matt は、Nora のようなリテールバンカーがクライアントの金融ニーズを理解するために、クライアントに関連する取引先、従業員、商談を参照する必要があるということを知っています。その他にどのような種類の取引先リレーションデータがあれば、リテールバンカーとクライアントとの会話に役立つでしょうか?
Matt がグラフの作成を開始する前に、その質問に答えるためのしっかりとした計画が必要です。

[代替テキスト: 計画の作成: 時計、鉛筆、カレンダー、クリップボード、ノート。]
リテールバンカーの ARC グラフに必要なオブジェクト、項目、アクションを特定するには質問とフィードバックの表が役立ちます。今後のクライアントとのミーティングの準備について Matt が尋ねた質問と Cumulus のリテールバンカーから受けたフィードバックに目を通してください。
質問 |
回答 |
|---|---|
クライアントのビジネスの現状に関する詳細がわかるのはどのレコードですか? |
取引先、従業員、商談、関連子会社、金融口座、資産と債務 |
クライアントに関して多くの情報が得られるのはどの項目ですか? |
取引先: 取引先番号、電話番号、住所
従業員: 電話、住所、名前
商談: フェーズ、確度、金額、最終更新日
金融口座: 残高、レコードタイプ、主所有者、世帯
資産/債務: 金額、種別、主所有者、世帯 関連子会社: 主取引先責任者、場所、電話 |
レコードに対してどのようなアクションを実行しますか? |
取引先: 編集、活動の記録、新規 ToDo
従業員: 新規作成、既存の編集
商談: 新規作成、既存の編集 金融口座: 新規作成、既存の編集
資産/債務: 新規作成、既存の編集 関連子会社: 新しいリレーションの作成、メンバーの追加、新規作成、既存の編集 |
その他に、ユーザーに次のような質問をして、ARC グラフに含めるオブジェクト、項目、アクションを特定します。
- クライアントのニーズを把握できるのはどのレコードですか?
- クライアントの希望を把握できるのはどのレコードですか?
- クライアントの将来の状況を把握できるのはどのレコードですか?
- クライアントのビジネスに勤める従業員を把握できるのはどのレコードですか?
- 誰が重要なリーダーであるかはどのようにして知りますか?
- 今後のライフイベントについてどのようにして知りますか?
- 会社が負っている債務についてどのようにして知りますか?
回答から、リテールバンカーは取引先レコードページに ARC グラフを表示したいことがわかります。上の表の情報を使用して、Matt はグラフの計画をスケッチします。
ルートノードは取引先にする必要があります。これは、ルートノードオブジェクトはグラフを表示するレコードページのオブジェクトと一致する必要があるためです。リテールバンカーはクライアントの従業員、商談、関連子会社、金融口座、債務、資産も表示されることを希望しています。

[代替テキスト: ホワイトボードに図を描く: 計画を立てる: 時計、鉛筆、カレンダー、クリップボード、ノート。]
この情報に基づいて、Matt はグラフに 5 つの子ノードを含めます。
子ノードは ARC グラフ内で親ノードと関連付けられているレコードです。取引先間リレーションを使用して関連子会社を示す取引先ノードを追加し、従業員を示す個人取引先ノード、商談、金融口座、資産と債務ノードを追加します。関連子会社ノードには 2 つの子ノードがあります。従業員を表す個人取引先と関連子会社の金融口座です。
ユーザーがクライアントリレーションを理解するために特に重要だとして挙げた項目とレコードを確実に含めるようにします。
グラフテンプレートを選択する
次に、取引先オブジェクトのリレーションのカスタム視覚化が含まれる ARC グラフを作成します。新しいグラフをゼロから作成することも、テンプレートを使用してカスタマイズし、時間を節約することもできます。
次の 3 つのテンプレート種別から選択します。
-
デフォルトテンプレートは Financial Services Cloud 組織で利用でき、企業対消費者 (B2C) と企業対企業 (B2B) のグラフが含まれています。
-
カスタムテンプレートはユーザーが作成するテンプレートです。
-
インストール済みテンプレートはサードパーティによって作成され、Salesforce 組織にインストールされています。

[代替テキスト: 新しい ARC リレーショングラフ: デフォルトテンプレート、B2B グラフ。]
Matt は [B2B Graph (B2B グラフ)] テンプレートを選択します。このテンプレートには取引先ルートノード、関連子会社、従業員、商談など、ユーザーが希望する多くのノードが含まれているためです。

[代替テキスト: 企業対企業グラフテンプレート: ARC グラフノード。]
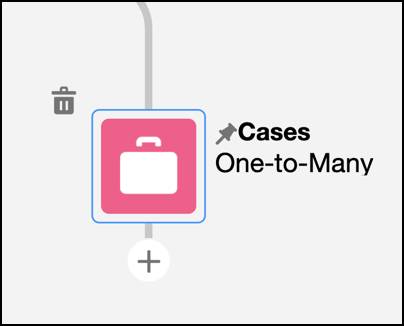
彼はケースノードを削除し、いくつかのノードを追加してチームのためのカスタムグラフを作成することにします。
ここで実際に、このモジュールの前の方で作成した Financial Services Cloud 組織を使用して、Matt と一緒に ARC グラフを設定しましょう。まず、次の手順を実行します。
- [Setup (設定)] から、[Quick Find (クイック検索)] ボックスに
Feature Settings(機能設定) と入力して、[Actionable Relationship Center] を選択します。
-
[New Relationship Graph (新規リレーショングラフ)] をクリックします。
- [Default Templates (デフォルトのテンプレート)] タブで [B2B Graph (B2B グラフ)] を選択し、[Create Graph (グラフを作成)] をクリックします。
グラフのプロパティを設定する
次に、Matt は ARC グラフのプロパティを設定します。
グラフの表示ラベルは、グラフをレコードページに追加するときに識別するのに役立つため、一意で内容を表す名前を使用します。
- [Label (表示ラベル)] に
Retail Banker Graph(リテールバンカーグラフ) などと入力します。[Developer Name (API 参照名)] 項目は自動入力されます。
- API 参照名をそのままにするか、別の一意の名前を入力します。
-
[Save (保存)] をクリックします。

[代替テキスト: ARC グラフ: ARC グラフノード、[Graph Properties (グラフのプロパティ)] タブ。]
グラフの設定を後で使用できるようにカスタムテンプレートとして保存するには、[Set as Template (テンプレートとして設定)] を選択します。テンプレートとして設定されたグラフはレコードページには追加できません。
グラフのプロパティを設定したところで、次はルートノードを設定します。
ルートノードのプロパティを設定する
次に、Matt はノードを設定します。彼のユーザーにはケースノードが不要なため、ケースノードを削除して変更を保存します。

[代替テキスト: グラフノードの削除: ケースノード。]
ARC リレーショングラフのルートノードはグラフが表示されるオブジェクトと一致する必要があります。このグラフを取引先レコードページに追加するには、B2B テンプレートのルートノードが正しく機能するように、取引先ノードの詳細を確認します。

[代替テキスト: カスタムノード設定の選択: グラフのプロパティ、ARC ノード。]
グラフのルートノードをクリックし、[Properties (プロパティ)] タブの項目が次のようになっていることを確認します。
-
Object (オブジェクト): Account (取引先)。
-
Node Configuration (ノード設定): Custom (カスタム)。
作業を保存します。
[Node Configuration (ノード設定)] のオプションは次のとおりです。
-
Use as Default (デフォルトとして使用): 同じオブジェクトの他のノード設定のためにこの設定をテンプレートとして保存します。
-
Linked (リンク済み): 対象オブジェクトのデフォルトノード設定を使用します。
-
Custom (カスタム): 独自のオブジェクトノード設定を作成するか、末端ノードを作成します。
これで、リテールバンカー ARC グラフのプロパティの更新が完了しました。
適切な質問をすることで、Matt は Nora のようなリテールバンカーがクライアントのニーズを理解するのに役立つ ARC グラフの計画を立てました。さらにその計画を使用して、すばやくテンプレートを作成し、グラフとルートノードのプロパティを設定しました。