Try Out the App
Follow Along with Trail Together
Want to follow along with an expert as you work through this step? Take a look at this video, part of the Trail Together series.
(This clip starts at the 7:45 minute mark, in case you want to rewind and watch the beginning of the step again.)
Check the App
Your app is ready to use! You can start by adding a few of the waypoints in the park that you want to visit. Let’s start off with places for Yosemite National Park.
- Click the App Launcher
 , then search for and select Trailblazer.
- Click the Waypoints tab.
- Click New to create a new waypoint.
- Call it
Half Domeand click Save & New.
- Create another waypoint called
Glacier Pointand click Save & New.
- Create one more called
El Capitanand click Save.
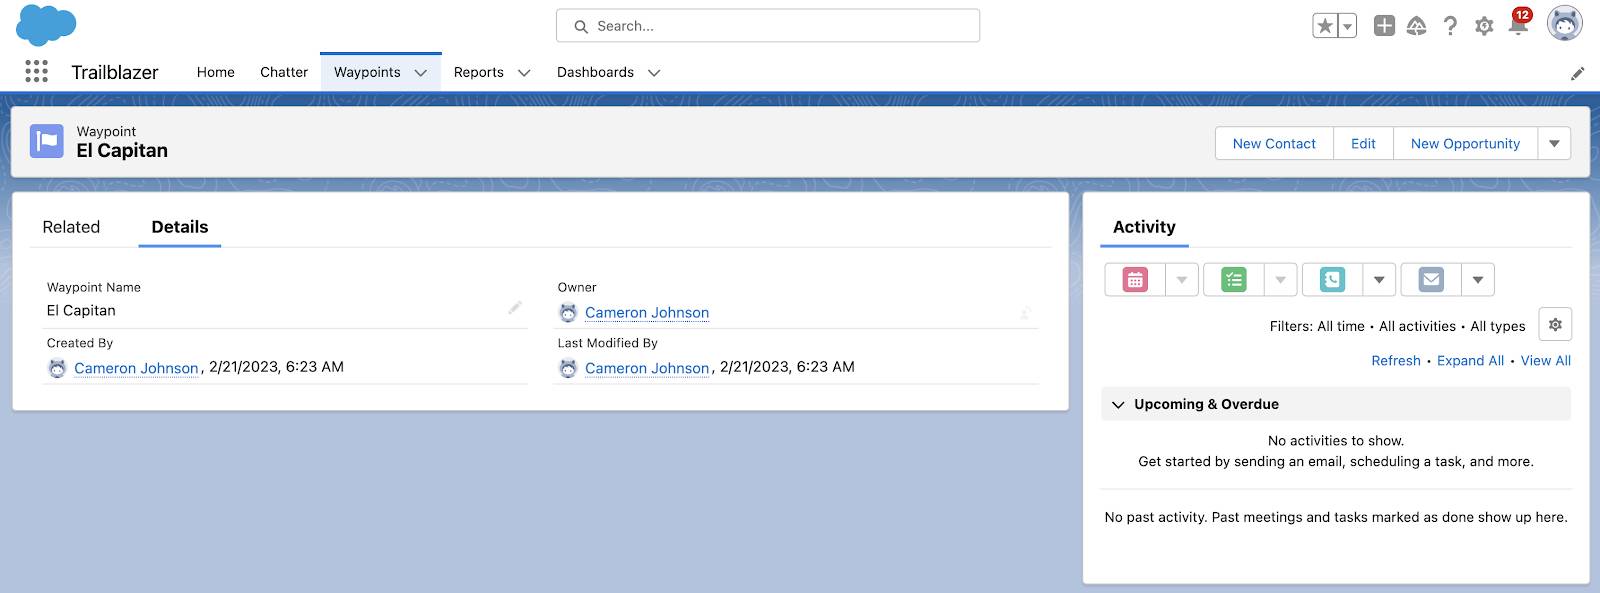
Take a look at the last waypoint that you created, El Capitan. In the record view, you can see the fields, activity timeline, and everything else you want to track about this record.

-
Details—The Waypoint custom object has four fields:
- Waypoint Name
- Created By (generated by the system)
- Owner (generated by the system)
- Last Modified By (generated by the system)
As you build out your app, you can add more fields to refine the things you want to track.
-
Activity timeline—Activities are tasks and events associated with this record. Tasks are to-do items, and events are meetings. There’s also a feature for logging notes about phone calls. We don’t go into Activities in this quick start, but keep this feature in mind, because it’s a handy and powerful one that you’ll love.