Customize the Asset Console
Learning Objectives
After completing this unit, you’ll be able to:
- Describe why separate record types and page layouts are required for the Asset page.
- Add related lists to the Asset page.
- Search for test drive appointments from the asset console.
- Add actions to the Asset page for service agents.
Create Separate Asset Record Types
In this module, we assume you are an administrator with the proper permissions to manage Automotive Cloud. If you’re not an administrator for Automotive Cloud, that’s OK. Read along to learn how your administrator would take the steps in a production org. Don't try to follow these steps in your Trailhead Playground. Automotive Cloud isn't available in the Trailhead Playground.
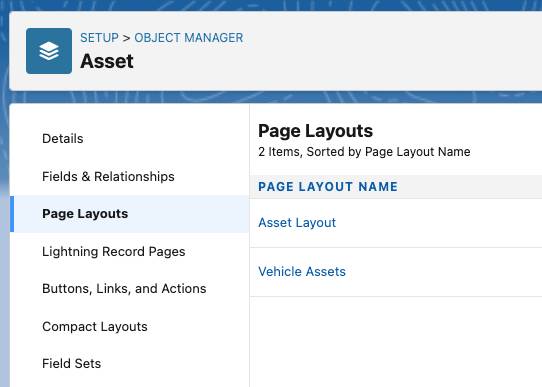
David decides to use two page layouts for an Asset record. The asset console view that comes with Automotive Cloud works perfectly for parts and accessories. For assets of type Vehicle, agents would rather use the vehicle console to find information. So, David can create an Asset record type for vehicles and assign a simplified page layout to it.
He creates a new page layout named Vehicle Asset for the Asset object. The Vehicle Asset page layout is similar to the default Asset page layout with the following exceptions.
Exception |
Name of Field/Related List |
|---|---|
Fields added only to the Vehicle Asset page layout |
Vehicle, Purchase Date |
Fields not added to the Vehicle Asset page layout |
Parent Asset, Install Date |
Related lists added only to the Vehicle Asset page layout |
Service Appointments, Child Assets |
David then creates the following two record types for the Asset object and gives all user profiles access to both record types.
- Parts & Accessories
- Vehicles
To find out how to create page layouts and record types, see Create Page Layouts and Create Record Types.
The record types are in place and each has a separate page layout assigned to it. David can now add components to the page layout based on whether the component information is related to vehicles or parts. For example, he adds the list of test drive appointments and makes it visible only for the Vehicle record type.
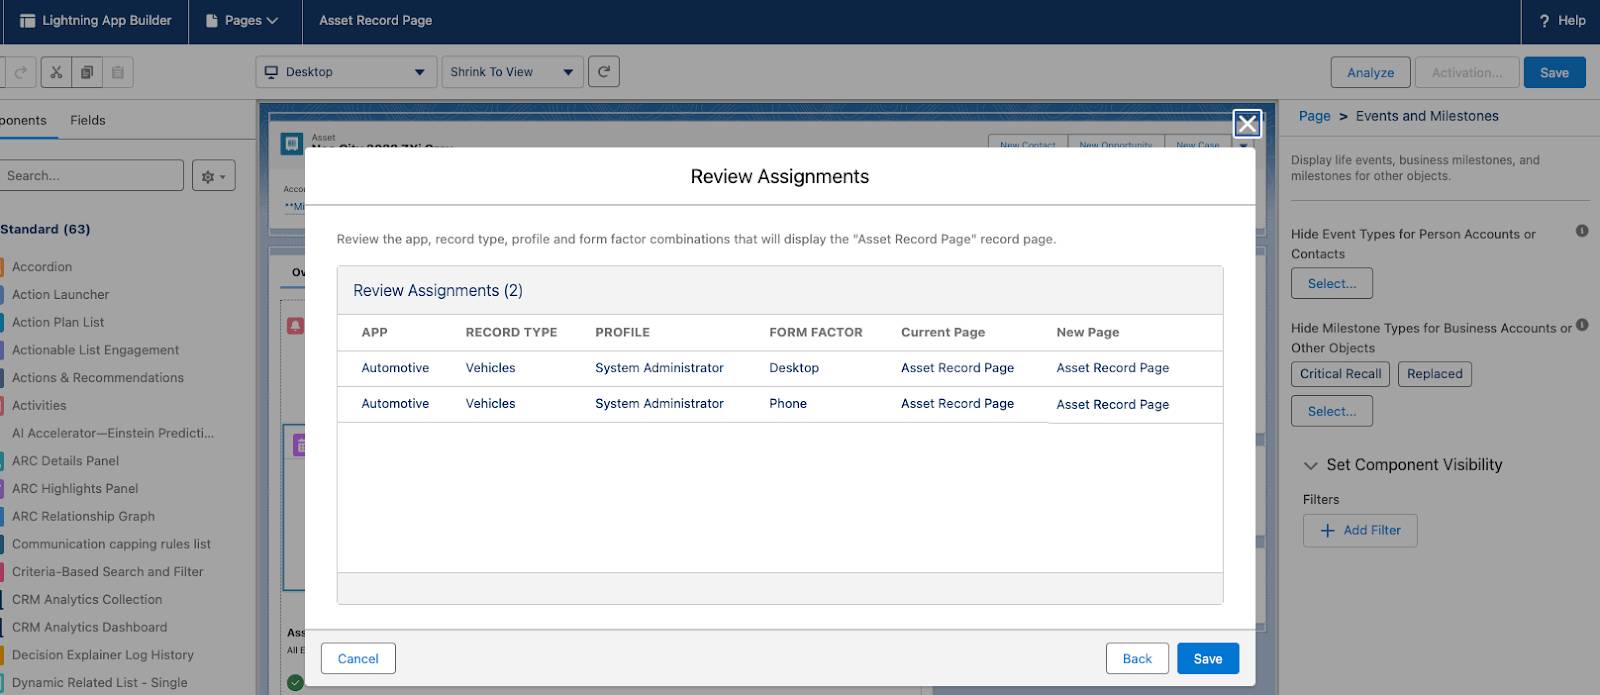
David can also hide specific asset milestones from an Asset record page depending on whether they apply to vehicles or not. For example, he creates a list of the following asset milestones, specifies their record types, and activates the page layout.
Asset Milestone Type |
Hide Milestone? |
Affected Record Type Page Layout |
|---|---|---|
10,000 miles completed |
Yes |
Asset layout for the Parts & Accessories record type |
Replaced |
Yes |
Asset layout for the Vehicle record type |
Critical Recall |
Yes |
Asset layout for the Vehicle record type |
Resold |
Yes |
Asset layout for the Parts & Accessories record type |
Pretty neat, isn’t it?
Add Lists to the Asset Console
David decides to create a new tab on the asset console, which would show the list of service entitlements and associated locations for an asset. He edits the Asset page in Lightning App Builder and adds a new tab to it with the following details.
- Tab Label: Custom
- Tab Name:
More
With the tab in place, David must now have it show service entitlements and associated locations for an asset.
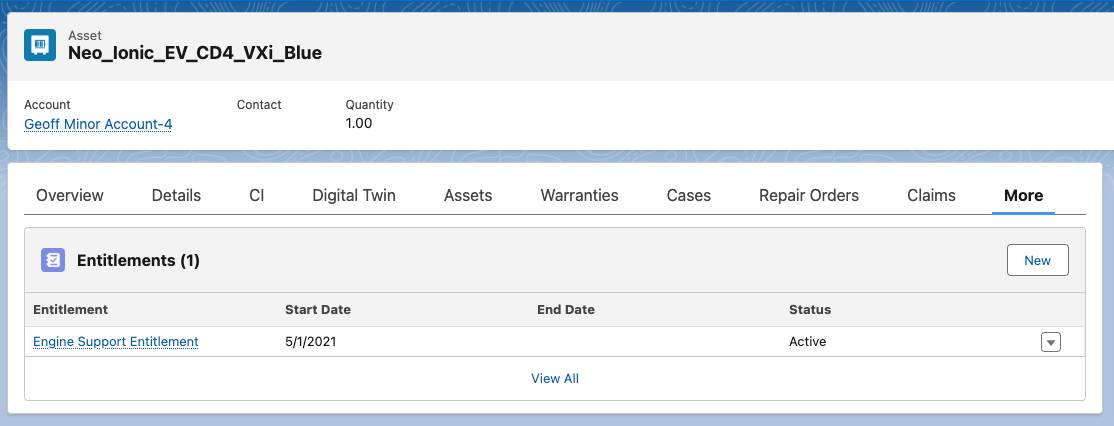
Service entitlements are mentioned in a customer’s contract and define the level of support that an OEM (original equipment manufacturer) agrees to provide for a specific asset. For example, Neo Motors includes 24-hours call support as a service entitlement for engine failures in vehicles. When service agents answer customer queries, they check the service entitlements list to see which services are covered as part of the contract.
Here’s how David shows a list of entitlements for an asset.
- Open an Asset record, and click Edit Object from Setup.
- Click Page Layouts and click Asset Page Layout.
- Drag the Entitlements related list to the page layout and click Save.
- Repeat step 3 for the Vehicle Asset Page Layout.
- Open an Asset record, and click Edit Page from Setup.
- Click the More tab.
- Drag the Related List - Single component to the tab.
- For Parent Record, select Use This Asset.
- For Related List, select Entitlements.
- Click Save.
- Click Activation.
- Click Done.
When an asset is linked to an account, inventory managers and operation managers regularly track the location history. For example, a vehicle can be transferred multiple times from one dealership to the other, and from one customer to another through sale and resale.
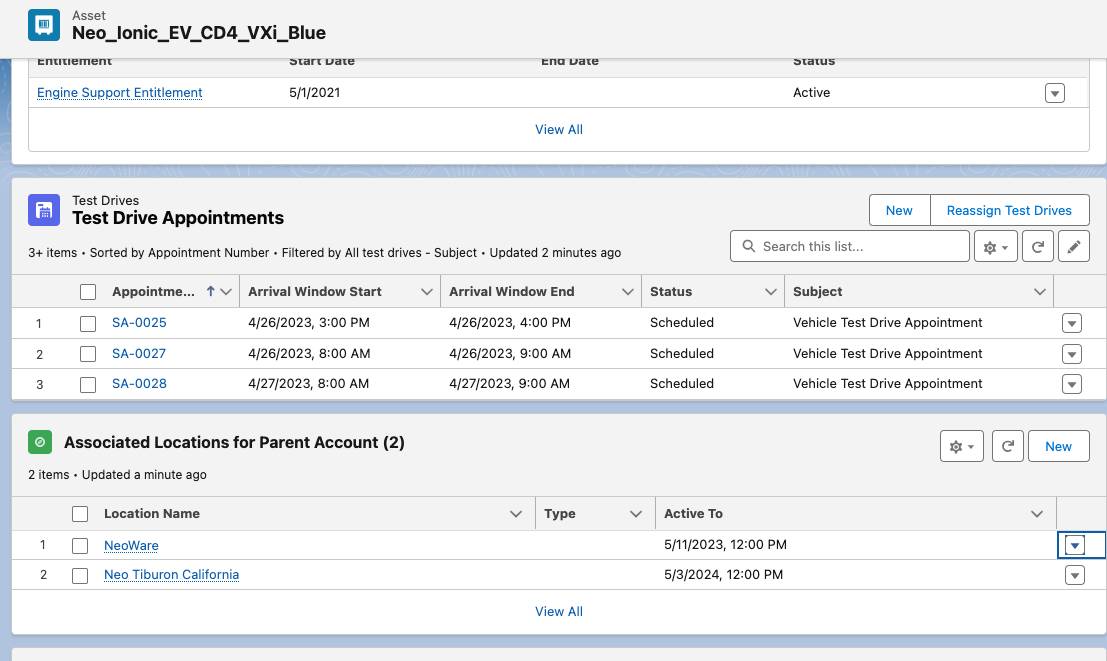
David adds the Associated Locations list to the Asset page layout to show all the accounts and locations that the asset is linked to.
- Open an Account record, and click Edit Object from Setup.
- Click Page Layouts and click Account Page Layout.
- Drag the Associated Locations related list to the page layout and click Save.
- Open an Asset record, and click Edit Page from Setup.
- Click the More tab.
- Drag the Related List- Single component to the tab.
- For Parent Record, select Parent Account.
- For Related List, select Associated Locations.
- For Related List Type, select Default.
- Select the following fields as columns for the list view:
- Location Name
- Active To
- Type
- Location Name
- Click Save.
- Click Activation, and select Assign as Org Default.
- Click Done.
Search for Test Drives
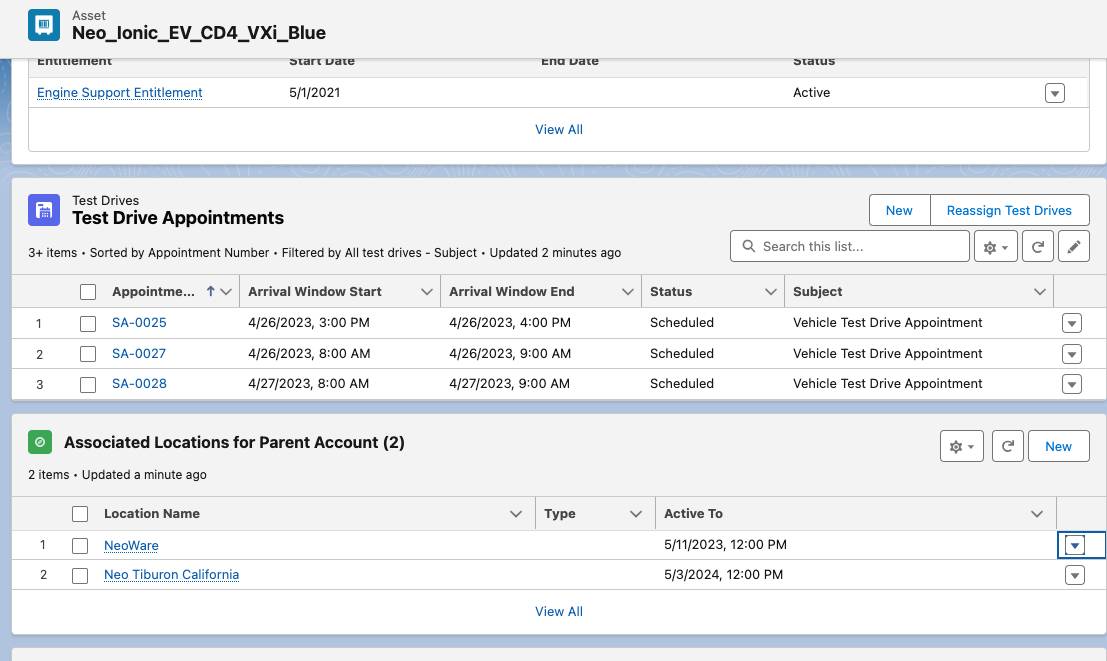
When a vehicle is at a dealer location, it can be used as a demo asset for test drive appointments. In Automotive Cloud, an asset is added as a service resource to a dealer’s service territory to indicate that it’s available for test drive appointments. Rosa wants to view the list of all test drive appointments where a specific asset has been used. But she only wants to see this list on Asset records with the Vehicle record type.
David performs the following steps.
- From the App Launcher, select Service Appointments.
- Click List View Controls and select New.
- Enter the name
Test Drive Appointments.
- In the Filters section, add the following data:
- Filter by owner: All service appointments
- Subject contains
Test Drive
- Filter by owner: All service appointments
- Click Save.
- Open an Asset record, and click Edit Page from Setup.
- Click the More tab.
- Drag the Related List - Single component to the tab.
- For Parent Record, select Use This Asset.
- For Related List, select Service Appointments.
- For Related List Type, select Test Drive Appointments.
- For Number of Records to Display, enter
3.
- Select Enable inline editing.
- Deselect Hide search bar.
- Click Save.
- Click Activation, and select App, Record Types, and Profiles.
- For Record Types, select Vehicle.
- Keep the selections for App and User Profiles as they are.
- Click Done.
Make Things Easier
There are a couple more customizations that David can do to make things easier for service agents.
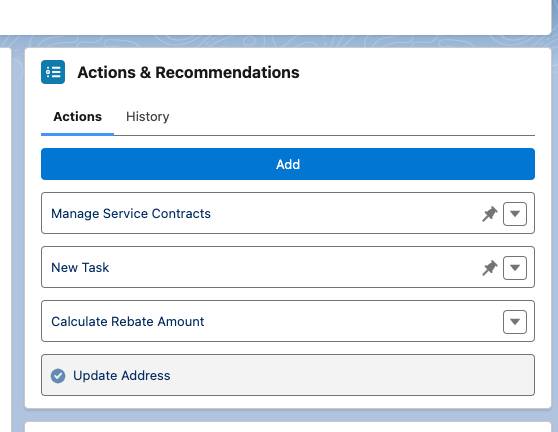
When service agents are on voice or video calls with partners or customers, agents use Asset record pages to refer to critical details. But often during such conversations, agents must quickly create a task for themselves or assign a follow-up task to other users. The Actions and Recommendations component on the asset console shows a list of frequently used actions that an admin adds via an action deployment. David must add a New Task quick action so that agents can capture task details without navigating away from the Asset page.
Sometimes dealers and partners enquire about their pending rebate claims. Agents often check the submitted claims offline and then call the dealer or partner again to inform them about the final payment amount. But this isn’t a great experience for dealers and partners because they expect the agents to provide proactive and ready answers during the interaction. David must add a screen flow-based action to the asset console so agents can calculate the final payment amount with a single click.
Here’s what David does.
- From Setup, search for and select Actions & Recommendations.
- Click New Deployment.
- Enter Label as
Asset Actions.
- For Guidance to Show, select Flows and quick actions.
- Click Next.
- Select Account and Asset as objects.
- Click Next.
- For the Default channel type, drag the following to the Auto-launch section:
-
Calculate Claim Amount-Flow (David had already created and activated a screen flow)
-
New Task-Quick Action
-
Calculate Claim Amount-Flow (David had already created and activated a screen flow)
- Click Next.
- David adds a few actions that users can find and launch on their own when they click Add on the component. He selects the following actions:
-
Road Assistance Support (A custom screen flow)
-
Manage Service Contracts
-
Update Address (An autolaunched flow)
-
New Event
-
Road Assistance Support (A custom screen flow)
- Click Save.
- Open an Asset record, and click Edit Page from Setup.
- Click the Actions & Recommendations component on the page layout.
- For Actions & Recommendations Deployment, select Asset Actions.
- Click Save.
- Click Activation.
- Click Done.
In the next unit, David works his magic on the vehicle console.