Get Early Access with the Sandbox Preview
Learning Objectives
After completing this unit, you’ll be able to:
- List the benefits of accessing a preview sandbox to evaluate and test new features.
- Explain the sandbox preview.
- Move a sandbox to a preview instance.
Preview and Test New Releases
Most Salesforce customers have access to at least one sandbox, a test environment, where they can build and test new features before releasing them into production. You can also use a sandbox to preview and test new features, in your own configuration, before they’re released.
Some features are enabled automatically. Those features are immediately visible to all Salesforce users when the release is in production. With a preview sandbox, you can evaluate new features ahead of time and determine if any communication will be helpful. Your users will definitely appreciate the heads up.
Also, since many new features require an admin to enable them or do a little bit of configuration before they can be used, you can use the sandbox preview to:
- Explore live features and identify the ones you want to enable.
- Learn how to enable features that you want to use.
- Practice enabling and configuring features before the release, so you’re prepared to roll them out to your users.
Before you can reap the benefits of a preview sandbox, take a few simple steps to make sure you have one lined up.
Don’t Miss the Boat!
The sandbox preview starts approximately 4-6 weeks before the production upgrade. You have plenty of time to enable, test, and explore new features. BUT...not ALL sandboxes get this early upgrade. Some, called “non-preview” sandboxes, don’t get the release until later, sometimes after the production release. This is because some customers need to delay the upgrade on one or more sandboxes due to requirements around specific projects.
As part of your release planning, make sure you have at least ONE preview sandbox, and make sure it stays on the new release throughout the sandbox preview period. This is really easy to do, but if you aren’t careful or you wait too long, you might miss the boat and inadvertently “opt out” of the sandbox preview.

How Does the Sandbox Preview Work?
Let’s demystify the sandbox preview. It’s all about where the sandbox lives. Imagine there are two types of houses, also known as “instances.” Sandboxes on a preview instance get the early upgrade. Sandboxes on a non-preview instance get the new release later, or in some cases, not until after production orgs are upgraded.

The location of a sandbox is determined by the timing of the most recent refresh. Most of the time, refreshing a sandbox sends the sandbox to a preview instance. However, sandboxes that are refreshed during the sandbox preview period (typically 4-6 weeks before the production release) move to a non-preview instance. If you have a preview sandbox and want to keep it, don’t refresh it after the sandbox preview cutoff date, or you could inadvertently lose the upgrade.
Note:
Refreshing a sandbox updates the sandbox’s metadata from its source org. Activating a replacement sandbox that was created using the Refresh link deletes the sandbox it is refreshing. The current configuration and data are erased, including application or data changes that you’ve made. Click the Activate link only if you don’t need the current contents of the sandbox.
It only takes a few simple steps to make sure you have access to a preview sandbox that gets an early upgrade.
- Identify your existing sandbox instances.
- Look up each sandbox instance in the Salesforce Sandbox Preview Guide to see if it’s a preview or non-preview instance.
- Follow the recommendations in the guide to make sure you have at least one sandbox on a preview instance.
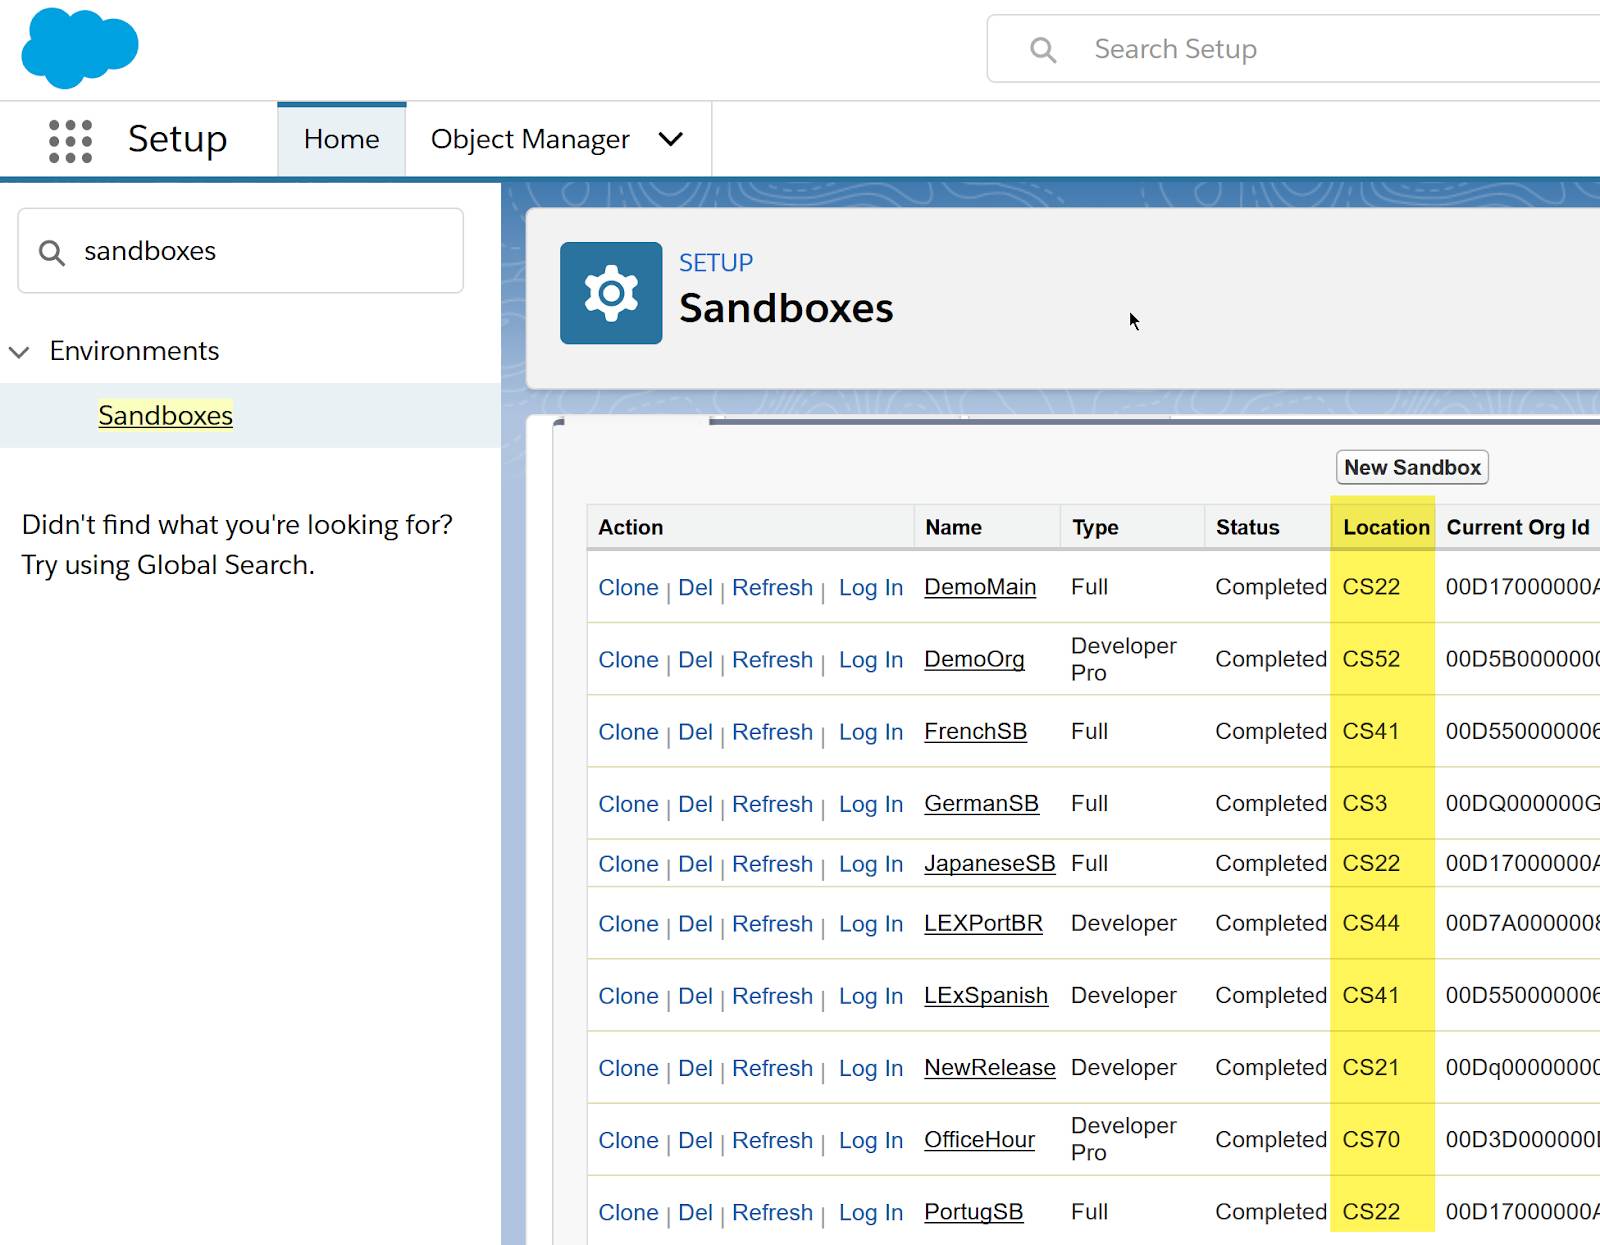
You can find your sandbox list in Setup. Make a note of the instance numbers listed in the Location column.

When you have the instance numbers, check each sandbox to see if it’s on a preview or non-preview instance. A good time to do this is right after the Sandbox Preview Instructions are posted, but you can do it anytime.
Although the Sandbox Preview Instructions provides basic information and timing, the best resource for sandbox preview planning is the Salesforce Sandbox Preview Guide. In the guide, look up your sandbox instances and get guidance on positioning them for the next release.
Watch this video to learn more about the sandbox preview.
Resources
- Documentation: Salesforce Sandbox Preview Guide
- Help: Refresh Your Sandbox
- Trailblazers Community: Release Readiness Trailblazers