Create Product Categories and Attributes
Learning Objectives
After completing this unit, you’ll be able to:
- Explore a product catalog.
- Create a category and subcategory.
- Add products to a category.
- Create attributes and attribute categories.
Review the Product Catalog
As you discovered, a catalog holds all the products and bundles that a company offers, typically organized into categories. Manoj has created a few catalogs for SmartBytes products and services, including hardware, POS (point of sale), service, software, and thermal management. Follow along with Manoj to explore the catalogs available in your Developer Edition org.
Before you follow along, though, you must connect the Developer Edition org you signed up for in unit 1 to Trailhead.
- Make sure you’re logged in to your Trailhead account.
- In the Challenge section at the bottom of this page, click the playground name and then click Connect Org.
- On the login screen, enter the username and password for the Developer Edition you just set up.
- On the Allow Access? screen, click Allow.
- On the Want to connect this org for hands-on challenges? screen, click Yes! Save it. You’re redirected back to the challenge page and ready to use your new Developer Edition to earn this badge.
Open your Developer Edition org and follow along to explore the catalogs.
- From the App Launcher, find and select Product Catalog Management.
- On the Product Catalog Management home page, click the Catalogs tile.
- Change the list view to All Catalogs. All the catalogs in your org are listed.

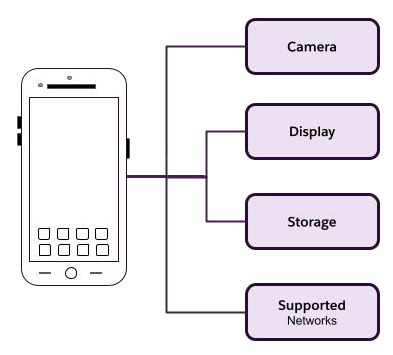
- Click Hardware Catalog. The Catalog record opens, with the Details tab displayed.
- Click the Categories tab.

- Notice the product categories: Laptops, Desktops, and Accessories.
This is how Manoj has organized the Hardware Catalog. Next, you create categories and subcategories in this catalog.
Create Category and Subcategory
Organizing products into meaningful categories and subcategories enhances the product-browsing experience.
The Hardware Catalog contains all of the hardware products that SmartBytes offers to customers. In addition to creating categories, Manoj further refines the structure by adding subcategories.

The laptop category has two subcategories: Productivity Laptops and Gaming Laptops. Notice the laptop bundles in the Productivity Laptops subcategory.
Follow along with Manoj to create a new Tablets category and a WiFi Tablets subcategory.
- On the Hardware Catalog record, Categories tab, click Create Category.
- In the New Category window, add these details:
- Name:
Tablets
- Description:
All tablet device products offered by SmartBytes
- Code:
CATE001
- Leave the Parent Category field blank. This is only used for subcategories.
- Name:
- Click Save. You've created the new Tablet category in the Hardware Catalog. Next, you add the subcategories.
- With the Tablets category record open, click the Categories tab.
- Click Create Subcategory.
- In the New Category window, enter these details:
- Name:
WiFi Tablets - Description:
All WiFi tablet devices - Retain the values in the Catalog and Parent Category fields, which are auto-populated.
- Code:
SCATE001a
- Name:
- Click Save.
Great job! You‘ve added a subcategory under Tablets to further organize the catalog.
Assign Products to Categories
Now, it's time to add the related products to these categories and subcategories.
- With the WiFi Tablets subcategory page open, click the Related tab.
- In the Products related list, click Assign Products.
- In the Select Products window, all available products are listed.
- In the Search Products field, enter
SmartBytes, and select SmartBytes Pad v1.
- Click Next, and Save. The SmartBytes Pad v1 product is added to the WiFi Tablets subcategory.
You’ve successfully created a product catalog, a category, and a subcategory, and then you assigned a product to the subcategory.
Next, follow Manoj to create attributes and attribute categories.
A Reflection of the Customer’s Personality
As the saying goes, “The customer is king,” and kings get what they want. This pretty much applies to all customers. Each wants best-fit products that satisfy their needs and ideally, reflect their personality.
Remember the last time you bought a mobile phone? From the myriad of choices, you chose the most suitable one, in your preferred color, and with the right storage capacity. Other factors probably came into play, including the carrier plan and price.
To cater for preferences like this, product designers aim to offer the most desirable customer preferences. It means capturing all the most important product characteristics during product creation.
Manage Dynamic Product Attributes
In Product Catalog Management, you use attributes to capture product characteristics. You can define a product attribute once and reuse it for multiple products.
Attribute Categories
An attribute category is a logical group for organizing a set of related attributes. For example, consider a tablet device sold by SmartBytes. The product has attributes for display size, display type, color, storage capacity, SIM type, and other characteristics.
To build a tablet product using Product Catalog Management, Manoj first creates the individual attributes. Then he creates categories for those attributes, including Display Specifications and Storage Specifications. Next, he assigns each attribute to a category.
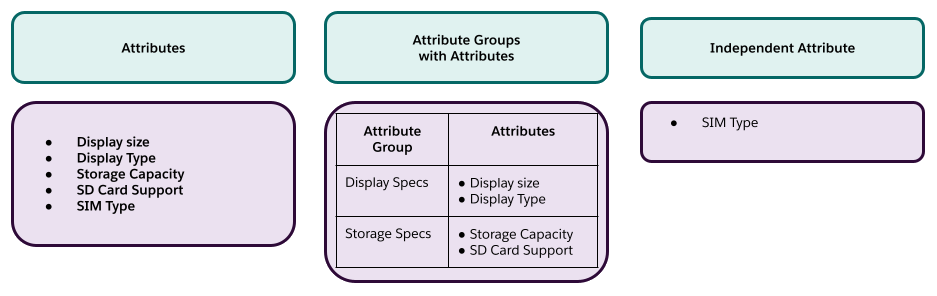
Now when Manoj creates product classifications, he can assign these attribute categories to them. While doing this, he can override the attributes, if required. For example, the attribute SIM type may not apply to WiFi tablets. Hence, these products don't need to inherit this attribute from the category.
As a product designer, Manoj needs to carefully create attributes for each product. Here is the typical flow for creating attributes for a product.

The attributes are grouped together into an attribute group and then assigned to product classifications.
Picklists
A picklist is a type of field that gives users a predefined list of values to choose from. It's essentially a dropdown menu with a set of specific options. The example image shows a Desktop product, with the memory attribute values presented in picklist format.
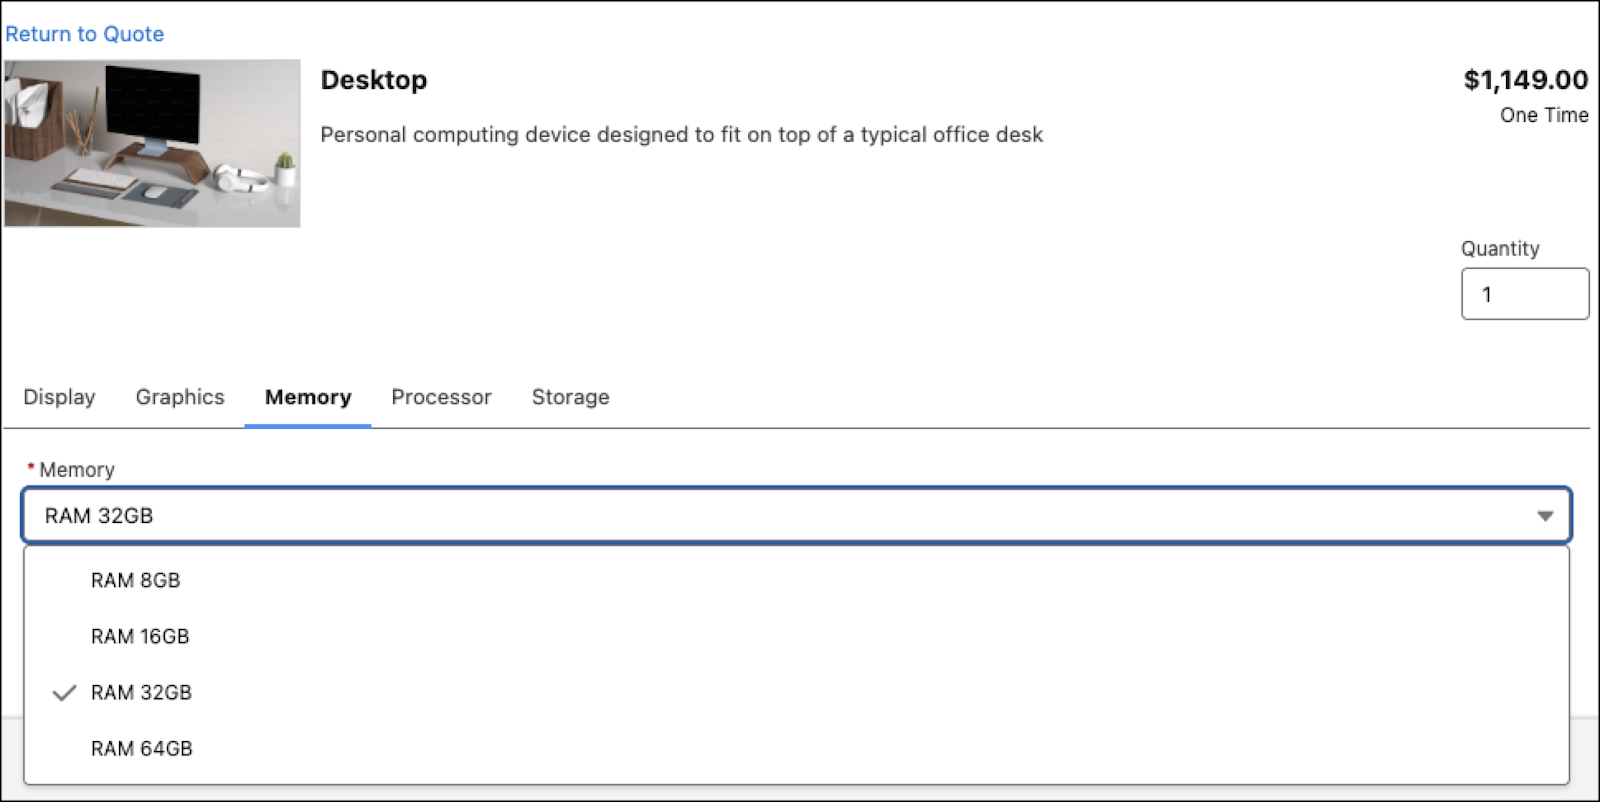
As the customer selects and personalizes the product, they choose the picklist value that’s closest to what they want. In this example, RAM ranges from 8GB to 64GB RAM, and a value of 32GB is selected.
In Product Catalog Management, you create picklists and then connect them to associated attributes to control the attribute’s values. You can reuse a single picklist across multiple attributes, and reuse those attributes across different object types and products.
Create Picklists
Follow along in your Developer Edition org as Manoj creates a picklist and picklist values.
- From the App Launcher, find and select Product Catalog Management.
- On the Product Catalog Management home page, click the Picklists tile, and change the list view to All Attribute Picklists.
- Click New.
- In the New Attribute Picklist window, add these details:
- Name:
Color
- Code:
PICK001
- Status: Active
- Data Type: Text
- Description:
All color values
- Click Save. The new Attribute Picklist opens.
- Click the Related tab.
- In the Attribute Picklist Values section, click New.
- In the New Attribute Picklist Value window, add these details:
- Name:
White - Code:
PICKVAL001 - Status: Active
- Display Value:
White - Value:
White - Sequence:
1 - Default: check the box
- Name:
- Click Save & New.
- Repeat the previous steps to create the following picklist values, and leave the Default option unselected.
Name
Code
Status
Display Value
Value
Sequence
BlackPICKVAL002ActiveBlackBlack2GreyPICKVAL003ActiveGreyGrey3 - Save your changes.
- Click the Color | Attribute Picklist tab.
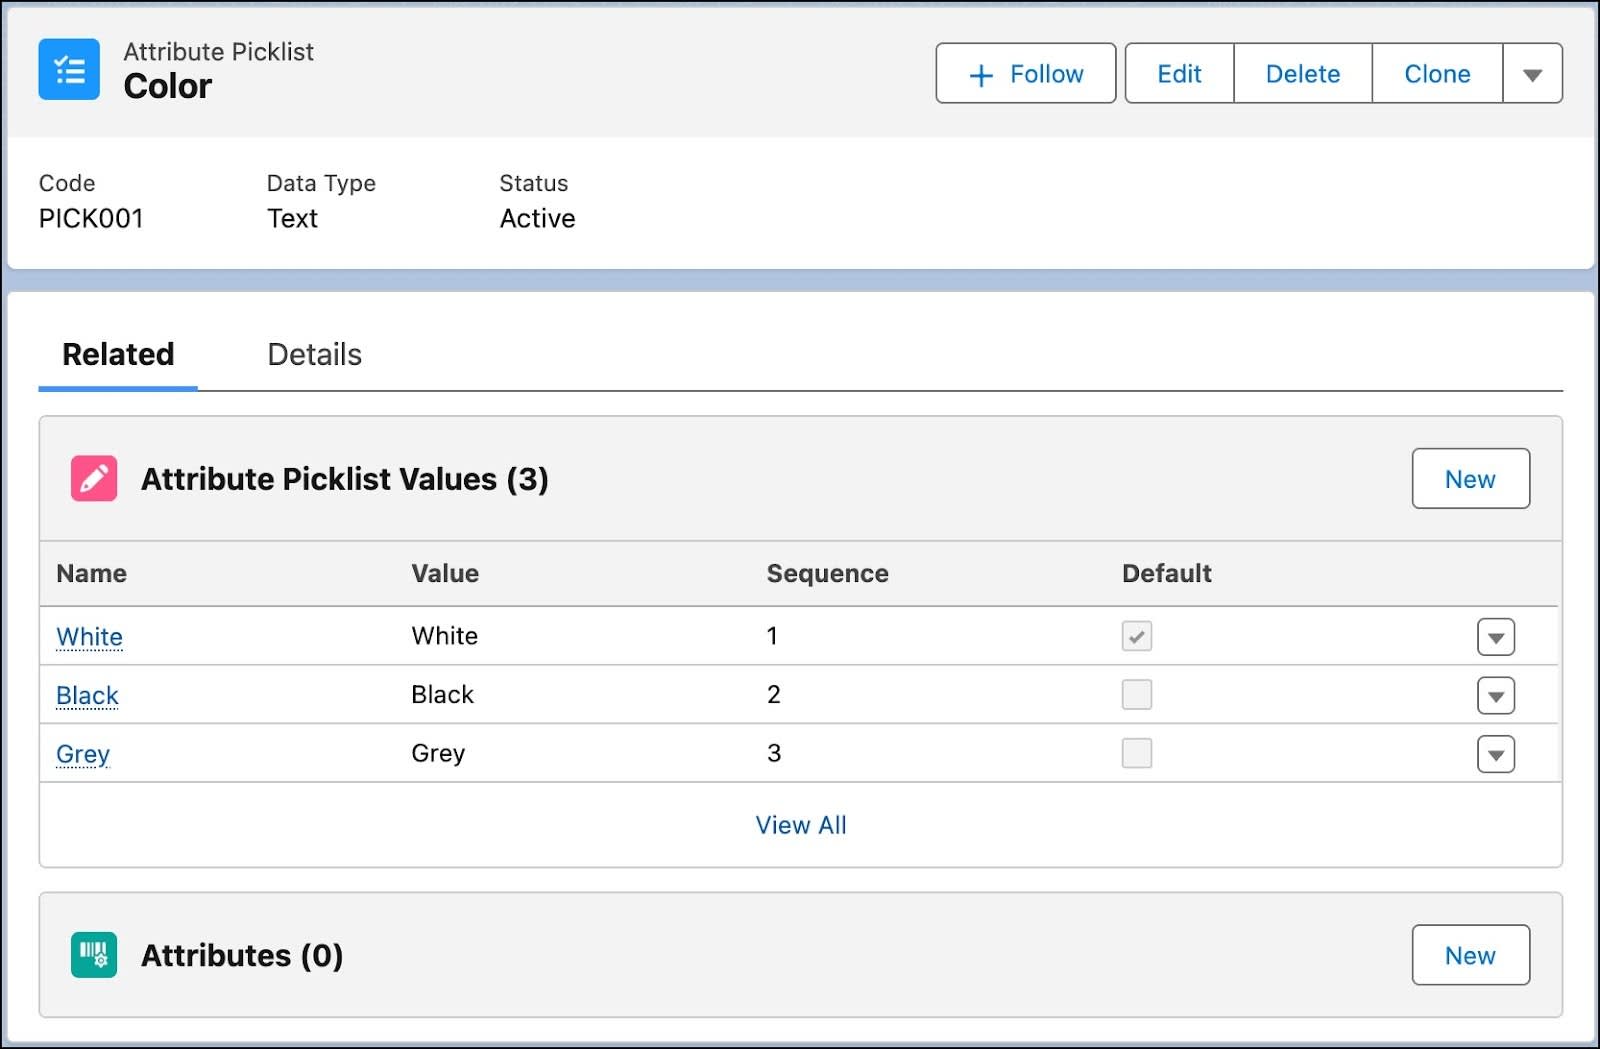
The Attribute Picklist Values section lists the three picklist values you created. Notice that the attribute value White is selected as the default value.
Create Attributes and an Attribute Category
Manoj now creates attributes and attribute categories. Take the steps in your own org.
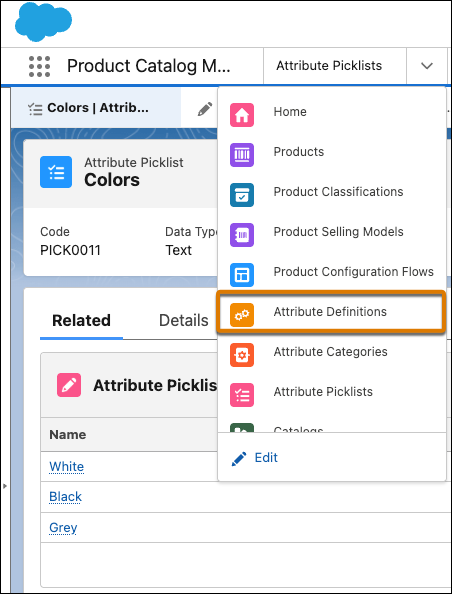
- From the Product Catalog Management Navigation Items List, select Attribute Definitions.
- Click New.
- In the New Attribute Definition window, add these details:
- Name:
TabletColor
- Label:
Tablet Color
- API Name:
tablet_color
- Data Type: Picklist
- Picklist: Search for and select Color
- Required: check the box
- Active: check the box
- Notice that Default Value is automatically set to White.

- Click Save.
- From the Product Catalog Management Navigation Items List, select Attribute Categories.
- Click New.
- In the New Attribute Category window, add these details:
- Name:
Tablet Display Specs - Code:
ATTRCAT001 - Description:
All tablet display specifications
- Name:
- Click Save. Go to the Related tab and in the Attributes section, click Assign.
- From the Assign Attributes to Attribute Category window, find and select the attributes TabletColor and Tablet Display Size.
- Click Assign.
You can view the selected attributes in the Attributes section of the Related tab.
Well done. You’ve defined attribute picklists, attributes, and attribute categories for the products.
With his categories, subcategories, attributes, and attribute categories in place, Manoj has prepared some of the building blocks of SmartByte products.
In the next unit, explore how to create product classifications.