Prepare a MuleSoft RPA Process for Development
Learning Objectives
After completing this unit, you’ll be able to:
- Manage the backlog of RPA processes.
- Assemble a team to develop, test, deploy, and maintain an approved RPA process project.
Manage RPA Process Backlogs
After your candidate RPA process is approved for creation, it passes to the individual or team specified during the approval process—either a Center of Excellence team or a project manager. Your RPA process then appears in the backlog of the specified individual or team, waiting for them to initiate the automation process.
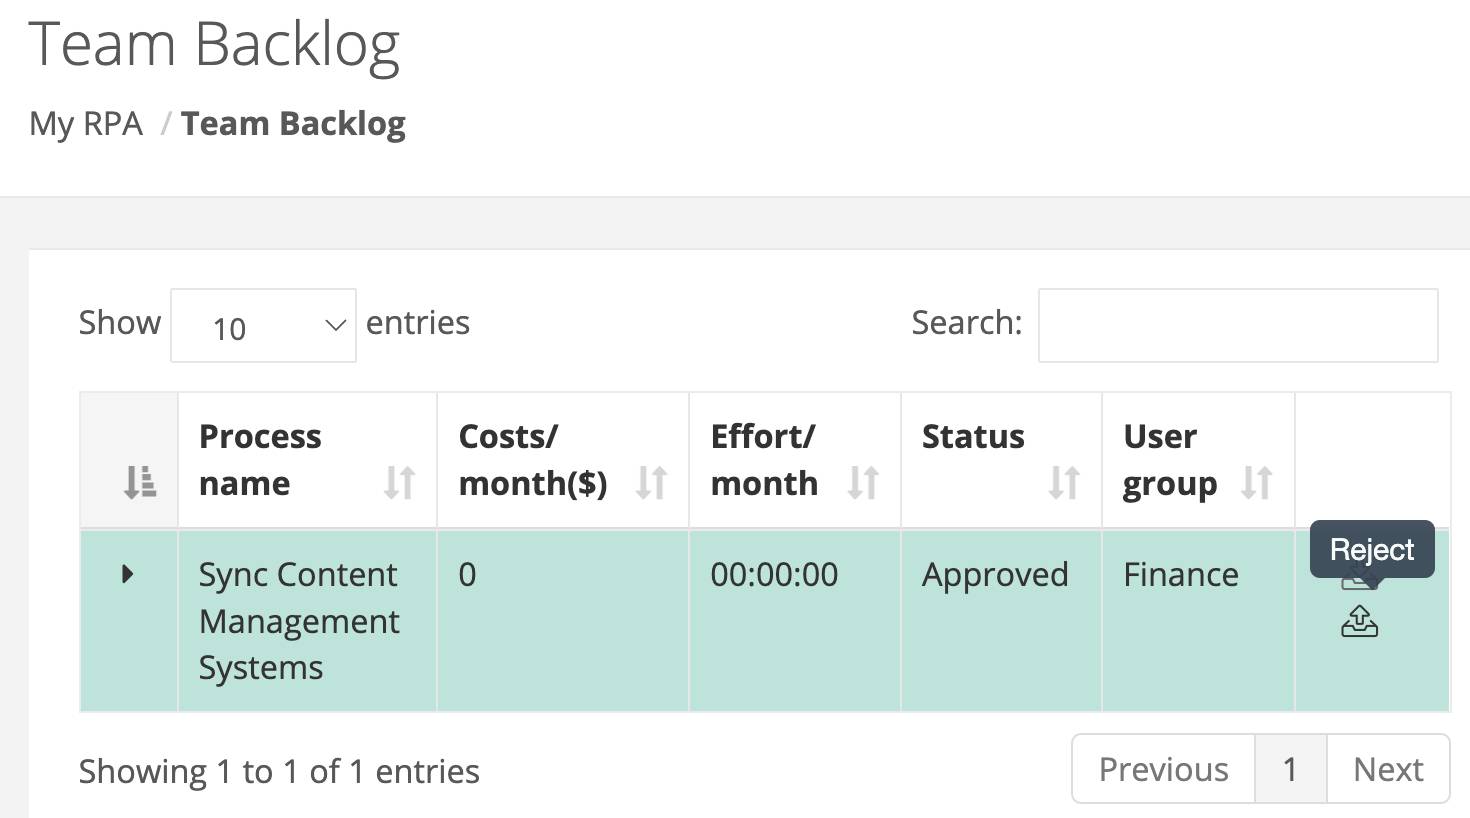
Center of Excellence Process Backlog
Candidate RPA processes sent to a Center of Excellence backlog appear in the Team Backlog view of the My RPA module for all members of the specified team. Your organization can have multiple Center of Excellence teams. For example, you may have a Services Center of Excellence for your services team and a Finance Center of Excellence for your finances team.
If you are a member of the Center of Excellence team, you have the option to claim the project to begin the automation process. The project then moves to the My Backlog section of your My RPA module and it behaves as if you are the project manager for the project.

Project Manager’s Process Backlog
Candidate RPA processes sent to the project manager are sent directly to the individual’s backlog, known as My Backlog. Next, the project manager has the option to start automating a candidate RPA process or reject it.
Start Automating a Candidate RPA Process
You begin the automation process for a candidate RPA process in your My Backlog view by clicking the following icon.![]()
Reject Candidate RPA Process
You can reject a candidate RPA process by clicking the following icon.![]()
After the candidate RPA process is rejected, it reverts to the Evaluation phase and appears in the Process Evaluation module's process list with a status of rejected. The candidate process can then be reevaluated and, if deemed appropriate, approved again for automation to either the same process manager or perhaps a different one.
Create an RPA Process in MuleSoft RPA Manager
After you click the start automation icon, the Create Process view loads. This page allows you to configure the project so that it’s ready to be developed. The project configuration is separated into two different tabs: Process Costs and Settings.
Process Costs
In the Process Costs section, you specify all the costs required to continue performing the business process manually and those associated with transitioning to an RPA solution. These numbers are similar to those listed in the Evaluation phase.
However, in addition to the costs required to perform the task manually, there is the option to list the costs required to automate the process. These include the initial investment, the depreciation period for that cost, and the monthly operating costs. These are all used to generate the initial financial analysis for the project. We cover this topic in more detail in the next unit. Although providing these costs helps determine the project’s ROI, it is not a required step.
Settings
The Settings section of the Create Process view, outlined in the following table, is where you fill out the information directly related to the development of the application.
| Setting |
Description |
|---|---|
|
Process name |
The process name is required and must be unique. The name should clearly relate to the business process that the RPA process is intended to automate. When following the standard RPA development lifecycle, the process name for your RPA process is set automatically based on the name set during the Evaluation phase. While you can change the name, the original name remains listed in the table in your My Backlog view of the My RPA module. |
|
Process owner |
The process owner specifies the individual who proposed, evaluated, and approved the RPA process for automation. By default, if you’re a process owner, you have view permissions but not edit permissions for the project. The process owner can be switched to a new user at any time within the Process Management view of the Process Automation module. |
|
Project manager |
The project manager oversees the development of the RPA process and has full view and edit permissions throughout the development process. The project manager can be changed at any time from within the Process Management view of the Process Automation module. |
|
Required applications for process |
Before implementing your RPA process, you should list in this section all known dependent applications required by the RPA bots. If there is a required application that isn’t available at runtime, the process fails to execute successfully. You can also add an application using the Process Applications view of the Process Automation module. You can then specify which MuleSoft RPA Bot instances have access to this application by modifying the appropriate bots using the RPA Bots view of the RPA Bot Management module. |
|
Process team |
To add members to your project team, you search for them using the process team’s add a member dropdown menu. After adding to the team, you can assign each user to the phase or phases of development that they are responsible for. Note: The Production phase encapsulates both the Deploy and the Manage and Monitor phases of the RPA development lifecycle. Only members who are assigned to a given phase have edit permissions during that phase of development and by default have permission to publish the project to the next phase. However, all team members have read permission to the RPA process at all times. Additionally, you can choose to use the Advanced Permissions option to restrict which users are allowed to publish an RPA process to the next phase of development. |
|
Category |
Your RPA processes in MuleSoft RPA Manager should be organized using categories that are in the Process Management view of Process Automation. When creating a project, you must specify an existing category. You can edit this setting at a later time if necessary. |
|
Process board |
Process boards enable teams to easily assign and track tasks to be completed by designated team members. Team members can then view the tasks assigned to them from all RPA processes that they contribute to by using the My Process Board view of the My RPA module. Tip: If you enable the Create automatic Phase Release Tasks option, a task called Ready for Release to <Name of the next phase> is automatically generated for each phase transition. Until this task is marked as complete in the process board, the publish button for pushing the process to the next phase of development remains locked. |
In this unit, you learned how to claim RPA processes. You also learned how to start or reject an automation process. You also explored the key information required by MuleSoft RPA Manager to fully configure an RPA process project for development. In the next unit, you examine the financial analysis autogenerated by MuleSoft RPA Manager based on the values provided by the project manager when creating the project.