Get Started with Native iOS Development
Learning Objectives
After completing this unit, you'll be able to:
- Describe two primary features of Mobile SDK for iOS.
- Install Mobile SDK for iOS.
- Create a native iOS project and specify application options.
- Run the Xcode project template app.
Native iOS Development
Salesforce Mobile SDK delivers technology and tools for creating native iOS apps that access Salesforce. Mobile SDK simplifies your life as an iOS developer in several ways:
- It automates the OAuth2 login process, so it’s a snap to integrate login and optional passcodes in your app.
- You access Salesforce REST APIs through wrapper methods that make SOQL queries, SOSL searches, and CRUD operations a breeze.
- You can choose to write native iOS apps in either Objective-C or Swift. Swift is the recommended path.
Let’s get going! We assume you’ve already set up your development environment. If you haven’t, make a quick detour to the Set Up Your Mobile SDK Developer Tools project to get everything you need.
Once you’re ready to move forward, you start by creating a simple native iOS Swift app. Later, you modify your app's basic REST request and add functionality to delete records. Finally, you learn how to add Mobile SDK to an existing iOS project with CocoaPods.
Follow Along with Trail Together
Want to follow along with an expert as you work through this step? Take a look at this video, part of the Trail Together series.
Creating a Connected App
To connect to the Salesforce service, every mobile app requires a Salesforce connected app. A connected app authorizes your app to communicate with Salesforce and securely access Salesforce APIs.
After you create and save your connected app, notice its details.
- Copy the Callback URL and Consumer Key values. You use these values to set up authentication in your app.
- Mobile SDK apps do not use the consumer secret, so you can ignore this value.
Creating an iOS Project with Forceios
Creating an iOS project with forceios is simple. In a Terminal window, type:
forceios create
The forceios utility prompts you to enter configuration values for your new project. Use these values:
Configuration setting |
Value |
|---|---|
Application type |
native_swift (or press RETURN) |
Application name |
MyTrailNativeApp |
Package name |
com.mytrail.ios |
Organization name |
MyApps, Inc. |
Output directory |
TrailiOSApps |
After a sequence of log messages, a congratulatory message appears. Pat yourself on the back, too. Your new native iOS app is now ready to run.
Running Your New iOS App
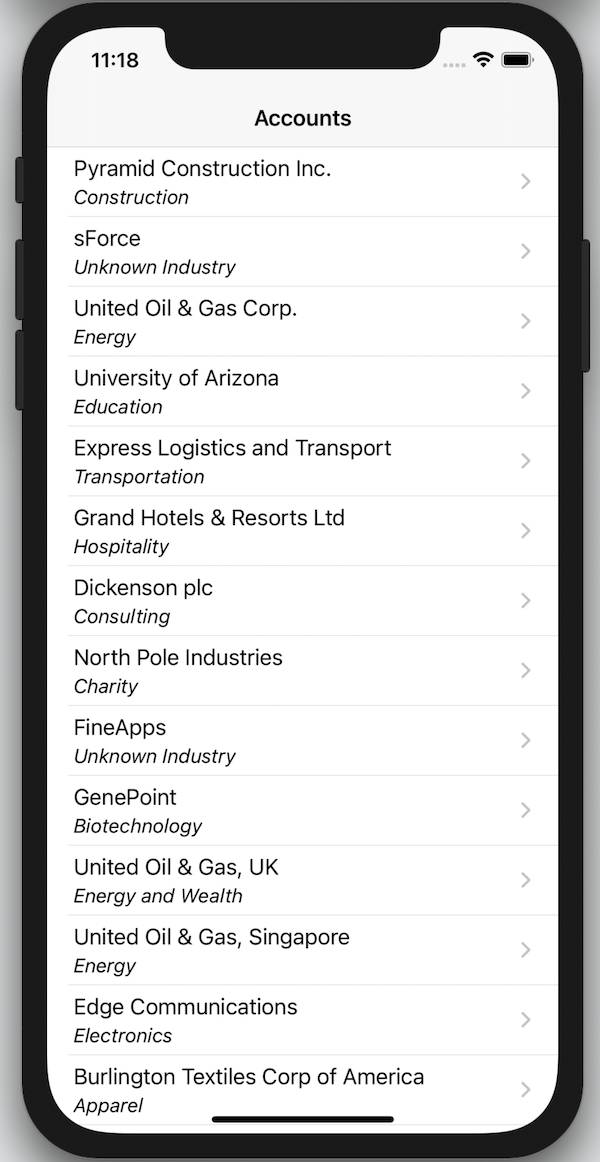
The project created by forceios executes a simple SOQL query and displays a table of accounts. Each account lets you drill down into its contacts and view their details. No life-changing innovation there, but at least it lets you know that the plumbing is in place and ready to do your bidding. Let’s see it in action!
Before posting any Mobile SDK app publicly, remember to replace the generic settings with values from your own connected app. So that you don’t forget, let’s do that now.
- In Xcode, select File | Open.
- Navigate to the TrailiOSApps folder and select the MyTrailNativeApp.xcworkspace file. Be sure to open the workspace file rather than the project file.
- Click Open.
- In the Xcode Project Navigator (⌘1), select MyTrailNativeApp | MyTrailNativeApp | Supporting Files | bootconfig.plist.
- In the Root node:
- Set
remoteAccessConsumerKeyto the consumer key from your connected app.
- Set
oauthRedirectURIto the callback URL from your connected app.
- Select Product | Run (⌘1).
- Log in with your DE username and password.
- If you've configured two-factor authentication in your org, fulfill the 2FA request.
- When prompted, click Allow to let the app access your data in Salesforce. You should see a table listing the names of accounts defined in your DE org.

Resources
- Creating an iOS Swift Project Manually
- iOS Native Quick Start
- https://github.com/forcedotcom/SalesforceMobileSDK-iOS
- Start Developing iOS Apps (Swift)
