Configure K-12 Architecture Kit
Learning Objectives
After completing this unit, you’ll be able to:
- Configure K-12 Architecture Kit.
- Employ best practices for K-12 Architecture Kit maintenance.
Who’s Ready for Configuration?
You are! It’s time to configure K-12 Architecture Kit for your org. That means it’s time to set up K-12 Architecture Kit to meet your institution’s specific needs.
First, consider these important notes about the configuration process.
User interface: K-12 Architecture Kit works best with the Lightning Experience user interface. As such, the instructions below reflect configuration in Lightning Experience. For more on how to switch to Lightning Experience if you are not already using it in your org, see the link to Lightning Experience documentation in the Resources section at the end of this unit.
First steps: To configure K-12 Architecture Kit, you need to do a few things that we walk you through in the next section.
- Make K-12 Architecture Kit record types available to profiles
- Assign page layouts that vary by record type
- Specify the Household Account model
Let’s Get Started
Begin by accessing profile settings.
Make K-12 Architecture Kit Record Types Available to Profiles
- Click the gear icon (
 ), then click Setup.
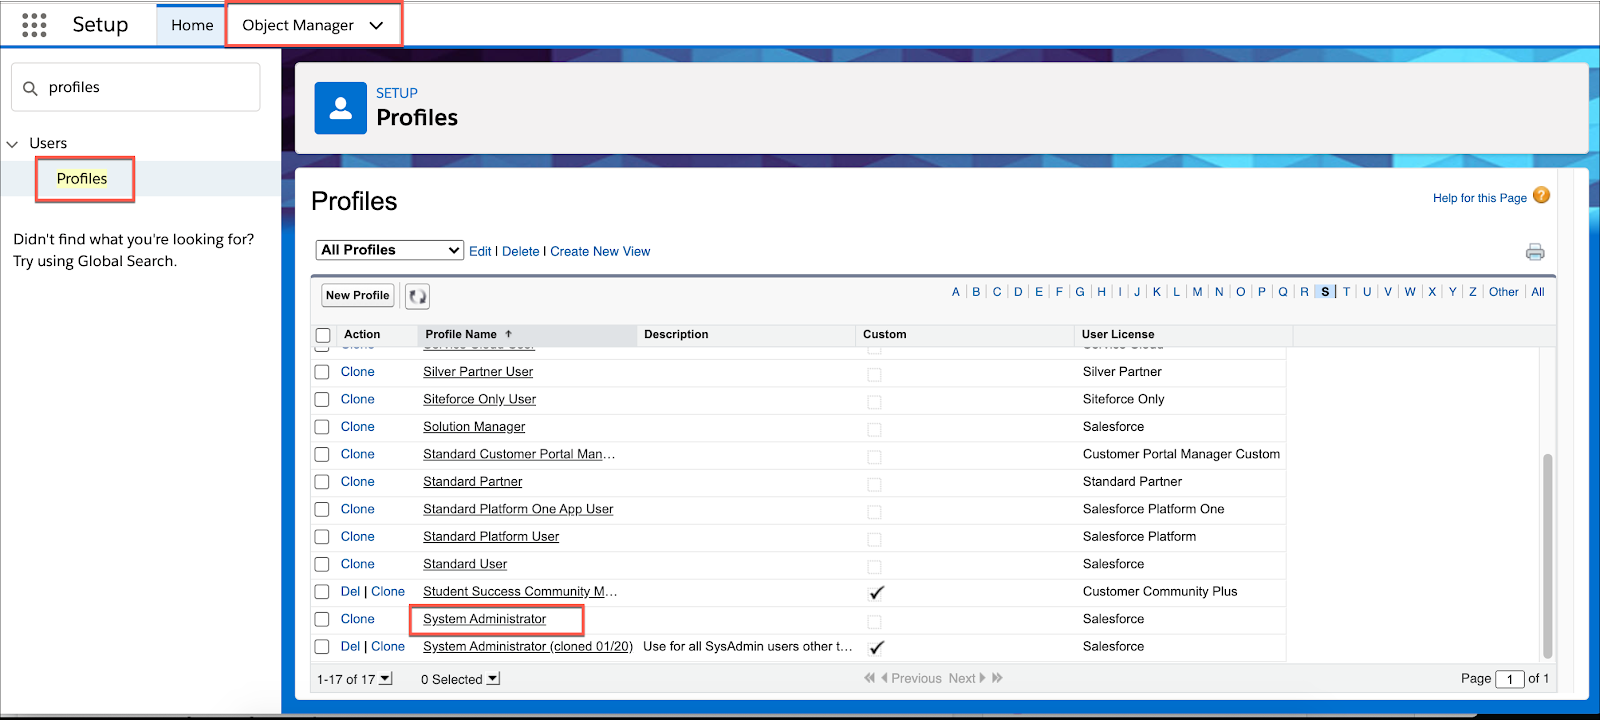
- Enter profiles in the Quick Find box on the top left-hand side of your screen. Then select Profile.
- Select the System Administrator profile.

Next, configure record types in K-12 Architecture Kit for the System Administrator profile.
- On the System Administrator Profiles page, scroll down to the Record Type Settings section and click the Edit link next to Accounts.
- Select Available Record Types and click the Add button to move them to Selected Record Types.
- Select Administrative from the Default picklist, and click Save.
Repeat these steps for any Record Type Settings that you can edit and have not yet been defined. For example, use these settings for these specified objects.
-
Case
- Selected Record Types: Incident
- Default Record Type: Incident
-
Contact
- Selected Record Types: Faculty/Staff, Guardian, and Student
- Default Record Type: Student
-
Attribute
- Selected Record Types: Credential and Student Characteristic
- Default Record Type: Student Characteristic
-
Course Connection
- Selected Record Types: Teacher and Student
- Default Record Type: Student
Assign Page Layouts
We are moving along! Next, follow these steps to modify page layout assignments for the System Administrator profile, for objects with assignments that vary by record type and for custom objects.
- On the System Administrator Profile page, under the Page Layouts section, click View Assignment next to Account.
- Click Edit Assignment.
- From the Profiles column, select the System Administrator profile; then from the Page Layout to Use picklist, select K12 Kit Organization Layout, and click Next. You'll see that the layout has been applied for all record types.
- Return to the previous page and select the Academic Department Account Record Type column from the System Administrator row, and from the Page Layout to Use picklist, select K12 Kit Academic Department Layout. Do the same for these Account types, which all have K-12-specific layouts.
Academic Program Account: K12 Kit Academic Program Layout
Educational Institution Account: K12 Kit Educational Institution Layout
Household Account: K12 Kit Household Layout
Sports Organization Account: K12 Kit Sports Organization Layout
- Click Save.
Repeat these steps to modify page layout assignments, as needed, for any object that indicates a page layout "Varies by Record Type" when viewing a profile's settings in Setup.
Case
- Master: Case Layout
- Incident: K12 Kit Incident Layout
Contact
- Master: HEDA Contact Layout
- Faculty/Staff: K12 Kit Faculty Staff Layout
- Guardian: K12 Kit Guardian Layout
- Student: K12 Kit Student Layout
Attribute
- Master and Credential: K12 Kit Credential Layout
- Student Characteristic: K12 Kit Student Characteristic Layout
Course
-
K12 Kit Course Layout for all available record types
- Finally, assign the K12 Kit layouts to objects under Custom Object Layouts. You don't need to assign the K12 Kit layouts to objects that your organization won't use, but changing them now prepares you for the future. That way you’re ready if you decide to start using objects that aren't currently planned for.
It’s worthwhile to note that K-12 Architecture Kit also delivers a range of compact layouts unique to the K-12 context. Take the time to explore these and put them to use in your setup. We show you how to do this in Unit 4 of this module.
Specify the Household Account Model
We’re almost there! One final configuration task—when you install K-12 Architecture Kit using the installer, the Administrative account model is enabled by default. We recommend that you change this setting to make the Household Account the default account model.
Why the Household Account model? In the K-12 context, communication most frequently happens between the school and a student’s legal guardian. The Household Account model helps users to better see a student’s circle of support, including those key related Contacts who will receive communication from the school or district on behalf of their student. Follow these steps to make the Household Account model the default account setting in your configuration.
- From the App Launcher (
 ), find and select EDA Settings.
- On the System tab, click Edit.
- From Default Account Model, choose Household Account.
- Click Save.
After making this change, any time you create a new, independent Contact (that is, a Contact that is not part of another Account), K-12 Architecture Kit automatically creates a Household Account for you, based on the Contact's last name. For example, if you create a new Contact record for a student named Bobby Smith, the Smith Household Account is created for you.
And that’s how to configure K-12 Architecture Kit. Nice work!
Resources
- Salesforce Help: Configure K-12 Architecture Kit
- Salesforce Help: Develop your Own Approach to Modeling Your School
