Explore Picklists
Learning Objectives
After completing this unit, you’ll be able to:
- Describe Industries picklists and their purpose.
- Create picklists and picklist items in Product Designer.
It’s OK to Be Picky
Life is full of choices. Our day-to-day decisions may come in all different sizes, but each one gives us the ability to shape our future. That’s why we all appreciate the opportunity to make choices about the things we buy.
Devi Jacob is the product designer at Infiwave, an internet and mobile service provider based in the Southwest United States. He knows order personalization gives customers a sense of ownership. The ability to customize increases their connection to Infiwave, and satisfaction with the company’s products and services.

Whether it’s selecting the color of a car or deciding between mobile phone plans, the power of choice ensures that customers get exactly what they’re looking for.
For this reason, Shared Catalog employs picklists. Picklists allow customers to easily customize purchases by tweaking the attribute values of a catalog offering through a list of options in the Industries Configure, Price, Quote (CPQ) Cart.
In the following example, a Color picklist contains a dropdown list of color options for a smartphone in the Cart. This picklist is required, meaning that the customer can’t submit the order for the phone without choosing a color value, but picklists can also be optional.

On the back end, you create picklists and then connect them to associated attributes to control the attribute’s values. You can reuse a single picklist across multiple attributes, and reuse those attributes across different object types and products. You learn more about attributes later in this module.
Here’s a Smartphone object type that contains a Device Storage attribute and its connected picklist.

In this diagram, the Device Storage picklist contains data capacities such as 32GB and 64GB as possible values.
Examples of Picklists
Use these flashcards to imagine how picklists are used in typical product configurations across different industries.
Read the product on each card, then click on the card to reveal the corresponding picklist label and picklist values. Click the right arrow to move to the next card, and the left arrow to return to the previous card.
Picklist Creation Overview
Infiwave just launched its latest smartwatch, Infiwatch. Before it’s available for customers to order, Devi must configure its foundational components. He wants to allow his customers to choose the band type for the smartwatch, so he explores how to create a picklist for it. He remembers that he must configure the picklist before he creates its associated product attribute.
To create a picklist in Shared Catalog, Devi follows these two simple steps.
- Configure the picklist
- Configure the picklist values
We delve into the details of each step.
Configure the Picklist
- From the App Launcher
 , find and select Vlocity Product Designer.
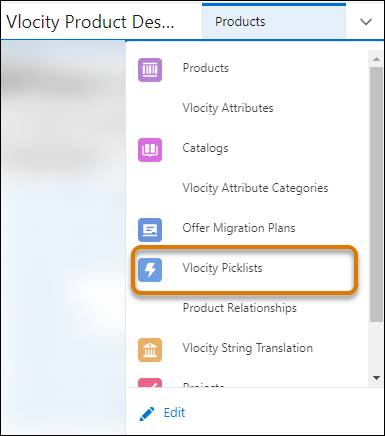
- In Vlocity Product Designer, click the navigation menu and select Vlocity Picklists.
3. In the Vlocity Picklists workspace, you can view the list of existing picklists. Click New to create a picklist.

4. When creating picklists, you enter basic information, including its name, code, and effective dates. These values are only visible during design-time, and not at runtime.


This table explains the properties that appear on the configuration screen.
Property |
Description |
|---|---|
Picklist Name |
Provide a unique and descriptive name for the picklist. Customers don’t see this name in the Cart. |
Code |
Enter a short, unique code to further identify the picklist. We recommend using a PKL_ prefix followed by an alphanumeric value. |
Version Label |
If you have an Enterprise Product Catalog (EPC) license and have enabled versioning, enter a version label, such as V1. You can then increment this number for each version you create to manage changes to the picklist. |
Data Type |
Enter the picklist data type. Picklist values can be Text, Number, Boolean (true or false), Date, or Datetime. |
Description |
Provide an optional explanation of the picklist’s purpose or its association with a catalog offering. |
Lifecycle Status |
With an EPC license, use this property to track the lifecycle of the picklist. By default, the lifecycle status of a new version is set to Draft, which allows you to make changes behind the scenes before making them visible to customers. |
Active |
Select this checkbox to make the picklist available across Shared Catalog. |
Effectivity Dates |
Effectivity dates specify the time range that a picklist is usable in. To make the picklist effective immediately, select today’s date in the Effective From field. To make the picklist active indefinitely, leave the Effective Until field blank. |
Configure the Picklist Values
After you set the properties of the picklist, create its selectable values.
- In the Picklist Values section, click New Picklist Value.

2. Enter information in the General Properties and Effectivity sections. Here’s a detailed explanation about each of these properties.
Property |
Description |
|---|---|
Value |
Enter a unique value for the picklist. The picklist data type controls the type of data you can enter. For instance, if you specify a Text data type on the picklist, you have a text entry field on the picklist item. |
Label |
Enter a descriptive label for the picklist. This label is visible to the user at runtime in the Cart. |
Code |
Enter a short code that displays only at design-time. We recommend using a PLI_ prefix followed by an alphanumeric value to quickly identify picklist item entities in the catalog. |
Abbreviation |
Enter an optional label abbreviation to identify the picklist. |
Effectivity Dates |
Enter effectivity dates for the picklist. Effectivity dates specify the date range that a picklist item is usable. |
Active |
Select the Active checkbox to make the picklist available for use across Shared Catalog. |
3. Create a picklist value for each band type of the smartwatch: chrome, leather, sports, and utility. When you’re done, they appear in a stacked list in the PICKLIST VALUES section.

You can click and drag these items to rearrange their order of appearance in the Cart.
Devi loves the idea of letting his customers choose different aspects of the Infiwatch. He begins building other picklists for the smartwatch, such as its band color and connectivity options.
You’ve just discovered the power of the picklist in Shared Catalog, but there’s still a missing piece. You must associate picklists with a product attribute so that the picklists can define their values. In the next unit, you learn how to create attributes and connect them to picklists.
Resources