Configure CPQ Cart Cards with FlexCard Designer
Learning Objectives
After completing this unit, you’ll be able to:
- Change the appearance of CPQ Cart Cards.
- Add fields to a CPQ Cart FlexCard.
Best Practices
Before you begin configuring CPQ Cart cards, consider the following best practices.
- Clone an existing FlexCard and work on the new FlexCard. For prototyping purposes though, it’s easier to just create a new version of each FlexCard you work on. This is so that you can revert your changes back to the original if something undesirable happens.
- Deactivate the FlexCard before you can modify it. You’ll be locked out of making changes to the FlexCard unless you do this.
- Reactivate the FlexCard when you are done modifying it. Otherwise, your CPQ Cart will not function properly.
Configure the Look and Feel of CPQ Cart Cards
Let’s go over a few small but impactful tweaks we can make to the look and feel of CPQ Cart. Generally, you want to make large visual changes to each parent card of a CPQ Cart tab. For now, we focus on the Catalog and Cart tabs.

Change the Background Color
Want to make a big change fast? Start with the background color of your CPQ Cart.
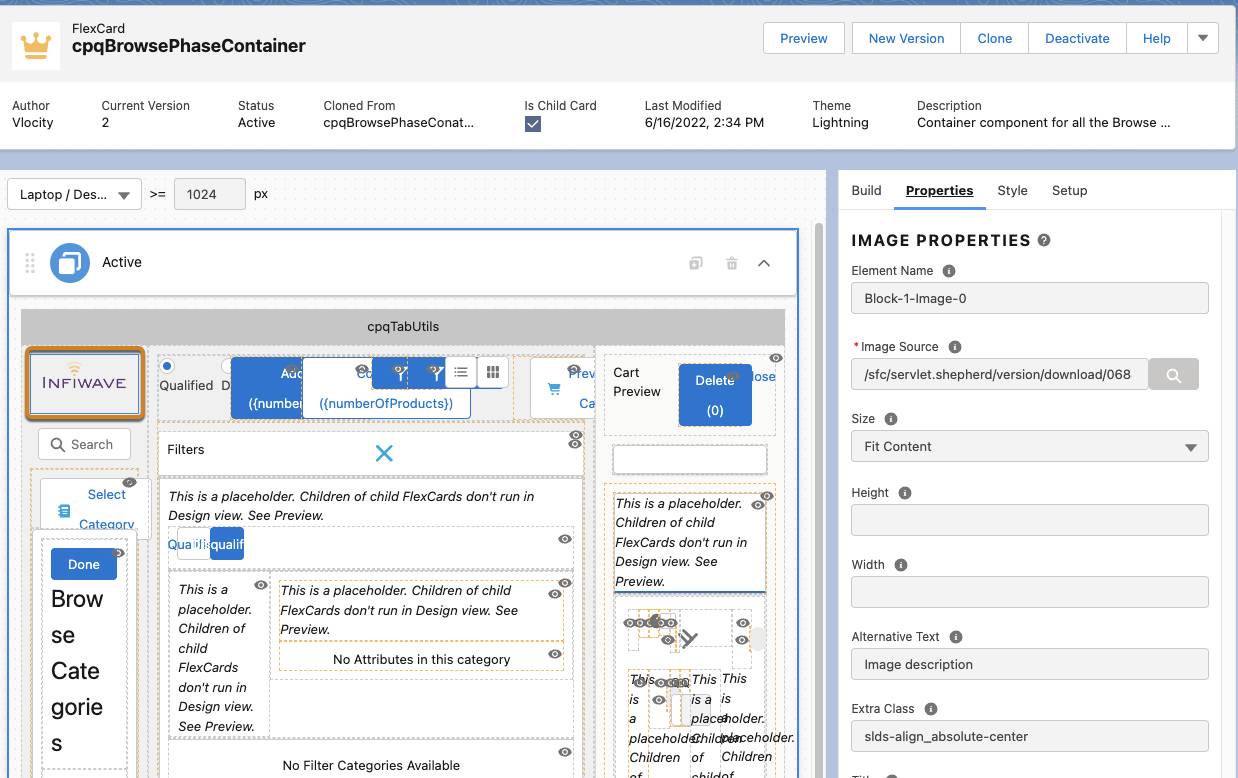
- To change the background color of the Catalog tab, in the OmniStudio FlexCards app, search for and click cpqBrowsePhaseContainer to show the available versions of the card, and then click version 2 of the card to open it.
- Click New Version to make a new version of the card.
- Click Style in the right pane.
- In the Background Color field, enter
#F0F0F0.
This will give the Catalog tab a neutral gray background.

Change theFont
Next up is another easy tweak. Modifying the default font makes for a subtle but effective change to align with your company’s branding. While you’re still on cpqBrowsePhaseContainer, you can modify the font CSS for this card. This CSS change affects all of the child cart fonts as well.
Within the Style tab, in the Inline CSS Styles field, enter font-family: Arial, Helvetica, sans-serif;.
This instructs web browsers to use the Arial font to render the text for this page. If Arial is unavailable, it uses Helvetica; if Helvetica is unavailable, it uses sans-serif.

AddBranding
Now let’s try something more substantial. Let’s say your company, Infiwave, has a logo that is required for all company apps, including CPQ Cart. Here’s how you add it.
- Click the Build tab, and then drag and drop the Image Element to the top of the left column, just above the Search bar.
- With the new image element selected, click the blue magnifying glass icon below the Image Source field in the Properties tab.
- Click Upload Files to upload any image you like or save and then upload the Infiwave image contained in the exercise guide.
- Once the upload is complete, click Done and then click Save. The image now appropriately shows up in this column of CPQ Cart for the Catalog tab, and it scales to the width of the browser.

Add Padding
What do you do if the logo appears a little too close to the Search field? You can change the amount of space between elements within a CPQ Cart card by giving it some padding.
Here’s how.
- Click the Image Element you added.
- Click the Style tab.
- For the Padding Type in the Alignment section, select Bottom, and for Padding Size, select Medium.
- Click the blue plus button to the right of Padding Size. Now the logo has a little bit of space below it.
- Click Activate to activate the card.
- Once the process is complete, click Done.
Remove Badges
Badges appear when you add a product to the cart. For example, if you add a phone product to the cart, it will have the badge “Add” to signify that this product is being added to someone’s account. However, maybe you find this particular badge unhelpful, while others need to stay. You can set a condition for the block that shows the badge, to only show it when Add is the value received from the API.
Here’s how.
- Navigate back to the OmniStudio FlexCards list.
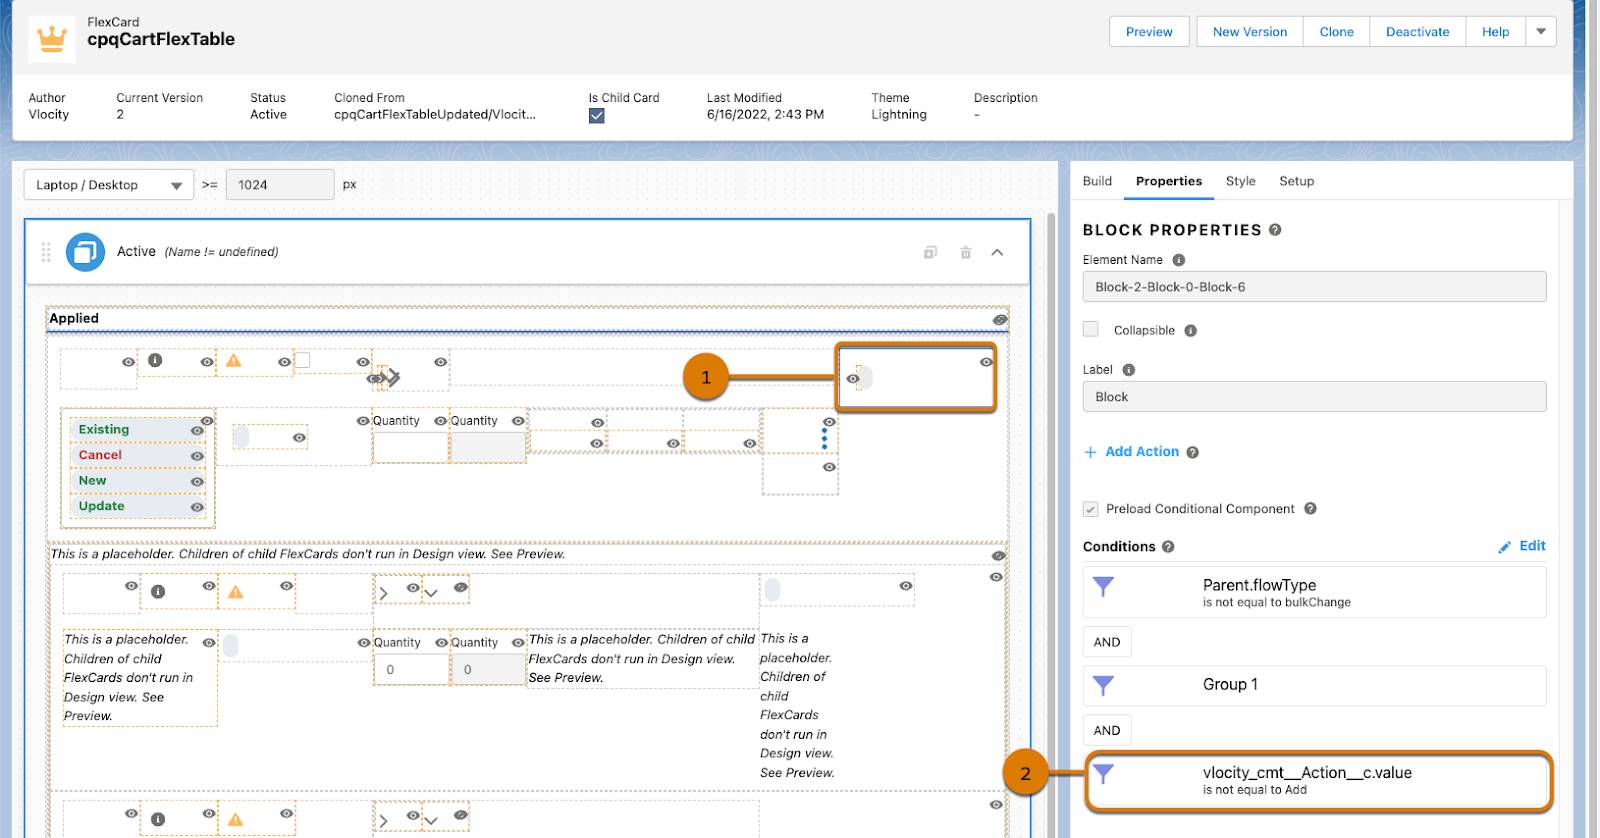
- Search for and click cpqCartFlexTable (version 2). This is a child card of cpqCartSummaryContainer that contains the badges for cart items. Any updates you make will be present in the parent card.
- Create a new version of the FlexCard.
- Click the Block (1) named Block-2-Block-0-Block-6 located towards the top of the card. You can hover over blocks to view their names.
- Click Edit to the right of Conditions. This block already has some conditions to only show it if bulk changes are not being performed.
- At the bottom of this modal, click + Add Condition.
- In the Data Field field, enter
vlocity_cmt__Action__c.value. This is the value of the Action field being passed to this card from CPQ APIs.
- Modify the operator to !=.
- Enter
Addfor the Value field.
- Click Save and then activate the card. This block will no longer show if the Action for a cart item is equal to ‘Add’ (2), therefore, we will no longer see the Add badge in CPQ Cart.

Add Fields to a CPQ Cart FlexCard
What if you want to add fields to CPQ Cart that do not appear out of the box? Thankfully, adding fields is easy with CPQ APIs and integration procedures. You simply need to specify the API name of the field where applicable.

Let’s say you want to show users the selling date so they know when products will be on sale. Here’s how you can add this information to the Catalog tab.
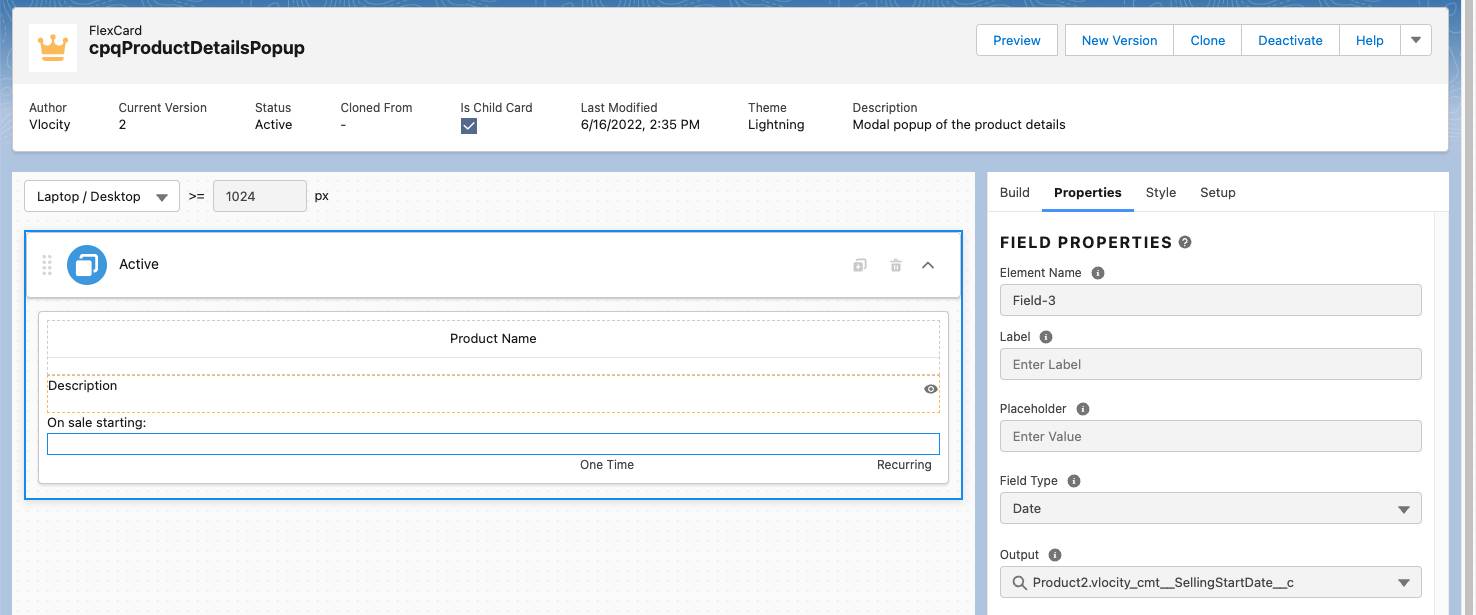
- Search for and click the child card cpqProductDetailsPopup from the OmniStudio FlexCards list.
- Click version 1 to open it. This is the child card for products that are clicked within the Catalog tab.
- Create a new version of the card.
- Drag the Rich Text Field element from the Build panel to the card under Description.
- In the element text area in the Properties pane, enter
On sale starting:.
- Drag and drop the Output Field onto the canvas below the text field you just created.
- Under Field Properties, select Date for the Field Type.
- In the Output field under Field Properties, enter
Product2.vlocity_cmt__SellingStartDate__c. This is the API field for the Selling Start Date value. When the API retrieves the product details, it will retrieve this value and place it within the Product2 node.
- In the Format field, specify how you would like the date to be formatted.
- Activate the card.
For our last configuration example, let’s add product images to the Catalog tab using a child FlexCard.
- Navigate to the OmniStudio FlexCards tab and click New to create a new FlexCard.
- Enter
cpqProductTileImagefor the name, and select Is Child Card.
- Click Next and then click Save.
- With this child card now in place, navigate to and open cpqProductTileList (version 2) and create a new version of the card.
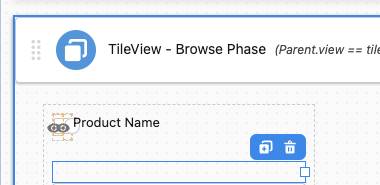
- Expand the TileView - Browse Phase accordion.
- Click the Build tab on the right pane.
- Drag and drop the FlexCard element just below Product Name on the layout for the product card.

- Enter
FlexCard cpqProductTileImagein the FlexCard Name and select the child card you just created from the dynamic search results.
- For Data Node, enter
{record.Attachments}. Attachments is the node for the product record that will contain product image URLs. These URLs can be entered or modified in Product Designer.
- Hover over the new FlexCard you added to the layout and click View Card.
- In the child FlexCard, click the Build tab in the right pane.
- Drag and drop the Image element onto the FlexCard.
- Within the Image Source field, enter
{url}. This is the location within the Attachments node where the value for the image URL is located. The image element will parse the image URL and render it.
- Activate the FlexCard.
- To see this in action, open or create a new Order. Go to the Catalog tab, and change the view to the product tile view using the tile icon.

Thanks to FlexCard Designer, it’s easy to customize LWC Cart.
Industries CPQ Cart is a versatile and easily configurable app for your clients and sales representatives, built with Lightning Web Components and FlexCard Designer. With clear business goals and development milestones in mind and a solid understanding of CPQ Cart, you can create a great sales experience!
Resources