Define Relationships
Learning Objectives
After completing this unit, you’ll be able to:
- Explain how relationships are defined in Agentforce Financial Services.
- Set up account contact relationships.
- Create a party role relationship.
- Plan customizations to party relationship groups.
Manage Relationships Between Individuals and Groups
Now that you have a person account, you can connect it with other person accounts and business accounts—but first, you have to define the types of relationships you can track.
Think back to the example client model in the first unit. A series of records defines their relationships to each other, their household, and their insurer. See the highlighted boxes on this diagram.
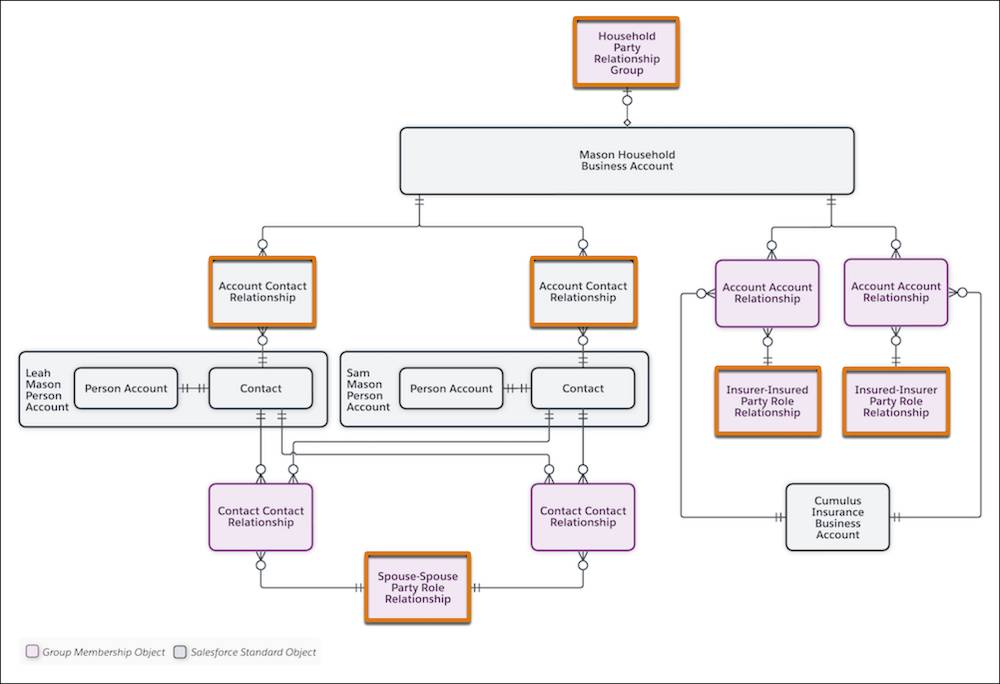
Let’s review what each of these objects does.
-
Account contact relationship connects a person account or contacts to a business account, such as a person account to their household or employer. These records also define that relationship, such as if the person account is a decision maker for the organization or household.
-
Party role relationship describes account-account and contact-contact relationships. In the example, a spouse-spouse party role relationship defines a marriage. A pair of insurer-insured and insured-insurer party role relationships also define a household’s relationship with their insurer.
-
Party relationship group relates to a business account to describe it as either a household or another type of group. Party relationship groups also store financial information and other details about the related business account.
Before your users can relate clients, businesses, and households, these relationships must be defined in Salesforce. As an admin, it’s your job to set up these relationships. In this unit, you create or modify each of these types of relationships so that they can be used in the New Group flow. Let’s get started.
Define Account Contact Roles
On the Account Contact Role object, the Roles picklist field is the most important to customize. This field is what you use to describe a relationship between an account and a contact. For example, the Role field can show that a contact is the main decision maker, an influencer, or a child in a family.
Create a picklist value to define a role for the legal counsel for a business account or household.
- In Setup, click Object Manager.
- Select Account Contact Relationship.
- Select Fields & Relationships.
- Select Roles.
- In Roles Picklist Values, click New.
- Enter
Legal Counsel.
- Save your work.
By default, the new picklist field appears at the bottom of the list. Select Reorder in the Roles Picklist Values list to change where it appears in the list.
When your users create an account contact relationship in the New Group flow or the Related Contact record page component, they see the option to select Legal Counsel.
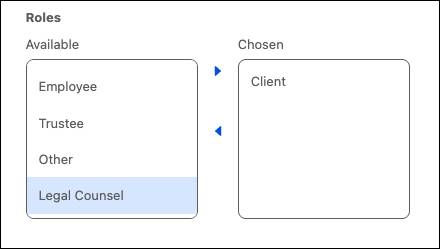
To add the role, the user selects it and then clicks  .
.
Create a Party Role Relationship
Party role relationships define account-account and contact-contact relationships. Here are three critical components of these records:
- Role Name is the role assigned to the primary record in the relationship. This name appears first in the record name.
- Related Role Name is the role assigned to the related record in the relationship. This name appears second in the record name.
- Relationship Object Name is the relationship object the party role relationship defines. This appears at the end of the record name and is either -CCR for contact-contact relationships or -AAR for account-account relationships.
In some cases, you need only one party role relationship to define both parts of a reciprocal relationship. In other situations, you need a party role relationship and its inverse.
For example, let’s start by examining a simple party role relationship for spouses. Because both the role and the related role are spouse, you need only one party role relationship. Your trial org includes the Spouse-Spouse-CCR party role relationship. Find it or check out the screenshot here.
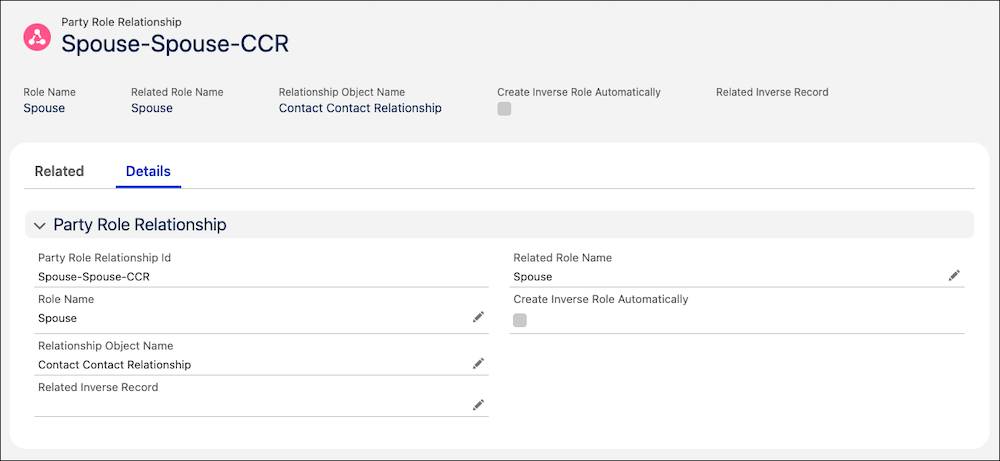
In the record name, spouse is both the role name and related role name, and the automatically added -CCR indicates that this record defines contact-contact relationships. You can use this same party role relationship to define both contact-contact relationships from one spouse to the other.

Consider an example that requires inverse roles now: an attorney and their client. Because the role name and related role are different, you must create inverse roles. Follow along in your trial org to create these records.
- From the App Launcher (
 ), find and select Party Role Relationships.
- Click New.
- Specify these details.
- Role Name:
Attorney - Related Role Name:
Client - Relationship Object Name: Contact Contact Relationship
- Select Create Inverse Role Automatically
- Role Name:
- Save your work.
Check out this record now.
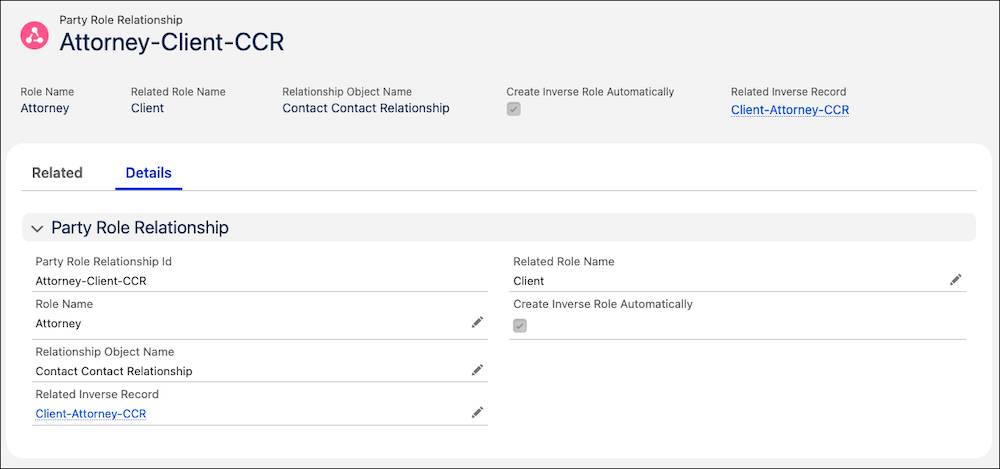
By selecting Create Inverse Role Automatically, you created not just Attorney-Client-CCR, but also its inverse Client-Attorney-CCR. You can find that second record linked in the Related Inverse Record field. Now, you can map both sides of this reciprocal relationship.
The record you created is now available when users create a relationship record. This includes when they use the New Group guided flow, which you explore in the next unit.
Customize Party Relationship Groups
Party relationship groups can be customized to reflect different kinds of groups and households. Most commonly, party relationship groups relate to a business account to define it as a household, but the object can be changed for other use cases.
The simplest change is to update the values for the Category picklist, which optionally describes the group. Similarly, you can add values to the Subtype field to further define the group or household. To include new values in either of these fields, add them to the fields in the Party Relationship Group object, just as you did with the picklist in the Account Contact Relationship object.
As an object that defines a business account, you can also add fields as needed for your business requirements.
Now that you have defined relationships, you create a household using your work in this unit. Continue to the next unit to learn how the New Group flow works.