Explore Tools for Holiday Readiness
Learning Objectives
After completing this unit, you’ll be able to:
- Describe the benefits of using Log Center.
- List the three actions you can take with Log Center.
- List the roles required for the Jobs Framework migration.
- Describe the dashboards available with the Reports & Dashboards tool.
Tools You Can Use
Linda Rosenberg, Cloud Kicks admin, wants to understand how her systems are running so she can make them perform optimally during the holiday season. Here are some tools she can use.
-
Log Center: Track system errors.
-
Jobs Framework: Automate code and data movement.
-
Reports & Dashboards: Track storefront data, traffic, and performance trends.
-
Code Profiler: Track run-time performance.
To test and optimize front-end performance, she looks at tools like Google Lighthouse and Web Vitals.
Log Center
Linda uses Log Center early in her holiday readiness timeline to:
- Find specific error messages, or search by date, instance, or other attribute.
- Track critical messages and recurring errors.
- Remove noise for easier troubleshooting.
- Take corrective actions.
- Prevent issues from impacting a site’s stability and performance.
Log Center tracks data via some fundamental rules.
- There’s one Log Center application per point of delivery (POD) per cylinder.
- For Secondary Instance Groups (SIGs), logs are available for 2 days. For Primary Instance Groups (PIGs), logs are available for 14 days. You can't change these settings.
- There is a quota of 1,000,000 log messages received per realm and instance group per day.
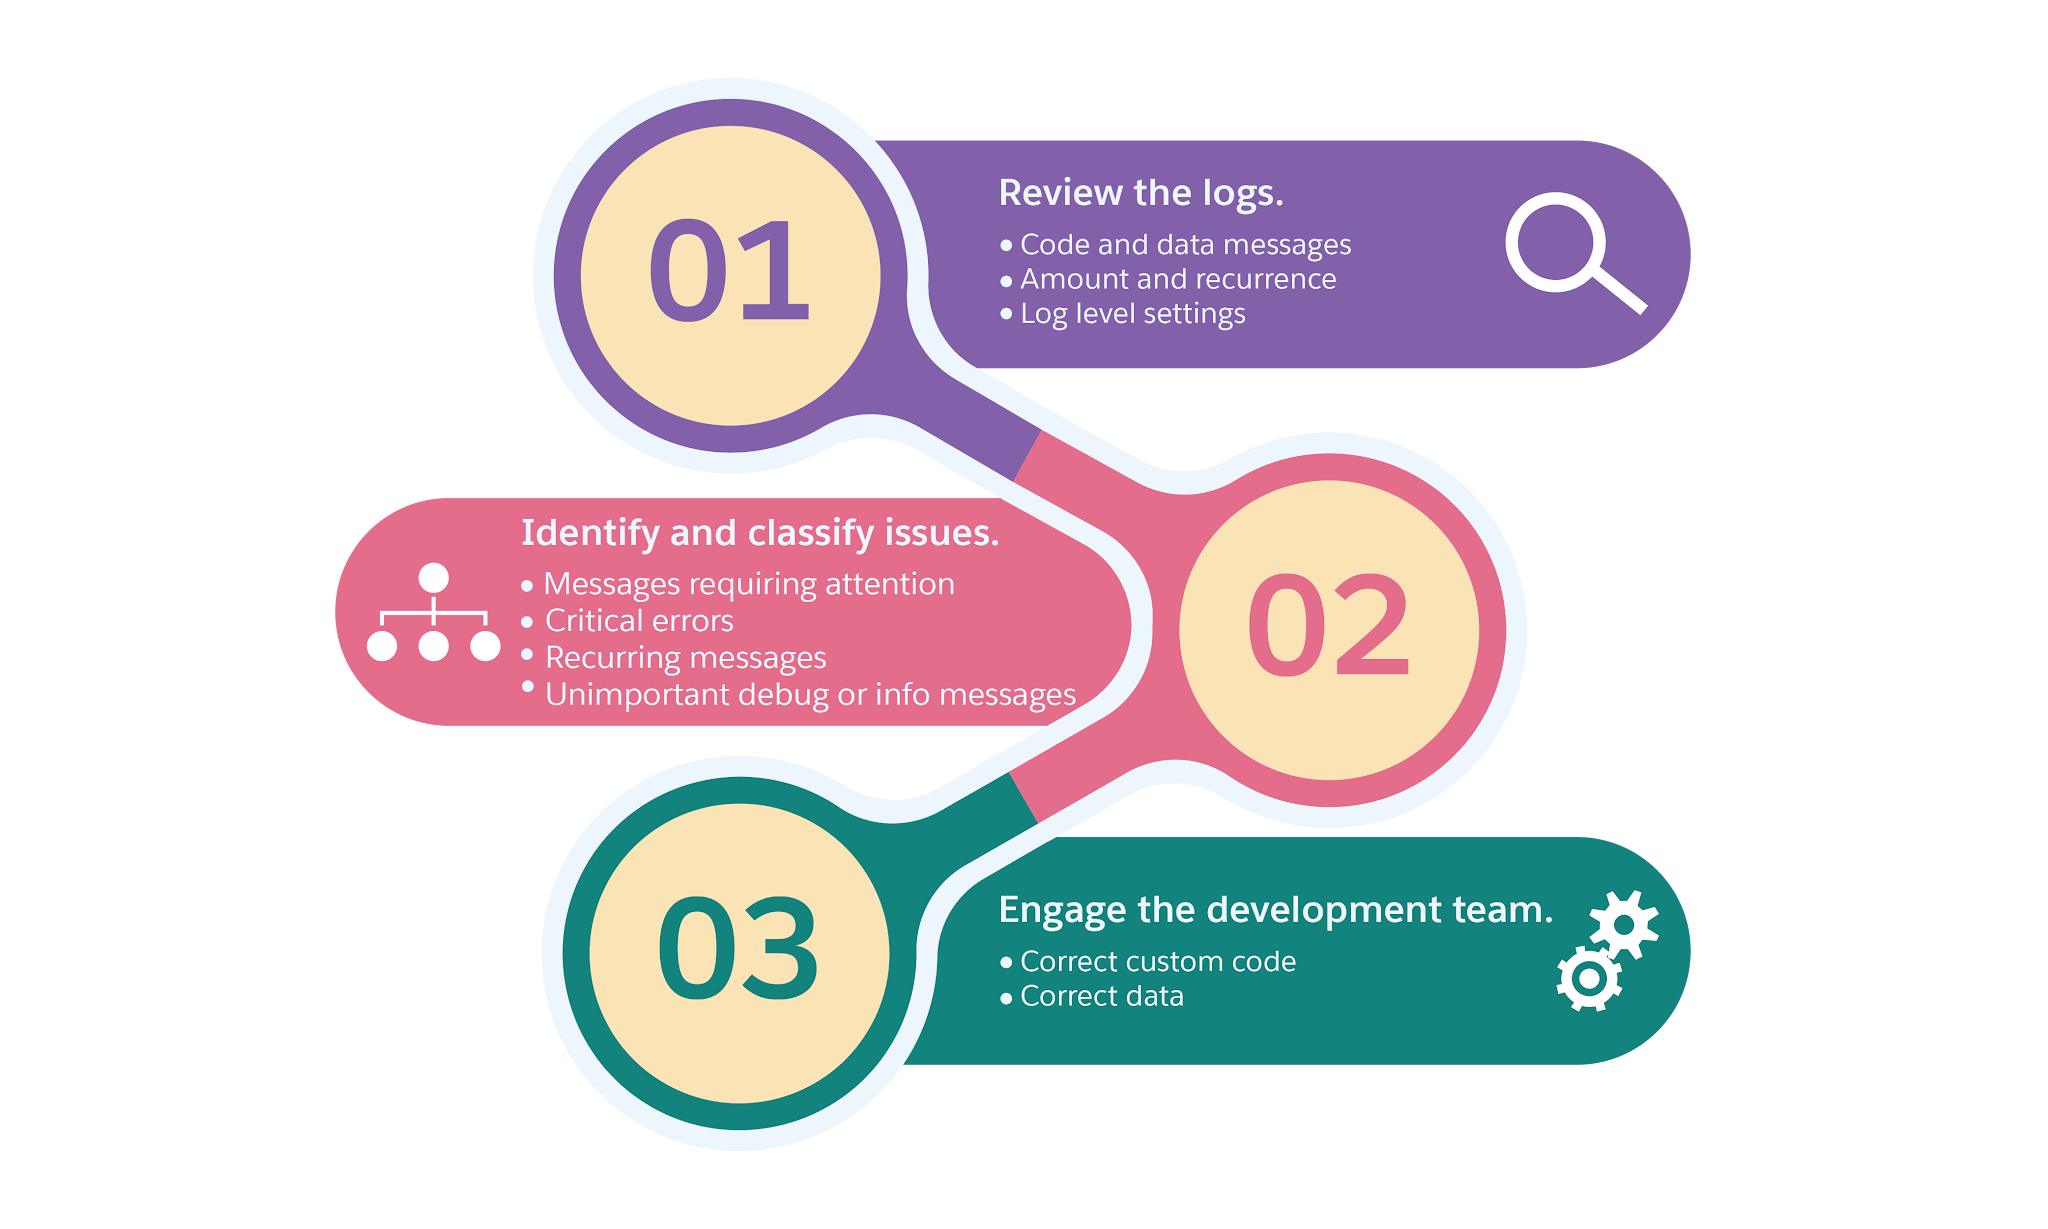
Linda takes full advantage of Log Center’s capabilities. Here are her primary actions.
-
Regularly reviews logs. Pay attention to code and data messages, and the amount and recurrence of each log. Errors with greater volume likely point to a recurring issue that can be fixed.
-
Separate noise from things that require corrective action. DEBUG or INFO messages, for example, might not matter.
-
Engage the development team to find and correct issues. Problems might be in custom code or data. This should lead to a better performing site, and a better experience for your shoppers.
Access Log Center
To access Log Center, your admin must assign you the Log Center User role in Account Manager. See the Salesforce B2C Commerce Roles & Permissions Trailhead module to learn how to assign Account Manager credentials.
To access Log Center in Business Manager:
- Open Business Manager.
- Click App Launcher.
- Select Administration | Site Development | Development Setup.
- Scroll down to the WebDAV Access section.
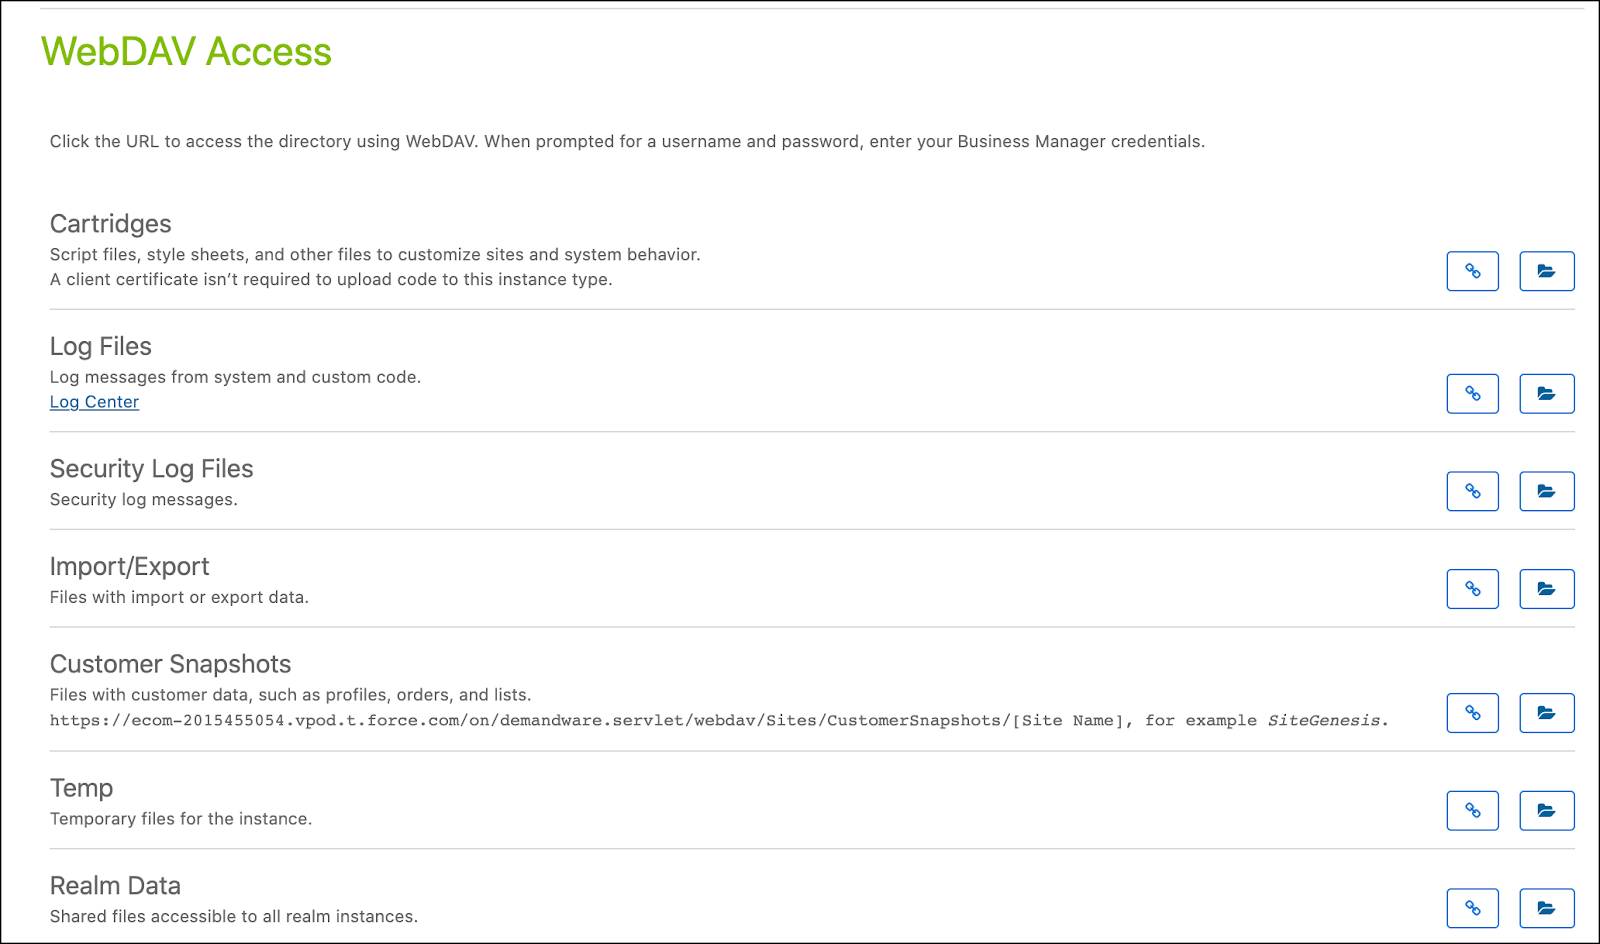
- Click the Log Center link or click the copy URL icon.
To access Log Center via URL:
- Open a browser.
- Paste the URL you copied from Business Manager, or enter the URL in a browser:
https://logcenter-us.visibility.commercecloud.salesforce.com/logcenter/search/_refine?tenant_realm=<your realm>The Log Center URL contains the POD number and cylinder. Use 00 for a SIG and 01 for a PIG.
- Enter your username and password.
- Click Sign In.
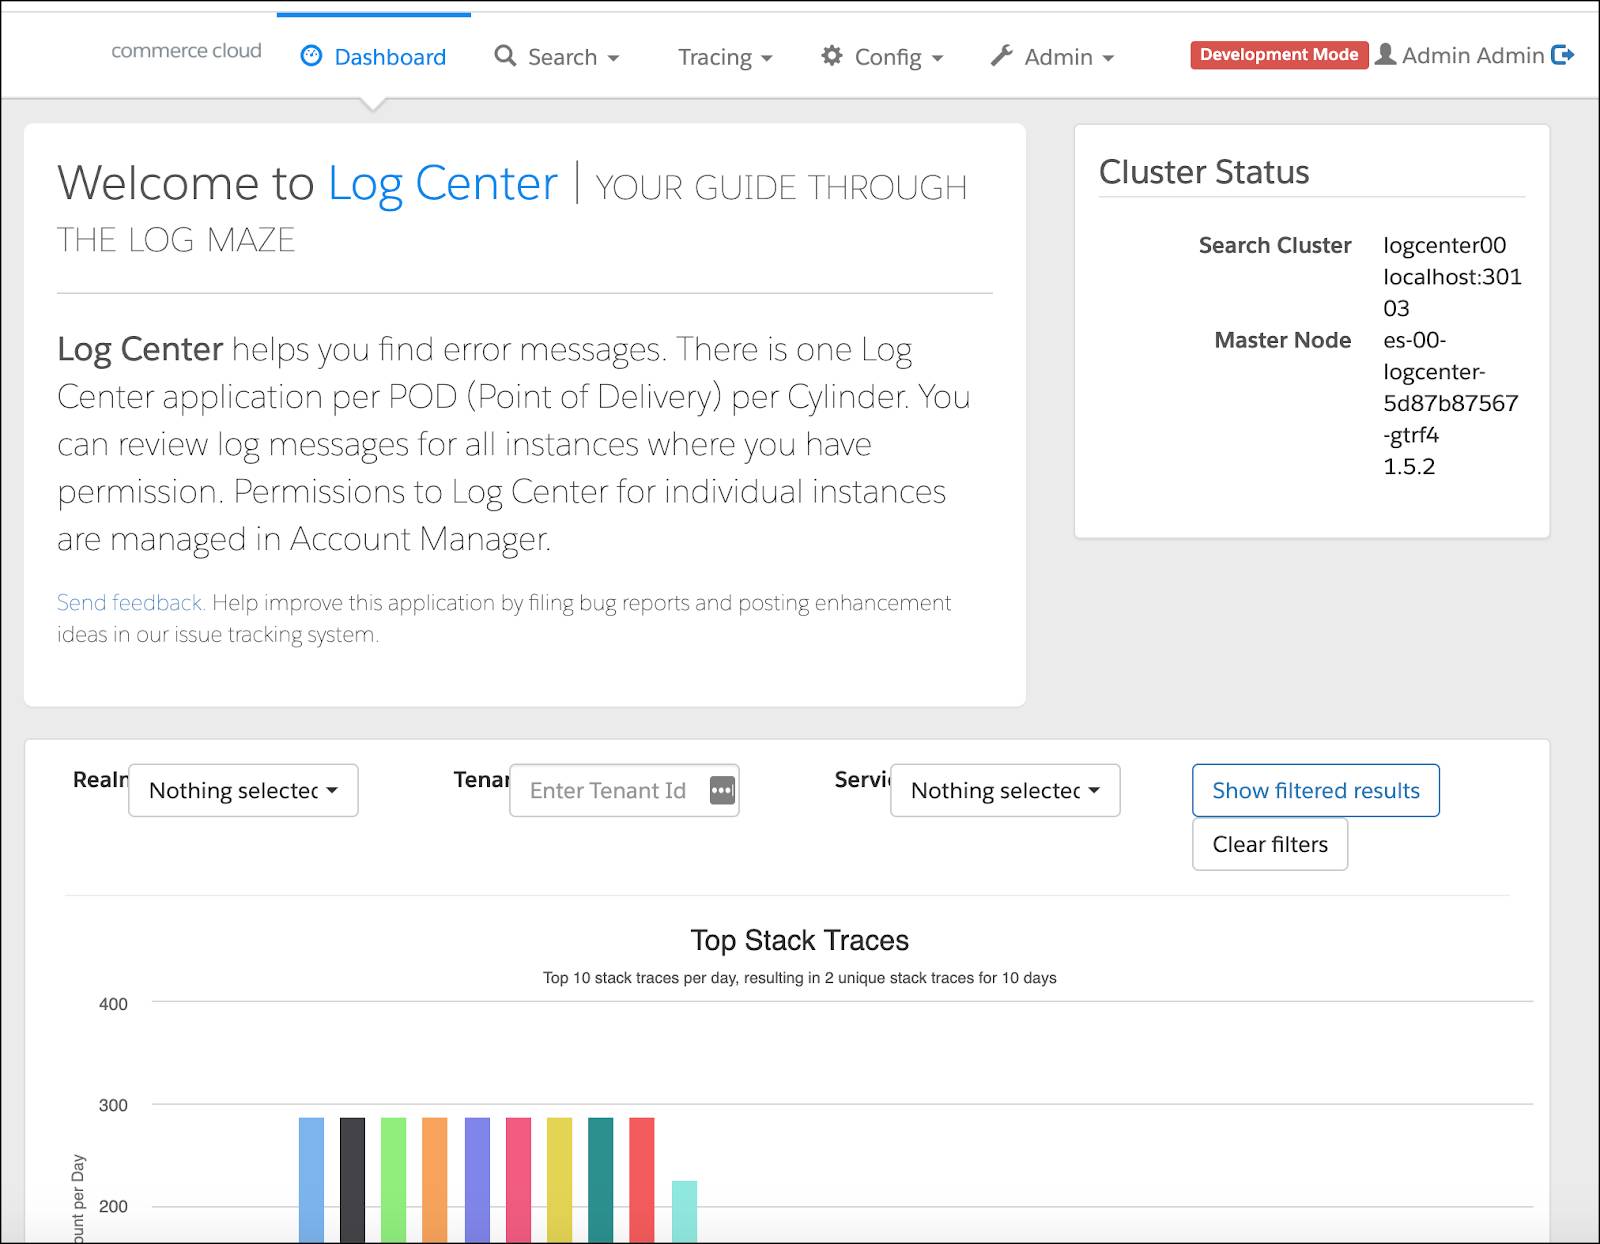
The dashboard lists the realms and instances that Linda is allowed to see. It shows a histogram of the top stack traces over the past 10 days.
- To see the exact count for each stack trace, hover over the bar in the chart.
- To view individual stack traces, click the horizontal labels.
Linda creates alerts in Log Center that tell her when and how often specific errors occur. This helps her focus on critical errors without having to constantly search for them.
Here’s how she creates a new alert.
- In Log Center, click the Search tab.
- Enter a search term such as
text,stackTrace,category,thread, orsessionIDto view activity with this label.
- Click Search.
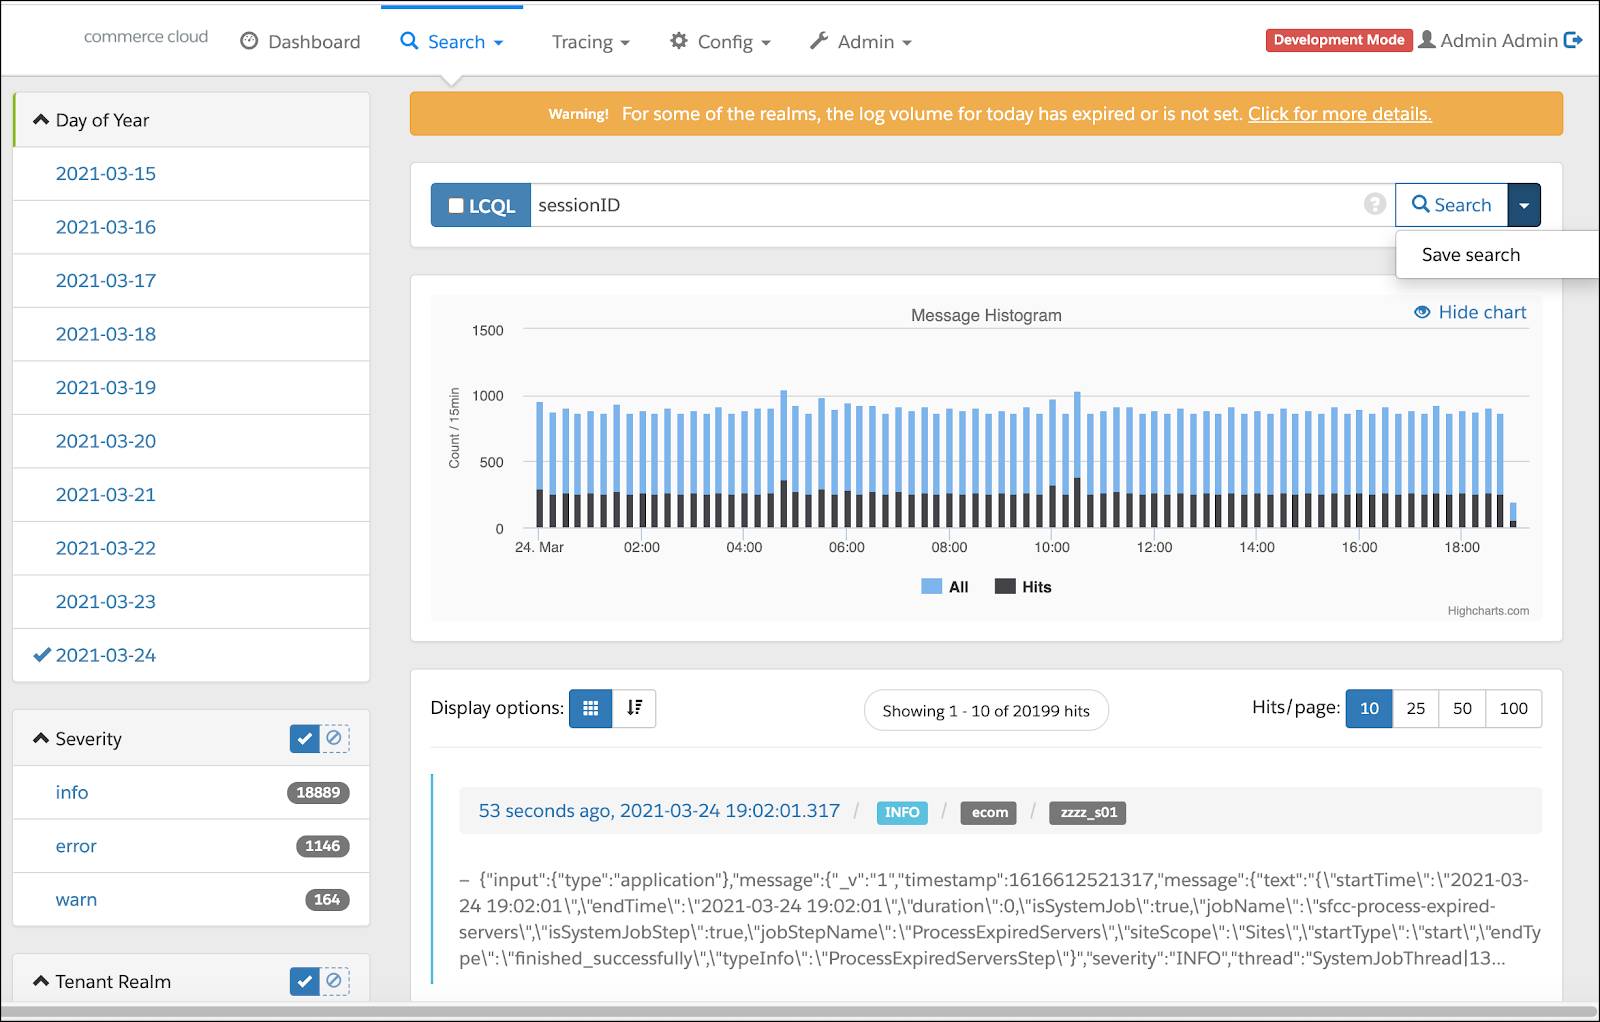
- Click the dropdown arrow beside the Search button.
- Click Save Search. This opens a window to save your search.
- Enter the name and enable it:
Session ID - Select the time interval for when to send the alerts: 10 minutes
- Set the threshold:
10More critical errors require a lower threshold.
- To save the search without sending notifications, click Disabled.
- To only send notifications when the search returns at least some results, set the Threshold to that number:
10 - To send a notification at each interval, regardless of results returned, select Always Send Notification.
- Configure an email list to send alerts to your IT operations (and maybe some of the business teams).
- Click Save.
- To edit or retrieve a saved search, click the Search tab again and select Managed Saved Searches.
- To send a test notification, click the test notification icon.
Linda documents what her team does when alerts occur, including an escalation matrix to ensure key team members know about problems and how they are being addressed. She takes it a step further by ensuring that each alert triggers actions based on problem type and severity.
The Jobs Framework
Linda already uses B2C Commerce jobs to automate import, export, and replication processes. The framework gives Linda more visibility and scheduling options. She can configure job flows for the parallel execution of jobs steps, potentially reducing job completion time. She can also start and monitor jobs with Salesforce Commerce API (SCAPI). This feature, along with the ability to monitor job progress in Business Manager gives her a lot more control and visibility into job status.
But hers is not the only role affected by the migration. Cloud Kicks developers like Vijay Lahiri must also get involved. While she schedules the jobs, he creates them.

In the new framework, Vijay can reduce the amount of code he has to write via system steps. If he can’t use a system job step, he can create a custom job that uses CommonJS modules in his preferred integrated development environment (IDE).
Migration Plan
So how do Linda and Vijay migrate their jobs to this framework? It turns out that their level of effort has a few factors.
- The number of jobs on the production instances
- The complexity of existing jobs
Linda meets with Vijay and his team to agree on the effort required. To get a better understanding of what this means, they take a look at the migration path.
Migrate from Legacy Jobs
Migration means recreating one job at a time. Linda deactivates a legacy job and then recreates it in the new system. She leaves the legacy jobs in an inactive state, and will delete them after she’s created and activated the new ones.
Here’s how to create a new job.
- Open Business Manager.
- Click App Launcher.
- Select Administration | Operations | Jobs.
- Click New Job.
- Enter the ID:
march-01 - Select priority: Normal
- Click Create.
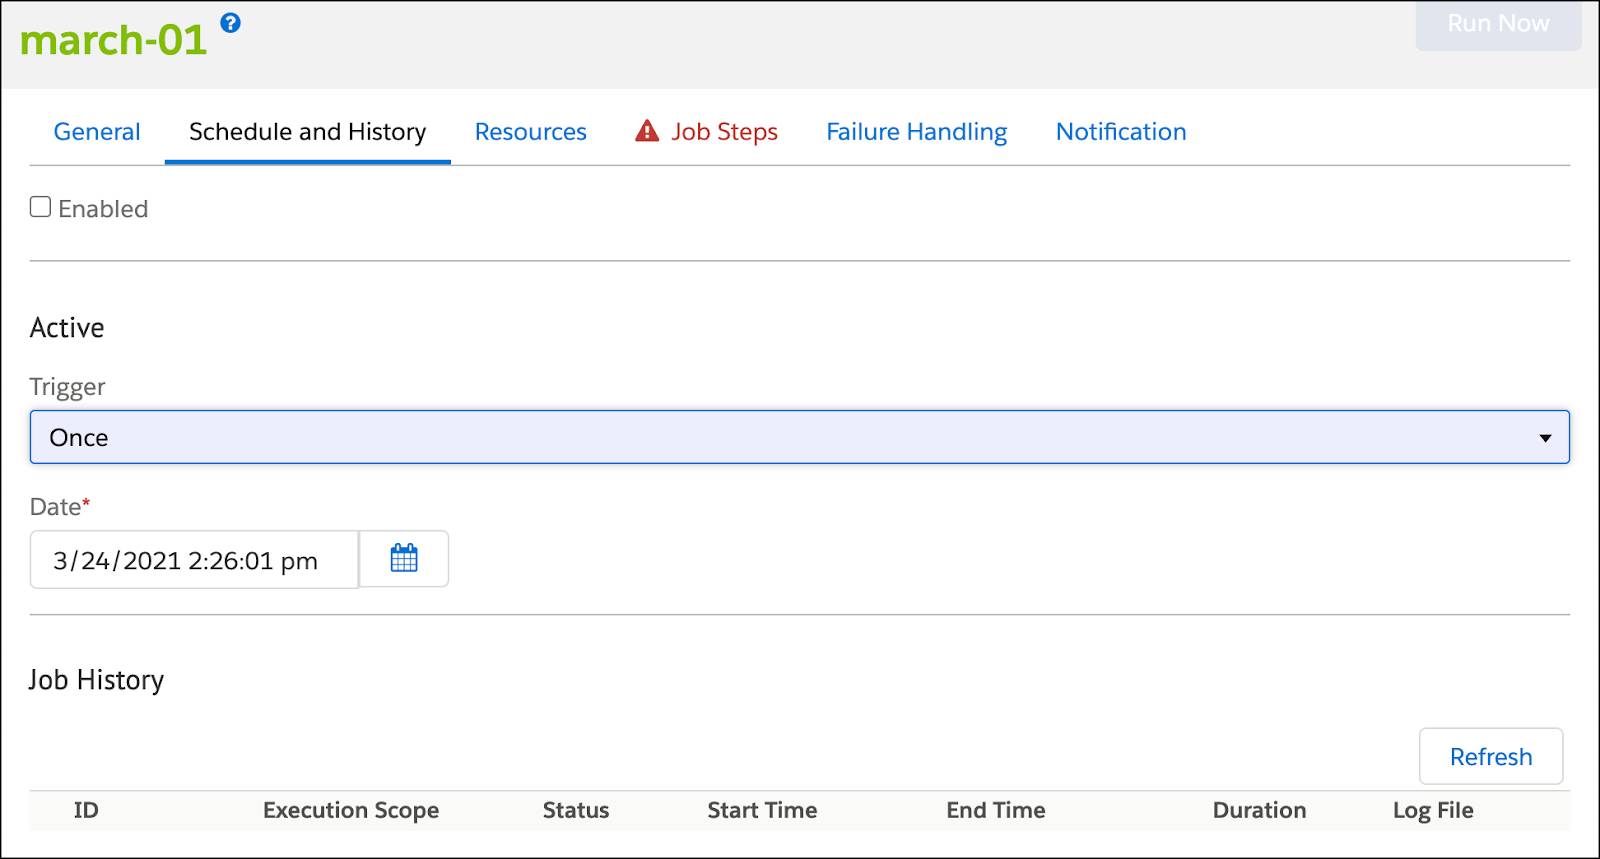
- Step through each section to design the job:
- Schedule
- Resources
- Steps and flows
- Failure handling
- Notifications
- Test the job to ensure proper functionality on a development instance.
- Replicate the new job to applicable environments and disable the legacy job it is meant to replace to avoid conflict.
- Verify expected results once more before removing the legacy job from the environment.
Reports & Dashboards
The B2C Commerce Reports and Dashboards tool helps managers and merchandisers identify trends over time and make informed business decisions. It helps admins and developers track technical details and ensure peak system performance.
From the tool’s main page (containing data summaries), drill down into a specific dashboard for more details.
|
Dashboard
|
View
|
|---|---|
|
|
Summaries for sales, orders, units, average order value (AOV), most used promotions, and top selling products |
|
|
Metrics such as revenue, orders, units, AOV, tax, and shipping by customers, sites, and channels |
|
|
Products and gift certificates data |
Traffic |
Visitor count trend, number of visits, visit duration, and revenue per visit, and top IP addresses |
Technical |
Controller performance data (such as average response time and cache hit ratio trends) and SCAPI All data except in the Real-Time section has a 24-hour delay. |
Real-Time Metrics |
Data on peak events such as Black Friday, Cyber Monday, and flash sales, including info on sales (basket creations, basket updates, and orders) and site performance (sessions, requests, system workload) in real time |
Code Profiler
Linda uses Code Profiler to analyze site performance in three levels of detail.
-
Production mode: Run-time behavior for a subset of requests. Provides a systems aggregated view, even under load. It’s the default for non-sandbox instances, can’t be deactivated, and has minimal performance impact.
-
Development mode: Run-time behavior for all requests of the system. Shows detailed data by request. It’s the default for sandbox instances, can be activated for other instance types, and requires run-time overhead.
-
Extended script development mode: Tracks internal run-time behavior with development mode details. This mode has severe performance implications. Use with caution on a production instance.
Next Steps
In this module, you learned how to use Log Center, the Jobs Framework, Reports & Dashboards, and the Code Profiler to get your sites ready for the holiday season. Next, learn how load testing can help drive your sites toward peak performance.
Resources
- External Link: Lighthouse Metrics
- External Link: Search Engine Journal: A Technical SEO Guide to Lighthouse Performance Metrics
- External Link: web.dev: Web Vitals
- Salesforce Help: Log Center
- Trailhead: Salesforce B2C Commerce Roles & Permissions
- Trailhead: Salesforce B2C Commerce Scheduled Jobs
- Salesforce Help: Jobs
- Salesforce Help: Salesforce Commerce API
- Trailhead: Assess Site Performance Salesforce B2C Commerce Reports & Dashboards
- Salesforce Help: Reports & Dashboards
- Salesforce Help: Site Performance