Creare un?azione agente Apex
Obiettivi di apprendimento
Al completamento di questa unità, sarai in grado di:
- Creare un’Azione agente Apex.
- Aggiungere un’azione agente a un agente secondario.
- Testare l’Azione agente.

Creare un’Azione agente Apex
Ora che il codice Apex è pronto, aggiungiamolo a un’azione. Potrai vedere in che punto i parametri del codice Apex si trasferiscono nell’azione.
- Nell’App Launcher (Programma di avvio app)
 , cerca e seleziona Agentforce Studio.
- Fai clic su Agent Customization (Personalizzazione agente).
- Fai clic su New Versione (Nuova versione).
- Sotto Subagents (Agenti secondari), seleziona Answer Weather Questions (Rispondi a domande sul meteo).
- Sotto Actions Available For Reasoning (Azioni disponibili per il ragionamento), fai clic su Select action (Seleziona azione) e seleziona Create a custom action (Crea un’azione personalizzata).
- In Action Name (Nome Azione), inserisci
Check Weather(Controlla meteo).
- In Description (Descrizione), inserisci
This action will return the local weather information.(Questa azione restituisce le informazioni sul meteo locale.) - In Reference Action Type (Tipo di azione riferimento), scegli Apex.
- In Reference Action Category (Categoria azione di riferimento), seleziona Invocable Method (Metodo invocabile).
- In Reference Action (Azione riferimento), seleziona Check Weather (Controlla meteo).
- Fai clic su Create and Open (Crea e apri).
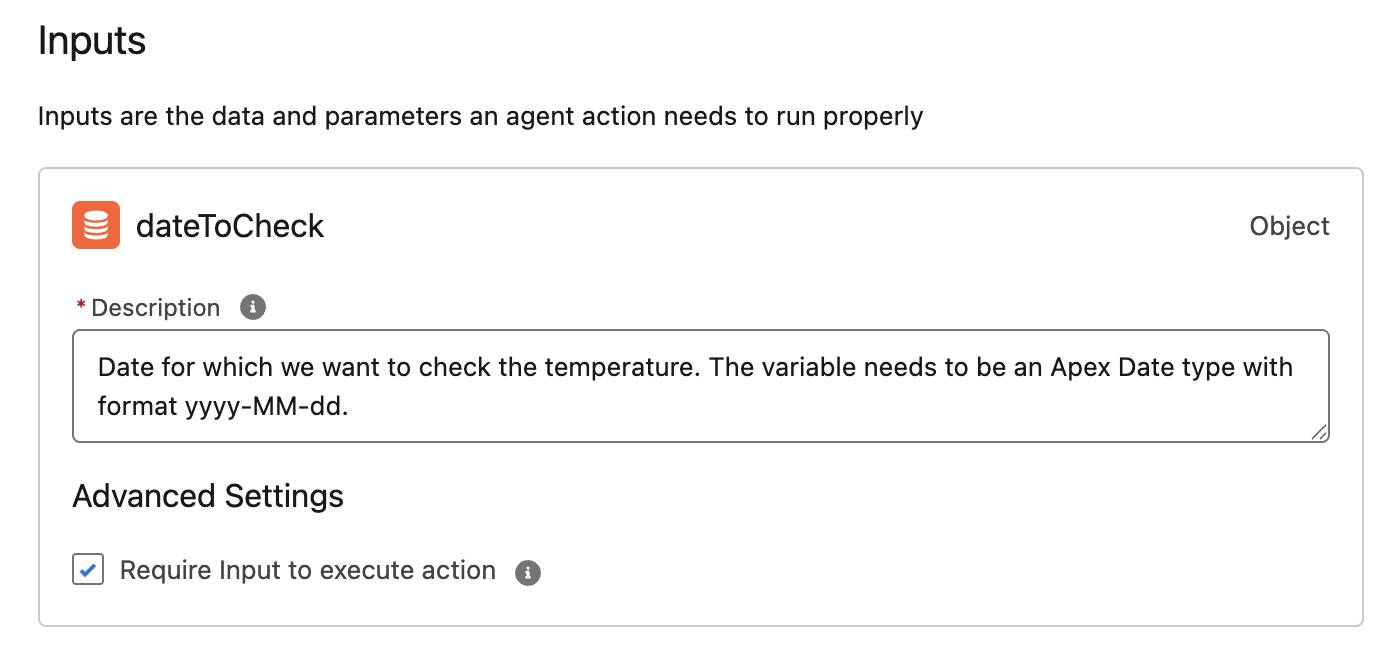
Come vedrai, nella sezione Inputs (Input), il campo della variabile dateToCheck è stato precompilato con la descrizione specificata nel parametro description (descrizione) della variabile invocabile Apex. Puoi aggiornare o aggiungere testo alle istruzioni, se necessario.
- Assicurati che la casella di controllo Require input to execute action (Richiedi input per eseguire l’azione) sia selezionata. Questa impostazione deriva dal codice, in cui il parametro required (obbligatorio) è impostato su true.
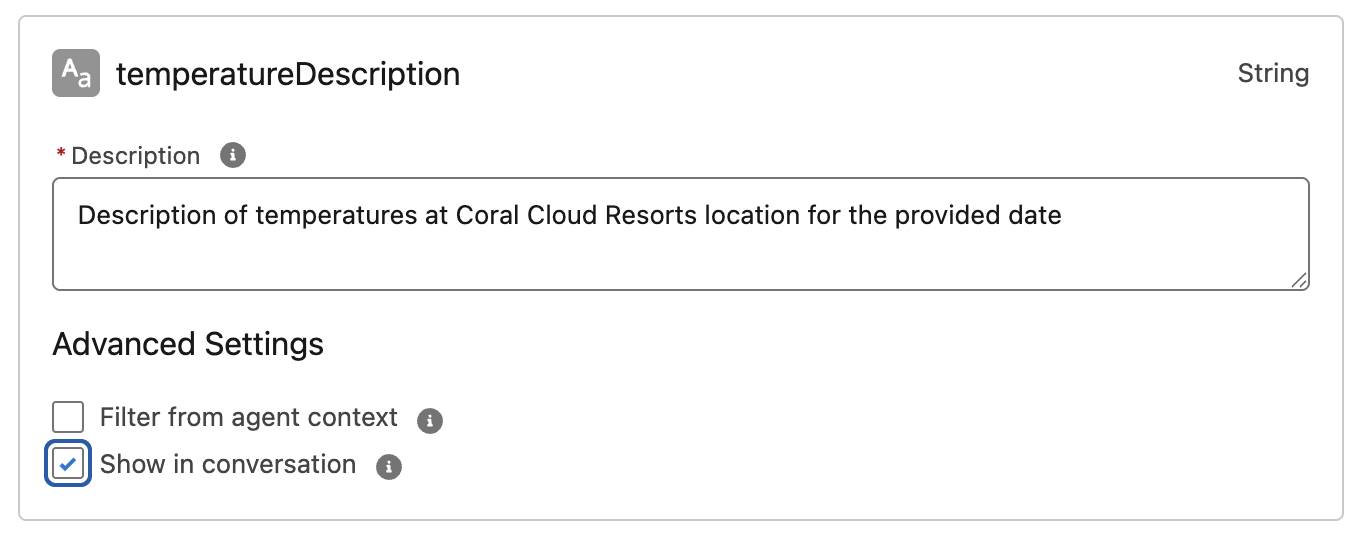
In Outputs (Output), sono state trasferite tre variabili invocabili Apex: maxTemperature, minTemperature e temperatureDescription. I campi Instructions (Istruzioni) di ciascuna variabile sono stati precompilati con i parametri Apex description (descrizione) e Data Type (Tipo di dati) corrispondenti.
- Per il terzo output, temperatureDescription, seleziona Show in conversation (Mostra nella conversazione).
- Fai clic su Save (Salva).
- Fai clic su Commit Version (Conferma versione).
- Fai di nuovo clic su Commit Version (Conferma versione).
- Fai clic su Activate (Attiva).
- Fai di nuovo clic su Activate (Attiva).
Ottimo! L’azione è completata. Adesso sai cosa bisogna fare per aggiungere codice Apex alle azioni. Inoltre, ti è più chiaro in che modo i parametri Apex contribuiscono a creare l’azione. Ora puoi testarla.
Guardiamo le previsioni meteo
Il Generatore Agentforce consente di lavorare con gli agenti e visualizzarne l’anteprima direttamente nello strumento.
- Nel Generatore Agentforce, fai clic su Preview (Anteprima).
- La modalità attiva dovrebbe essere Live Test Mode (Modalità Test live).
- Nella casella Describe your task or ask a question (Descrivi l’operazione o poni una domanda), inserisci
What’s the weather like this Monday?(Come sarà il tempo lunedì?) e premi Invio. L’agente potrebbe chiederti di inserire una data precisa e darti la possibilità di selezionarla. Seleziona la data corrispondente a lunedì prossimo e fai clic su Submit (Invia).
-

Dai un’occhiata ai passaggi che ha seguito l’agente e osserva che ha selezionato l’azione Check Weather (Controlla meteo) per rispondere alla richiesta. 
Ben fatto! Hai compiuto un grande passo verso l’uso di tutta la funzionalità Apex già presente nell’organizzazione e nel renderla disponibile agli agenti IA affinché possano usarla. Hai appreso alcune best practice e le impostazioni da applicare ai parametri per sfruttare tutto il potenziale dei tuoi agenti.
Risorse
- Guida di Salesforce: Procedure consigliate per le istruzioni di azione degli agenti
- YouTube: Best Practices for Building Agentforce Apex Actions | TDX 2025: Developer Highlights (Best practice per la creazione di azioni Apex in Agentforce | TDX 2025: Developer Highlights)
- Blog per gli sviluppatori Salesforce: Build Advanced Custom Agent Actions with Code (Creare azioni agente personalizzate avanzate utilizzando il codice)