Add Benefits and Partners
Assign Benefits to Tiers
From her experience running the Cloud Kicks Inner Circle loyalty program, Mary can vouch for the effectiveness of rewards on customer loyalty. She believes a similar rewards system will motivate LevelUp members to remain engaged with the program. As members move to higher tiers, they become eligible for more benefits. These benefits are grouped by benefit type and category.
For example, an Extended Return Period is a benefit type that falls under the Orders category. Benefit types can have more than one benefit. For instance, the duration of the return period depends on a member’s tier. Gold-tier members get a 30-day return period, while Platinum members have 60 days to return orders. The two benefits are associated with the same benefit type, that is Extended Return Period.
To summarize, you must create benefit types, add benefits to them, and finally assign benefits to tiers.
For this project, you only create one benefit type and one benefit. You can create more for practice, but it's optional.
Create a Benefit Type
Typically, you add categories before you create a benefit type. In your special Developer Edition org, the categories are already defined.
Here’s how you create a benefit type. Make sure you're still on the program setup window for LevelUp.
- Click
 in Tier and Benefits to expand the section.
- Click Add Benefit Type with Benefits.
- Specify these details.
- Benefit Category: Orders
- Benefit Type:
Extended Return Period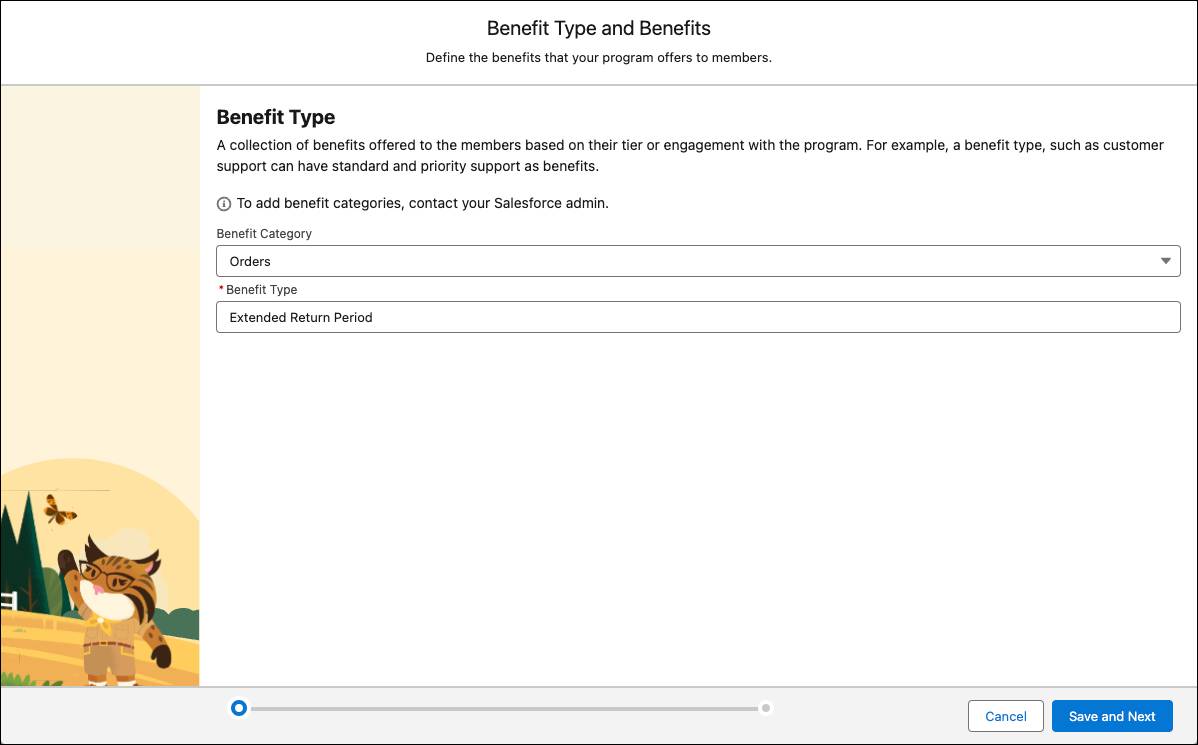
- Benefit Category: Orders
- Click Save and Next.
Next, you add a benefit to the benefit type.
Add a Benefit to a Benefit Type and Tiers
You prioritize benefits by ranking them. When a benefit type has two or more benefits, the benefit with the higher ranking or Priority Sequence number is assigned to the member.
You consult with Mary to decide the benefits for each tier. Typically, higher tiers are entitled to the most benefits. Mary decides that all members of the Silver and Gold tier should enjoy an extended 30-day return period. Moreover, Platinum tier members get an extended 60-day return period.
Follow these steps to add a benefit to a benefit type and tiers.
- Click Add Benefit.
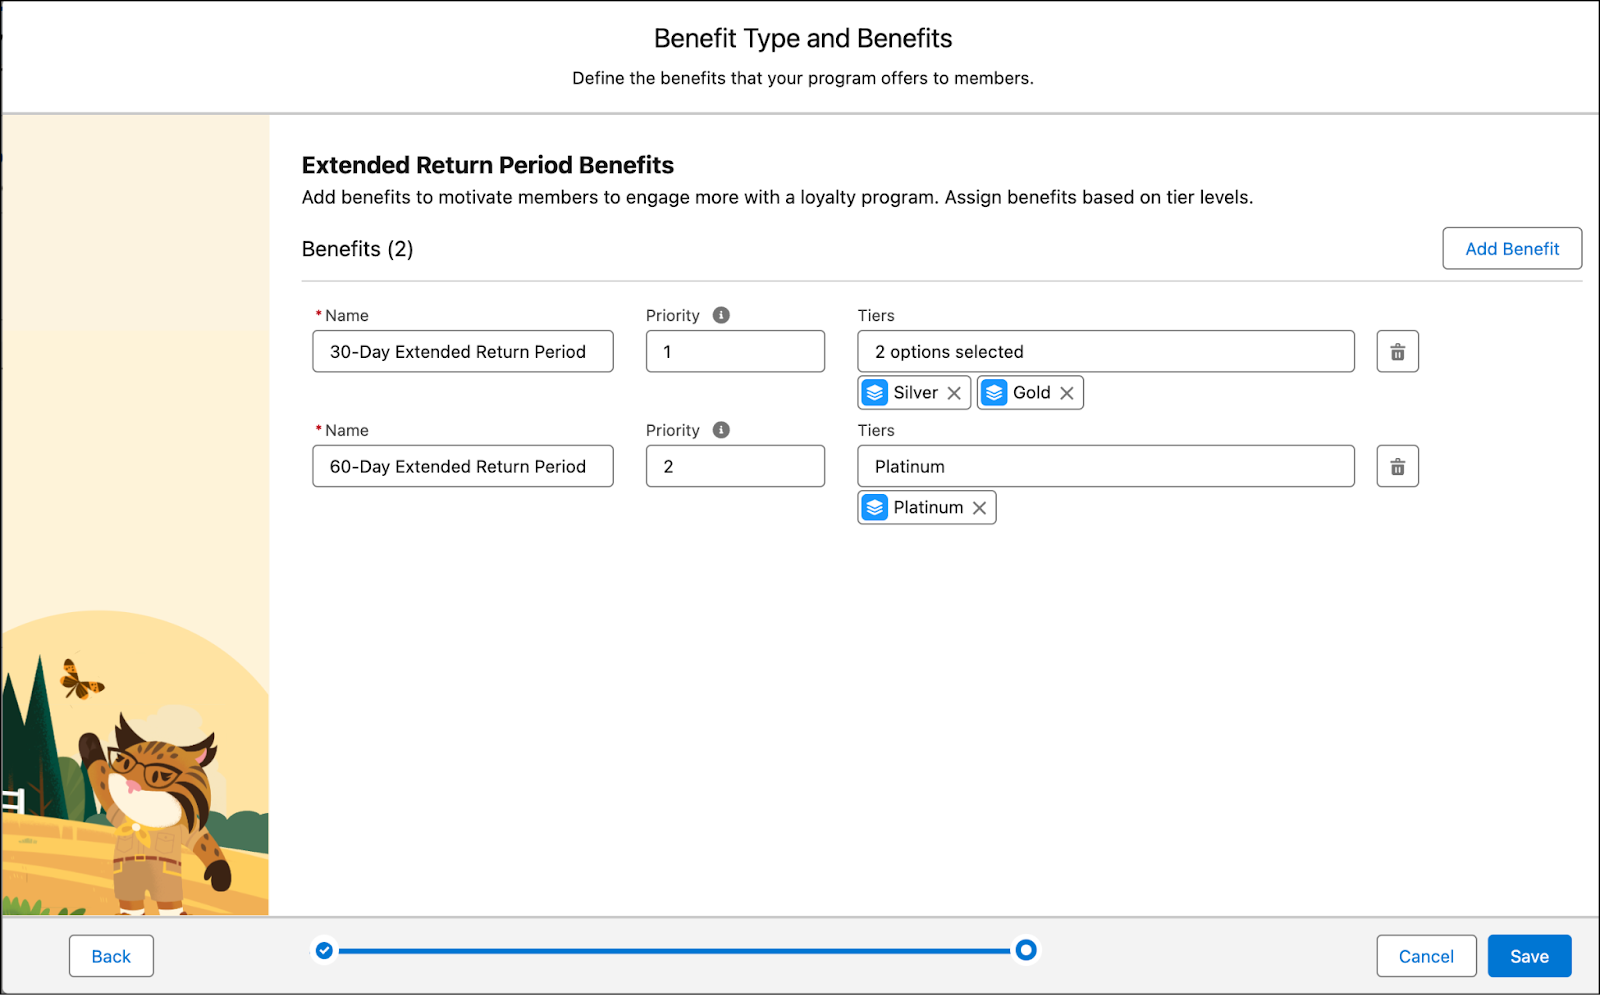
- Add these details.
- Name:
30-Day Extended Return Period on All Orders - Priority:
1 - Tiers: Silver, Gold
- Name:
- Click Add Benefit.
- Add these details.
- Name:
60-Day Extended Return Period on All Orders - Priority:
2 - Tiers: Platinum
- Name:
- Save your work.
Mary requests additional benefits for the program, as well. Review this table to see how they work with benefit categories, benefit types, and priority sequences. For extra practice, you can repeat the steps to add the benefits listed in the next table. This part is optional, so we won’t check for these benefits in your Developer Edition org.
Benefit Category |
Benefit Type |
Benefit Name |
Priority |
Tiers |
|---|---|---|---|---|
Member Exclusives |
Early Access to Seasonal Sales |
One-Day Early Access to Online Seasonal Sales |
– |
Platinum |
Member Exclusives |
Exclusive Discounts |
10% off on certain shoes |
1 |
Gold |
Member Exclusives |
Exclusive Discounts |
20% off on certain shoes |
2 |
Platinum |
Orders |
Shipping |
Free Shipping |
– |
Gold, Platinum |
Here’s an example of several benefit types you could associate with the LevelUp program.
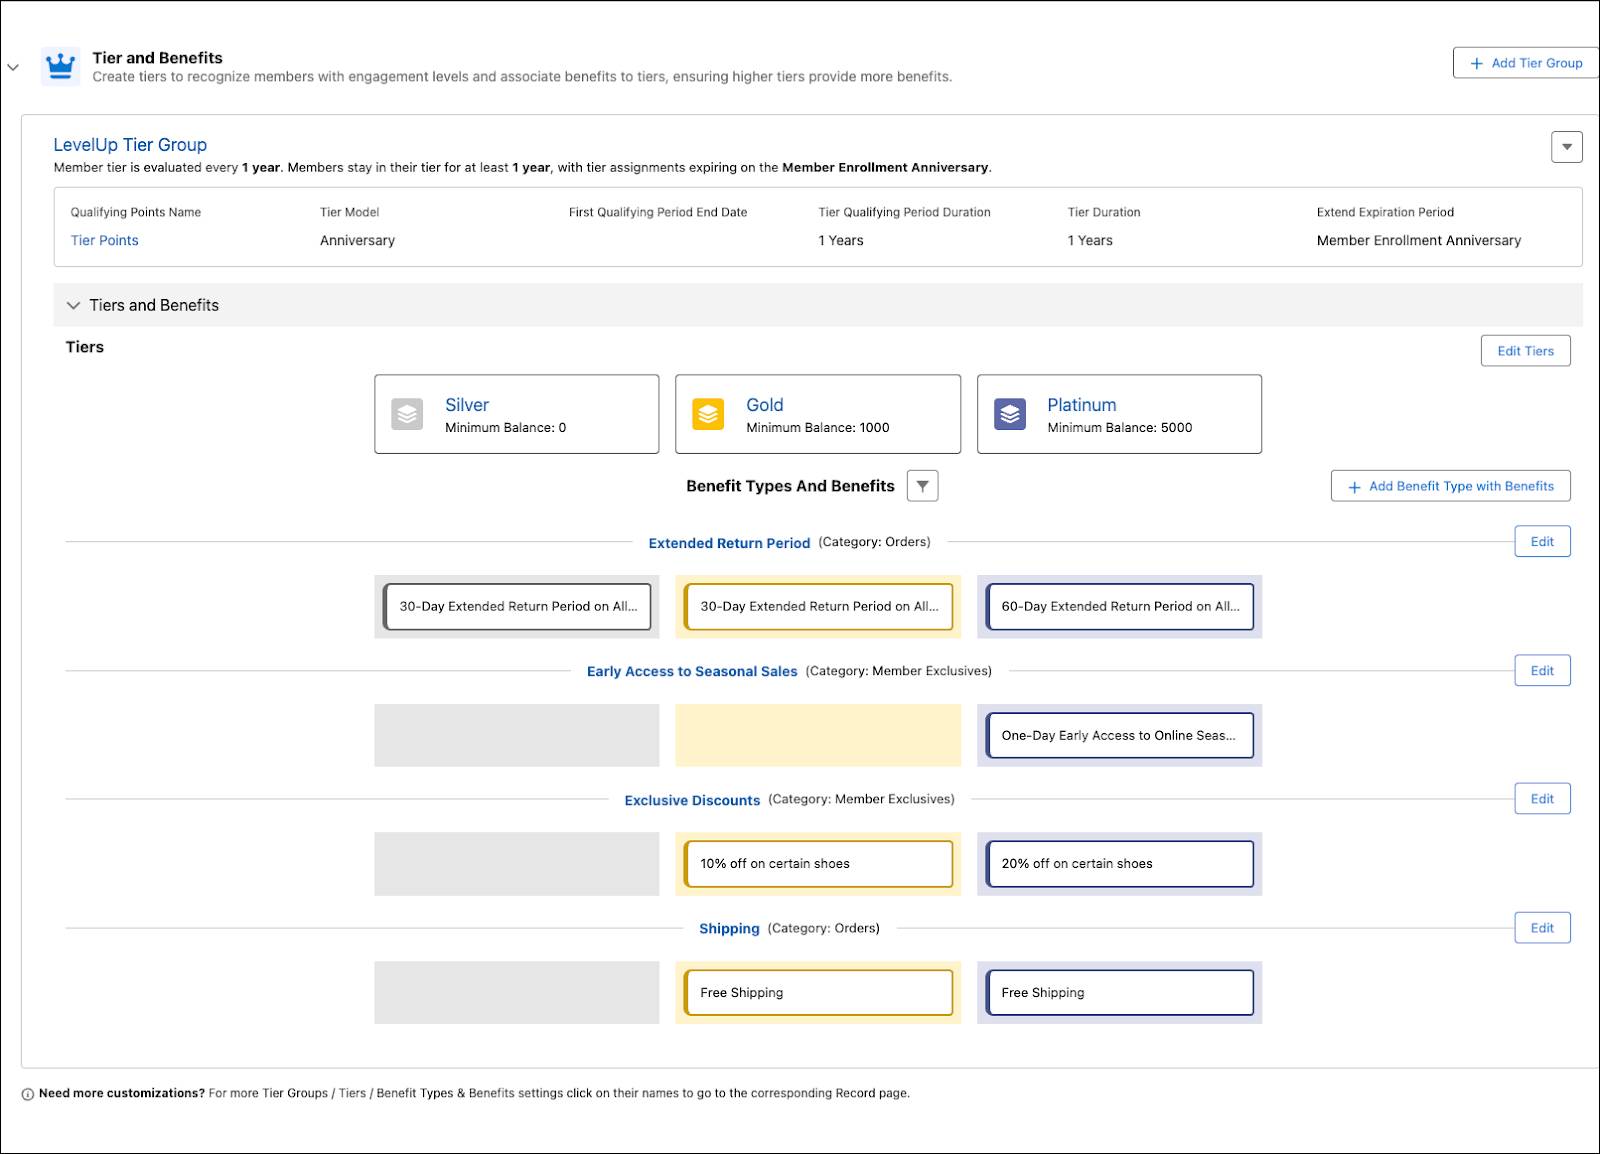
The benefits are all set up.
IMPORTANT: Click Activate Program and boom, your loyalty program is ready!
Next up, add a program partner.
Add Program Partners and Products
Mary wants to promote the LevelX range of shoes. LevelX is an exclusive line created in collaboration with leading designers. To make this product category available for members to redeem, it must be added to the program.
To add the product category to the program, first add En Mode as a partner in the program.
- In the Navigation menu, click the dropdown
 and select Loyalty Programs.
- Click the link for the Level Up program.
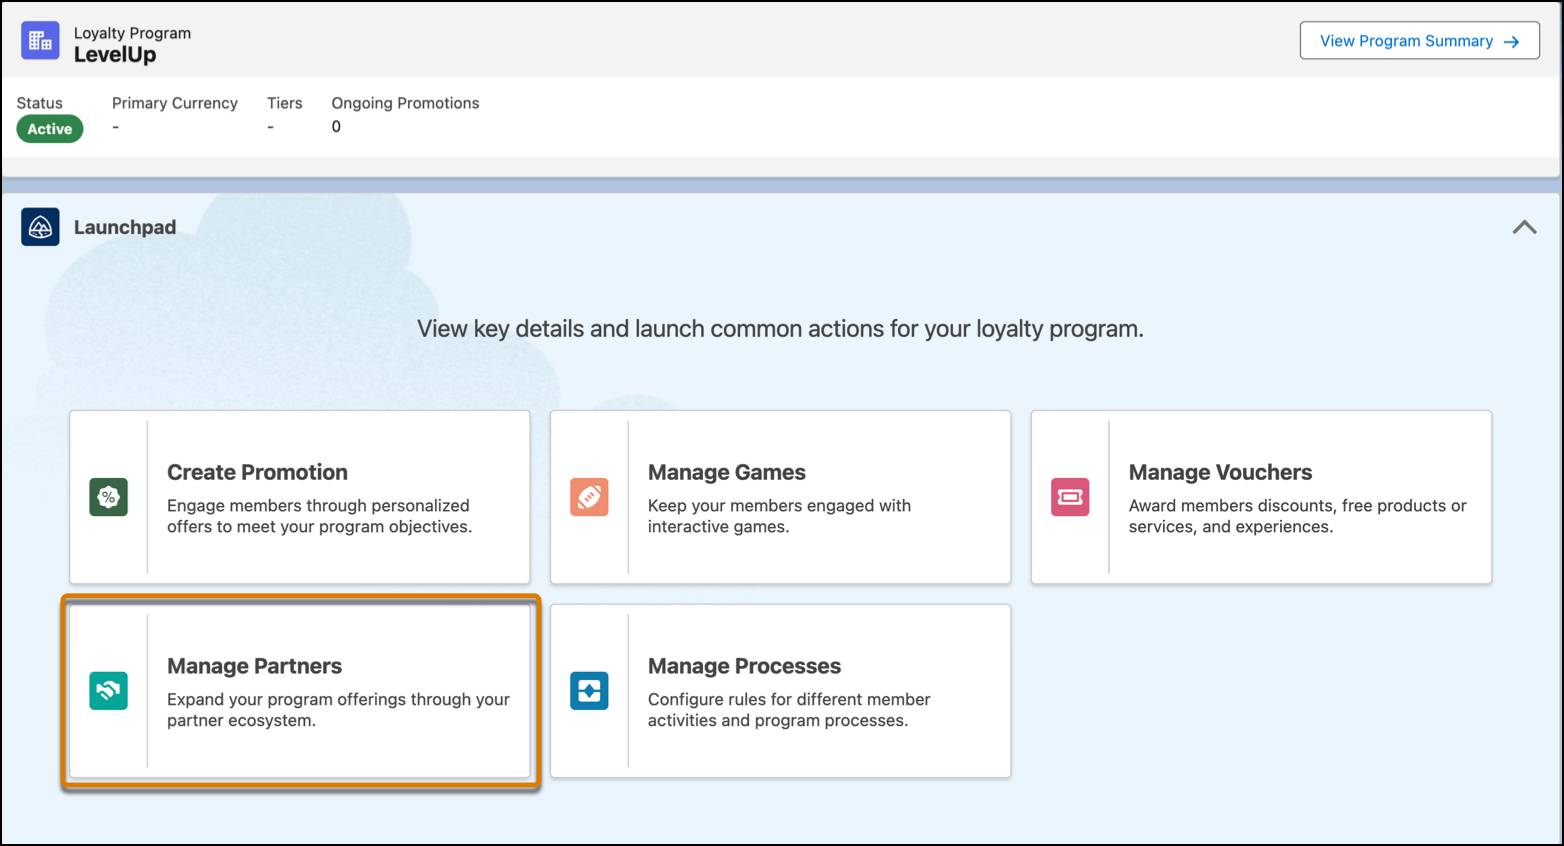
- On the LevelUp Loyalty Program record Launchpad, click Manage Partners.
- In the Loyalty Program Partners list, click New.
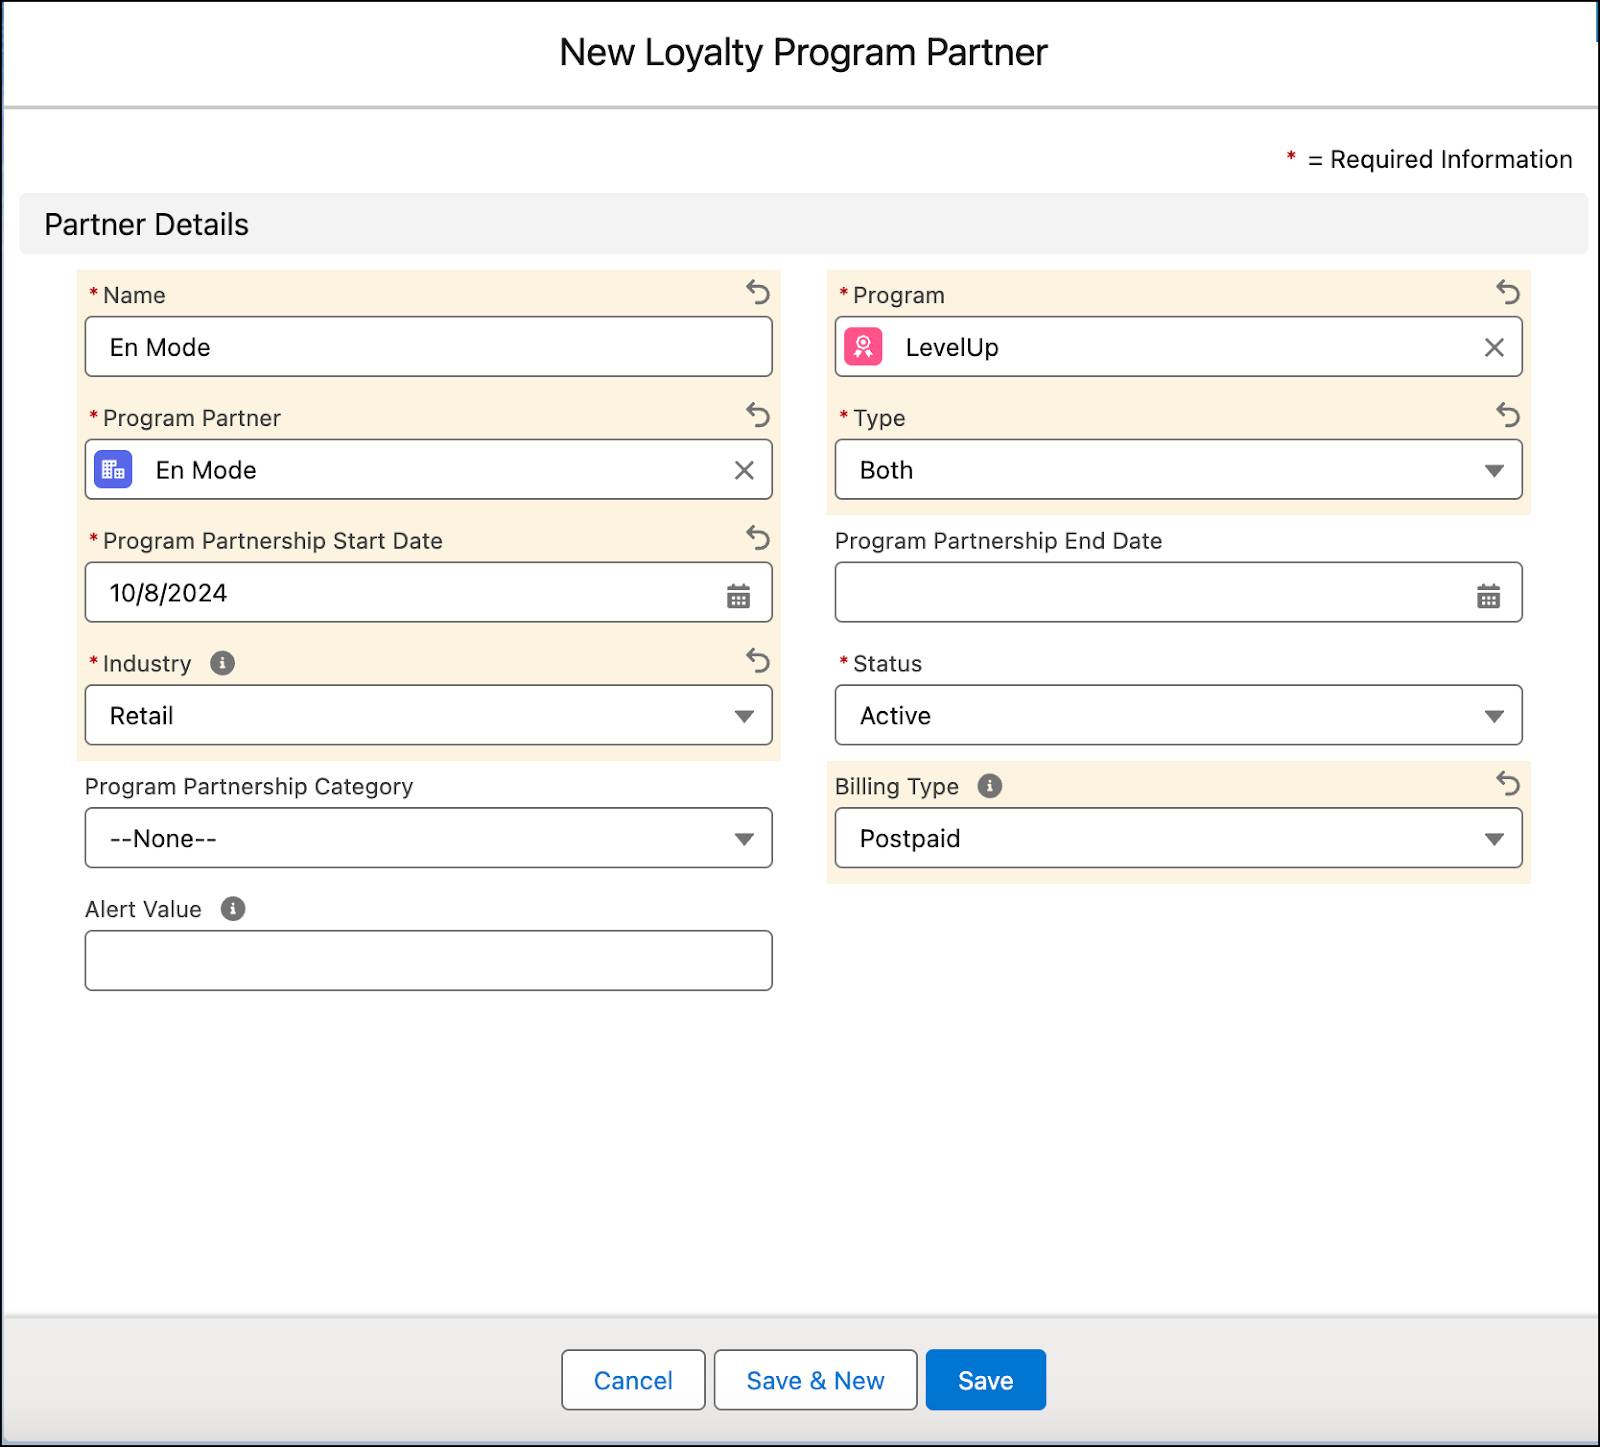
- Add these details.
- Name:
En Mode - Program: LevelUp
- Program Partner: En Mode
- Type: Both
- Program Partnership Start Date: Today’s date
- Industry: Retail
- Status: Active
- Billing Type: Postpaid
- Name:
- Save your work.
Before moving on, learn about these two important fields on the record.
-
Type: This picklist offers three options—Accrual, Redemption, and Both. With the Accrual option, partners reward members with points for doing business with them. The Redemption option involves members redeeming their points with the partner. With the Both option, members who purchase products get points that they can redeem for future purchases.
-
Billing Type: You can choose either Prepaid or Postpaid. With postpaid billing, partners pay the total amount based on a schedule. Prepaid billing means they purchase a points pack from the loyalty program.
To learn more, check out the Expanded Partner Management Trailhead module.
Next, add the product category, LevelX shoes.

- In the Loyalty Partner Products related list on the Loyalty Program Partner record, click Add Products.
- Select Add Product Categories.
- Click Next.
- Select LevelX Shoes.
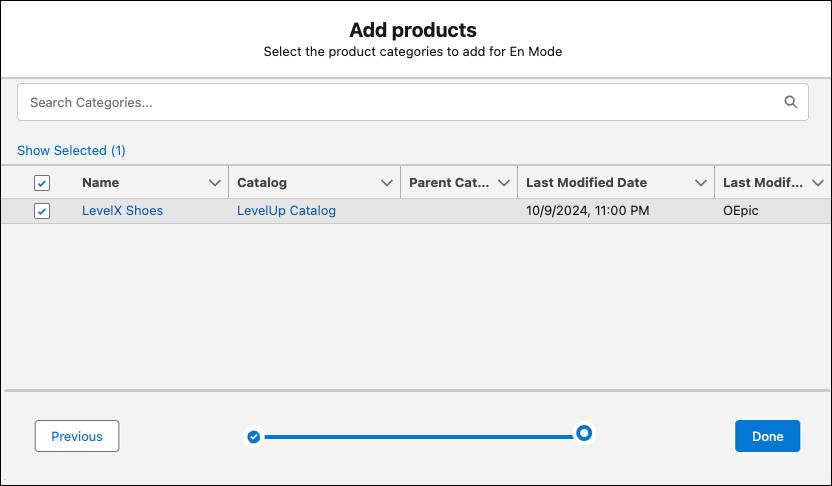
- Click Done.
Now that you’ve added the LevelX product line, you can promote it in the loyalty program.
So far, you’ve created a loyalty program, added tiers to the program, set up the program currencies, and added benefits to tiers. Next, you learn how to set up different types of rewards.