Brand the Site
Follow Along with Trail Together
Want to follow along with an expert as you work through this step? Take a look at this video, part of the Trail Together series.
(This clip starts at the 19:37 minute mark, in case you want to rewind and watch the beginning of the step again.)
Add Company Branding
Much like business cards, television commercials, or billboards, branding is key for sites! The Ursa Major Solar site needs an Ursa Major Solar look. In this next step, add some visual appeal with a company logo, header image, and featured topic images.
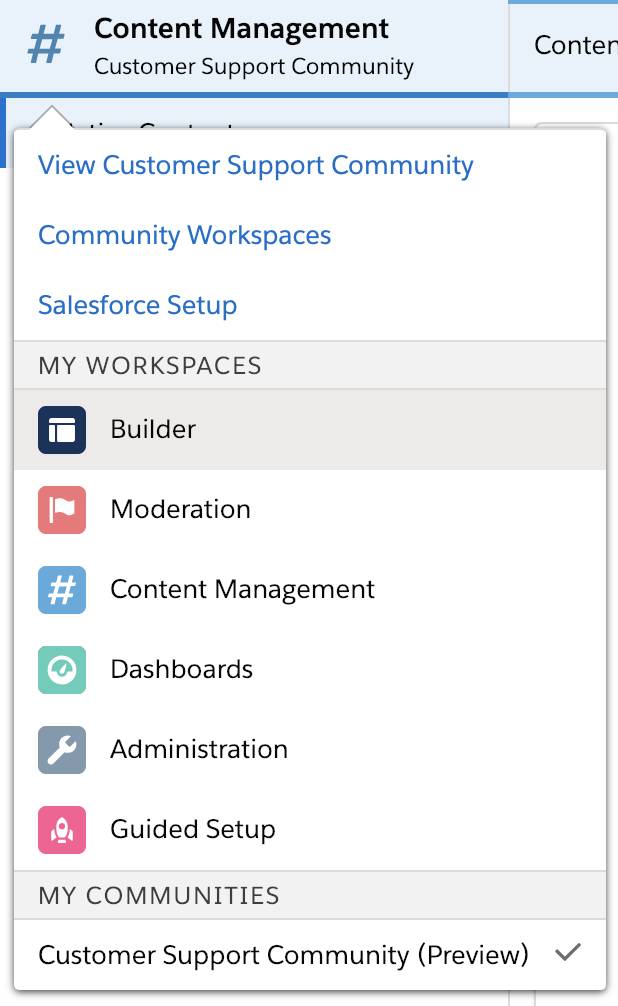
- Click the # in the upper left corner (you should be in Content Management) and then click Builder from the menu selector.
Note: If the popup box appears, click the x to close it.
- Click the Theme icon
 then click Images to expand the Images menu.
- Click the Upload an image icon
 under Company Logo.
- Click Upload Image.
- Select the UrsaMajorLogo.png file from the folder you downloaded, and click Open.
- Click the Upload an image icon
 under Header Image.
- Click Upload Image.
- Select Sunrise.jpg file from your downloaded folder, and click Open.
Customize Using the Experience Builder
More customizing! Edit pages and components with the Experience Builder, and customize their design and content.
- Ensure you are on the Home page (it will show on the tab at the top of the page).
- Click the Page Structure icon
 in the upper left.
- In the Content Header section, click Headline and make these changes using the Headline menu:
-
Title:
Welcome to Ursa Major Solar’s Customer Site! -
Banner Text:
Find solutions, ask questions, and contact support.
- In the Sidebar section, click Reputation Leaderboard, and make the following change using the Reputation Leaderboard menu:
-
Title:
Customer Leaderboard
- In the Sidebar section, click Trending Topics and make the following change using the Trending Topics menu:
-
Title:
Hot Right NowNote: If there are any published articles in the site that are tagged with topics, they show up under the Trending Topics component at this point.
- In the Content Footer section, click Contact Support & Ask Buttons and make the following changes using the Contact Support and Ask Buttons menu:
-
Ask Community Label:
Ask Your Peers -
Contact Support Label:
Ask Support
Add Images to Featured Topics
Featured Topics are useful but to be more visually appealing, they need images. Add some images that reflect Ursa Major Solar’s look.
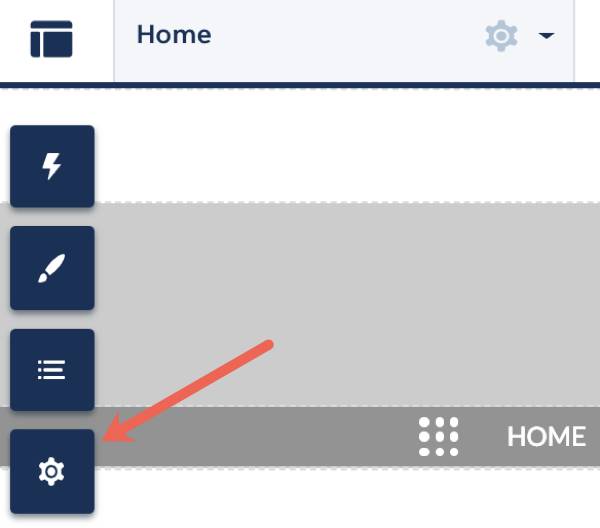
- Click the Settings icon
 on the left.
- With General tab open, scroll down and select Set Featured Topics.
- Click the Batteries item to expand the menu.
- Click Upload thumbnail image to upload an image.
- Click SolarBatteries.jpg from the folder you downloaded earlier, and click Open.
Note: If you run into an issue of uploading images to Featured Topics, it is okay to skip adding images to Featured Topics as this action is not checked when verifying this unit.
- Click Close.
- Repeat the previous steps for Inverters (SolarInverter.jpg) and Solar Panels (SolarPanels.jpg).
- Click Save.
Various Ways to View the Site
Now that you’ve done some customizing, see how the site appears on different devices.
- Click top left and select Builder.
- Click the View Mode button at the top of the page and see how it appears on a phone (Mobile) and a tablet.

- Using the View Mode button, put it in Desktop mode again.
Time to Shine
Time to publish and activate. Publishing will push out your most recent changes made to the site. Note, it is best practice to add a description when publishing the site so feel free to do so when prompted.
- Click Publish.
- Click Publish in the Publish popup.
- Click Got It.
- Click Preview in the upper right corner to see all the changes you made.
- In the upper right corner, click Back to Builder.
Activate to make it accessible to members. In an Experience Builder site, activating sends out a welcome email to all members.
- From Builder, click the menu icon
 in the upper left, and then click Workspaces.
- Click the Administration tile.
- Click Activate, then click OK.
In this step you customized, customized, and customized the site even more. You added Ursa Major Solar branding, used the Experience Builder, and activated your site using Experience Cloud. Your next step is all about engaging users via Reputation Levels.