Create, Test, and Deploy Your Unlocked Package
Build and Test the Project in a Scratch Org
As with any Salesforce DX project, you’re going to start working in your own scratch org. You can run and test your app there before you build the package and install it in your target environment.
- Make sure you are in the
GIFterdirectory.
The GIFter project has a scratch org configuration file ready for you to use. - If you’re not connected to the Dev Hub org, log in to it:
sf org login web --set-default-dev-hub --alias DevHub
- Go ahead and create your scratch org.
sf org create scratch --set-default --definition-file config/project-scratch-def.json
You get a response like:
You now have a scratch org ready to use and set as the default for your project workspace.Your scratch org is ready.
- Next, deploy all your source from the
force-appfolder into your newly created scratch org.sf project deploy start
You’ll see a readout of all the source that was deployed into your org.=== Pushed Source STATE FULL NAME TYPE PROJECT PATH ───── ──────────────────────────────────── ──────────────────── ───────────────────────────────────────────────────────────────────────── Add GIFter CustomApplication force-app/main/default/applications/GIFter.app-meta.xml Add SearchGIPHY/SearchGIPHY.auradoc AuraDefinitionBundle force-app/main/default/aura/SearchGIPHY/SearchGIPHY.auradoc Add SearchGIPHY/SearchGIPHY.cmp AuraDefinitionBundle force-app/main/default/aura/SearchGIPHY/SearchGIPHY.cmp Add SearchGIPHY/SearchGIPHY.cmp AuraDefinitionBundle force-app/main/default/aura/SearchGIPHY/SearchGIPHY.cmp-meta.xml Add SearchGIPHY/SearchGIPHY.css AuraDefinitionBundle force-app/main/default/aura/SearchGIPHY/SearchGIPHY.css Add SearchGIPHY/SearchGIPHY.design AuraDefinitionBundle force-app/main/default/aura/SearchGIPHY/SearchGIPHY.design Add SearchGIPHY/SearchGIPHY.svg AuraDefinitionBundle force-app/main/default/aura/SearchGIPHY/SearchGIPHY.svg Add SearchGIPHY/SearchGIPHYController.js AuraDefinitionBundle force-app/main/default/aura/SearchGIPHY/SearchGIPHYController.js Add SearchGIPHY/SearchGIPHYHelper.js AuraDefinitionBundle force-app/main/default/aura/SearchGIPHY/SearchGIPHYHelper.js Add SearchGIPHY/SearchGIPHYRenderer.js AuraDefinitionBundle force-app/main/default/aura/SearchGIPHY/SearchGIPHYRenderer.js Add ChatterHelper ApexClass force-app/main/default/classes/ChatterHelper.cls Add ChatterHelper ApexClass force-app/main/default/classes/ChatterHelper.cls-meta.xml Add GIPHY CspTrustedSite force-app/main/default/cspTrustedSites/GIPHY.cspTrustedSite-meta.xml Add GIFter FlexiPage force-app/main/default/flexipages/GIFter.flexipage-meta.xml Add GIFter_UtilityBar FlexiPage force-app/main/default/flexipages/GIFter_UtilityBar.flexipage-meta.xml Add GIFter PermissionSet force-app/main/default/permissionsets/GIFter.permissionset-meta.xml Add GiphyMedia0 RemoteSiteSetting force-app/main/default/remoteSiteSettings/GiphyMedia0.remoteSite-meta.xml Add GiphyMedia1 RemoteSiteSetting force-app/main/default/remoteSiteSettings/GiphyMedia1.remoteSite-meta.xml Add GIPHY StaticResource force-app/main/default/staticresources/GIPHY.resource Add GIPHY StaticResource force-app/main/default/staticresources/GIPHY.resource-meta.xml Add jquery360 StaticResource force-app/main/default/staticresources/jquery360.js Add jquery360 StaticResource force-app/main/default/staticresources/jquery360.resource-meta.xml Add GIFter CustomTab force-app/main/default/tabs/GIFter.tab-meta.xml
In your source there’s a permission set (named GIFter) that you use to govern access to the GIFter app you’re building. - Assign the default user in the scratch org to this permission set.
sf org assign permset --name GIFter
=== Permsets Assigned
USERNAME                       PERMISSION SET ASSIGNMENT
─────────────────────────────  ─────────────────────────
test-ou0arkv1qbow@example.com  GIFter
- OK, let’s open the app and try it out.
While you can open the org and then browse to the GIFter app from the App Launcher, let’s go one step further and open it up directly.sf org open --path lightning/n/GIFter
This is an example of what you’ll see if you enter funny animals in GIPHY Search Terms.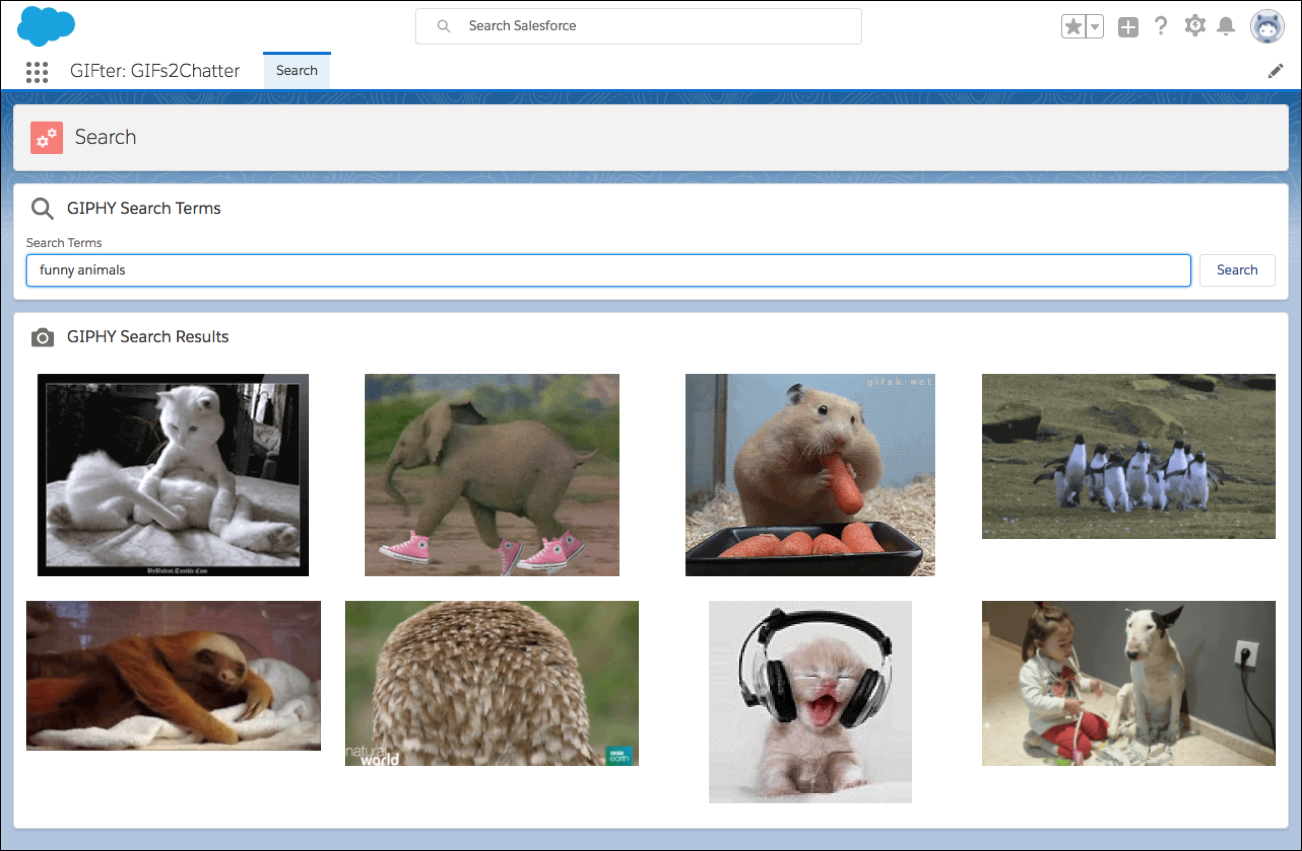
- Try the app out. Have some fun.
At this point, you’ve validated that the app works as expected. Let’s go ahead and create your package!
Create the Unlocked Package
There are two parts to a package: the first is the package and the second is the package version.
A package is really a manifest about what it is you're going to create, whereas the package version is a snapshot in time of the metadata and code that relates to what you're building and installing.
So the first step is to create a package, specifying information that’s unlikely to change, like the name and description. You’re also going to choose the type of package you want to create, in this case, an unlocked package.
- Open
sfdx-project.jsonin your favorite text editor.
GIFter is an open-source project that can change at any time. To ensure that you can successfully complete the steps, let’s make sure your project file looks like this one to start out.{ "packageDirectories": [ { "path": "force-app", "default": true } ], "namespace": "", "sfdcLoginUrl": "https://login.salesforce.com", "sourceApiVersion": "55.0" } - If necessary, delete some existing parameters, such as
id,versionName, andversionNumber. Update thesourceApiVersionto match the version of the Salesforce CLI. Don’t forget to save!
- Create the package.
sf package create --name GIFter --description "Using GIPHY to find GIFs and post to Chatter" --path force-app --package-type Unlocked --target-dev-hub DevHub
The package alias (GIFter) is now associated with the Package ID (0Ho).
=== Ids
NAME                  VALUE
───────────────────── ──────────────────
Package Id           0Hoxxx
If you forget the package alias or package ID, you can list all the packages you created in your Dev Hub by running sf package list.
Create the Package Version
Now that you have the package defined, you can create a specific version of the package. This package version is the artifact that’s installed into various orgs. As you make updates to your app, you create new package versions that contain the updated source.
IMPORTANT: This project illustrates the workflow for creating the package versions. If you copy and paste the command line examples, be sure to substitute your specific information to complete the hands-on challenge.
- Open the
sfdx-project.jsonfile.
Notice that thesf package createcommand updates the project file to include important details about the package. InpackageDirectories, you can see the package name you defined, with placeholders for the version name and version number. The command also creates apackageAliasessection, which maps the package name (alias) to its corresponding package ID (0Ho).{ "packageDirectories": [ { "path": "force-app", "default": true, "package": "GIFter", "versionName": "ver 0.1", "versionNumber": "0.1.0.NEXT" } ], "namespace": "", "sfdcLoginUrl": "https://login.salesforce.com", "sourceApiVersion": "55.0", "packageAliases": { "GIFter": "0Hoxxx" } }TheversionNameis really up to you, and doesn’t necessarily have to change with each new version you create. More importantly, theversionNumberauto-increments based on the use of the NEXT keyword. You can leave the rest alone. - Let’s say you’re ready to release the first version of GIFter.
Update theversionNameandversionNumber."versionName": "Summer '22", "versionNumber": "1.0.0.NEXT"
- Save
sfdx-project.json. - With this information set, create your first package version.
sf package version create --package GIFter --path force-app --installation-key test1234 --wait 10 --target-hub-org DevHub
Successfully created the package version [08cxxx]. Subscriber Package Version Id: 04txxx.
Package Installation URL: https://login.salesforce.com/packaging/installPackage.apexp?p0=04txxx
As an alternative, you can use the "sf package install" command.
OK, so now you’re ready to install this package in another org!
Install and Test the Package Version in a Scratch Org
Before you install the package in your TP (or in the real world, or any of your sandbox or production orgs), it’s always best to first test it in a newly created scratch org. So let’s repeat a few of the steps you performed earlier, yet this time you install your app in a scratch org using the package version you just created.
- Create the scratch org.
sf org create scratch --set-default --definition-file config/project-scratch-def.json
- Install the package into the scratch org using the alias for the package version.
sf package install --wait 10 --publish-wait 10 --package GIFter@1.0.0-1 --installation-key test1234 --no-prompt
This operation takes several moments to complete. When it does, you see the message:Successfully installed package [04t_xxx]
The install command effectively replaces theproject deploy startcommand you used earlier. - Assign the permission set.
sf org assign permset --name GIFter
- Now, let’s open the scratch org and see if things work as expected.
sf org open --path lightning/n/GIFter
As expected, the app works! And if you go into Setup and choose Installed Packages, you can see that your GIFter package has been installed.

This looks good! Time to install it in your Trailhead Playground.
Install the Package Version in Your Trailhead Playground (TP)
Unsurprisingly, you use some of the same commands to install the package version into your TP. Unlike the scratch org, however, the TP already exists so there’s no step to create it.
- Install the package, this time targeting your TP.
sf package install --target-org MyTP --wait 10 --package GIFter@1.0.0-1 --installation-key test1234 --no-prompt
- Once that completes, assign the permission set.
sf org assign permset --name GIFter --target-org MyTP
- And finally, open the org and run the app.
sf org open --path lightning/n/GIFter --target-org MyTP
You’ve successfully used an unlocked package to create, test, and deploy your application. Nice!
We won't check any of your setup. Click Verify Step to go to the next step in the project.