Create Two Employee Agents
Now it’s time to create an agent and see how they look and function in the application. When setting up agents in your environment, you can start with just one agent or create as many agents as you need.
Create a General Agent
The first agent your company asks you to create is an agent that engages and interacts with your employees in response to CRM data-related requests. This includes querying a record, drafting an email, summarizing records, updating records, and more. To solve this, you decide to build an agent called General Agent.
After researching the available topics and their associated actions, you land on these topics.
- MigrationDefaultTopic—though you have to customize it to remove one of the default actions
- Single Record Summary
Initial Agent Setup
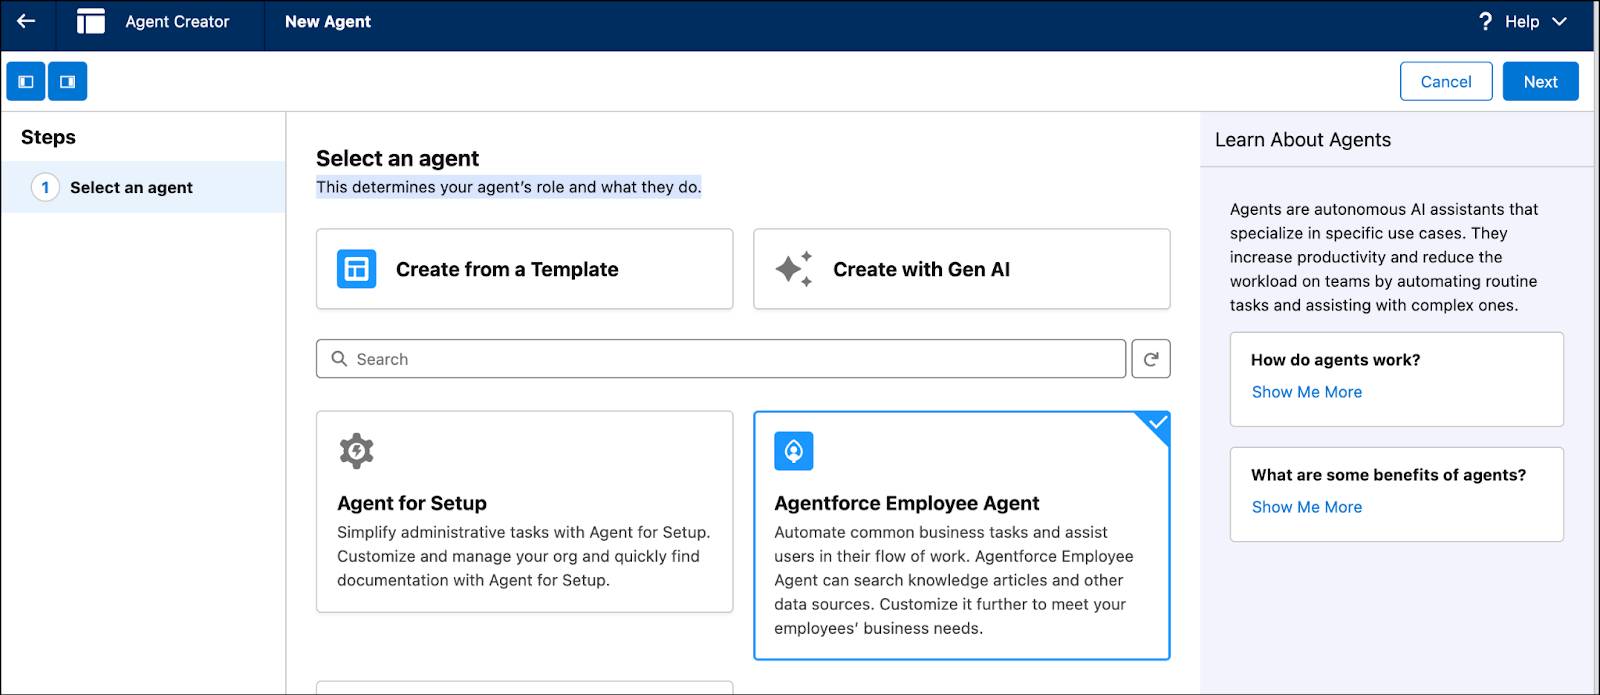
- In the Setup Quick Find, search for and select Agentforce Agents.
- Click + New Agent. Note: If you don’t see the New Agent button, refresh the page.
- Select Agentforce Employee Agent as the type.

- Click Next.
- General FAQ is selected by default. Click See Included Actions to view the included actions. For General FAQ, Answer Question with Knowledge action is associated. This is an action your agent won’t use, so you don’t need this Topic.
- Deselect General FAQ by clicking Added since you want to associate a couple of other Topics after you create it.
- Click Next.
- Use these settings for the agent.
|
Field
|
Value
|
|---|---|
Name |
General Agent |
API Name |
General_Agent |
Description |
Automate common business tasks and assist users in their flow of work. General Agent engages and interacts with the user about any request that could be CRM data related. This could include tasks such as identifying and summarizing records, answering queries, aggregating data, finding and querying objects, updating records, or drafting and refining emails. Customize it further to meet your employees’ business needs. |
Role |
Leave the default role. |
Company |
Coral Cloud Resorts provides customers with exceptional destination activities, unforgettable experiences, and reservation services, all backed by a commitment to top-notch customer service. |
Keep a record of conversations with Enhanced Event Logs to review agent behavior |
Checked |
- Leave everything else as is and click Next.
- For now, Data Cloud and thus Data Libraries won’t be used. Click Create.
- If a popup screen appears, click Let’s Go.
Add Specific Topics and Actions, Quick Test, and Activate
- In Topics, click New and select Add from Asset Library.

- Check the box next to MigrationDefaultTopic and Single Record Summary, then click Finish. Both Topics are now associated with your agent.
- Click MigrationDefaultTopic which opens the Topic Details, showing the Topic Configuration.
- Click This Topic’s Actions to view all of the actions associated with MigrationDefaultTopic. You see Answer Question with Knowledge at the bottom, which uses Data Cloud. Since you don’t have Data Cloud enabled, you need to remove this action.
- Click the down arrow next to Answer Questions with Knowledge and click Remove From Topic. This change automatically saves.
- In the Conversation Preview window, if you see a message stating You’re about to use Agentforce, click Got It.
- In the Conversation Preview window, click Refresh.

- In the Conversation Preview window, enter
Tell me about Edge Communications. Note: Typically you run more tests than this prior to activating. The Batch Test button redirects you to the Testing Center from which you can run a larger test on this agent. For the purpose of this project, you don’t need to do that.
- Read the information provided about Edge Communications.
- In the upper right corner, click Activate.
- In the Configuration Issues Detected popup appears, click Ignore & Activate.

- Once activated, click the Back Button. Note: If a pop-up appears asking if you are sure you want to leave, click Leave. Don’t worry—your work has been saved.

Congratulations! You’ve now created a functional employee agent. Next, you’ll create a permission set and try using your new agent.