Examine Common Salesforce Maps Use Cases
Learning Objectives
After completing this unit, you’ll be able to:
- Automate user processes.
- Interact with plotted data.
- Create routes and schedules.
Earlier you met Candace Evans, a sales rep at Cloud Kicks. Throughout this unit, you look at common use cases for sales users based on Candace’s experience. But Salesforce Maps isn’t just for sales! It can be used by anyone interested in making business decisions faster using location intelligence. Here are a few examples.
Role |
Use Cases |
|---|---|
Sales User |
Identify and prioritize leads, accounts, and opportunities based on proximity. Easily create, save, and execute sales visits with optimized routes. |
Service User |
View location of service calls to plan technician visits. Technicians utilize the check-in feature to help dispatch and schedule service calls based on the location of the available technicians. |
Marketing User |
View leads and contact locations as a heat map. Identify population areas for effective marketing campaigns and book event venues based on the density of relevant leads and contacts within specific geographical areas. |
Management Team |
View teams’ accounts and opportunities for coaching purposes. Help team members efficiently plan prospect or client visits based on proximity. View and adjust ownership of territories as needed. |
Candace Evans meets with her manager to discuss Salesforce Maps features that can help her increase productivity, stay organized, save time, and, consequently, increase revenue through faster maturation of her deals. He shows her how to automate some processes and demonstrates how to use Salesforce Maps. Excited about what she learned, Candice is ready to start.
Automate Processes
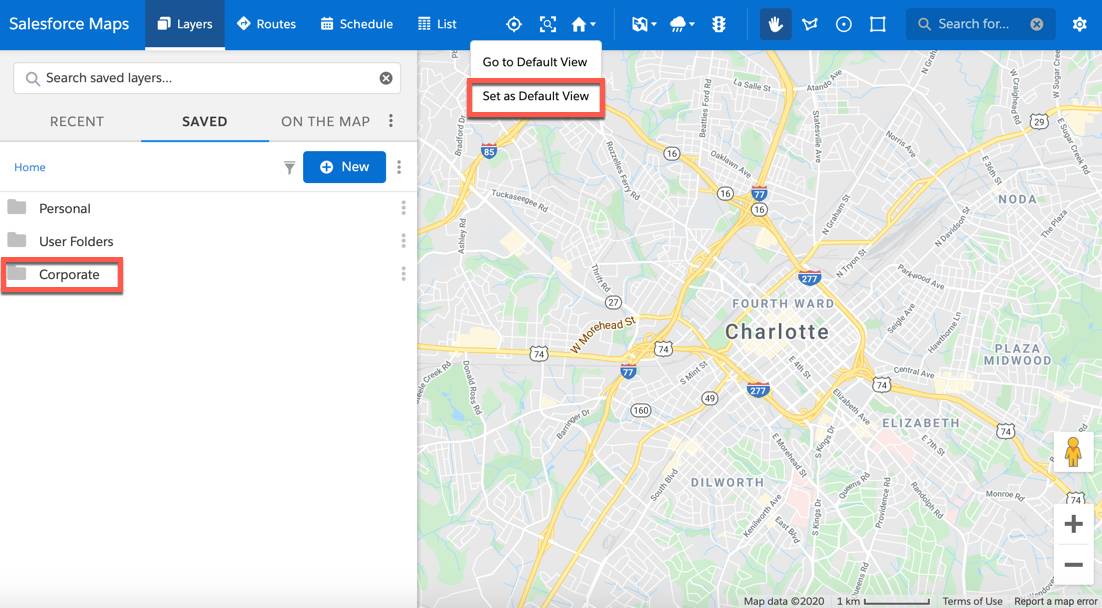
Hoping to save time, she starts by automating some of her account planning needs. Candace’s territory consists of one state—North Carolina. She wants a zoomed-in view of her territory when using Salesforce Maps, so she enters North Carolina in the search bar, and then adjusts the map zoom level to display a complete view of her territory. Next she selects  and chooses Set as Default View to set the current map as her default view. Next, she selects the Corporate folder on the left side panel.
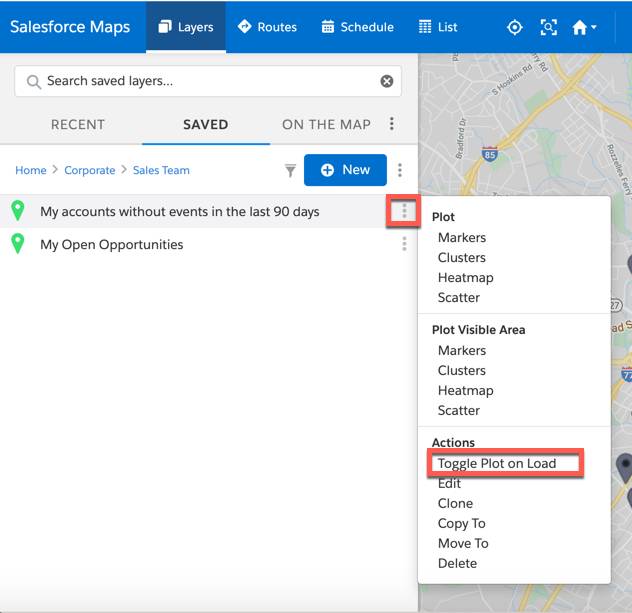
A sales team subfolder appears and contains two marker layers.
- My accounts without events in the last 90 days
- My Open Opportunities
Rather than plotting these marker layers each time she uses Salesforce Maps, Candace sets them to load automatically by clicking the three vertical dots next to each layer and selecting the Toggle Plot on Load action.
Candace tests her newly set automation by refreshing her map.
Interact with Markers
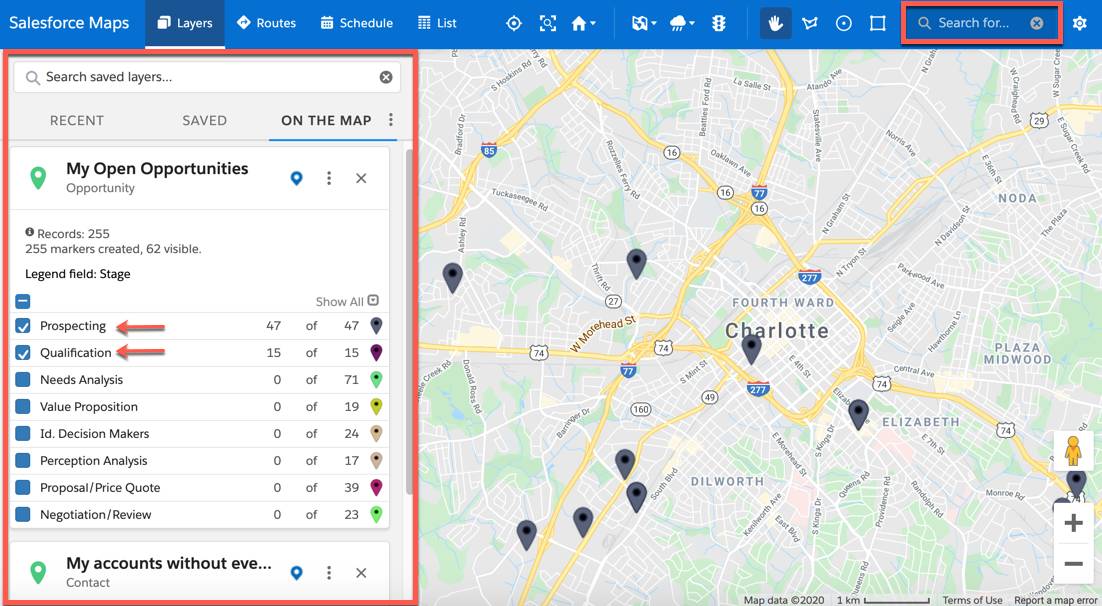
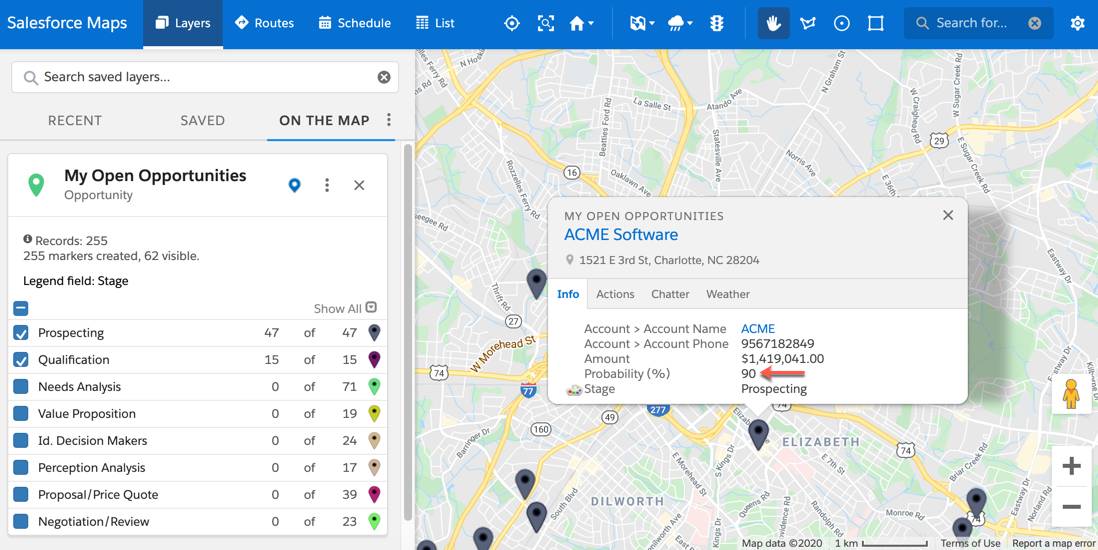
The map automatically loads with a view of her territory and both marker layers plot. The opportunity marker layer has a legend that displays map markers as different colors based on the opportunity stage.
Candace decides to plan visits only to her opportunities in the prospecting and qualification stages. She un-checks all visual markers in the left side panel, and then selects the checkbox next to both Prospecting and Qualification.
Now she can start planning her week in Charlotte, North Carolina. She begins by using the Point of Interest search bar to center in on that map area.
Candace clicks a marker to view more information, including the account name, phone number, opportunity amount, probability, and stage.
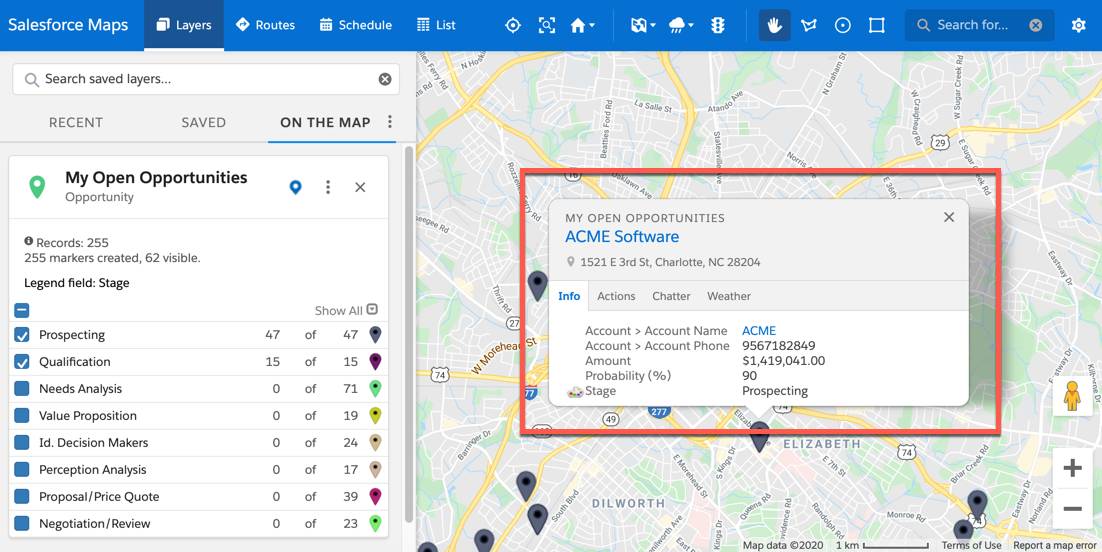
She calls the account, ACME Software, sets up a meeting for Monday at 10 AM, and edits the probability field of the opportunity to 90%.
Then she clicks the Actions tab and clicks Log a Call under the activities section where she enters notes about her call. Next, she clicks New Event and creates a new event for her scheduled meetings on Monday at 10 AM. Feeling excited about her progress, she clicks Add to Route under the actions section and starts creating her route for Monday.


Routes
After adding the marker to a route, Candace draws a shape around other account markers in the area and uses the Mass Actions automation to add them all to the route.

All selected accounts appear on the left side panel under the Routes tab. Since Candace has one appointment, she toggles on Time-based Routes.

Next, she enters the time of her appointment and sets the duration to 1 hour. She doesn’t have any other appointments for that day. She sets the duration for all other stops as 30 minutes and selects optimize. Salesforce Maps returns the most optimal way to get to each stop, as well as the length of time it takes in traffic and miles driven.

Candace saves her route and follows the same steps to create a route for additional days.
When creating routes, here are some answers to commonly asked questions.
Questions |
Answers |
|---|---|
Can you set your home as your default start and end location? |
Yes, create a favorite location and select the settings gear to add your favorite location as your start and end location. |
Can you add an airport or hotel to your route? |
Yes, select Add a Stop at the bottom of the route menu or search for the location using the points of interest search bar and select Add to Route. |
How can you add a meeting time and duration to a route? |
Yes, toggle on Time-based Routes and enter meeting time and duration. |
Candace completes her routes for the week and starts planning for the following week.
Schedule
The following Monday she scheduled meetings with out-of-town clients as events in her Salesforce calendar. She wants to see these scheduled meetings on the map so she can add additional meetings where there are gaps. In this case, she would use the Schedule tab to view her calendar events. After selecting the Schedule tab, she selects the date she’s traveling—now her meetings display in an easy-to-follow view.
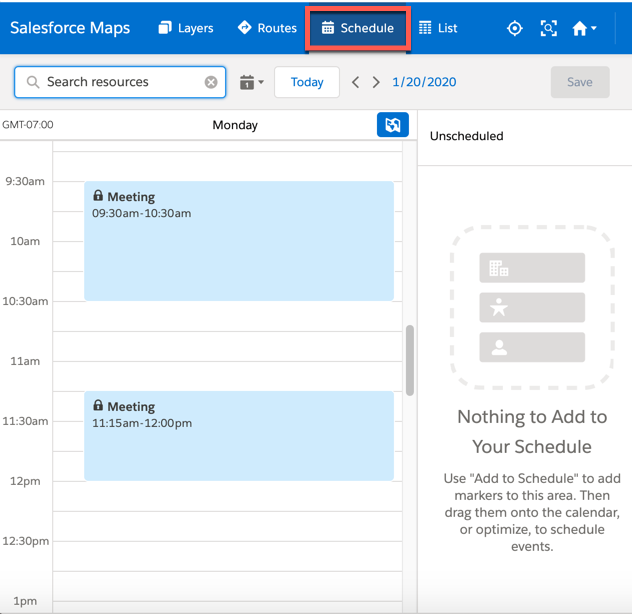
She uses the calendar to select the week view.

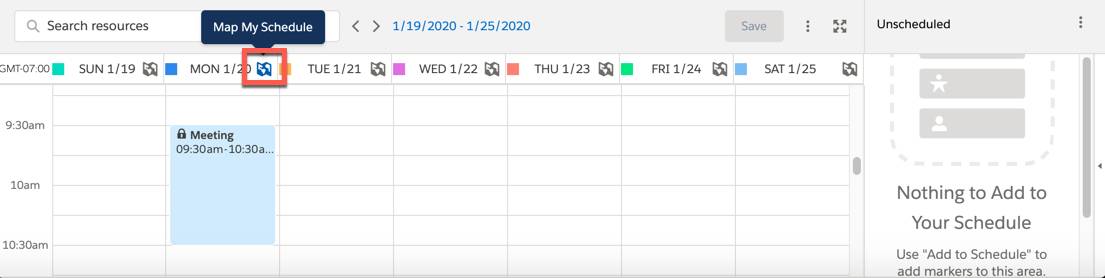
Candace has two scheduled meetings on Monday but no other scheduled meetings scheduled for the rest of the week. She selects Map My Schedule to display her route for Monday on a map.
She notices a number of gaps between her meetings. She clicks some nearby markers, calls each account, and schedules additional meetings.
Under the actions tab, she clicks Add to Schedule for each additional meeting and they display in the unscheduled queue. Next, she drags each account to the meeting time in her schedule for Monday.

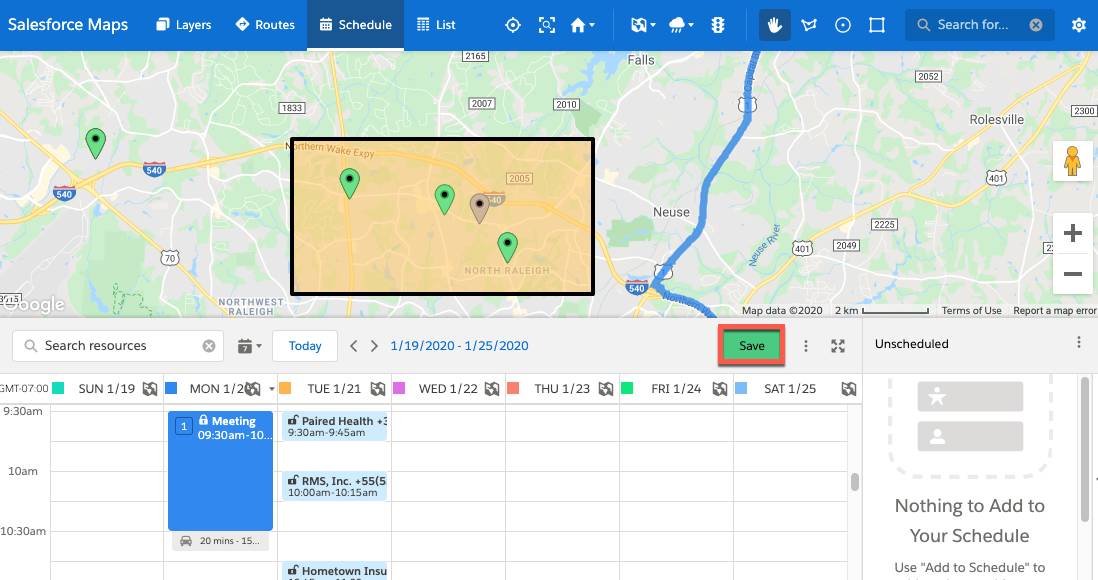
Once her Monday schedule is complete, she turns her attention to Tuesday. Her flight home doesn’t leave until Tuesday evening, so rather than working in the hotel lobby for the day, she decides to schedule some meetings for Tuesday. She draws a shape on the map around opportunities between the hotel and airport and takes the following steps.
- Right click in the shape, select mass actions, then select Add to Schedule.
- In the unscheduled queue, click the T button on the toolbar for Tuesday.
- Select the Add to Schedule button.
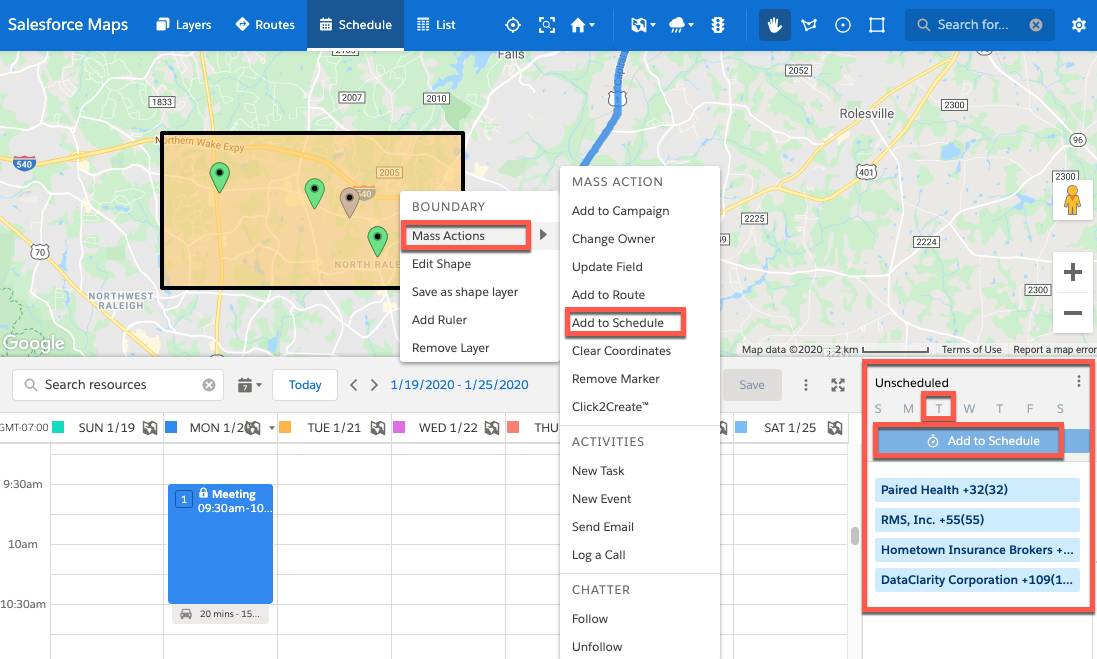
All unscheduled accounts populate on the schedule under Tuesday. She makes adjustments by dragging accounts to different time slots then selects Map My Schedule to view her route on the map. When satisfied, she clicks Save and her meetings are automatically saved as events in her Salesforce calendar.
Candace is thrilled about the time she saved planning efficient routes and schedules. Not only that, once she’s in the field, Salesforce Maps can also guide her through her daily appointments right from her phone!
Resources
- Salesforce Help: Create a Maps Favorite Location
- Salesforce Help: Routes and Schedule Settings in Maps
- Salesforce Help: Use Heatmaps in Maps
- Salesforce Help: Creating a Route in Maps
- Salesforce Help: Create a Time Based Route in Maps