Set Up Interaction Summaries
Learning Objectives
After completing this unit, you’ll be able to:
- Enable the Interaction Summary setting.
- Add an Interaction Summaries component to Home and Account pages.
- Add an Interaction Attendees component to the interaction record page.
- Disable role hierarchy-based sharing.
- Enable Compliant Data Sharing for interactions and interaction summaries.

Enable the Interaction Summary Setting
The first task at hand for Matt is to enable the Interaction Summary Setting. This setting unlocks all the relevant components required to set up the Interaction Summaries feature. Remember that you can’t disable the Interaction Summary setting after it’s enabled.
Here’s how he enables the Interaction Summary setting.
- Click
 and then click Setup.
- In the Quick Find box, enter
interaction summary, and select Interaction Summary Settings.
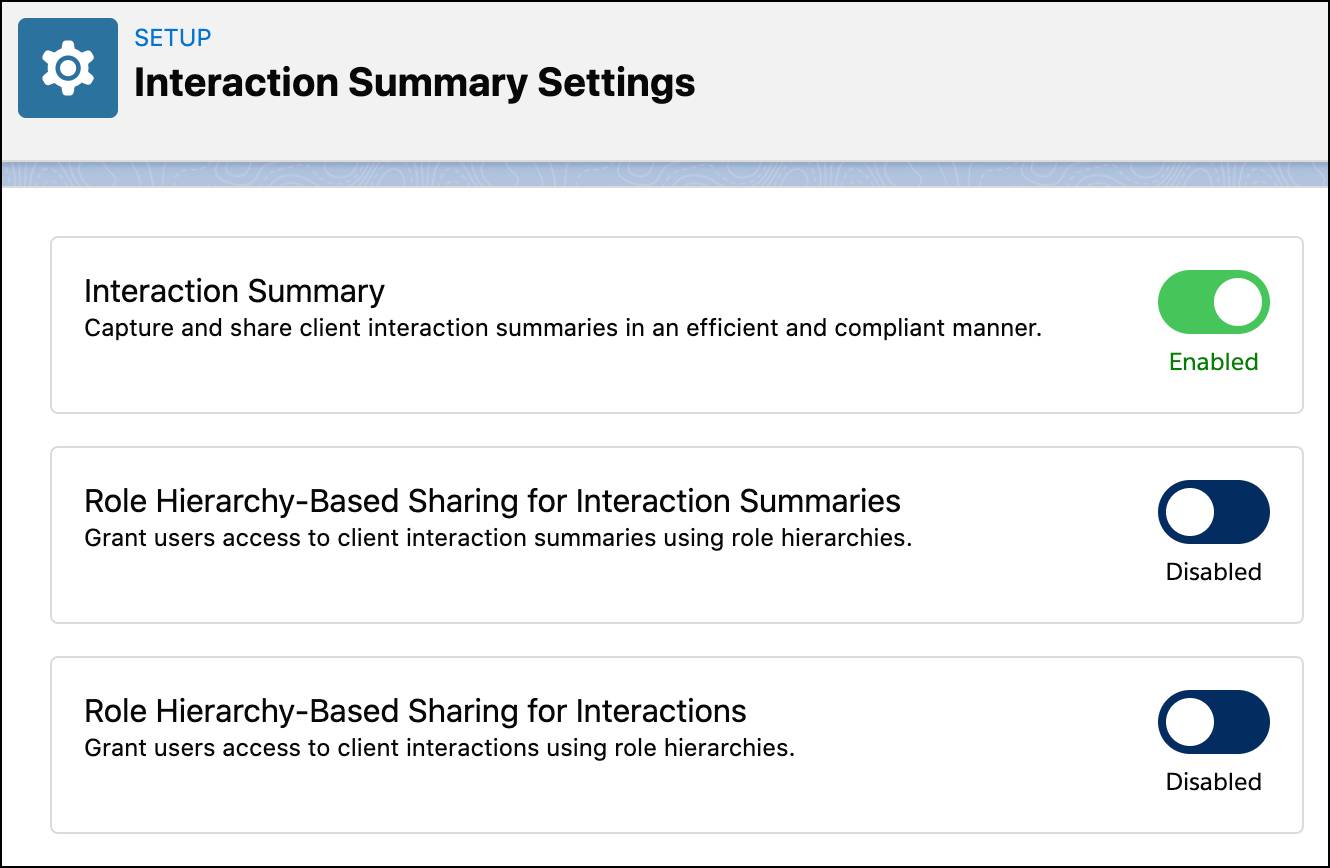
- Enable Interaction Summary.
Add the Interaction Summaries Component to Home and Account Pages
Matt wants to make sure that Rob has easy access to interaction summaries whenever he logs in to the org. Rob tells him that the home and client account pages are the two places that he frequently visits. So Matt adds the Interaction Summaries component to these pages.
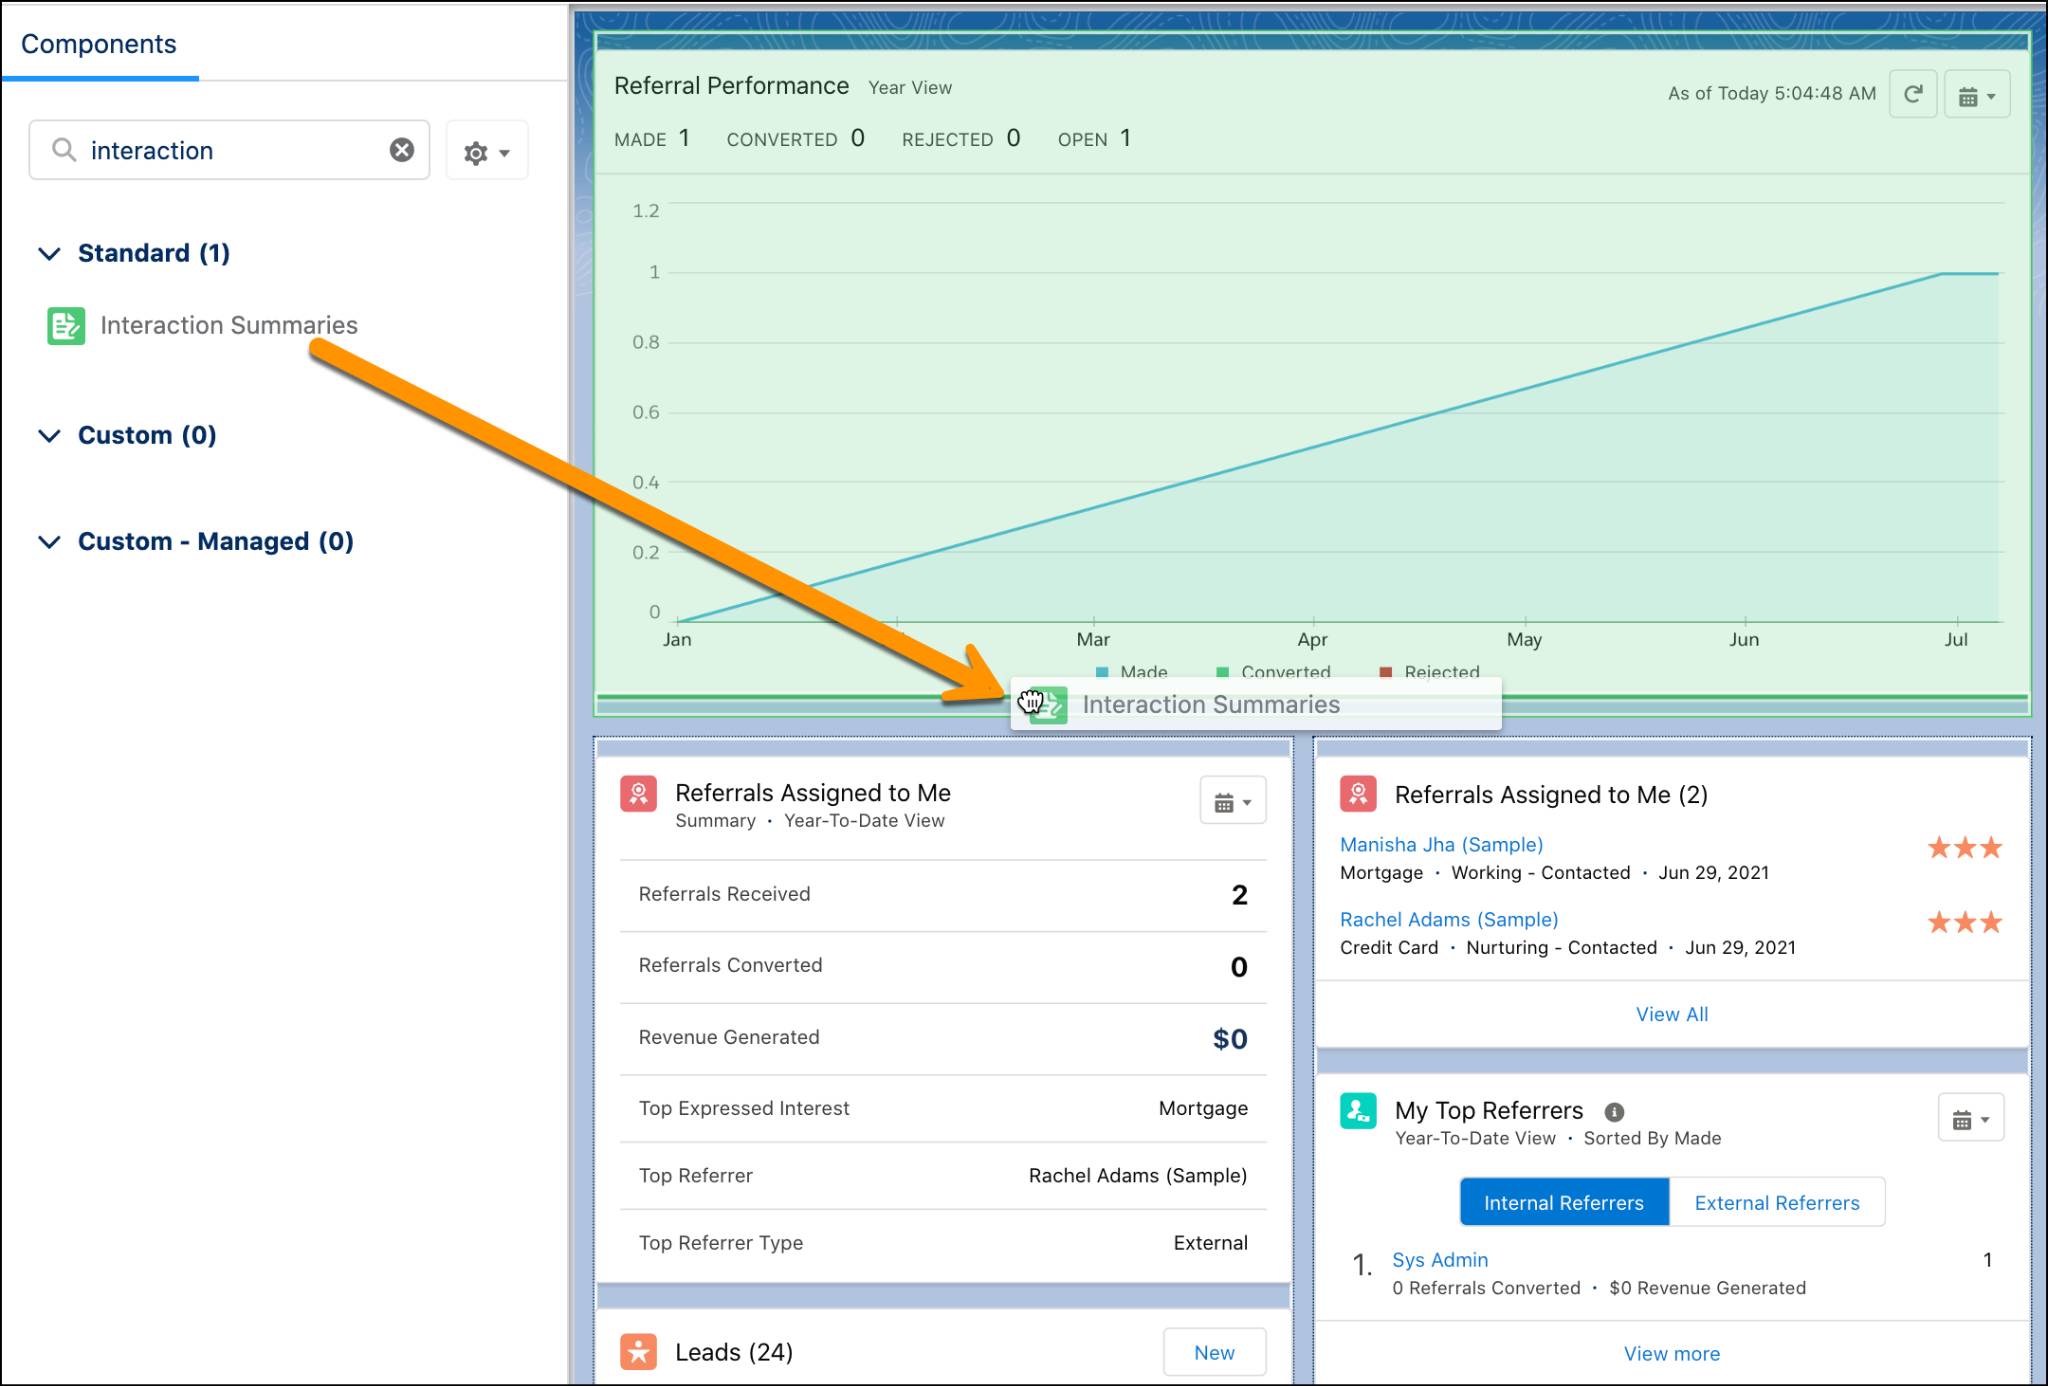
The Interaction Summaries component displays interaction summaries in the context of the page it’s added to. So when Rob logs in to the org and opens the Home tab, he sees all the interaction summaries that he has access to across all accounts. When he opens a particular account, he only sees the interaction summaries related to that account. Smart, eh?
Here’s how Matt adds the Interaction Summaries component to the home and account pages.
- On the Home page, click
 and then click Edit Page. For the account page, open an account record page and do the same.
- On Lightning App Builder, from the Components sidebar, drag the Interaction Summaries component onto the page.
- Click Save.
Add Interaction Attendees Component to Interaction Record Page
Attendees are one aspect of client interactions that Rob wishes he could document properly. Until now, he’s been mentioning them as a footnote in his meeting notes or relying on his memory. But as the notes pile up, it becomes harder to remember attendees for past client meetings.
Salesforce came up with Interaction Attendees to solve this problem. Now Rob gets a dedicated component just to record the attendees for an interaction.
Here’s how Matt adds the Interaction Attendees component to an interaction record page.
- Click
 | Setup | Object Manager tab.
- In the Quick Find box, enter
interaction, and then click the Interaction object.
- Click Lightning Record Pages | Interaction Record Page | Edit.
- If you see a No Data for this Object window, click OK. This window appears because you haven’t created any interactions yet.
- From the Components sidebar, drag the Interaction Attendees component onto the page.
- Click Save.
Disable Role Hierarchy-Based Sharing
Role hierarchy-based sharing allows data sharing based on the order of roles you have set up in your org. This feature is enabled by default to allow automatic sharing. For this acquisition deal, Rob doesn’t want the related interactions or summaries to be shared with his seniors unless they’re cleared by the compliance manager. So Matt disables the settings for both interactions and summaries.
- Click
 and then click Setup.
- In the Quick Find box, enter
interaction, and then select Interaction Summary Settings.
- To revoke access to interaction summaries using role hierarchies, disable Role Hierarchy-Based Sharing for Interaction Summaries.
- To revoke access to interactions using role hierarchies, disable Role Hierarchy-Based Sharing for Interactions.

Set Up Compliant Data Sharing for Interaction Summaries
If you’ve completed the Compliant Data Sharing in Agentforce Financial Services badge, you already understand the preliminary admin-related tasks required to set up Compliant Data Sharing. In this unit, you explore the remaining setup required to make Compliant Data Sharing work with Interaction Summaries.
If your business use case doesn’t require Compliant Data Sharing’s controlled sharing, you can use Salesforce’s other sharing features to share interactions and summaries.
Enable Compliant Data Sharing for Interaction and Interaction Summaries
Before Rob can share interaction and interaction summaries with his team members, Matt must enable Compliant Data Sharing for him. Here’s how he does that.
- Click
 and then click Setup.
- In the Quick Find box, enter
object enablement, and then select Object Enablement Settings.
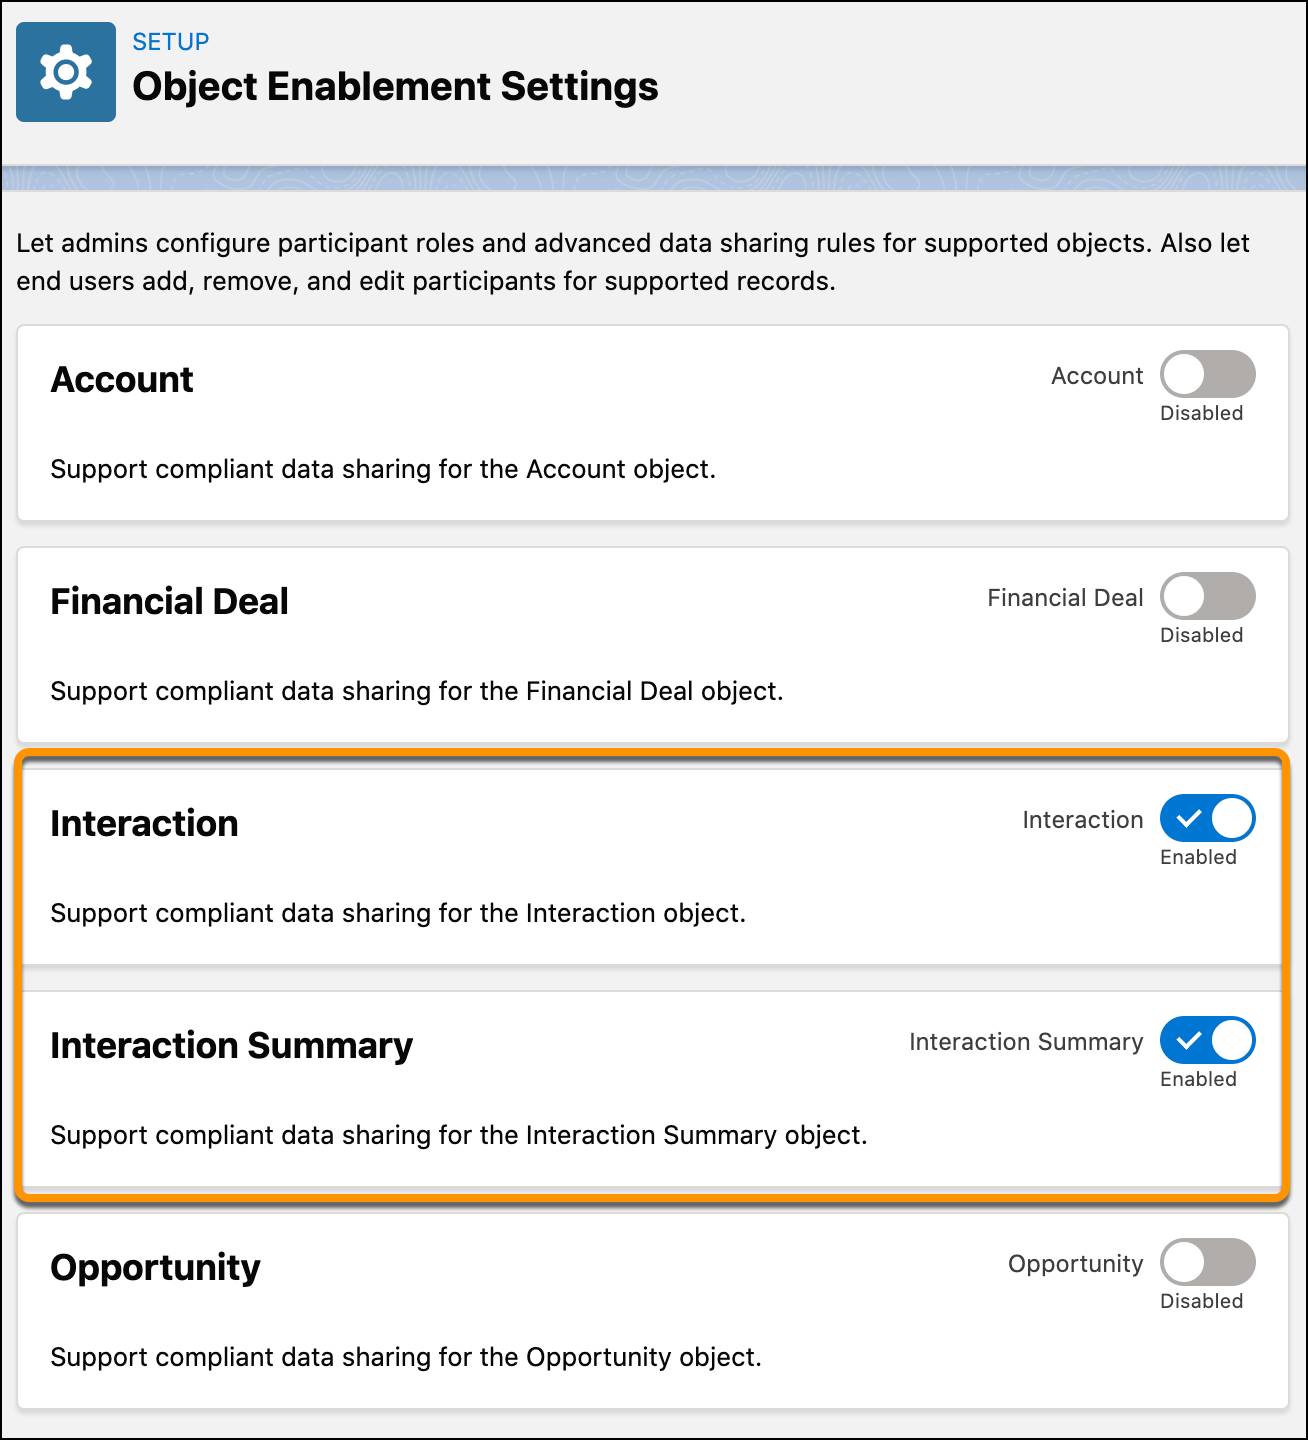
- Enable Interaction.
- Enable Interaction Summary.
Add Manage Participants Components to Interaction Record Page
Participants are users who have been granted access to an interaction or summary using Compliant Data Sharing. The Manage Participants component lets Rob share interactions and interaction summaries to multiple participants at a time. Participants can be individual users or groups.
The Manage Participants component also makes smart suggestions regarding the participants to be added, making sharing notes convenient and time-saving. For interactions, you can add accounts and interaction attendees as suggestions. And for summaries, you can add accounts, partner accounts, interactions, and interaction attendees.
Matt adds the Manage Participants component the same way he added the Interaction Attendees component in the previous section. First, he adds the component to the Interaction page.
- Click
 | Setup | Object Manager tab.
- In the Quick Find box, enter
interaction, and then click the Interaction object.
- Click Lightning Record Pages | Interaction Record Page | Edit.
- If you see a No Data for this Object window, click OK. This window appears because you haven’t created any interactions yet.
- Drag the Manage Participants component onto the page.
- Select the type of participants to show up as suggestions.
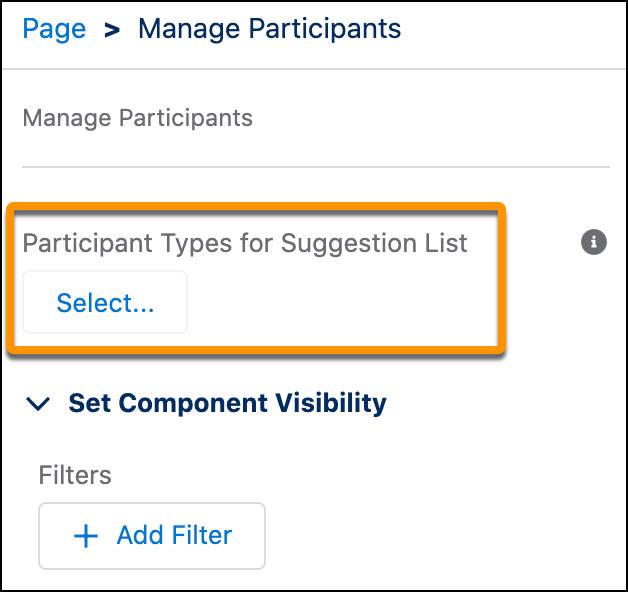
- Select the Share Interaction component, and under Participant Types for Suggestion List, click Select.
- In the Available box, select the participant type and click
 to move it to the Selected box. Matt selects Account.
- Click OK.
- Back on the Lightning App Builder page, click Save.
Add Manage Participants Components to Interaction Summary Record Page
Next, Matt adds the Manage Participants component to the Interaction Summary Record page.
- Click
 | Setup | Object Manager tab.
- In the Quick Find box, enter
interaction summary, and then click the Interaction Summary object.
- Click Lightning Record Pages | Interaction Summary Record Page | Edit.
- If you see a No Data for this Object window, click OK. This window appears because you haven’t created any interaction summary yet.
- From the Components sidebar, drag the Manage Participants component onto the page.
- Select the type of participants to show up as suggestions.
- Select the Share Interaction Summary component, and under Participant Types for Suggestion List, click Select.
- In the Available box, select the participant type and click
 to move it to the Selected box. Matt selects Account.
- Click OK.
- Back on the Lightning App Builder page, click Save.
Matt has now successfully set up Interaction Summaries for his org. In the next unit, follow Rob as he creates his first interaction summary and manages its various aspects. Start your engines!
Resources
- Salesforce Developers: Enable and Configure Interaction Summaries
- Salesforce Developers: Configure Sharing Settings for Interaction and Interaction Summaries
- Salesforce Developers: Compliant Data Sharing in Agentforce Financial Services