Build a Promotion
Learning Objectives
After completing this unit, you’ll be able to:
- Create a promotion.
- Apply the promotion to a product.
- Explain ways to adjust pricing for child products.
Create a Promotion
With the blueprint of her promotion ready, Ada is all set to create the promotion. Here’s what she does.
Use the App Launcher to locate and launch Vlocity Product Console. On the Vlocity Product Console Dashboard, in the Product Management section, click the new (+) icon beside Promotion. In the New Promotion page, there are four sections Ada needs to fill in.
- General Properties
- Duration
- Additional Properties
- Effectivity
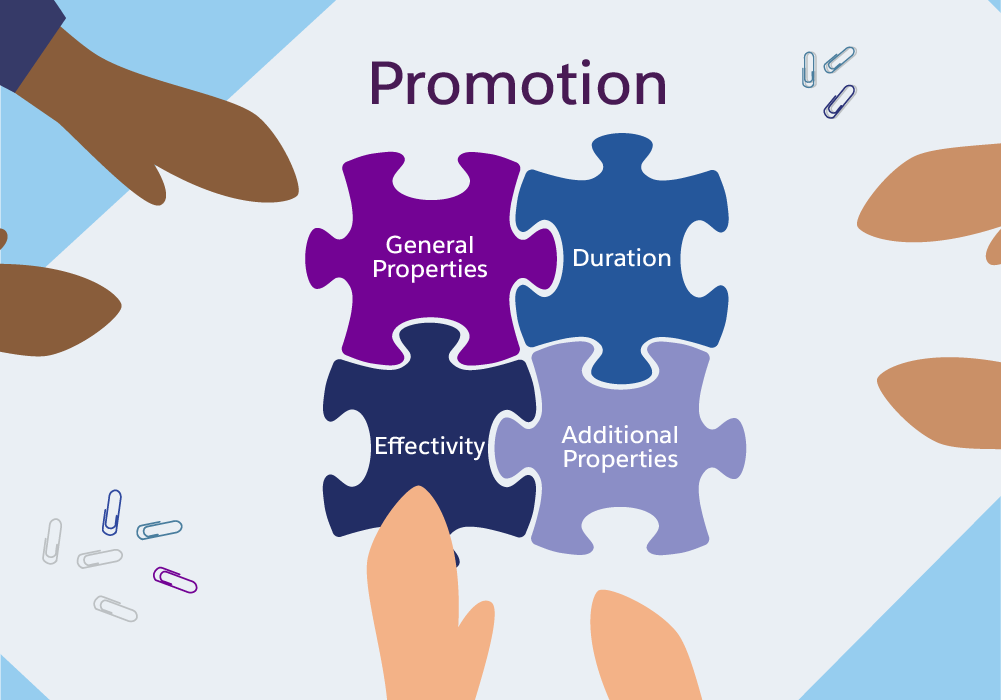
[alt text: You fill in four sections when building a promotion: General Properties, Duration, Additional Properties, and Effectivity.]
Let’s follow her as she adds these details.
- In the Name field, enter
Student Internet Promotion.
- For Code, enter
PROMO-STUDENTINTERNET. It’s best practice to use all caps and no spaces.
- In the Description field, enter
Get 20% off on internet service for 3 months plus free installation with a 1-year subscription. Since the description is viewable in the cart, Ada wants to be clear with her details.
- For Pricelist, select B2C Price List.
- For Commitment Duration Time Plan, select TP-12M, which translates to a time plan of 12 months. All customers will receive promotional pricing with a 1-year subscription.
- For Commitment Duration Time Policy, select
TPOL-PURCHASEDATE. This means the 1-year subscription commitment goes into effect the day the customer purchases the promotion.
- Select the Orderable checkbox so the promotion shows in the Promotions list of the cart.
- In the Service Continuation field, select Manual Opt-Out.
- Select the Active checkbox to enable the promotion.
- In the Effective From date field, enter today’s date.
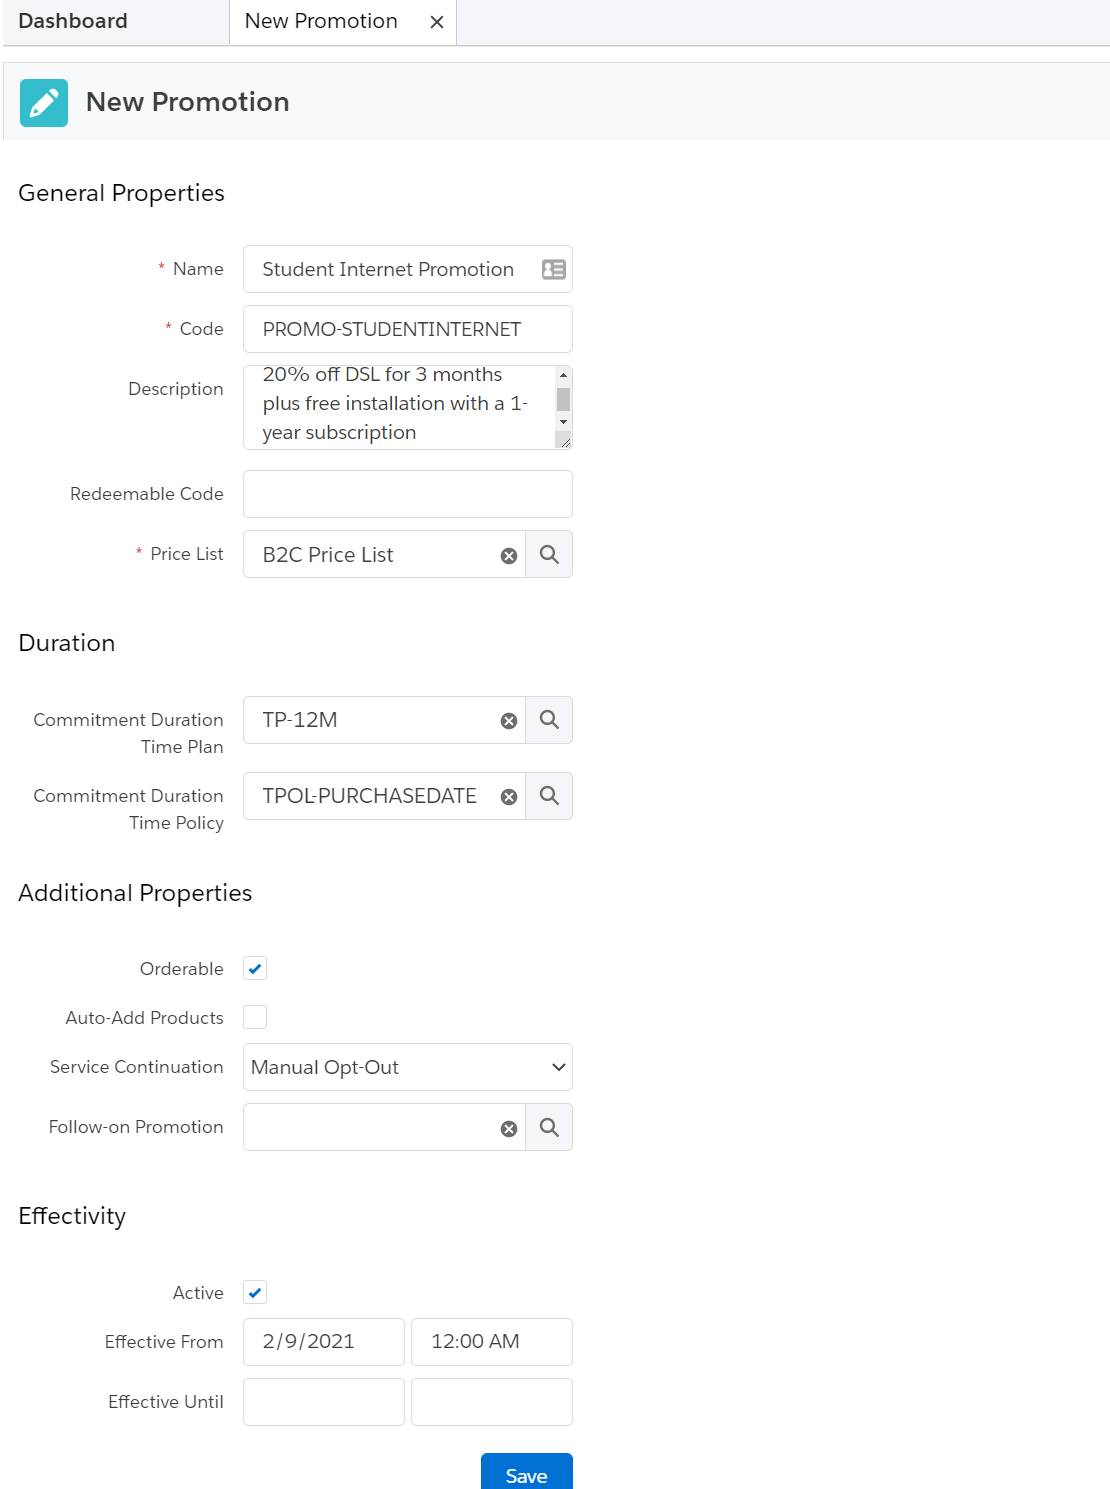
[alt text: The New Promotion page with details filled in.]
Ada reviews all the details on the page and then clicks Save.
Add Products to the Promotion
Now it’s time for Ada to add the products she wants the promotion to apply to. On the Student Internet Promotion page, click Promotion Products in the sidebar and then New Promotion Product. In the new window that appears, enter information about:
- The bundle you want to apply the promotion to
- The cardinality (quantity) settings for the entire bundle
Let’s follow Ada as she adds all these details.
- In the Action Type field, select Add.
- For Product, select Back to School Student Offer.
- Under the Cardinality section, enter:
-
1for Minimum Quantity
-
1for Quantity
-
1for Maximum Quantity
-
- Select the Active checkbox.
- In the Effective From date field, enter today’s date.
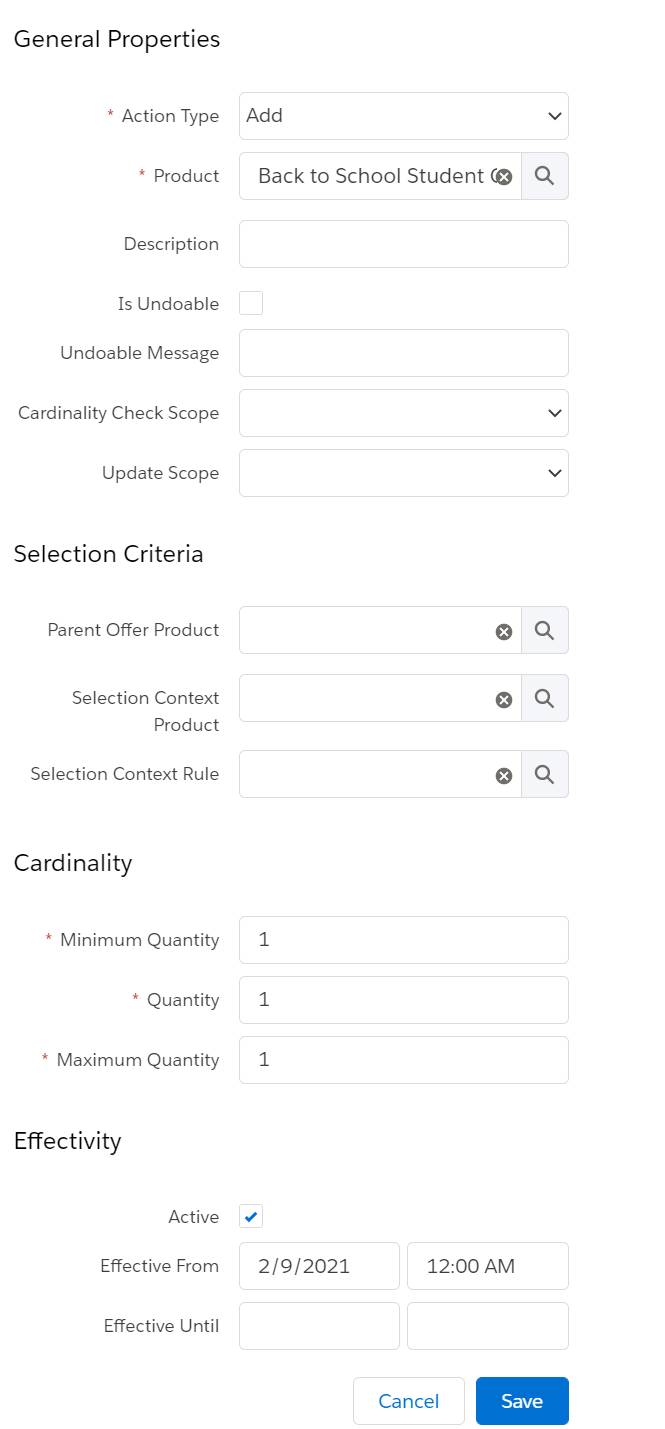
[alt text: The New Promotion Product page with details filled in.]
Ada reviews all the details on the page and then saves it.
Adjust the Pricing of Child Products
You can adjust the price of any product in a promotion through a percentage or an amount. You can also set how long the adjusted price lasts by assigning a time plan—for example, 20% off for 3 months or $5 off monthly for 6 months. You make these price reductions through adjustments and overrides. Let’s look at the differences between the two.
Adjustments
As noted earlier, Ada wants to assign an additional time plan to the internet service child product and reduce the price by 20% for 3 months. After that time, the service will revert to its original price. Let’s follow Ada as she does this.
- On the Student Internet Promotion page, click Product Adjustments in the sidebar.
- In the Product column, expand Back to School Student Offer and Home Internet Solution. Then, click DSL Service to open the configuration window.
- In the configuration window, click Product Pricing (1) and then Adjustments (2).
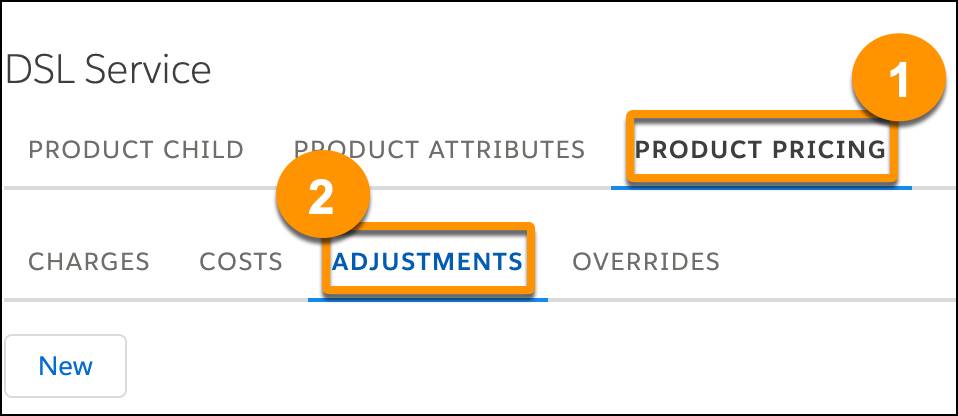
- Click New to open a new Price List entry dialog.
- For Price List, select B2C Price List.
- In the Display Text, enter
20% off monthly charge for 3 months with purchase of Student Internet Promotion.
- Under the Pricing Variable section:
- In the Charge Type field, select Adjustment.
- In the Sub-Type field, select Standard.
- Click Search and select the Recurring Monthly Std Price Adjustment Pct Pricing Variable.
- In the Charge Type field, select Adjustment.
- In the Pricing Element section, click 20% Off Monthly.
- For Time Plan, select TP-3M as the discount is applied for the first 3 months of the subscription.
- Select the Active checkbox.
- In the Effective From date field, enter today’s date.
After reviewing all the details in the dialog box, Ada clicks Save.
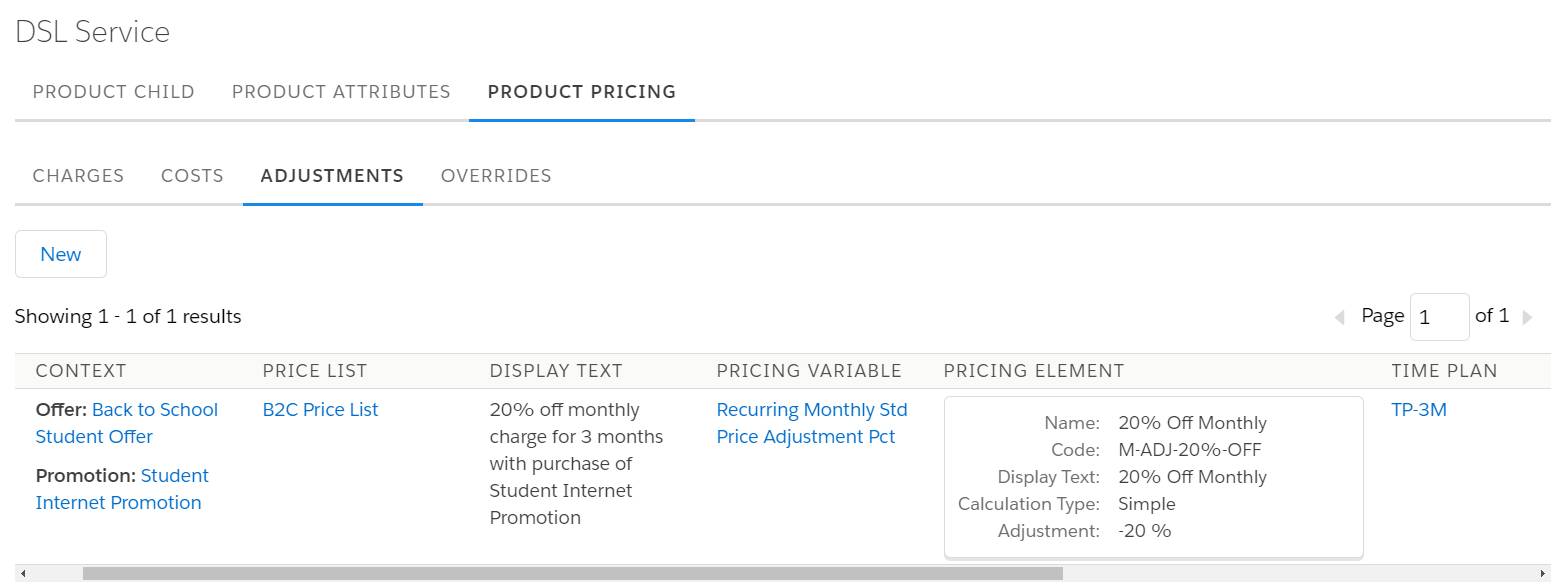
[alt text: Ada creates an adjustment to discount the base price of DSL service by 20% and limit the discount to 3 months.]
Overrides
To change the price of the Installation child product to free, Ada uses an override. She fills out the same fields within the Overrides subtab under Product Pricing as she did in Adjustments, but with a few changes. Why don’t you try this out yourself in the training org? If you need help, refer to the practice guide under Resources.
What’s Next?
In this unit, you helped Ada build a promotion and adjust the price of child products within that promotion. Great job! In the next unit, you help her adjust the behavior of the promotion to define how a promotion is applied and deleted within a cart.