Learn About Modifying Policies
Learning Objectives
After completing this unit, you’ll be able to:
- Describe the basic steps for modifying an existing policy.
- Explain how the solution components support the policy-modification process.
Policy Modifications
In the previous unit, we explored how Individual Policy Administration for Insurance provides business processes, services, and Lightning web components that enable customers and brokers to purchase new insurance policies through an easy, guided user experience.
Issuing a policy is only the start, though. For a modern policy-administration system to delight, it must also give users convenient, efficient ways to make changes to existing policies. The insurance industry calls these endorsements or mid-term adjustments.
In this unit, let’s dive into the business processes for endorsing existing policies.

A policyholder may want to make changes to an existing policy, such as to:
- Modify the terms of an existing coverage.
- Add a new coverage.
- Add an insured item or insured party.
- Remove an insured item or insured party.
While the specific services and components involved in each type of modification differ from one another, they follow the same basic steps.
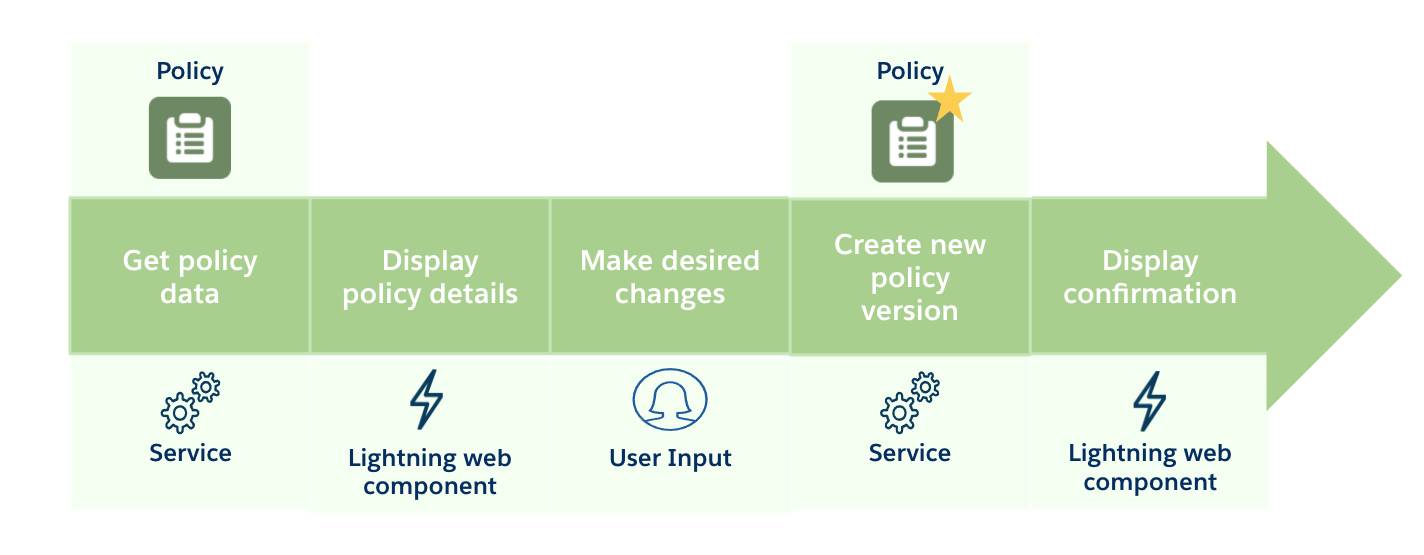
The key steps for endorsing a policy include getting policy data, displaying policy details, making desired changes, creating a new policy version, and displaying a confirmation.
This table summarizes each of these main steps.
Steps |
Summary |
|---|---|
Get policy data |
A dedicated service retrieves information about the original policy. Different services handle different endorsement types. |
Display policy details |
The retrieved policy information is displayed to the user with a Lightning web component. Different Lightning web components handle different policy structures. |
Make desired changes |
The user chooses which modifications to make. Services automatically calculate and display any premium changes. |
Create new policy version |
A dedicated service creates a new version of the original policy. Companion services also create a new policy transaction, revenue schedule, and make external calls to documentation or billing systems, when applicable. |
Display confirmation |
A Lightning web component summarizes policy and pricing changes and links to the new policy version. |
Let’s check in with Anna Murphy and see how things go when she makes changes to her auto policy.
Big Changes, Easy Solutions
Anna purchased her auto policy 6 months ago. So far, she’s quite pleased with her experience. Now, Anna welcomes some exciting changes in her career and personal life.
- She receives a promotion at work, along with a sizable bonus. With this bonus, she purchases a second car. She now wants to add the new car to her existing policy.
- She gets engaged to her long-time boyfriend and wants to add him as a secondary insured driver.
- She wants to add a Rental Car rider, which covers the cost of a rental vehicle in case of an accident. She didn’t purchase this optional coverage initially, but now thinks it is a good idea.

Conveniently, with Individual Policy Administration for Insurance, Anna can complete all these endorsements from any device.
Let’s walk through her experience across the following steps.
- Visiting the policyholder portal
- Modifying coverages
- Adding a vehicle
- Adding a driver
Visit the Policyholder Portal
To initiate any policy changes, all Anna needs to do is log into her policyholder portal and select her desired endorsements.
She can easily launch a guided flow for each change straight from her portal.
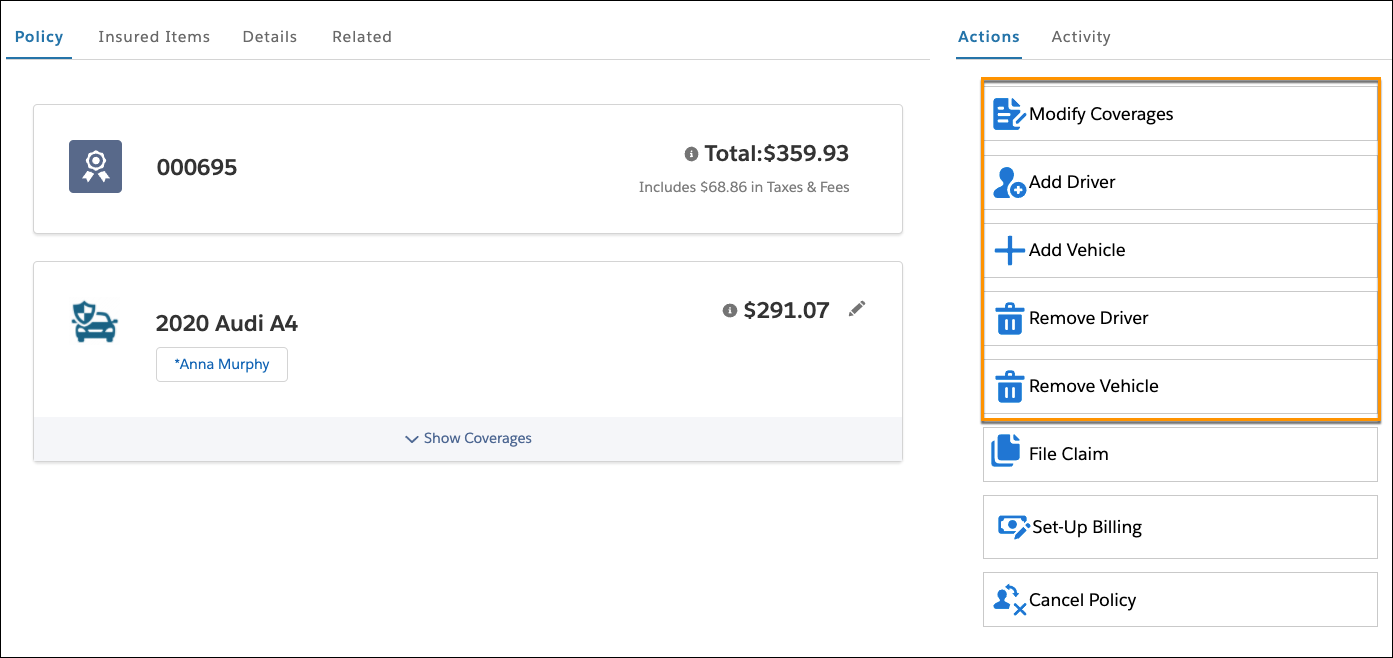
Key endorsement actions available to Anna include modify coverages, add driver, add vehicle, remove driver, and remove vehicle.
Modify Coverages
Anna begins by modifying her coverages to add the Rental Car coverage to the policy. She clicks the Modify Coverages button to start the guided flow.
A Lightning web component designed for auto insurance displays her modification options.
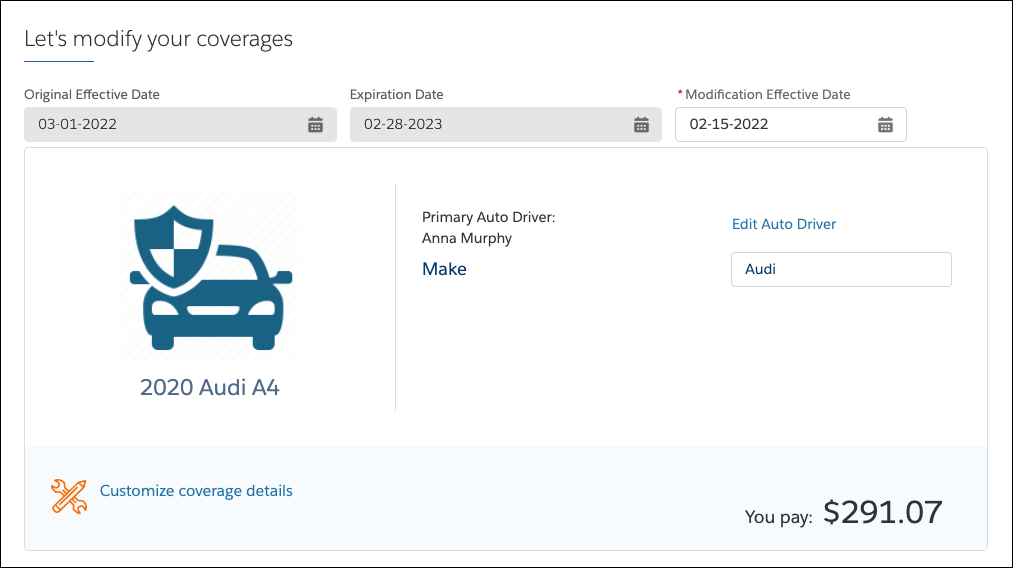
Anna clicks Customize coverage details and adds the Rental Car optional coverage.
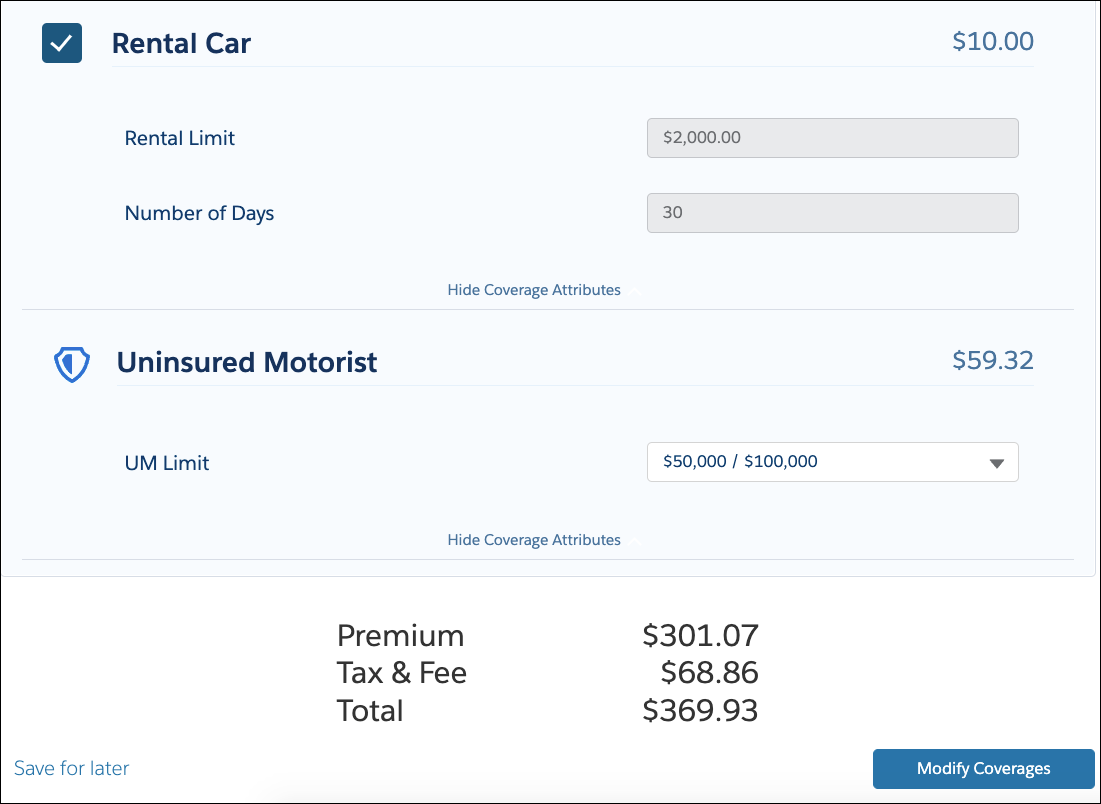
The policy automatically recalculates to include the additional cost of the rider.
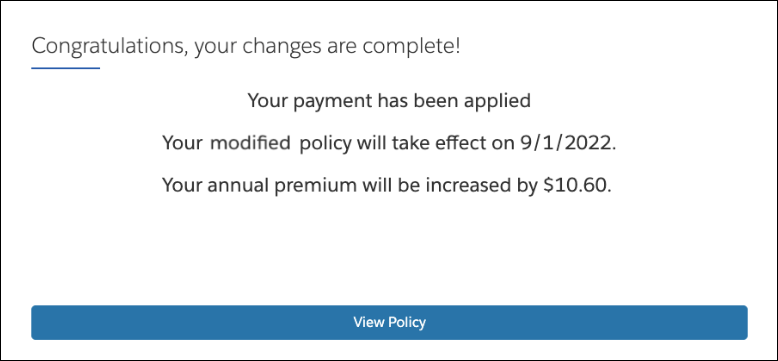
After approving the new coverage, she receives confirmation that an additional $10.60 applies to her annual premium.
Add a Vehicle
Back in her policyholder portal, Anna launches the Add Vehicle guided flow to add her new auto, a shiny new Jeep Wrangler, to the existing policy.
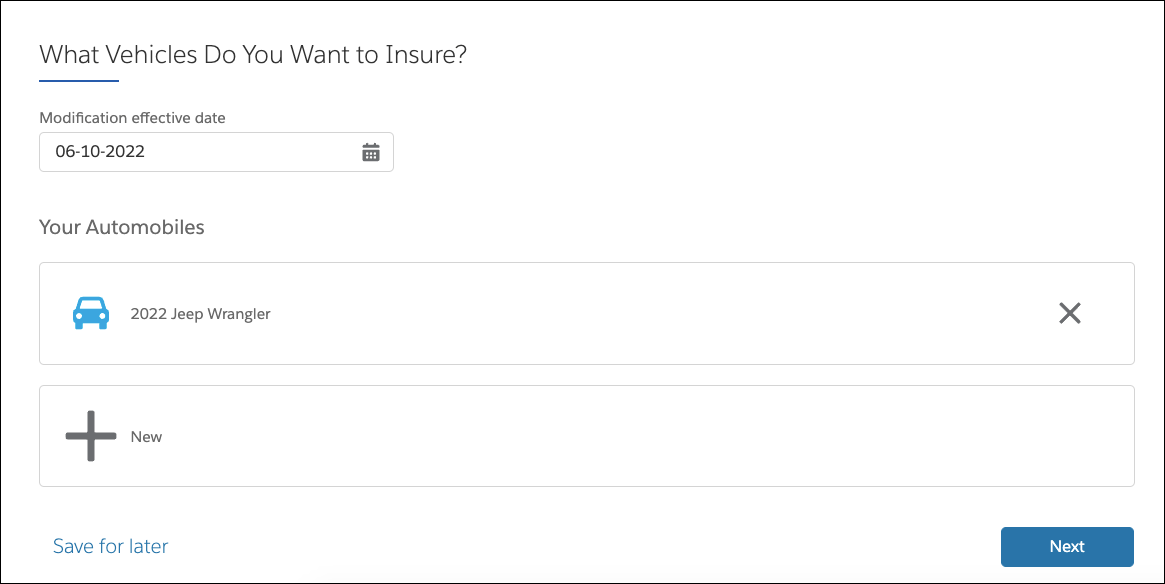
First, she selects the effective date for the modification and then provides details about the vehicle.
Thanks to the advanced modeling capabilities of the product-administration system, Anna can then customize coverage details for her new auto.
Under a single policy, each auto can have its own coverages and drivers. After she selects the desired terms for the new auto, the policy reprices, and Anna sees the difference between the original premium and the new premium.

The policy-administration system knows that Anna pays the policy every 3 months, so it calculates the premium increase quarterly. Anna clicks Add Vehicle to confirm the premium increase.
Add a Driver
Finally, Anna adds her fiance as a second driver for both cars. The policy price instantly updates after she enters his driving history and other personal details. The new version takes effect on the designated date.
So, in just under 10 minutes, Anna successfully completes all her policy modifications. She is seriously impressed.
Modifying a Policy Process
Drag the following steps for the Modify Policy guided flow into the correct order.