Add Objects to the Enhanced Timeline
Learning Objectives
After completing this unit, you’ll be able to:
- Set up fields for an object you add to the timeline.
- Select an icon for a timeline object.
- Add an object to the timeline.
Before You Start
Before you start this module, consider completing the following recommended content.
List the Fields for a Custom Object
Leif Hansen is a patient manager for the Bloomington Caregivers home healthcare agency.

As part of his work there, Leif organizes counseling sessions for patients with anxiety. In these sessions, patients participate in treatments such as behavioral therapy, cognitive behavioral therapy, psychodynamic therapy, and music therapy.
Harryette Randall, the Salesforce admin at Bloomington Caregivers, is configuring Health Cloud to help Leif track his client’s attendance at these sessions.

Harryette creates a custom object called Counseling Session. This object includes fields where the therapists running the sessions can record the patient’s attendance, the date of the session, and the treatment the patient opted for.
The counseling session object includes these fields.
|
Field Label
|
Field Name
|
Data Type
|
Description
|
|---|---|---|---|
Created By |
CreatedById |
Lookup(User) |
The user who created the counseling session record |
Duration |
Duration__c |
Number(2, 1) |
The duration of the counseling session |
Last Modified By |
LastModifiedById |
Lookup(User) |
The user who last modified the counseling session record |
Owner |
OwnerId |
Lookup(User,Group) |
The user who owns the counseling session record |
Patient |
Patient__c |
Lookup(Account) |
The patient who attended the counseling session |
Session Date |
Session_Date__c |
Date/Time |
The date and time of the counseling session |
Session Name |
Name |
Auto Number |
A unique number for the counseling session record |
Session Type |
Session_Type__c |
Picklist |
The type of treatment undertaken in the counseling session |
Visible on Patient Card |
Is_Visible_on_Patient_Card__c |
Formula (Checkbox) |
A flag to indicate that the counseling session record can appear in the patient card |
Enhanced Timeline in Health Cloud
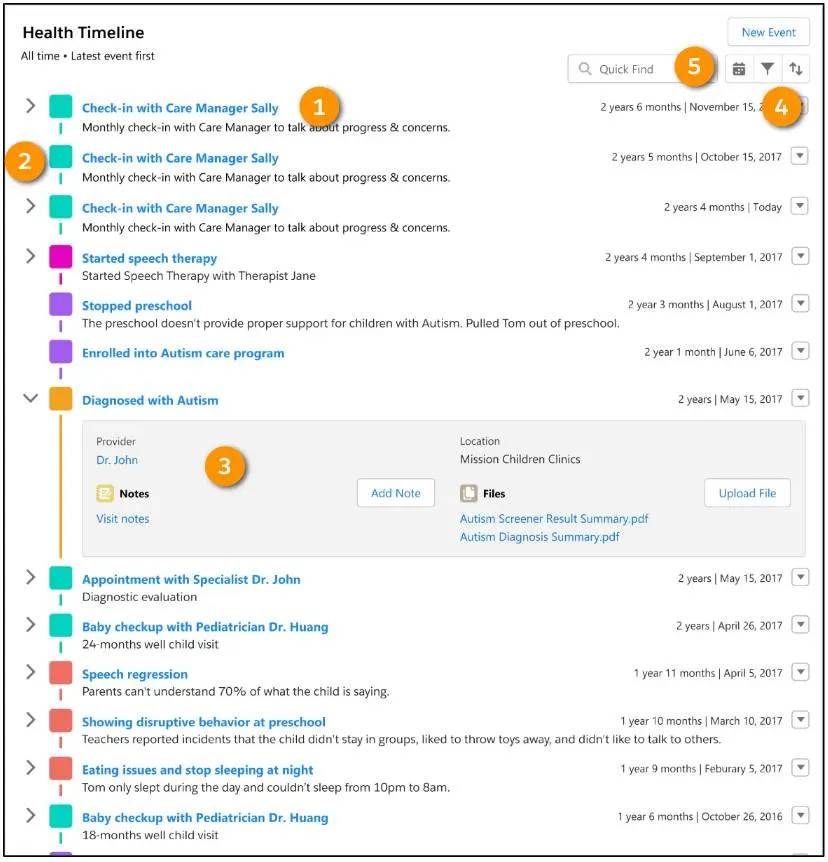
The Health Timeline enables healthcare professionals to visualize and track the events that affect their patients. The timeline appears in both the Health Cloud console and the Experience Cloud site. The image shows the timeline components.

- An event (1), such as a medical check-up or dental appointment
- Type of event, such as a screening or an x-ray, represented by an icon (2)
- Details for each event (3)
- Filters (4) to select a specific event to track
- Date filters (5) for the timeline so you can focus on a specific time frame
Leif and the other caregivers want a better impression of their patients’ participation in the counseling sessions. So, Leif adds events from the Counseling Session custom object to the timeline.
Define the Object’s Timeline Configuration
The timeline can display details from any object related to the patient through the Account object. The object can be a core Salesforce object, a Health Cloud object, or a custom object—such as the Counseling Session object—as long as it has that link to the patient’s Account object record. The Counseling Session custom object includes a lookup to the Account object (Patient__c).
Harryette talks to Leif to find out how he wants to set up the timeline.
Determine Timeline Categories
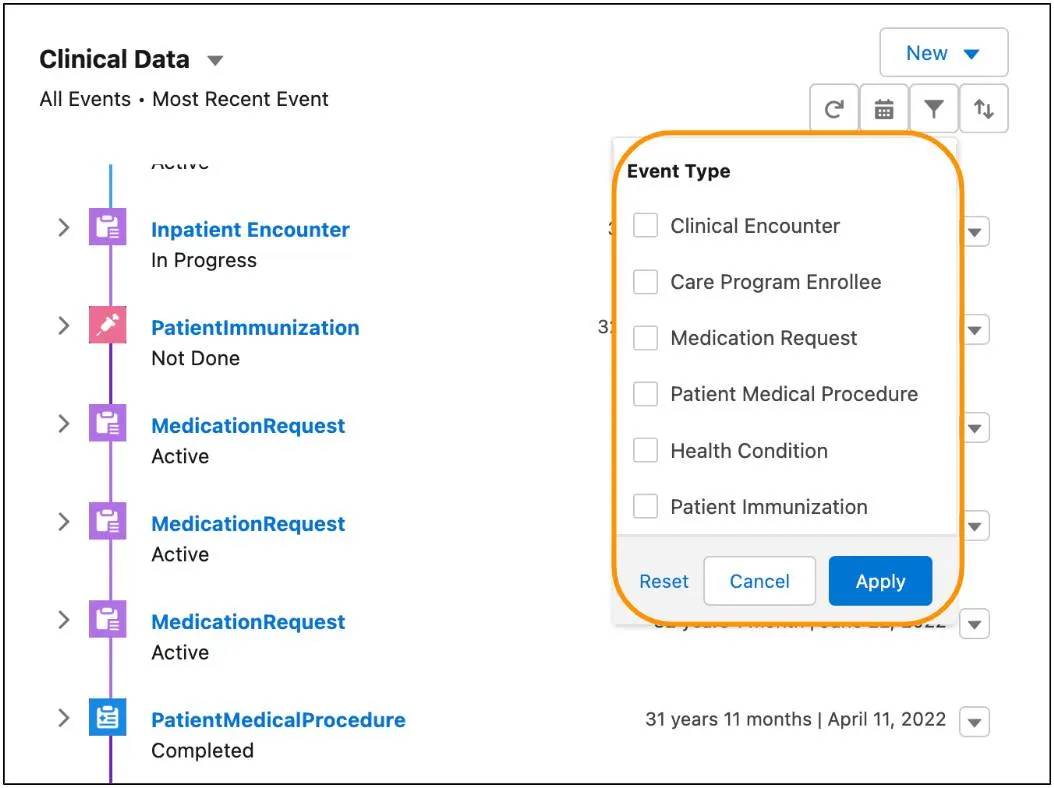
Every item on the health timeline belongs to a category. That’s how Leif can filter the timeline content using the Select All Events picklist in the console timeline or the filter in the Experience Cloud site timeline.

Leif asks Harryette to add the Counseling Session object to a new category called Counseling.
Determine Timeline Items
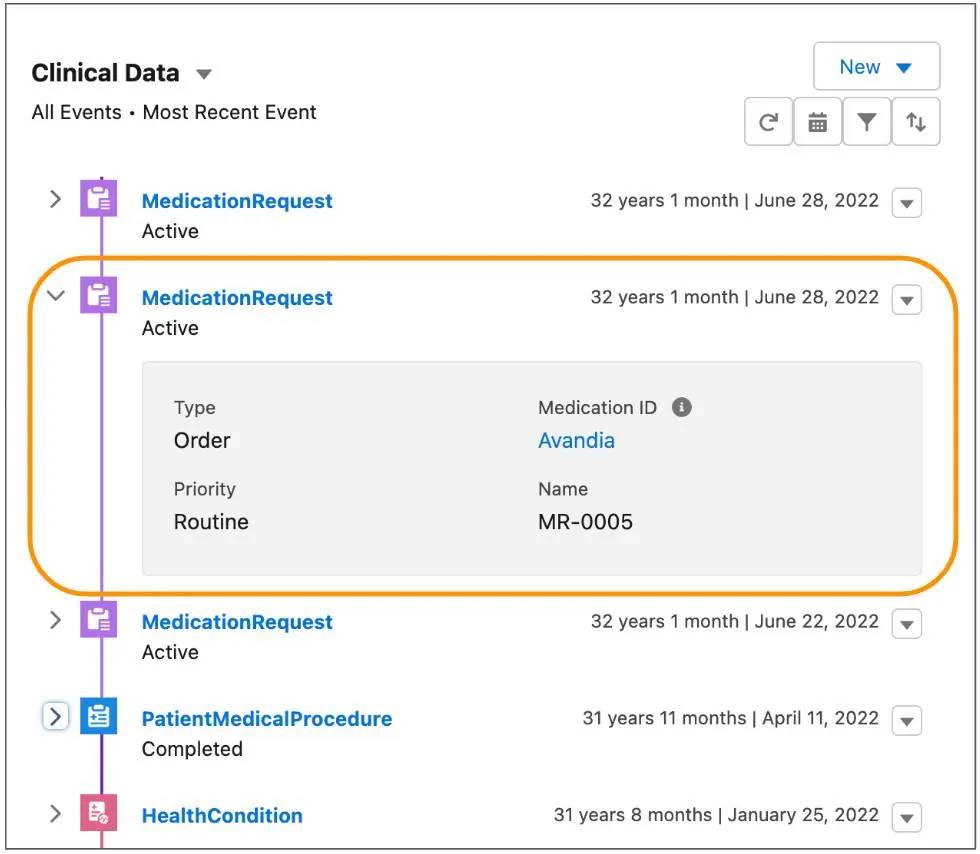
Each item on the timeline displays the content of a field from the item’s underlying object. And each timeline item can display a number of fields when a user expands the item.

Leif asks Harryette to display the type of counseling session as the item’s timeline label, and to show the session duration as hover text. Harryette determines that the type of counseling session is represented by the Session_Type__c field and the session duration is captured in the Duration__c field.
Leif can have all the counseling session types show up on the timeline, or just some of them. He can also filter the sessions by any field, such as duration or type. Leif wants to see all session types on the timeline, so Harryette doesn’t filter any of them.
Add a Timeline View Configuration
With Leif’s preferences in mind, here’s how Harryette configures the timeline.
- From Setup, in the Quick Find box, select Timeline.
- Enable the timeline and create a new timeline. When you name the timeline, specify the underlying object. In Leif’s case, the timeline object is Account.
- Add your chosen related objects to the timeline. In Leif’s case, this includes the new counseling object Harryette created.
- Specify the conditions for showing records on the timeline. For example, you can show counseling tasks that aren’t canceled or deferred.
- Save the new timeline, preview it for a patient, and activate it.
After you configure the timeline, add it to a record page so that end users like Leif can use it. Timeline is a Lightning component, so you add it to a Lightning record page the same way as any other component, by dragging it to the page and activating it.
You can also add a timeline to an experience site, so that patients can see it through their portal.
Now the timeline is ready to go. The next time Leif visits one of his patients’ timeline views, he sees details of the counseling sessions the patient has attended.
Resources