Create Marketing Assets Using Account Engagement
Learning Objectives
After completing this unit, you’ll be able to:
- Create personalized marketing assets using Account Engagement.
- Demonstrate how a marketing asset can be personalized using Account Engagement features.
Get Organized
Now that Leung and Alan from Get Cloudy Consulting have a working lead management process set up, they are ready to begin creating assets. Before they do, they need to make sure they have a place for assets to go. Searching for a particular asset and not knowing where it is would be a waste of time for you and anyone on your marketing team. Folders are the best way to organize your marketing assets in a way that makes sense for your team. Once you have created your folders you can assign permissions to them.
Let’s review the process of creating a folder.
- Navigate to Content | Folders.
- Click + Add Folder.
- Name the folder. For this module let’s name the folder
Monthly Webinars. - Save when finished.

Here are a few things to keep in mind when organizing your folders.
- You can’t rename or delete the Uncategorized folders.
- You can have up to 10,000 items in a folder.
- You can nest folders up to 16 levels deep.
- You must create user groups and organize your folders before you can create folder permissions.
Learn more about organizing your content and marketing assets in a way that makes sense for your team.
Tagging content is an additional layer of organization for your marketing content. If your company would like to find assets more quickly, this is a good time to begin tagging content since you’re already working on the overall organization strategy of your content. Learn more about using tags in Account Engagement to help sort, organize, report, search, and more.
User Groups
Leung and Alan are setting up a user group for round-robin lead assignments. When they assign a prospect to a group, the prospect is assigned to a group member, equally distributing leads. Within the app, it should look something like the following.
- Navigate to Account Engagement Settings | User Management | Groups.
- Click + Add User Group.
- Name the group.
- Click Create Group.

If you’re interested in doing this at your company, learn how to manage users and privileges.
Folder Permissions
A great way Leung can protect Get Cloudy’s content and control which users have access to their marketing assets is by applying folder permissions. In the app, it would look something like the following.

It’s important to note that before you apply folder permissions, you need to have created user groups.
Reach Prospects with Personalized Content
Now that you and your friends at Get Cloudy Consulting have created and organized folders, created user groups, and assigned folder permissions, let’s start making some personalized content within Account Engagement.
Leung wants to focus on Get Cloudy’s website and landing pages. Let’s look at five ways to personalize Get Cloudy’s content first, then pull it all together on a landing page.
Dynamic Content
Leung wants to use dynamic content to display custom HTML on Get Cloudy’s website or forms, landing pages, layout templates, or emails based on prospect criteria. When a prospect matches the criteria for their dynamic content, a variation of the content displays. Let’s get the Dynamic content set up.
- Navigate to Content | Dynamic Content.
- Click + Add Dynamic Content.
- Enter the name
Monthly Webinar Series. Remember that this is for internal use only.
- Select the Monthly Webinars folder.
- Set the default content that prospects see when they don’t match a variation.
- Click the
 and enter
 Greetings valued customer! - Click Save.
Now to add a variation:
- Select the Attended event? field.
- Enter the criteria for the variation. Select is and enter
truein the text box.
- Click
 [alt text: pencil icon] to add your content.
- Enter
Thank you for attending our event!in the editor and click Save.
- You can add up to 25 variations by clicking +Add Variation.
- Click Save the dynamic content when finished.
- Similar to Leung, if you want to embed the content into your landing page:
- Open the dynamic content that you want to work with and click View Embed Code.
- Copy the code and paste the embed code into your page’s HTML source code.
- Open the dynamic content that you want to work with and click View Embed Code.
There is much more information to consider and options for you and Leung to try when it comes to dynamic content. Learn more about marketing to your customers with Account Engagement.
Handlebars Merge Fields
Leung knows that whenever you can customize the content, the better it will serve you. Customers are more likely to engage with your message when it’s personalized. Handlebars merge fields are a great way to customize the content you create in Account Engagement with information from your prospect records.

You can also insert information about your company, like your business address, and create defaults when prospect records don’t contain certain values. HML is on by default in business units created after June 12, 2020.
Reuse Your Content in Marketing Assets
The next way to personalize content on a landing page is to use snippets, which streamline how you create recurring marketing assets for your campaigns and business as a whole. A snippet works across assets related to a campaign and can contain helpful strings like dates, links, images, and logos. They can be reused in emails, email templates, forms, and landing pages. There are two kinds of snippets.
- Campaign snippets work only with connected campaigns. You assign a snippet to a specific campaign to use it in that campaign’s related assets. When the value of the snippet changes, you only have to edit the snippet record. The changes appear where the snippet is used.
- Business snippets can be used throughout your account or your business unit. When the value of the snippet changes, similar to campaign snippets, you only need to edit the snippet record. You see the changes anywhere the snippet is used.
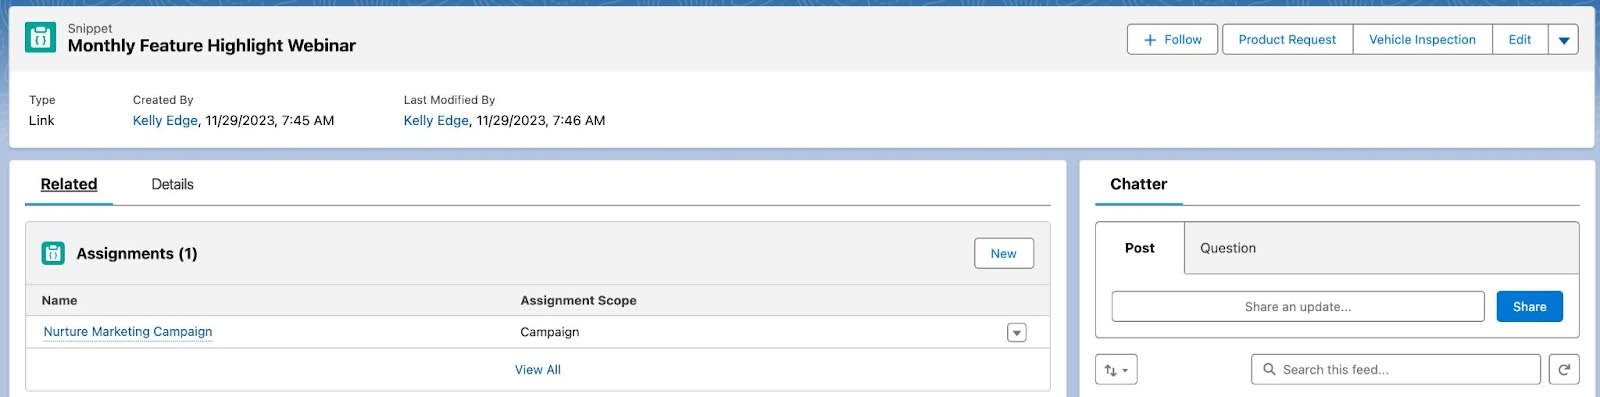
Leung would like to create a snippet to be used on Get Cloudy’s webinar landing page. Get Cloudy offers multiple webinars each month so she would like to streamline the marketing content for those webinars. First, Leung needs to make sure the Salesforce org is ready for the feature. She needs to ensure users have access to the Snippets tab and the correct related lists because snippets use related lists to appear in the org. Now, Leung needs to create a snippet for her team.
Let’s create the snippet.
- Navigate to Content | Snippets.
- Click New.
- Enter the name
Monthly Feature Highlight Webinar.The API name must be unique to the assignment and can’t be changed.
- Select Link from the Type dropdown menu.
- Click Save.

- On the snippet record, click Related and then, click New.
- In the Assignment field, choose Campaigns. Select the Nurture Marketing Campaign. campaign.
- Enter Monthly Feature Highlight Webinar for the Snippet Name and API Name.
- Click Save.
Snippets are available in different places, but you always add them to your content from the merge field picker.

Track Link Clicks
The next way Leung is going to personalize her landing page is by tracking link clicks. Get Cloudy uses custom redirects to track banner ad clicks, links to third-party sites, links on social media, and access to files hosted outside of Account Engagement. Clicks are tracked as an activity on a prospect’s record. Let’s take a moment to get a custom redirect set up on the landing page.
- Navigate to Content | Custom Redirects.
- Click +Add Custom Redirect.
- Enter
Monthly Webinars(this name is used in prospect activity and reporting).
- Select Monthly Webinars from the dropdown folder menu.
- Choose a campaign. This does not overwrite a prospect’s existing campaign.
- Enter the target URL.
- Optionally, if you are tracking activity on pages with Google Analytics tracking code, add parameters here.
- If you would like to trigger activities after someone visits a custom redirects page, add completion actions here. Remember that they are not retroactive and don’t execute on visitors who have not converted to prospects yet.
- Click Create Custom Redirect.

Forms and Form Handlers
The last way that Leung is going to personalize her landing page is with forms and form handlers. Forms and form handlers serve different purposes within Account Engagement. Forms are managed and designed within Account Engagement while form handlers connect your external forms so that you can funnel that information into Account Engagement. Determine which option is best for you.
A customized form facilitates more efficient data collection, improves user engagement, strengthens brand identity, and enables better utilization of collected data for decision-making purposes. The best way to customize forms is with the form builder. For more control over the form’s look and feel, use layout templates and customize the form code.
Lastly, Leung and Get Cloudy have struggled with bot submissions for some of their forms. This is becoming an ever-increasing problem for a lot of companies as online forms are an easy target for bots. They can fill your database with spam prospects. Leung turns on reCAPTCHA for her landing page to limit the number of spam submissions.
While this may not completely eliminate the problem, it does significantly reduce the amount of spam prospects. Leung simply enabled it on the Advanced tab of the Look and Feel step in the form wizard.
Landing Pages
Now it’s time to bring this all together in the Get Cloudy webinar landing page. A landing page is a web page a visitor reaches after clicking a link, banner, or call to action. This page generally displays content that is specific to the advertisement, search keyword, or link clicked. Landing page visitors are more likely to convert when you present them with relevant, actionable content.
You did it! You created and organized folders for marketing assets, created user groups, and added permission to some folders. Then you created marketing assets for a landing page to help personalize content for prospects. Great work! In the next unit, you learn about customizing email marketing content in order to increase engagement through meaningful connections with your prospects.