Create a Custom Relationship Graph
Learning Objectives
After completing this unit, you’ll be able to:
- Create an ARC relationship graph plan.
- Build an ARC relationship graph.
Create an ARC Relationship Graph Plan
Creating an ARC graph that captures the most essential client data is critical.
At Cumulus, bankers such as Nora want to see their client’s related accounts, employees, and opportunities to understand each client’s financial needs. But, which other types of account relationship data can guide a retail banker’s conversation with their client?
Before you start building the graph, youneed a plan to answer those questions. That plan identifies the objects, fields, and actions needed in the ARC graph you build.
Check out this list of common questions that help you create a plan.
- Which records give you visibility into your client’s needs?
- Which records give you visibility into your client’s wants?
- Which records show you what the future looks like for your clients?
- Which records show you employees who work at your client’s business?
- How do you know who the important leaders are?
- How do you know about upcoming life events?
- How do you know about the debt a company carries?
Here are a few questions and answers for the bankers at Cumulus.
Question |
Response |
|---|---|
Which records give you details on your client’s current state of business? |
Account, employees, opportunities,financial accounts, assets and liabilities, and subsidiaries. |
Which fields give you the most information about your clients? |
Account: Account number, phone number, address
Employees: Phone, address, name
Opportunities: Stage, probability, amount, last modified date
Financial Accounts: Balance, record type, primary owner, household
Asset/Liabilities: Amount, type, primary owner, household Subsidiaries: Primary contact, location, phone |
What type of actions do you take on the records? |
Account: Edit, log a call, new task
Employees: Create new, edit existing
Opportunities: Create new, edit existing Financial Accounts: Create new, edit existing
Asset/Liabilities: Create new, edit existing Subsidiaries: Create new relationship, add member, create new, edit existing |
The answers show that bankers want to see an ARC graph on the account record page. Using the information in the chart, you can sketch a plan for the graph.
The root node must be Account because the root node object must match the object of the record page where the graph appears. Bankers also want to see their client’s employees, opportunities, subsidiaries, financial accounts, liabilities, and assets from other objects.
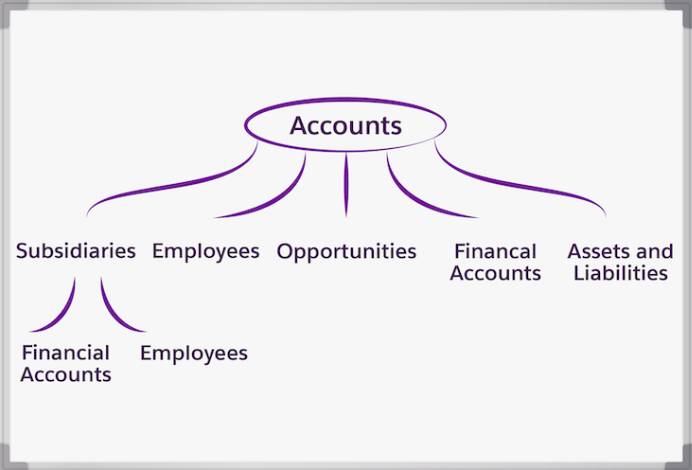
Based on this information, you plan to include five child nodes on the graph.
A child node is a record associated with the parent node in the ARC graph. You can add the account node to show subsidiaries usingaccount-account relationships, and add the person account node to show employees. You can also add opportunities, financial accounts, and assets and liabilities nodes.
The subsidiaries node has also two child nodes with a person account to show employees and financial accounts of the subsidiary.
Select a Graph Template
It’s time to create an ARC graph with custom visualizations of relationships on the Account object. You can create a new graph from scratch, or use a template and customize it to save time.
Choose from the three template types.
-
Default templates are available in your org and include business-to-consumer (B2C) and business-to-business (B2B) graphs.
-
Custom templates are those you create.
-
Installed templates are created by a third party and installed into your Salesforce org.
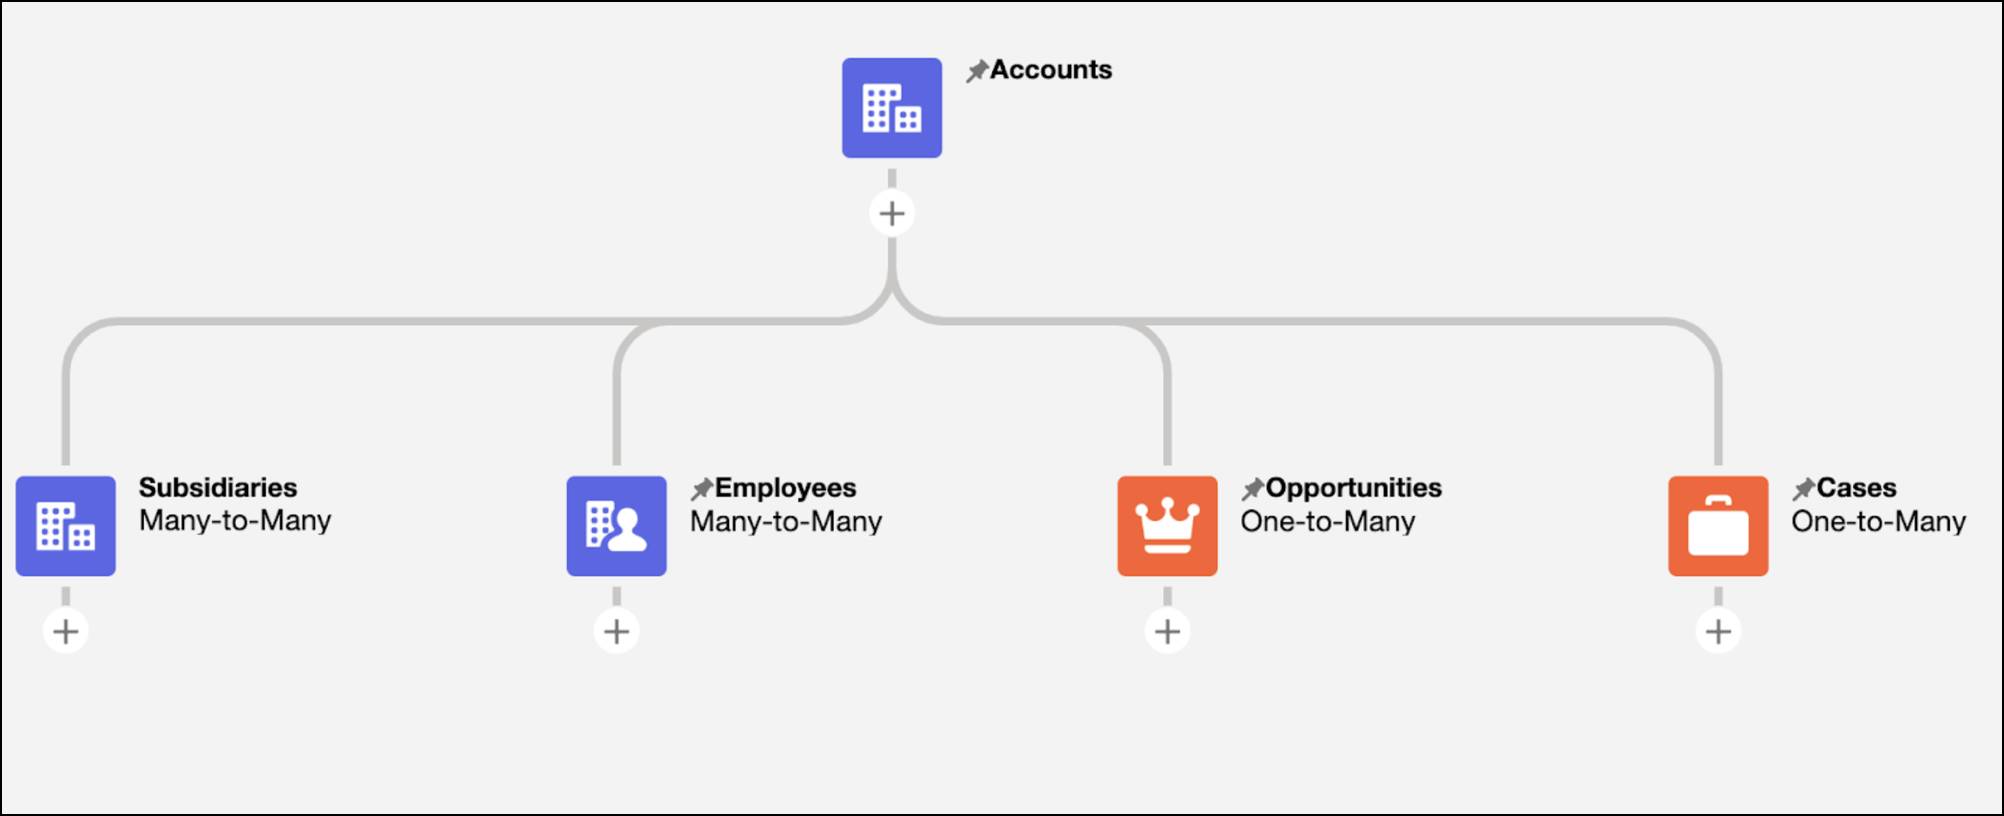
For Cumulus’s requirements, you can select the B2B Graph template because it includes many of the nodes users want, including the accounts root node, andsubsidiaries, employees, and opportunities. You can remove the Cases node and add more nodes to create a custom graph.
Before that, though, create the new relationship graph from the template.
- From Setup, in the Quick Find box, enter
Feature Settings, and then select Actionable Relationship Center.
- Click New Relationship Graph.
- In the Default Templates tab, select B2B Graph.
- Click Create Graph.
You’re now ready to begin configuring the changes.
Configure Graph Properties
Start by configuring the ARC graph properties.
The graph label is useful for identifying the graph when you add it to a record page, so use a unique, descriptive name.
- Enter a label, for example,
Retail Banker Graph.
- The Developer Name field auto-populates. Retain the developer name or enter another unique name.
- Save your work.
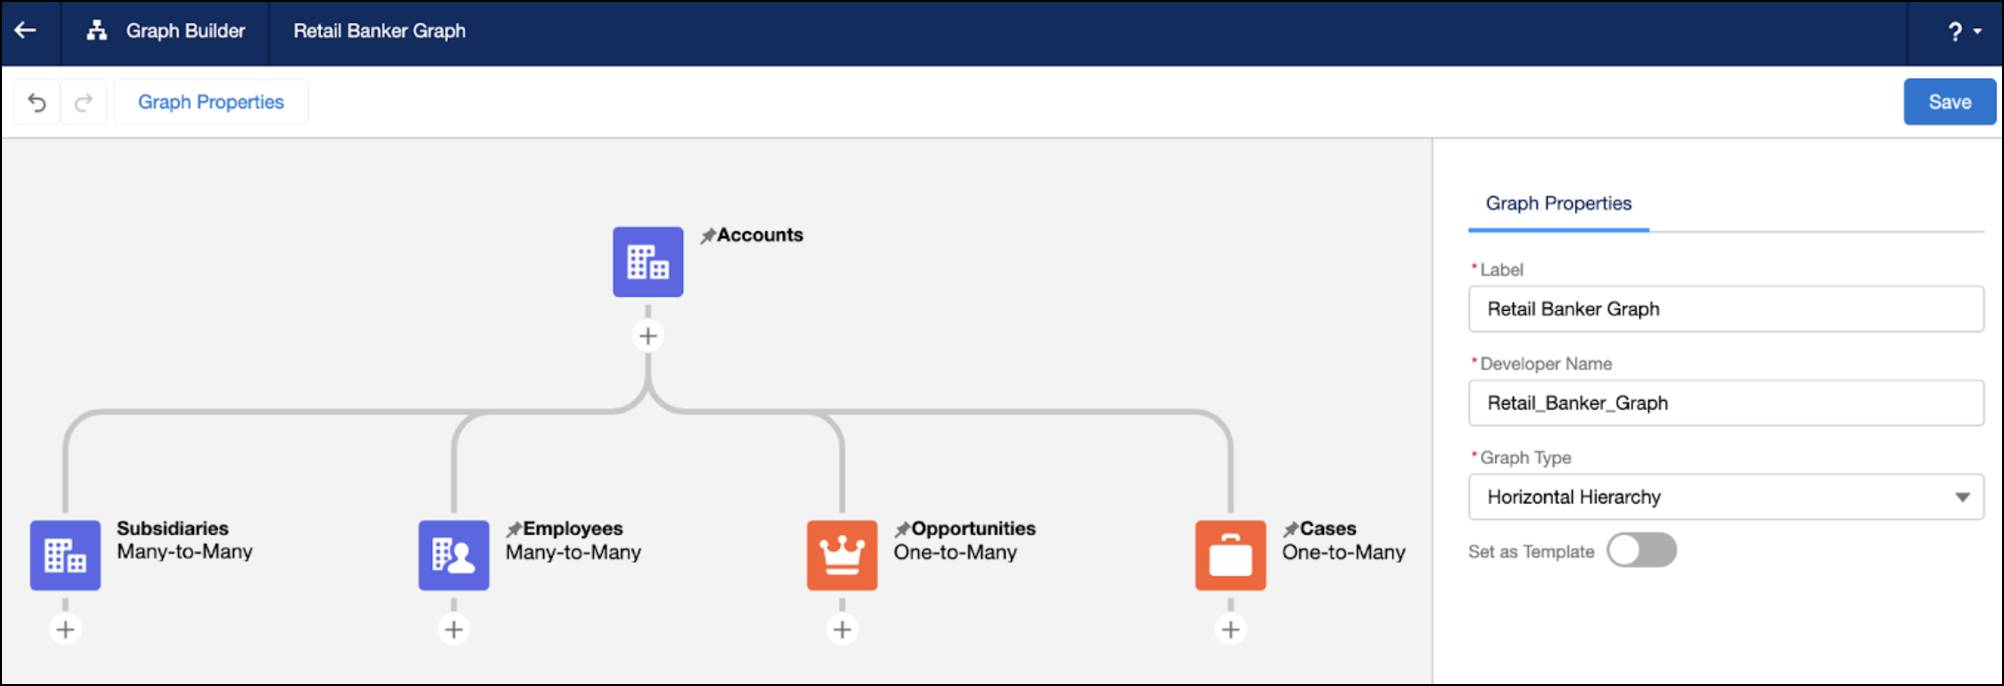
To save the graph configuration as a custom template to use later, select Set as Template. If a graph is set as a template, it can’t be added to a record page.
Configure the Root Node Properties
Now that the graph’s properties are set, it’s time to configure the root node.
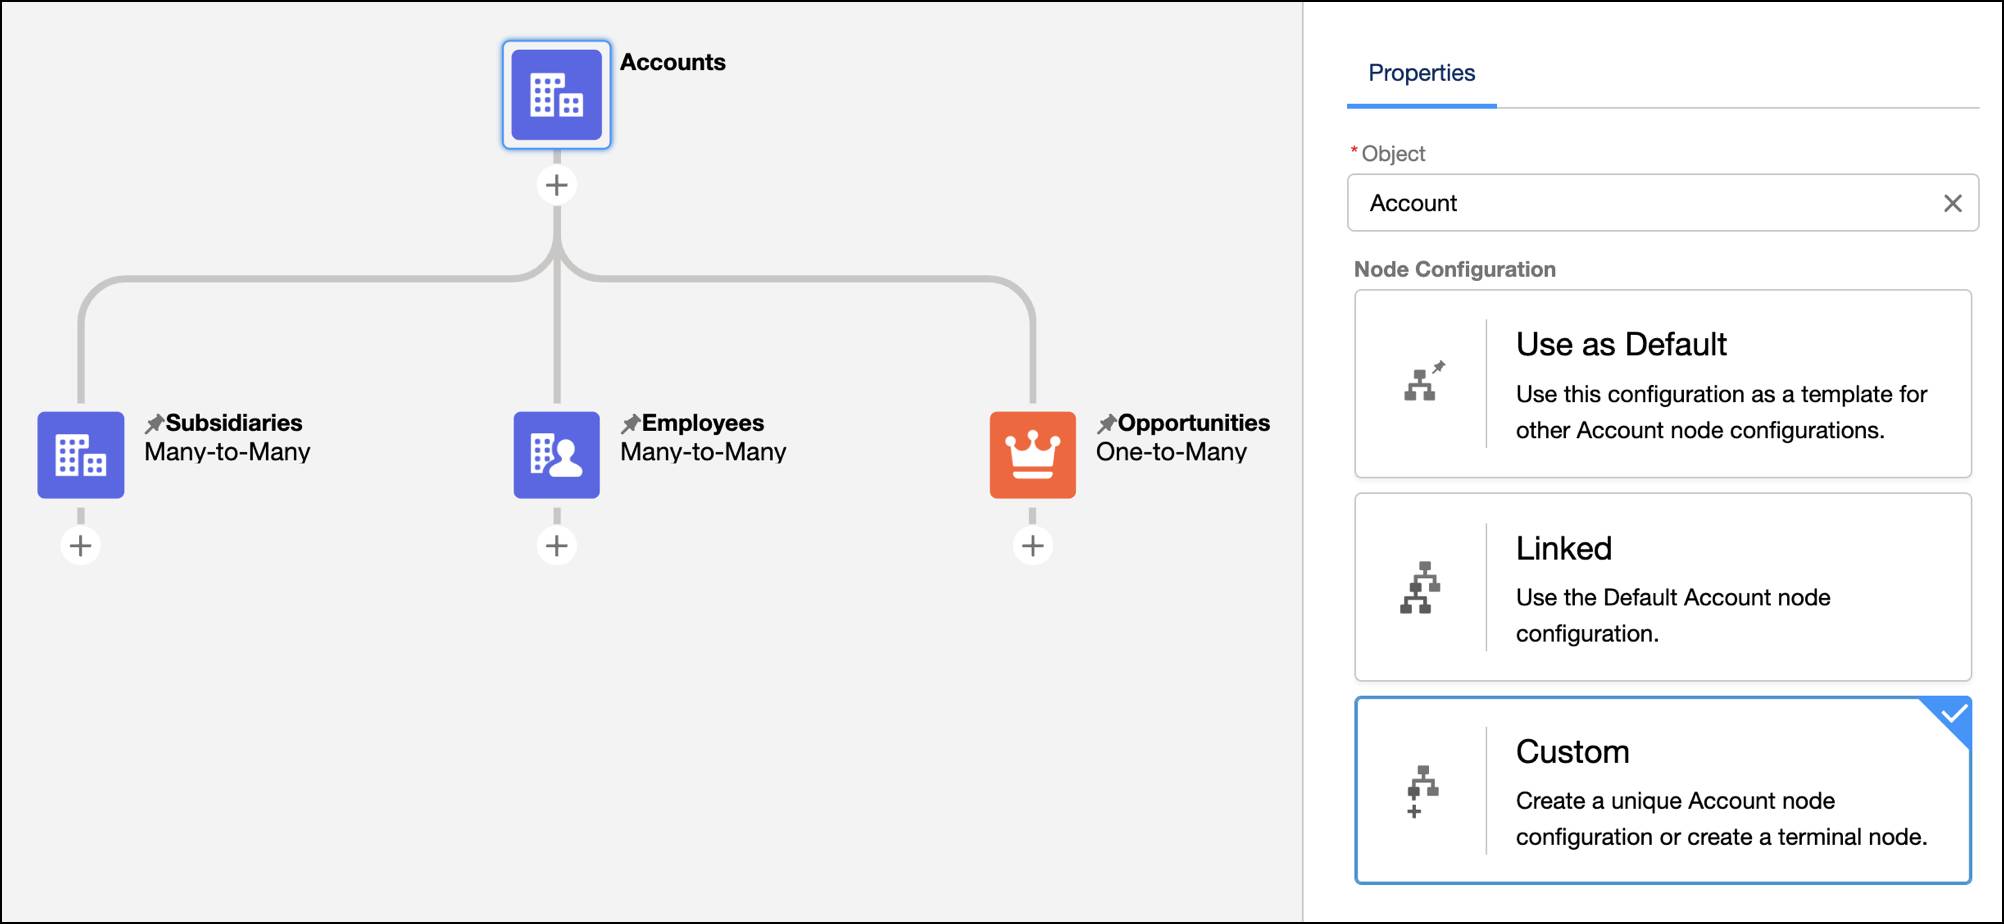
The root node on the ARC relationship graph must match the object on which the graph will appear. To add this graph to an account record page and so that the B2B template root node works correctly, confirm the account node details.
- Click the root node on the graph, and confirm the fields on the Properties tab are as follows.
-
Object: Account
-
Node Configuration: Custom
-
Object: Account
- Save your work.
Pause here to consider the Node Configuration options.
-
Use as Default saves the configuration as a template for other node configurations of the same object.
-
Linked uses the Default node configuration of the target object.
-
Custom, which you selected, creates a unique object node configuration or creates a terminal node.
You’re now finished updating the properties for the retail banker ARC graph.
What’s Next?
In this unit, you learned that asking the right questions helps youestablish a plan for an ARC graph. You then used an example plan to choose a template and configure the graph and root node properties.
Now, it’s time to go a level down to add child nodes to your graph.