Create a Lightning Console App
Now, you define an initial static version of the instant notification app and deploy it as a Lightning console app.
Create a Lightning Web Component
- Create a Lightning web component named
notificationConsole:
- In Visual Studio Code, under force-app/main/default, right-click the lwc folder and select SFDX: Create Lightning Web Component.
- Enter
notificationConsolefor the name of the new component.
- Press Enter and then press Enter again to accept the default
force-app/main/default/lwc.
- Replace the content of notificationConsole.js with this code:Code Highlights:
import { LightningElement, track } from "lwc";
import { ShowToastEvent } from "lightning/platformShowToastEvent";
export default class NotificationConsole extends LightningElement {
  @track
  notifications = [];
  async connectedCallback() {
    this.dispatchEvent(
      new ShowToastEvent({
        variant: "success",
        title: "Ready to receive notifications"
      })
    );
    this.notifications = [
      { id: "id1", time: "00:01", message: "Greetings Trailblazer!" },
      { id: "id2", time: "00:02", message: "Congratulations on building this first version of the app." },
      { id: "id3", time: "00:03", message: "Beware of the bears." }
    ];
  }
  handleClearClick() {
    this.notifications = [];
  }
  get notificationCount() {
    return this.notifications.length;
  }
}
-
notificationsholds the received notifications. It's initialized with some hard-coded sample values for now.
-
connectedCallbackdisplays a toast that indicates that the app is initialized.
- Save the file.
- Open notificationConsole.html, and add this code between the
templatetags:Code Highlights:<div class="container"> <!-- Header --> <div class="slds-p-around_x-small slds-border_bottom slds-theme_shade"> <div class="slds-grid slds-grid_align-spread slds-grid_vertical-align-center"> <span class="slds-badge slds-badge_inverse">{notificationCount}</span> <lightning-button-icon onclick={handleClearClick} icon-name="utility:delete" title="Clear notifications" alternative-text="Clear notifications" variant="border-filled" ></lightning-button-icon> </div> </div> <!-- Notification list --> <div class="slds-container_fluid slds-scrollable_y content"> <template for:each={notifications} for:item="notification"> <div key={notification.id} class="slds-p-around_small slds-border_top"> <div class="slds-grid slds-grid_align-spread slds-has-flexi-truncate"> <p>{notification.message}</p> <p class="slds-text-color_weak slds-p-left_x-small">{notification.time}</p> </div> </div> </template> </div> </div>
The component contains two parts (these could be sub-components):
- A header that contains a notification counter and a button that lets you to clear notifications.
- A notification list that contains the messages and the time when they were received.
- Save the file.
- To make the component available as a Lightning utility item, open
notificationConsole.js-meta.xmland replace theisExposedtag with these lines:Code Highlights:<isExposed>true</isExposed> <targets> <target>lightning__UtilityBar</target> </targets>
-
isExposedset totrueexposes the component to the Lightning App Builder.
- The
lightning__UtilityBartarget allows the component to be added as a Lightning utility item.
- Save the file.
- In the
notificationConsolefolder, create a notificationConsole.css file with this code:Code Highlights:.container { height:100%; } .content { height:calc(100% - 49px); }
- We set special style rules so that the header remains static while the list expands with a vertical scroll bar when there are multiple notifications.
- Save the file.
- Right click on the lwc folder and select SFDX: Deploy Source to Org to deploy your component to your org.
Deploy a Lightning Console App
- From Setup, enter
App Managerin the Quick Find box, then select App Manager.
- Locate the Sales application that is Lightning-enabled. (Look for a check mark in the Visible in Lightning column next to Lightning in the App Type column.) Click the down arrow on the right-hand side and select Edit.
- Navigate to Utility Items (Desktop Only).
- Click Add Utility Item next to Utility Items.
- Scroll down the list of components and select notificationConsole under Custom.
- Set the following properties for the component:
- Label:
Notifications - Icon: announcement
- Panel Width:
340(default value)
- Panel Height:
300 - Check the box next to Start automatically.

- Click Save, then click Back
 .
.
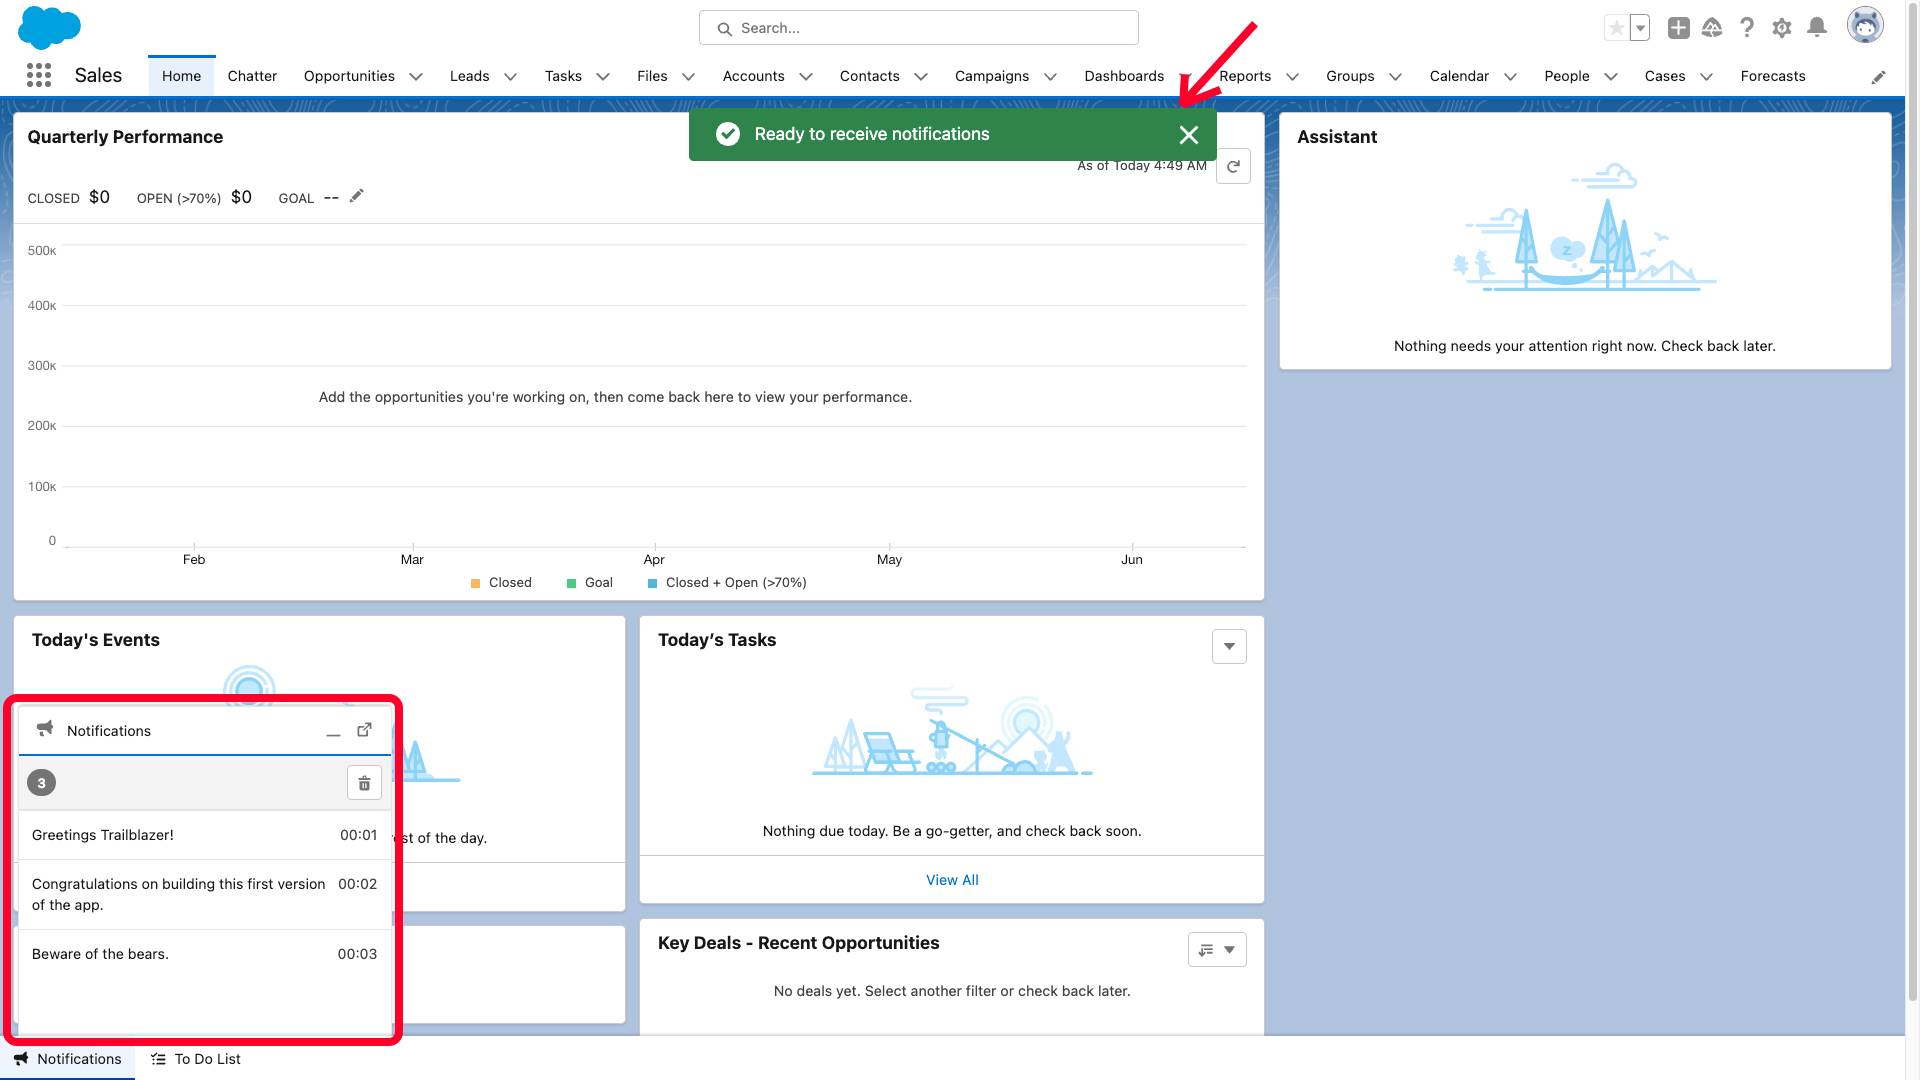
From the App Launcher ( ), find and select Sales. You can now see a "Ready to receive notifications" toast displayed, and the Notifications Lightning console app at the bottom of the screen. Click the Notifications app, and it expands with the three notifications we hard coded as illustrated below.