Manage Plan Assignments
Learning Objectives
After completing this unit, you’ll be able to:
- Describe how to add, edit, and remove plan assignments for sales reps.
- Explain how to manage plan assignment dates and custom fields.
Introduction
Picture this: You’re a sales manager overseeing a rockstar team. Things are humming along smoothly when suddenly one of your reps gets promoted to lead a new vertical, and another rep transfers to a different department. Then there’s a fresh compensation plan rolling out, and you’ve got to make adjustments for someone leaving the team. Suddenly, your once-perfectly-aligned compensation setup needs a bit of tweaking.
Whether it’s a promotion, a shift to a new territory, or a departure, managing reps on compensation plans is part of keeping everything running like a well-oiled machine. And while it sounds tricky, it’s easier than you think after you know the process.
In this module, you learn all about plan assignments across common business scenarios.
Manage Plans for Reps
In Salesforce Spiff, you have three ways to manage your plans. You can make changes directly in the user profile, in the Plan Assignments tab, or from the Plans page. Don’t worry, you learn how to navigate each of these options next.
Manage Plans Through Profiles
The user profile in Salesforce Spiff is a goldmine of valuable information about the user, including the teams they're part of and the compensation plans that are assigned to them. If you want to manage the commission plan for just one user, this is a great place to start.
To update a user’s plan, access their user profile and scroll down to the Plan Assignments section.
Here, you see the existing plans assigned to a user.

In the Plan Assignments section, turn on Edit mode and make these changes.
-
Assign a New Plan (1): Click + Add Plan Assignment to assign a new compensation plan to the user.
-
Set Plan Dates (2): Use the Effective As Of and Effective Until dates to specify the time frame for which the commission plan is active.
-
Delete a Plan Assignment (3): Instead of removing a plan assignment altogether, the best practice is to set the Effective Until date to smoothly transition out of the plan. Deleting a plan assignment removes any calculated statements for the assigned rep. However, Spiff prevents deletion if the rep has any frozen statements.
Manage Plans Using Plan Assignments
The Plan Assignments page provides a comprehensive view of all your users and their details, including contact information, assigned plans, effective dates, and more, all in a convenient tabular format. You can personalize this table to display the information that matters most to you.
You can perform many important tasks on the Plan Assignments tab.
-
Assign a New Plan: Use the Add Plan Assignment workflow to quickly choose a plan and assign it to multiple users at once.

-
Set Plan Dates: Enter Edit mode and use the Effective As Of and Effective Until dates to define the time frame for which the commission plan is active. You can make these changes across multiple users and plans simultaneously.

-
Delete a Plan Assignment: Rather than removing a plan assignment entirely, it’s best to set the Effective Until date to mark the plan's end date, ensuring a smooth transition. Alternatively, you can use the Remove Assignment option in the Edit mode.

Manage Plans Using the Plans Page
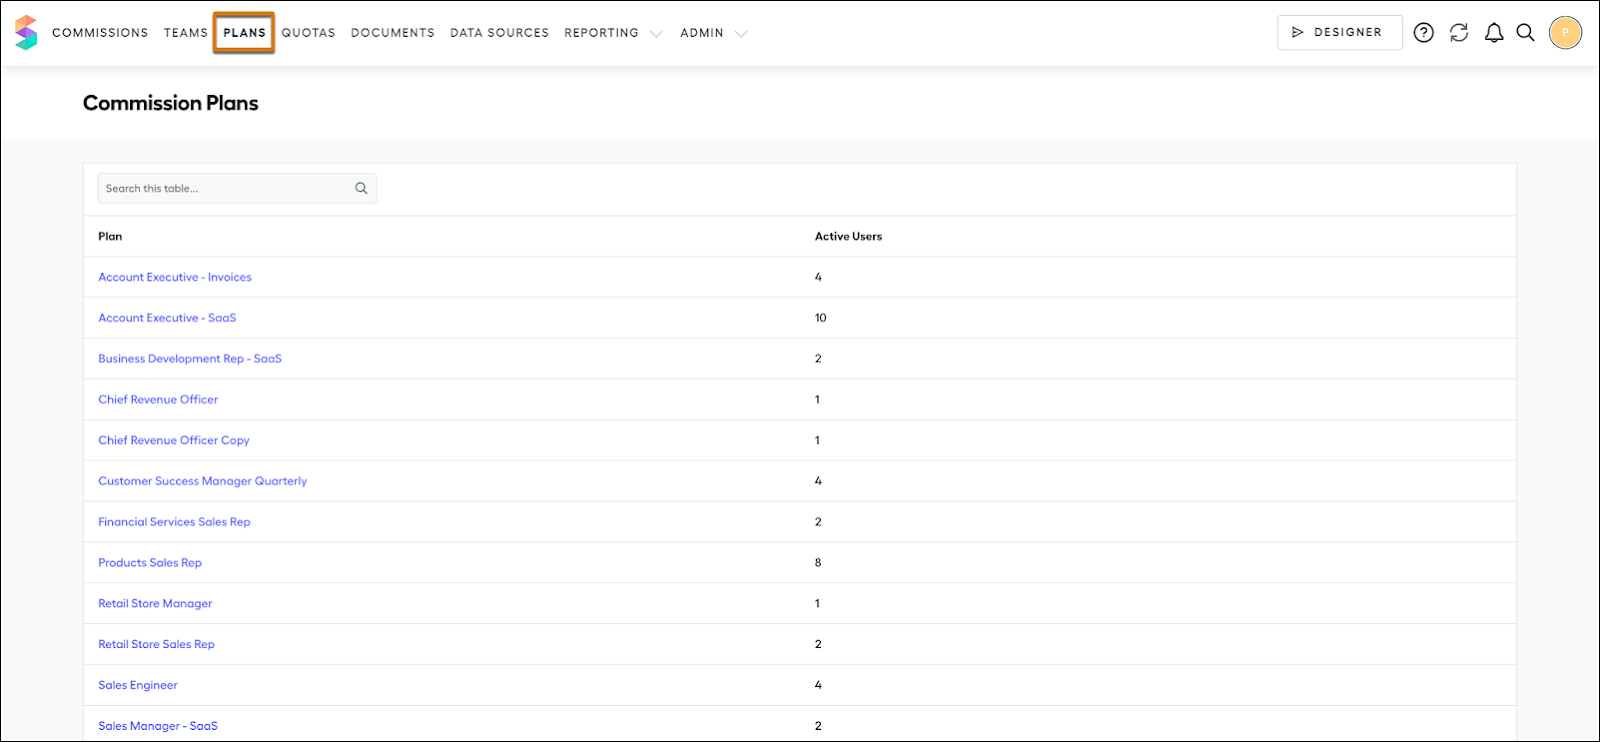
The Plans page gives you a clear view of all active plans and you can manage each one individually on this page. Here’s what the Plans page looks like.

While the previous method works well for managing all your plans in one place, this approach is perfect when you need to focus on specific plans and their assigned users. Click Plans to access the page, then choose the plan you want to manage.
You can perform these important tasks on the Plans page.
-
Assign Users: Check out this image of the Plans page illustrating the process of assigning users to a plan.

If you’re using Plan Automation with teams, users are automatically assigned to a plan when you add them to a team. If not, you can manually assign users by clicking Assign Users (1). Select the users (2), choose the appropriate team and plan (3), and assign them as needed (4).
-
Set Plan Dates: Set your plan dates in the Assigned Users page, as shown in this image. Enter Edit mode and use the Effective As Of and Effective Until dates to define the time frame for which the commission plan is active.

-
Delete a Plan Assignment: Rather than removing a plan assignment entirely, it’s best to set the Effective Until date to mark the plan's end date, ensuring a smooth transition. Alternatively, you can use the Remove Assignment option in the Edit mode.

In this unit, you learned how to manage compensation plans in Salesforce Spiff using different methods. In the next unit, learn how to manage plans in bulk.
