Discover the MuleSoft RPA Project Lifecycle
Learning Objectives
After completing this unit, you’ll be able to:
- Identify the phases in a MuleSoft RPA project lifecycle.
- Explain which MuleSoft RPA component enables you to handle each phase of the RPA project lifecycle.
Discover the RPA Lifecycle
Every MuleSoft RPA process goes through a series of key development steps called phases to ensure that it’s valuable to your company and succeeds upon deployment. We refer to these phases as the RPA lifecycle. As you begin to discover the MuleSoft RPA process lifecycle, it’s helpful to orient yourself with the lifecycle phases and how components and features work together to carry out each lifecycle phase.
In chronological order, the phases are: Evaluate, Design, Build, Test, and Production. RPA Manager has a visual diagram to remind you in what phase is an RPA process.

Each lifecycle phase is often performed by different job roles, also known as personas. MuleSoft RPA aligns certain job roles to particular phases. For example, when an RPA process is in the Design phase, it blocks an RPA developer from implementing in RPA Builder. When the RPA process is in the Test, Deploy, or Production phase, RPA designers and RPA developers are blocked from editing the RPA process.
Take a look at this video demonstration introducing some of the key RPA lifecycle phases. Now let’s take a look at the RPA lifecycle phases and statuses in more detail.
Evaluate Phase
While RPA has the potential to help companies increase employee efficiency and reduce company costs, not all tasks are appropriate for RPA. If a process is complex and variable, or infrequently performed and quick to complete, it may not be cost-effective to use an RPA bot to automate it. The Evaluate phase of the RPA lifecycle determines whether the process is suitable to be handled by an RPA bot.
MuleSoft RPA Manager has a built-in evaluation tool that enables you to quickly assess the potential of an RPA process. This tool is available for the business analyst role or other roles with financial responsibility for the project. The tool evaluates the current organizational impact and cost to complete tasks manually and the benefit of transitioning to an RPA process automation. It then uses these inputs to perform a simple cost-benefit analysis to determine the potential value gained—or perhaps lost—by deploying an RPA bot.
Decision-makers can use the results of the Evaluate phase to accept or reject the proposed MuleSoft RPA process. If the RPA process is approved, MuleSoft RPA Manager automatically moves the RPA process to the Design phase.
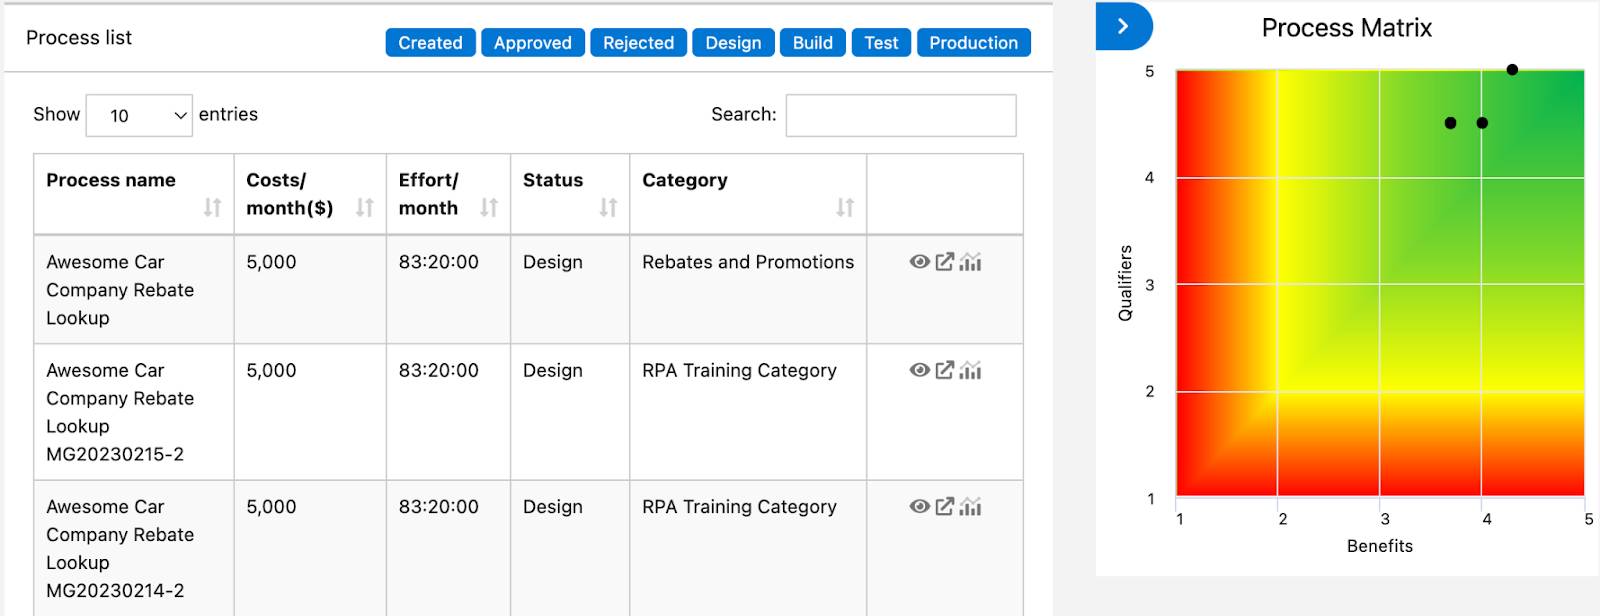
In the Evaluate phase, the RPA process moves between the Created, Approved, and Rejected statuses. In the Created and Rejected status, the process evaluation can be changed. When the RPA process reaches the Approved status, the process evaluation cannot be edited unless the RPA process is returned to the Rejected status. Every RPA process appears in a Process Matrix so they can be compared. Even after an RPA process advances to a later lifecycle stage, it appears in the Process Matrix.
In the Approved status, the RPA process is assigned to or claimed by a project manager. The project manager then assembles the RPA process lifecycle team before the RPA process is moved to the Design phase. There’s also the option to reject the RPA process. In this case, the RPA process evaluation criteria and documentation can be modified or the RPA process can be deleted.

Design Phase
After you’ve decided that it’s worth creating an RPA process for a given task, what comes next? Just like any other project, you need to make a plan. Think of the Design phase as taking the evaluated process and breaking it down into a flowchart that corresponds to the actions that will be performed.
This flowchart is called the Business Process Model and Notation (BPMN) diagram. You create this flowchart in the RPA BPMN editor in MuleSoft RPA Manager. The BPMN is generated either manually using a simple drag-and-drop interface or automatically using a tool called the MuleSoft RPA Recorder.
The BPMN flowchart that you build connects the following flow elements.
- A Start Event is always the first element of a BPMN diagram flow.
- Bot Tasks that automatically carry out a sequence of automated activities.
- Manual User Tasks that stop the RPA process until a user manually intervenes to continue executing the RPA process.
- Gateways that conditionally route the flow to other flow elements.
You can annotate the BPMN diagram to give instructions to RPA developers. If you’re using the MuleSoft RPA Recorder, it automatically annotates the BPMN diagram. The MuleSoft RPA Recorder annotations are highly structured and are used by MuleSoft RPA Builder to convert the annotations into detailed code blocks. These code blocks are used to execute the replay of the recorded user actions.
When the RPA process BPMN design is complete, users with the correct permissions move the RPA process to the Build phase. The BPMN diagram is then blocked from further editing.
Build Phase
After the process is fully mapped out, you’re ready to build. You must transition from working online to working locally in MuleSoft RPA Builder. To simplify the design process, you download your BPMN from MuleSoft RPA Manager into MuleSoft RPA Builder by browsing for it in the MuleSoft RPA Manager repository.
When an RPA BPMN file is loaded into MuleSoft RPA Builder, any detailed documentation captured by the MuleSoft RPA Recorder is converted into blocks of executable code. At a high level, each BPMN symbol is converted to a flow element that is connected. These flow elements use variables called activity parameters to share data across the RPA flow.
In the autogenerated code, Bot Tasks are the most complex. Each of these elements has its BPMN documentation converted into detailed blocks of code called workflows. The workflows combine code blocks from a Toolbox library to replay all the steps. Later, developers modify the steps in the autogenerated workflows to make the code more robust or to add additional functionality.
The MuleSoft RPA Recorder captures the mouse and keyboard actions using absolute coordinates. This is a good way to capture values and click paths, but these literal recordings are often not the most stable (robust) or flexible representations of the user’s actions. For this reason, an RPA developer usually replaces most of the autogenerated implementation for each RPA process element with other options from the Toolbox during the Build phase.
Within MuleSoft RPA Builder, you build out each of the steps in the BPMN by using a drag-and-drop interface, combined with recording your keyboard inputs. You can additionally test individual RPA process flow elements or the full RPA process to ensure the automation works as expected.
MuleSoft RPA Builder also has the RPA BPMN editor, which allows you to modify the BPMN diagram. For example, you can edit or completely replace any of the flow elements. You can also copy and paste components between workflows in other Bot Tasks elements.
You can export and import workflows between Bot Tasks by using the activity library. You can export and import entire RPA process implementations as CRPA files. You can also store particular steps within a workflow as template files with the .tptx suffix and then use templates as new elements that appear in the Toolbox.
Test Phase
When you finish building your RPA process, you upload it back to the MuleSoft RPA Manager. It’s important that you don’t immediately publish your process to a production RPA bot without further testing. Due to the complex nature of the tasks being performed by the RPA bot, it’s critical that you rigorously test the process to ensure it operates as expected.
MuleSoft RPA Manager allows you to quickly create a series of Test Plan configurations. Each Test Plan should test the process under a different condition. If an RPA bot successfully passes each of the test plans, then you can be confident that it’s ready to be deployed. Otherwise, you likely need to modify your process logic or even the BPMN itself.
Each Test Plan configuration sets initial values for activity parameters, specifies one or more available RPA bots to run the RPA process, and specifies what type of user or Windows session should be used to execute the test. This is needed because the RPA bot is using the Windows system’s keyboard and mouse to execute all the action steps in the RPA process.
You need a dedicated session to run the RPA process so that the RPA process execution doesn’t conflict with other users on the Windows system. For example, conflicts may include the ability to close open windows, reproduce the correct screen resolution, and reproduce other Windows configuration settings.
A Test Plan is manually triggered when MuleSoft RPA Manager runs the test. MuleSoft RPA Manager provides other tools to help you monitor the RPA process in near real-time while it’s running. This shows you tables of each flow element and action step as it executes. You also see a visual viewer that shows near real-time screenshots and an animated progress indicator in the BPMN diagram.
When errors are reported by the RPA bot that is running the RPA process during the test, MuleSoft RPA Manager provides a downloadable detailed diagnostic report called an analysis package. The analysis package is imported into MuleSoft RPA Builder and shows exactly where the error occurred. This allows developers to begin troubleshooting a root cause and work on solutions.
After testing is complete, the RPA process is published to the next phase where you schedule when and how often the RPA process should be triggered in a production environment.
Production Phase (Deploy, Manage, and Monitor)
Now is the moment you’ve been waiting for. After your process passes all of your tests and is production ready, it can be deployed to one or more RPA bots. Just like in the Test phase, deployment is performed directly in MuleSoft RPA Manager. To deploy your RPA process, organize all the required configurations into a deployment configuration called an Execution Plan.
The steps to configure an Execution Plan are nearly identical to creating a Test Plan with one difference. An Execution Plan may contain schedulers to decide when and how often to trigger the RPA process. A scheduler is often configured to coincide with the availability of external systems that the RPA process will access or the availability of users expected to carry out User Tasks in the RPA process in a timely manner. For example, Monday–Friday, 8 AM–5 PM.
After an RPA process is deployed to a bot it immediately starts saving countless work hours. However, just like any code, it’s important that you monitor the RPA process and respond to any issues as they arise. Like most cloud-hosted control planes, MuleSoft RPA Manager has built-in monitoring capabilities. These features allow you to quickly assess the performance of deployed RPA processes and the bots on which they are deployed. This includes near real-time snapshots of the Windows session(s) running the RPA processes, configurable dashboards, and automated alerts should errors arise.
You just learned about the MuleSoft RPA lifecycle and the components used to complete each phase. In the next unit, you explore each of these components in more detail.