Transform Data Using Functions and Formulas
Learning Objectives
After completing this unit, you’ll be able to:
- Navigate around the Custom Expression Editor.
- Transform data using string functions.
- Transform data using number functions.
- Transform data using date functions.
In unit 2, you learned how to map the fields of a target object in the current action step to different source values. This usually involves mapping one target field to one source value. Recall source values are the following.
- text strings
- numbers
- data pills
- picklist values from data pills
However, there are many integration situations in which you need to map one target field to multiple source values. To do this, you transform data in the target fields using functions and formulas. And the tool you use to transform data is the Custom Expression Editor.
Custom Expression Editor
The Custom Expression Editor makes it easy for you to transform data using functions and formulas. It guides you with contextual in-app help, provides specific examples and actionable error messages along the way, and validates the syntax of your custom expressions. This ensures you’re on the right track and ultimately successful in building your custom expressions.
To access the Custom Expression Editor, click in a field in a step of your flow and then click Custom Expression. The Custom Expression Editor appears.
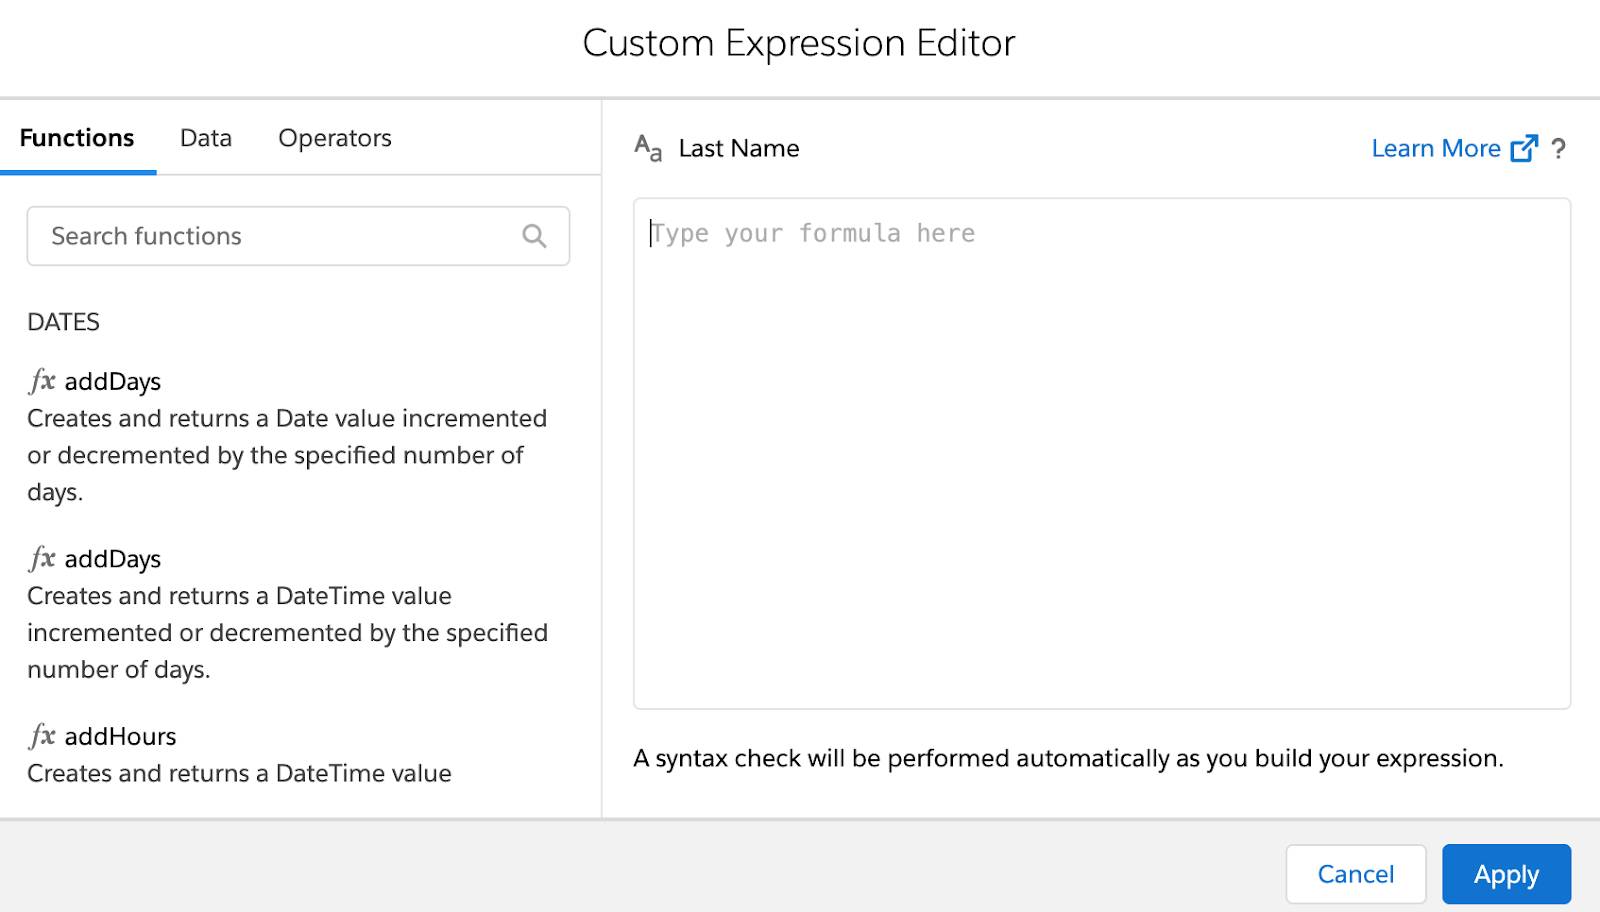
The Custom Expression Editor has the following three tabs.
Tab |
Description |
|---|---|
Functions |
Provides numerous functions including the following.
|
Data |
Shows data pills from the previous steps of the flow. |
Operators |
Lets you add, subtract, multiply, divide numbers, and use open and close parentheses to specify order of precedence in formulas. |
Let’s learn how to transform data in some example use cases using the Custom Expression Editor.
Transform Data Using String Functions
Let’s say you have a flow that starts when a new row is created in the Marketing Event Tracker spreadsheet. Then, the flow creates a contact using the Contact object in Sales Cloud. The Marketing Event Tracker contains the First Name, Last Name, and Email fields. Your flow must transform the first names and last names to begin with a capital letter and the email accounts to be in lowercase when creating contacts in Sales Cloud.
To meet these requirements, you must use two functions.
- capitalize() accepts a text string, capitalizes the first letter of each word in the string, and returns the result.
- lower() accepts a text string, converts its letters to lowercase, and returns the result.
Follow these steps to transform the first names, last names, and email accounts to have the desired letter cases using the capitalize() and lower() functions.
- In the Create new record in the Salesforce step, click in the Last Name field and then click Custom Expression.
- In the Functions tab, scroll down and select capitalize. Notice that MuleSoft Composer provides contextual in-app help and examples for this function. Also, a syntax error message appears and persists until you’ve configured a valid custom expression.
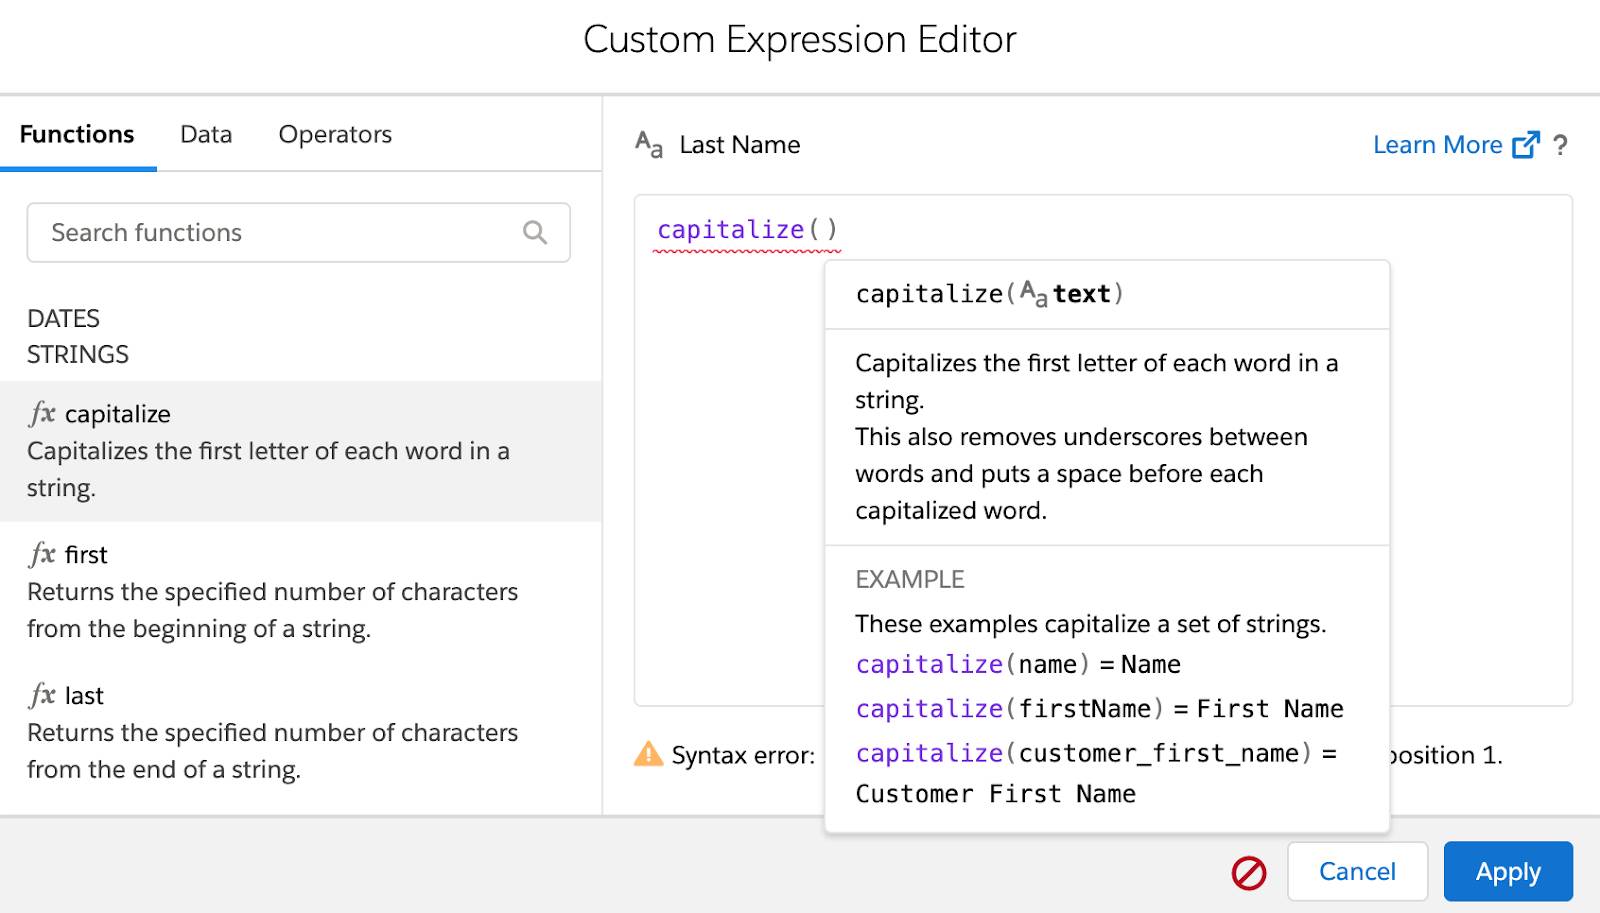
- With your cursor still within capitalize(), click the Data tab, and then select Last Name. MuleSoft Composer validates the syntax of your custom expression. If there’s any error in the expression, you must fix it before you can proceed to the next step.
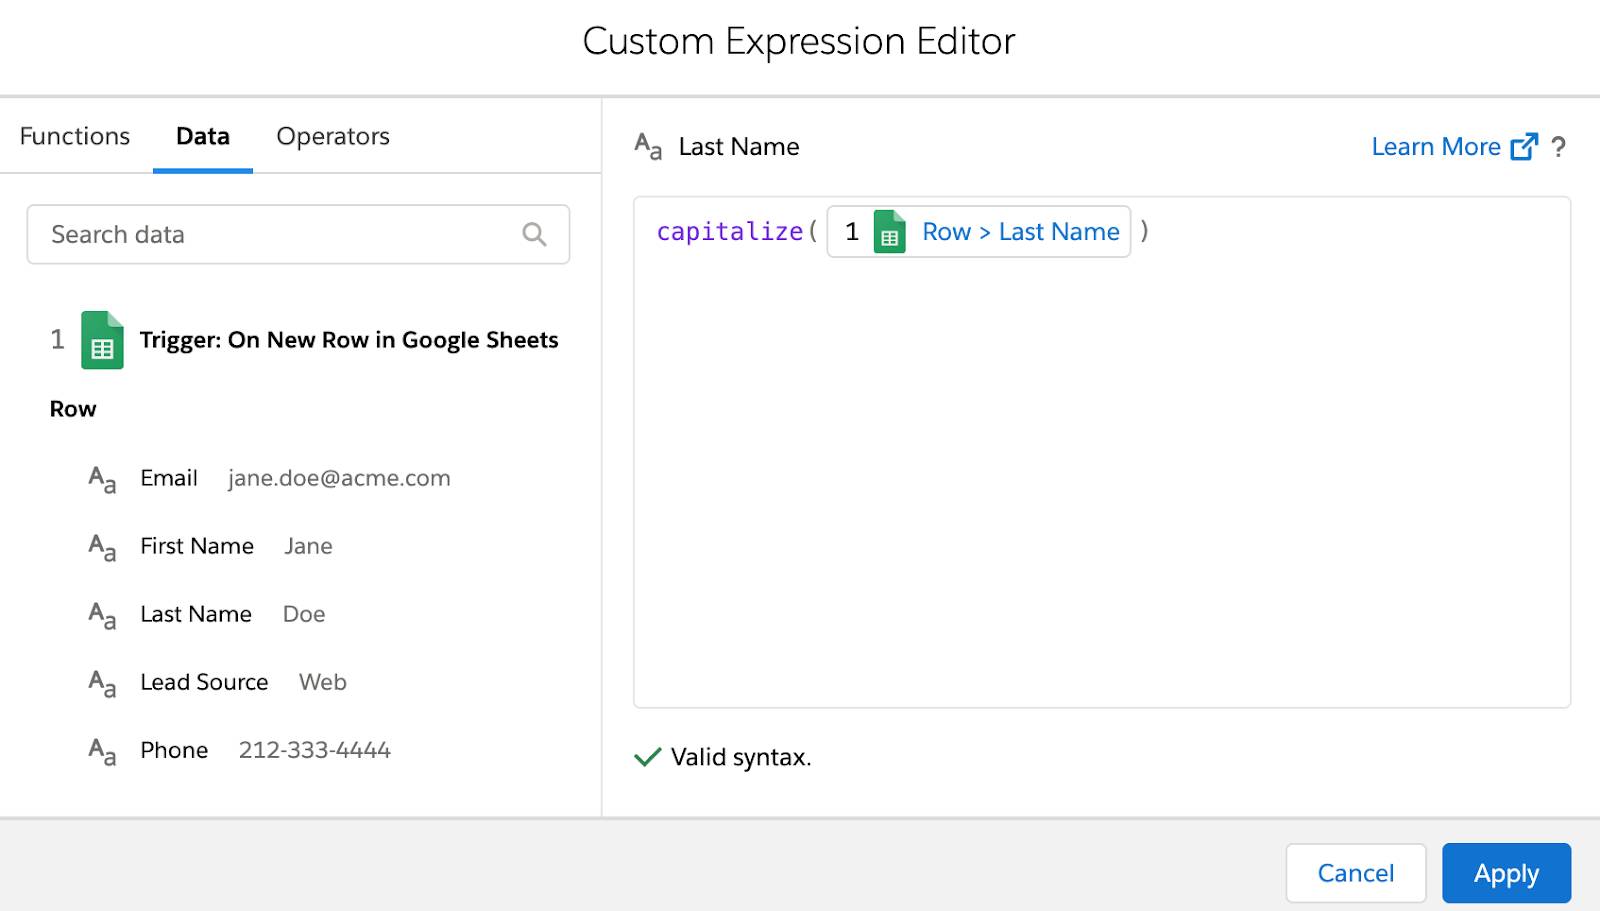
- Click Apply to accept the expression.
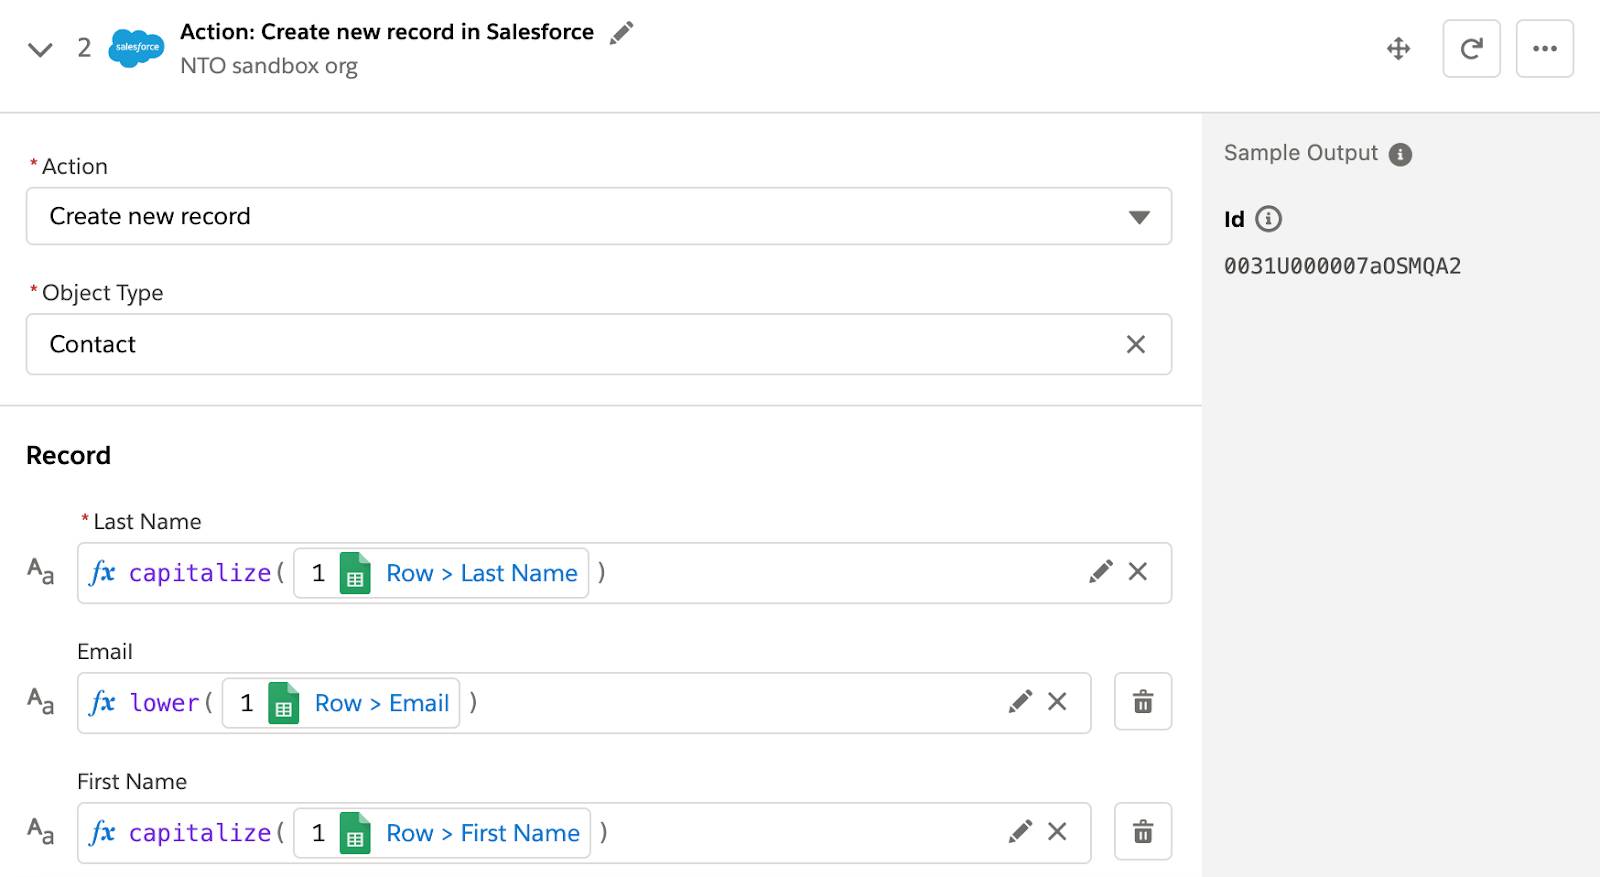
- Repeat steps 1 through 4 for the First Name field.
- Repeat steps 1 through 4 for the Email field but this time use the lower() function. Your Create new record in Salesforce action step looks like this.
Transform Data Using Number Functions
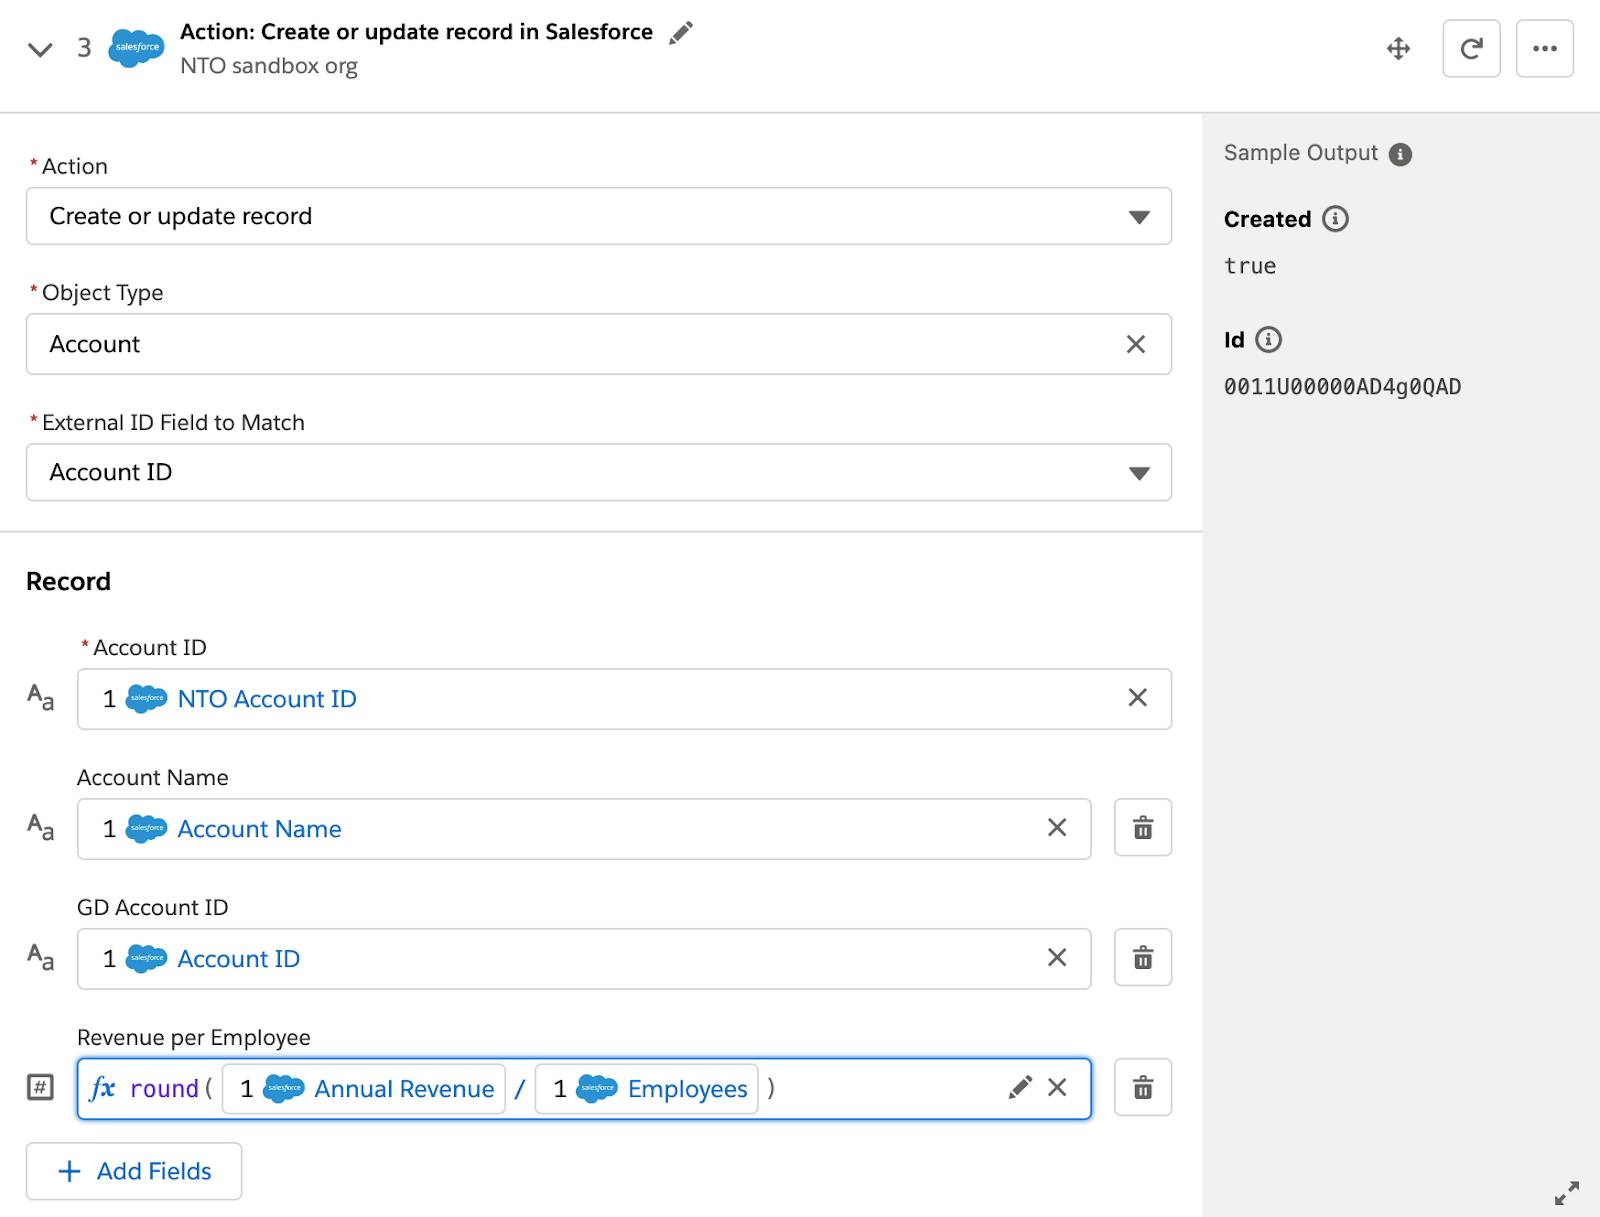
Let’s look at an example of a flow that syncs accounts from the GD (Great Divide) org to the NTO org. The NTO org has a numeric custom field called Revenue per Employee.
In this flow, there’s a Create or update record in Salesforce action step in which you must calculate the Revenue per Employee field and round it before creating or updating the resultant record in the NTO org. To do this, use the divide operator and the round() function. This function accepts a number, rounds it to the nearest whole number, and returns the result.
Your formula looks like this.
Revenue per Employee = round ( Annual Revenue / Employees )
Follow these steps to transform data for the Revenue per Employee field using the divide operator and the round() function.
- In the Create or update record in Salesforce step, click in the Revenue per Employee field and then click Custom Expression.
- In the Functions tab, scroll down and select round.
- With your cursor still within round(), click the Data tab, and then select Annual Revenue from step 1 of the flow.
- Click the Operators tab, and then select Divide. Alternatively, use Control+/.
Note: You can use keyboard shortcuts for mathematical operators. Use Control + minus (-) or divide (/). Use Control + Shift + plus (+), multiply (*), open parenthesis ((), and close parenthesis ()). For example, to enter a multiply (*) operator, press Control+Shift+*.
- Click the Data tab, and then select Employees from step 1 of the flow. MuleSoft Composer validates the syntax of your custom expression. If there’s any error in your expression, you must fix it before you can proceed to the next step.

- Click Apply to accept the expression. Your Create or update record in Salesforce step looks like this.
Transform Data Using Date Functions
Let’s use the same flow that syncs accounts from the GD org to the NTO org. In this flow, you need to fetch only accounts modified in the last 7 days.
To do this, you use two functions.
- now() returns the current date and time as a datetime.
- addDays() accepts two datetimes (a time reference and a number of days), and returns a datetime incremented or decremented by the specified number of days.
Follow these steps to transform data using the now() and addDays() functions to meet the condition for fetching accounts modified in the last 7 days.
- In the Get records in Salesforce step, select the All conditions must be met (AND) condition.
- Select Last Modified Date as the field and Equals as the operator.
- Click in the Value field and then click Custom Expression.
- In the Functions tab, scroll down and select addDays. Make sure to select the addDays() function that works with a datetime.
- With your cursor still within the first parameter of addDays(), scroll down and select now as the value.
- Enter
-7as the second parameter value of addDays() to the right of the comma. This value indicates 7 days before now.
- Click Apply to accept the expression. Your Get records in Salesforce step looks like this.

Transform Data from One Data Type to Another
Since different systems store data differently, there are times when you need to transform data from one data type to another. You can do this using various functions. The following table describes some key functions.
Function |
Description |
|---|---|
fromStringToDate |
Transforms a string into a date. |
fromStringToNumber |
Transforms a string into a number. |
fromNumberToString |
Transforms a number into a string. |
fromNumberToDateTime |
Transforms a number into a datetime. |
fromDateToString |
Transforms a date into a string. |
fromDateTimeToNumber |
Transforms a datetime into a number. |
fromDateToDateTime |
Transforms a date into a datetime. |
Let’s take a look at an example. You have a flow that syncs accounts from the NTO org to customers in NetSuite. In this flow, you have a Create Record in NetSuite step that creates a customer in NetSuite using an account in the NTO org. This step involves mapping the Last Modified Date field in Salesforce to the corresponding field in NetSuite.
However, dates are stored as dates in Salesforce but as datetimes in NetSuite. To transform Salesforce dates into NetSuite datetimes, use the fromDateToDateTime() function.
Follow these steps to transform Salesforce dates into NetSuite datetimes.
- In the Create Record in NetSuite step, click in the Last Modified Date field and then click Custom Expression.
- In the Functions tab, scroll down and select fromDateToDateTime.
- With your cursor still within the first parameter of fromDateToDateTime(), click the Data tab, and then select Last Modified Date from step 1 of the flow.

- Click Apply to accept the expression. Your Create Record in NetSuite step looks like this.

Transform Data Using a Mixture of Values
You can also transform data in one custom expression using a mixture of text strings, numbers, and data pills as well as string, number, and date functions and formulas.
Let’s use the same flow you learned in unit 1. Recall that this flow syncs Salesforce accounts to Slack notifications. The flow performs the following tasks.
- Find any new or updated account in the NTO org.
- Send a notification to the Slack sales-leads channel.
Let’s replace the custom expression in the Message field of step 2 of the flow with the following. Note that it uses different text strings, capitalize(), round(), daysBetweenDates(), today(), and several data pills from step 1 of the flow.

At runtime, this flow can produce a Slack message like this.

Great job! You’ve learned how to transform data using functions and formulas. In the next unit, you learn how to manage connections and action steps and test your flow to ensure it works as expected.