Conduct Due Diligence and Collect Reviews
Learning Objectives
After completing this unit, you’ll be able to:
- Conduct due diligence with action plans and verification checks.
- Collect reviews from your colleagues and external reviewers.
Create an Action Plan
As a first-time applicant, the (fictional) nonprofit No More Homelessness (NMH) has a new account record in Salesforce. This record is where Michon, a program coordinator at the (fictional) Six Sides Fund, creates an action plan consisting of tasks and document checklist items. The action plan ensures he performs standard intake steps, collects the right information, and creates verification check records to log his decisions.
Verification check records provide historical documentation for the organization and a standard set of data about each grantseeker. Standardization reduces duplication of work, especially on manual tasks like reviewing documents.
Michon starts by assigning an action plan to the NMH account.
- On the account record, click Action Plans.
- Click New Plan.
- Enter a Name. Michon enters
Initial Verification. - In Action Plan Template, search and select the action plan. Michon selects US Due Diligence. Your admin can create different action plan templates for your needs.
- Choose a Start Date.
- The Target Record field is already auto-filled to the current account.
- Decide if you want to select the Skip Nonwork Days For Tasks box. Selecting this option means weekends don’t count against deadlines generated from the template. That’s the standard process at the Six Sides Fund, so Michon selects the field.
- Select a Status. Michon selects In Progress.
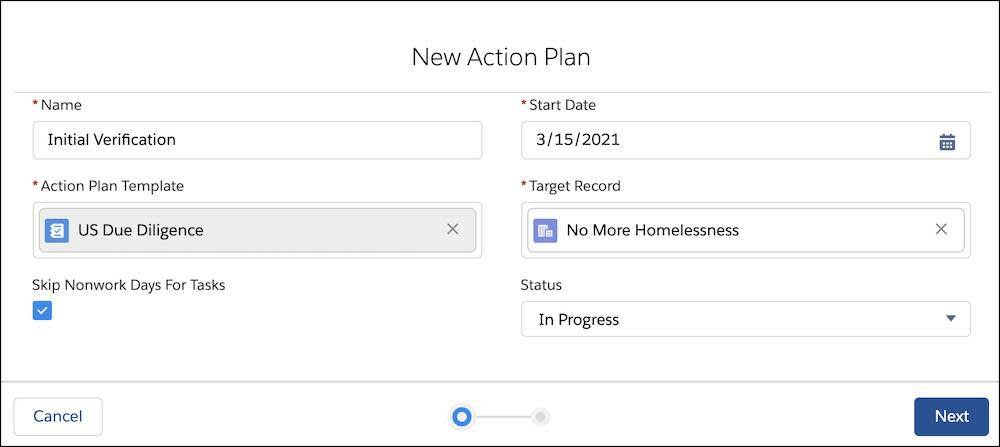
- Click Next to review the tasks and document checklist items, then click Save.
Let’s check out the new action plan.
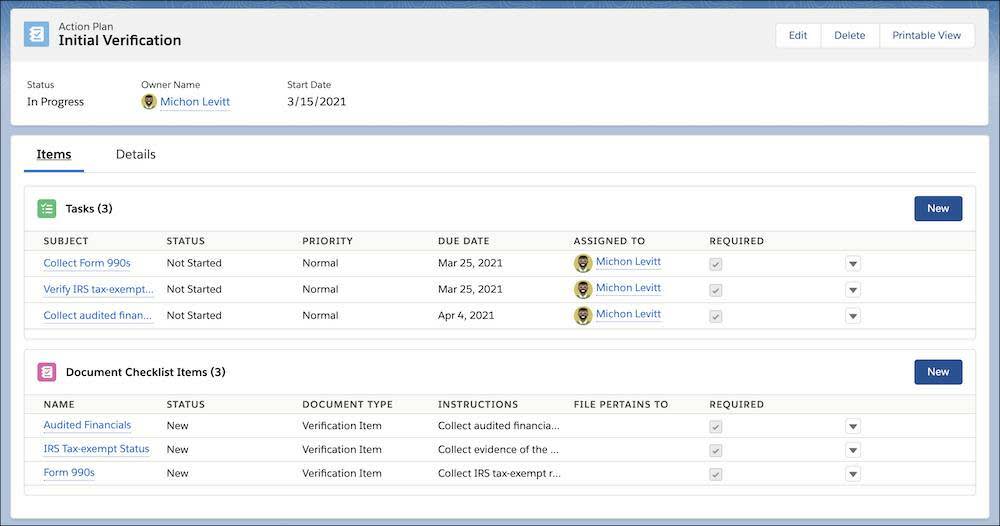
The tasks and document checklist items also appear on the account record. You can find your document checklist items there by selecting Verification Items.
Create a Verification Check
Michon collects the organization’s most recent informational tax filings (the IRS Form 990 in the United States) from an online database. He then creates a verification check record for a document checklist item.
- Go to the account record you'd like to verify and select Verification Items.
- Click the Verification Items dropdown icon (
 ) in the item you’d like to verify, then select Create Verification Check.
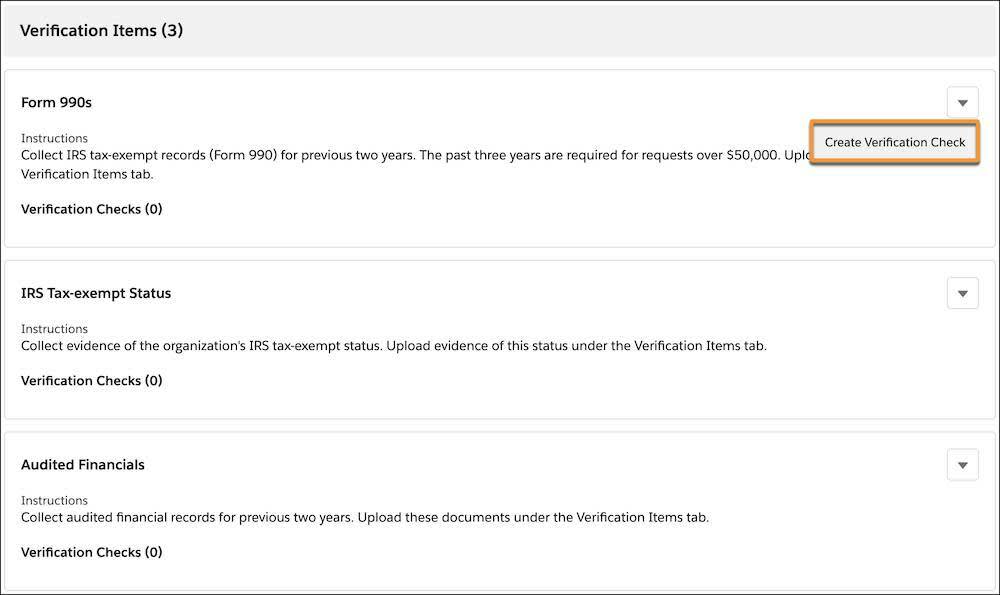
- Enter a Verification Check Name. Michon enters
NMH Form 990s. - Select a Status. Michon selects Accepted.
- Choose the Date Verified.
- Add Comments. This field is optional, but helpful to document decisions. Michon enters a few notes.
- Upload the file by clicking Upload Files and selecting the file, or by dropping the file into Files. Click Done when the file is uploaded successfully.
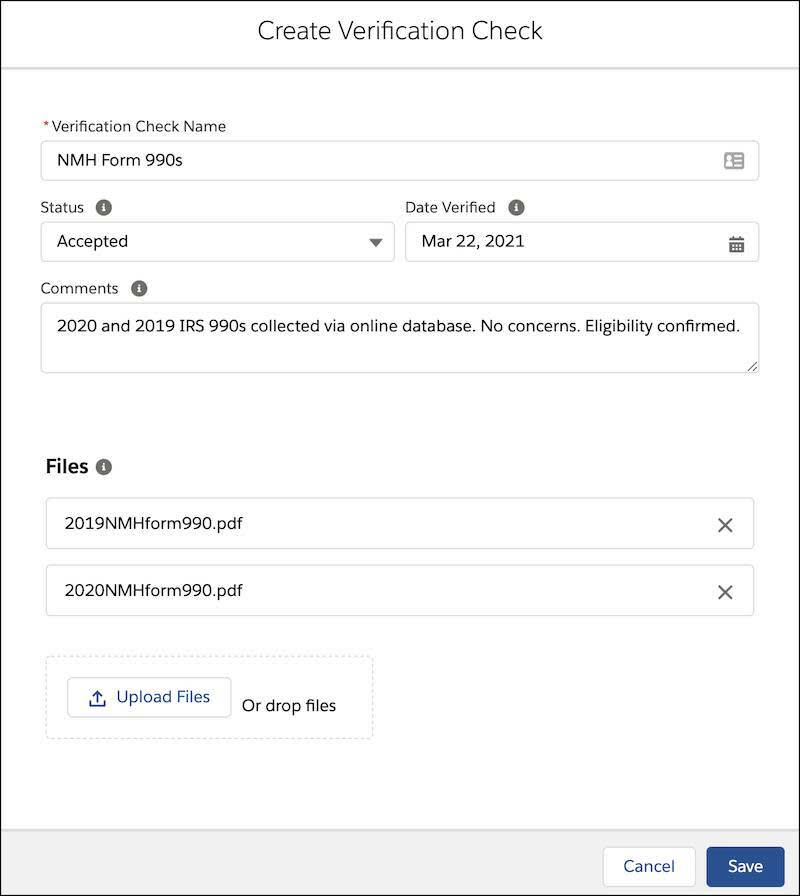
- Click Save.
Grants Management also includes a tax status search to retrieve tax information via API about US-based organizations to quickly check if a grantseeker is an eligible nonprofit. If an admin configured this feature, you have the option to Check Tax Status when you click the Verification Items dropdown icon ( ) on the IRS Tax-exempt Status verification item.
Create a Review
Michon wants his colleagues to share their opinion on this application, too. He can do this using the Review object.
Reviews collect and store feedback from key stakeholders in the grantmaking process, like your organization’s financial, legal, and program experts.
Michon specifically wants to share this funding request for review with Aileen Davis, the Six Sides Fund's executive director, to collect her experienced perspective.
- Go to the funding request record you would like others to review. Michon starts his request for a review from NMH’s funding request record.
- Navigate to the Reviews tab.
- Click New.

- Enter a Review Name. Michon enters
Executive Program Review. - Select a Status. Michon selects Not Started.
- Because Michon started this review from a funding request record, the Funding Request field is already filled.
- Enter a Due Date.
- Other information could be entered at this moment, but Michon skips these fields for now. Let's learn why.
- In Assigned To, you can search and select a reviewer—but Michon has some configuration to do for this review first, so he leaves this blank.
- You could enter Comments here if you’re creating the review for yourself. Michon doesn't fill out Comments, though, because he’s assigning this review.
- Submitted Date is the date the review is completed, so Michon leaves it blank.
- You can also set the Display Start Date or Display End Date values here, but Michon leaves those fields blank because they determine when a reviewer can submit their comments. He’ll set those fields after he configures the review.

- Click Save.
- Click the review name in the message that appears or on the Funding Request record to go to the review record.
Michon is now on the review record on the Review Workspace tab. This record is where he configures which information is visible to the reviewer.

For now, it’s blank. Let’s configure it now.
- Click Edit Workspace in the Review Workspace.
- Click + New Section. Each section retrieves information from objects within Grants Management.
- In Section Name, enter
Funding Request Details. - Select Expand section by default. This option shows the selected fields when a reviewer first goes to the review record. These sections are collapsed by default if this option isn’t selected.
- Select Show attached files. This option includes any files attached to the funding request—for this request that includes the budget and narrative the foundation asked for as part of the initial application.
- In the Fields from section, select the object you want the reviewer to view under the Review field. Michon selects Funding Request.
- The fields on the funding request appear. Michon selects Applying Organization, Funding Program, Geographical Area Served, Requested For, and Requested Amount, and adds them to the review record by clicking Move selection to Selected fields (
 ).
).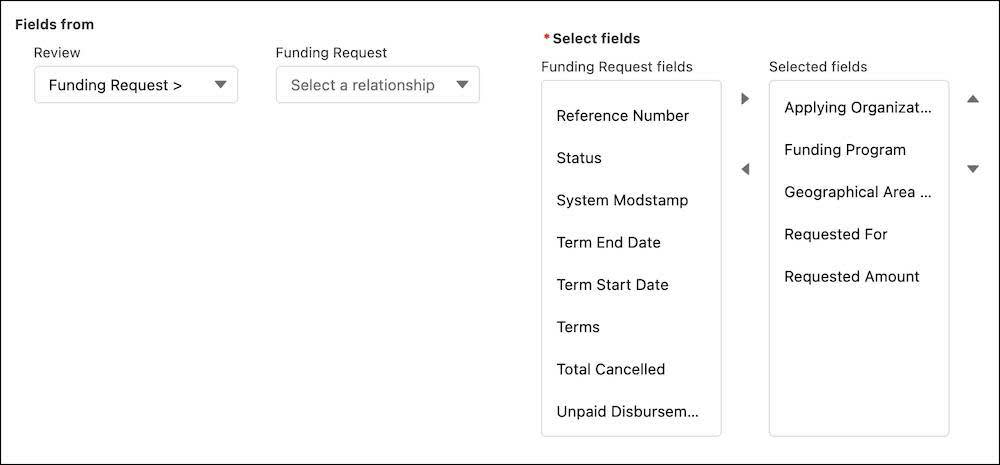
- Click Add.
The Review Workspace now shows a preview of the fields Michon selected.

To finish, Michon clicks Save Workspace. He then finds and selects Aileen in the Assigned To field on the Details tab of the review record. He also sets the Display Start Date and Display End Date values to establish the time period for reviews and allow Aileen to submit her review. Remember: Reviewers can only see fields visible to their user profiles and permissions.

Submit a Review
When Aileen logs in she can see all of the reviews assigned to her in a list view set up by the foundation’s Salesforce admin. She opens the funding request, reviews the details, and changes the Status to In Progress.

When she’s ready to submit her review, she goes to the review record, adds her notes in the Comments field, clicks Submit, then confirms her submission. She also sets the submitted date in the Details tab.
As a result, Michon has the feedback required to move ahead with the request, recorded in a way that stays with the funding request through the entire grant process.

But what if you need more information from the grantseeker to process their request? There’s a collaborative tool for that need, too: requirements. We explore those records in the next unit, plus how to track disbursed funds.
Resources
- Salesforce Help: Complete Due Diligence for a Grantseeker
- Salesforce Help: Set Up a Due Diligence Process
- Salesforce Help: Considerations for Creating Action Plan Templates
- Salesforce Help: Create and Customize Reviews
- Salesforce Help: Manage Review Fields on the Review Workspace
- Salesforce Help: Complete a Review