Preparar su organización para acceder a Models API
Objetivos de aprendizaje
Después de completar esta unidad, podrá:
- Configurar su entorno de Salesforce DX.
- Registrarse para obtener una zona de pruebas de IA.
- Autorizar su zona de pruebas de IA en Visual Studio Code.
- Crear un proyecto de Salesforce DX.

El próximo paso para DreamHouse Realty
Después de planificar su primer proyecto de IA con DreamHouse Realty, Maria necesita configurar su organización y entorno así puede empezar a crear su tablero. Models API es accesible para cualquier organización con IA generativa de Einstein y Data 360 habilitados.
Registrarse para obtener una organización de prueba con IA generativa de Einstein
Para completar este proyecto, necesita una zona de pruebas personalizada de tiempo limitado especial que contiene IA de Einstein y Data 360.
- Haga clic en Create Playground (Crear zona de pruebas).
- Su nueva organización se encuentra asociada automáticamente a su cuenta de Trailhead.
- Tome nota de la fecha de caducidad de su organización y complete esta insignia antes de dicha fecha.
Restablezca su contraseña.
- Haga clic en Launch (Iniciar) para iniciar su Trailhead Playground.
- Haga clic en
 y seleccione Configuración.
- En el cuadro de búsqueda rápida, busque y seleccione Users (Usuarios).
- Localice su nombre en la lista de usuarios. Seleccione la casilla junto a su nombre. Tome nota del nombre de usuario. Éste es el nombre de usuario para su Trailhead Playground.
- Haga clic en Restablecer contraseña(s) y Aceptar. Esta acción envía un email a la dirección de email asociada con su nombre de usuario. Asegúrese de comprobar la carpeta de spam si no puede ver el email.
- Haga clic en el vínculo en el email.
- Ingrese una nueva contraseña, confírmela y haga clic en Cambiar contraseña.
Si aún no lo ha hecho, inicie su zona de pruebas de IA.
- Haga clic en el ícono de engranaje (
 ) y en Setup (Configuración). La página Configuración se abre en una nueva ficha.
- En el cuadro de búsqueda rápida, busque y seleccione Einstein Setup (Configuración de Einstein).
- Asegúrese de que el botón de alternancia Turn on Einstein (Activar Einstein) esté en On (Activado) (
 ).
).
Para asegurarse de que su componente web Lightning se vea de inmediato cuando se implementa, desactive la memoria caché del navegador en su organización.
- Haga clic en el ícono de engranaje (
 ) y en Setup (Configuración). La página Configuración se abre en una nueva ficha.
- En el cuadro de búsqueda rápida, busque y seleccione Session Settings (Configuración de la sesión).
- En Caching (Almacenamiento en caché), anule la selección de “Enable secure and persistent browser caching to improve performance” (Activar el almacenamiento en caché seguro y persistente para aumentar el rendimiento).

Instalar Command Line Interface (CLI) de Salesforce
Utilice la CLI de Salesforce para controlar todo el ciclo de vida de sus aplicaciones de Salesforce. Con ella puede crear fácilmente entornos de desarrollo y pruebas, sincronizar código fuente entre sus organizaciones y el sistema de control de versiones (VCS), y realizar pruebas.
Consulte la Guía de configuración de la interfaz de línea de comandos de Salesforce para obtener instrucciones de instalación completas.
- Instale la CLI desde Salesforce CLI.
- Para confirmar que esté instalada de forma apropiada la versión más reciente de la interfaz de línea de comandos, ejecute el siguiente comando desde la línea de comandos.
sf update
Debería ver un resultado similar a Updating CLI…
(Actualizando CLI…)
Instalar extensiones de Salesforce para Visual Studio Code
Visual Studio Code es el editor de código directo de los desarrolladores de Salesforce. Se trata de una herramienta gratuita, de código abierto que está disponible para Windows, Linux y macOS. Este editor ofrece extensiones de instalación sencilla que permiten resaltar sintaxis, completar código y mucho más.
Si todavía no las tiene, siga las instrucciones para instalar Visual Studio Code y el paquete de extensión de Salesforce recomendado.
- Descargue e instale la versión más reciente de Visual Studio Code para su sistema operativo. Si ya instaló Visual Studio Code, no es necesario volver a instalarlo.
- Inicie Visual Studio Code.
- En la barra de herramientas de la izquierda, haga clic en el ícono de extensiones (
 ).
).
- Busque el paquete
Salesforce Extension Packy haga clic en Install (Instalar).
Crear un proyecto
- En Visual Studio Code, abra la paleta de comandos. Para ello, pulse Ctrl+Mayús+P (Windows) o Cmd+Mayús+P (macOS).
- Escriba
SFDX.
- Seleccione SFDX: Create Project (SFDX: Crear proyecto).
- Pulse Entrar para aceptar la opción estándar.
- Ingrese
ModelsAPILWCcomo el nombre de proyecto.
- Pulse Entrar.
- Seleccione una carpeta para almacenar el proyecto.
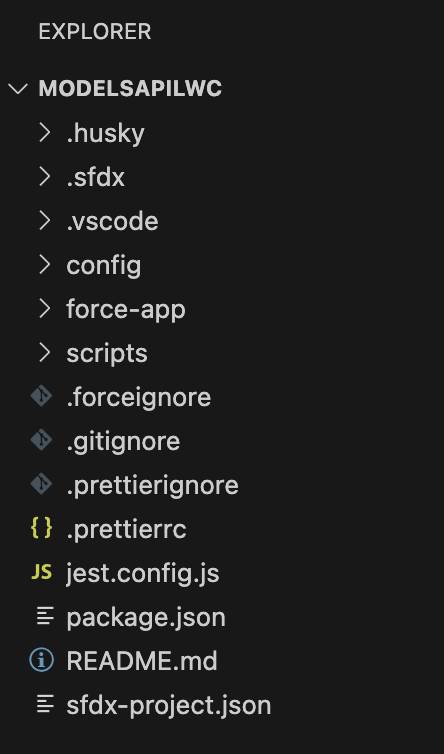
- Haga clic en Create Project (Crear proyecto). Su configuración de base será similar a la que se muestra a continuación.
Conectar su entorno de Visual Studio Code
Antes de crear un componente web Lightning, debe conectar su zona de pruebas de IA a su entorno de VS Code.
Autorizar su zona de pruebas de IA
En VS Code, autorice su zona de pruebas personalizada.
- En Visual Studio Code, abra la paleta de comandos. Para ello, pulse Ctrl+Mayús+P (Windows) o Cmd+Mayús+P (macOS).
- Escriba
SFDX.
- Seleccione SFDX: Authorize an Org (SFDX: Autorizar una organización).
- Pulse Entrar para aceptar la opción de URL de inicio de sesión predeterminada del proyecto.
- Pulse Entrar para aceptar el alias predeterminado. Esta acción abre el inicio de sesión de Salesforce en una ventana de navegador separada.
- Inicie sesión con sus credenciales de zona de pruebas de IA.
- Si se le solicita que permita el acceso, haga clic en Permitir.
- Tras autenticarse en el navegador, la CLI recordará sus credenciales. Cuando el proceso se complete con éxito, se mostrará un mensaje similar al siguiente:

Ahora está todo listo para completar el reto y avanzar a la próxima unidad. Tenga en cuenta que este reto solo se verifica si Einstein está habilitado en Setup (Configuración), pero todos los pasos anteriores son obligatorios para empezar a crear el tablero en la próxima unidad.