Deploy Your Flow to Production
Learning Objectives
After completing this unit, you’ll be able to:
- Add a flow to an outbound change set.
- Add a flow test to an outbound change set.
- Deploy an inbound change set.
- Verify and activate a flow after deploying it to your production org.

From Sandbox to Production
You’ve planned your flow, created tests, set the right user permissions, built the flow to avoid hitting limits, and accounted for potential errors. And of course, you did all of this in a sandbox. Now that the flow is ready, it’s time to move it to production. To copy the flow from a sandbox to production, start by adding the flow to an outbound change set.

Think of change sets like luggage; they’re containers that are used to transport things from one place to another. More specifically, you pack your change set luggage with configuration items so Salesforce can move them from a sandbox to its related production org. Configuration items include things like custom objects and fields, validation rules, page layouts, and more.
Create an Outbound Change Set in a Sandbox
You can’t replicate the following steps in a Trailhead playground, because Trailhead playgrounds don’t support change sets. Instead, watch this video walkthrough of deploying a flow from a sandbox to a production org. If you have a sandbox to use, you’re welcome to follow along using your own flows and flow tests.
It’s Alive!... Almost
But don’t release the balloons and streamers just yet. Even though your flow is in your production org, you still have more to do.
Update Flow Trigger Explorer
For record-triggered flows, confirm that your flow is in the right spot in Flow Trigger Explorer. Adjust the flow’s placement as necessary. For more information on Flow Trigger Explorer, check out the Meet Flow Trigger Explorer unit in our Record-Triggered Flows badge.
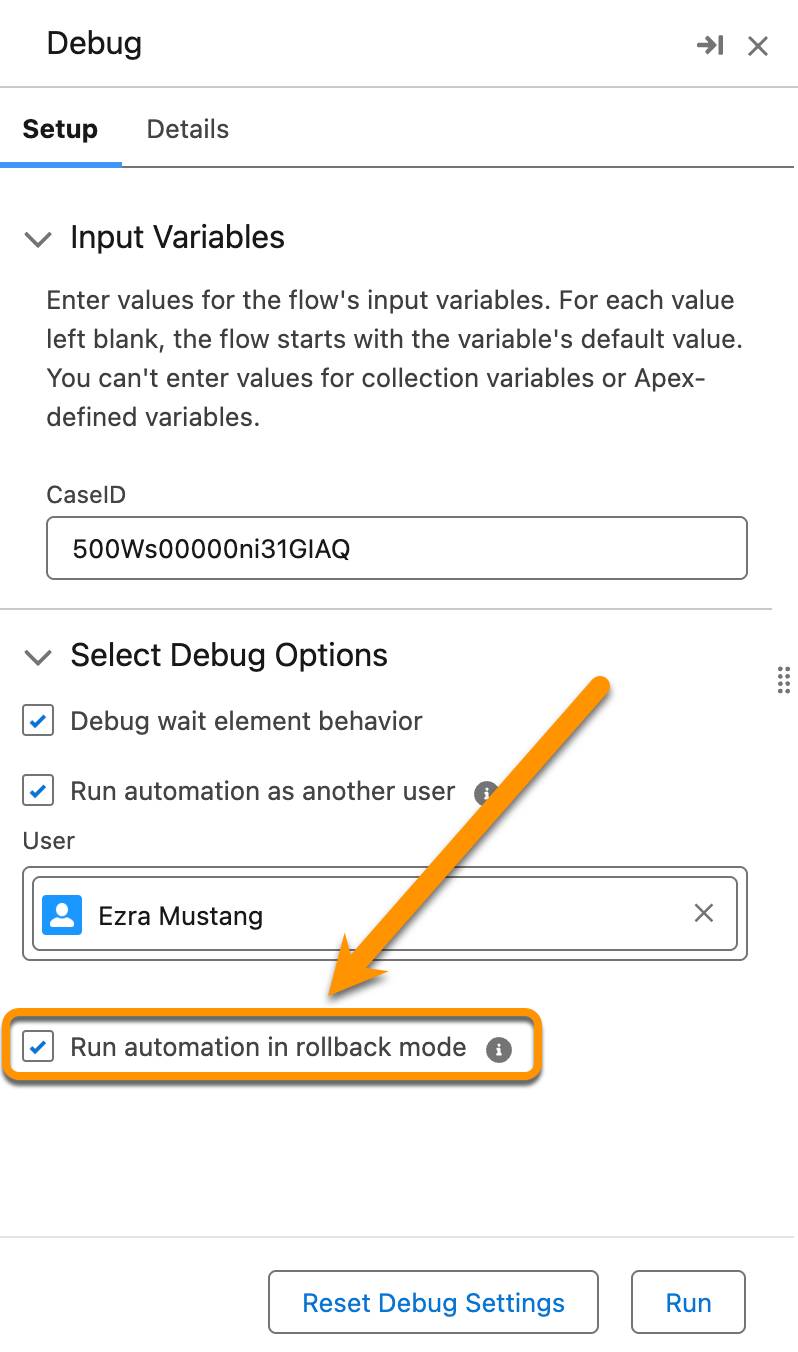
Debug Once More (with Rollback)
Debug the flow again to confirm that the sandbox and the production org have no differences that will cause problems. If your flow is a scheduled or autolaunched flow, select Run automation in rollback mode in the Debug panel so you don’t affect your production org’s data.
Activate the Correct Version of the Flow
When you’re confident that the flow is working as it should, activate it. By default, change sets deploy flows as deactivated, even if the flow had an active version in the original sandbox. But change sets also include every version of that flow, so be certain that you activate the correct version.
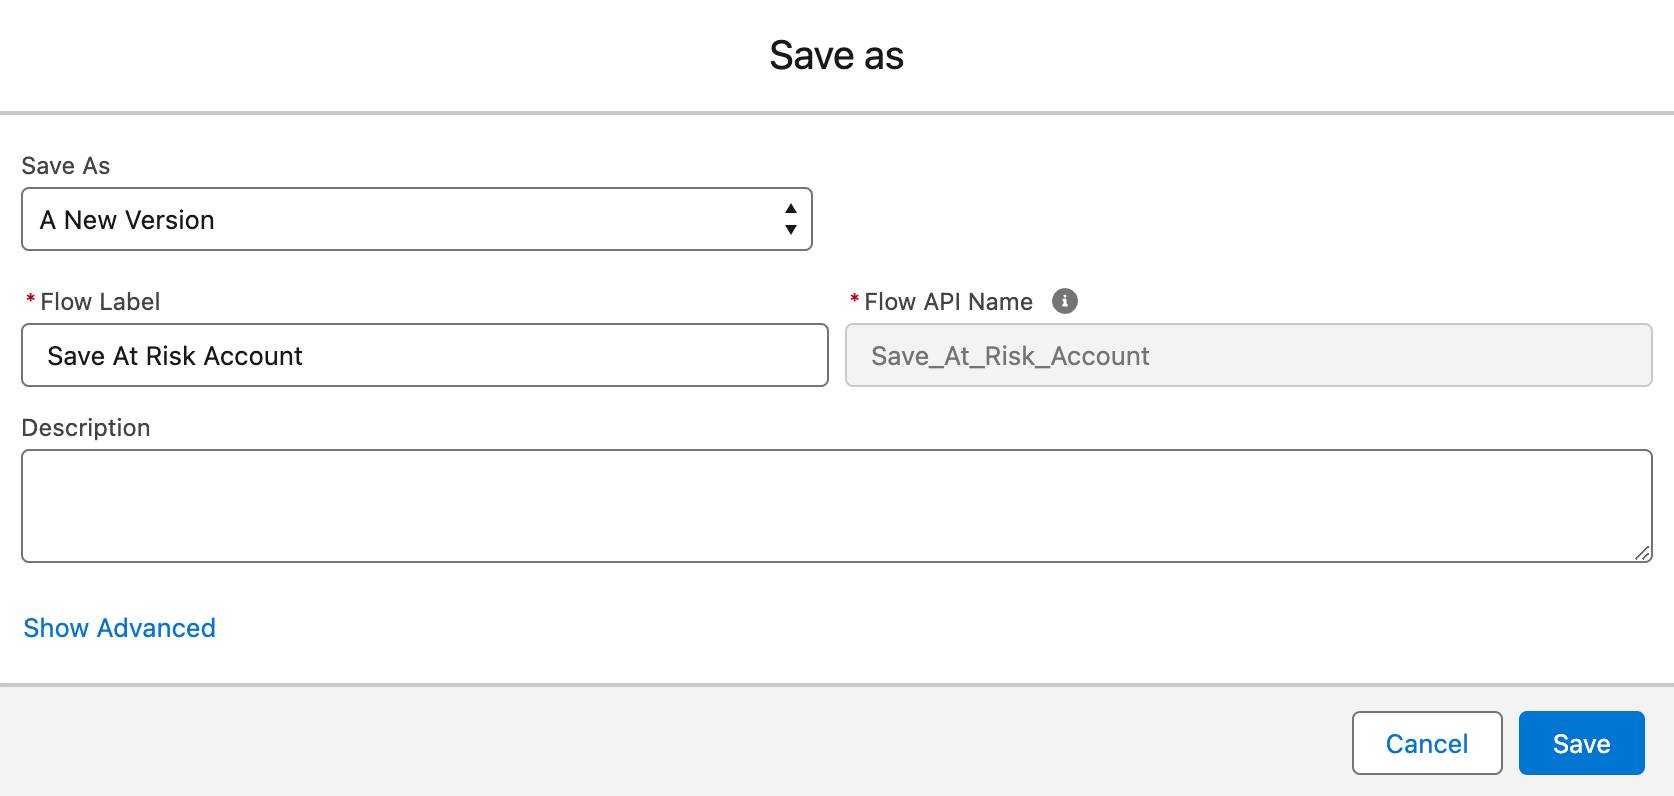
Why would a flow have multiple versions? If you save your flow by clicking Save As New Version, you can save a new version of the flow.
If your flow has only one version, you can activate it by opening the flow and clicking Activate. However, if you deploy a flow with multiple versions from a sandbox, it’s best practice to double-check which version you’re activating. To view all the versions of a flow, click  next to the flow you want to activate, then select View Details and Versions.
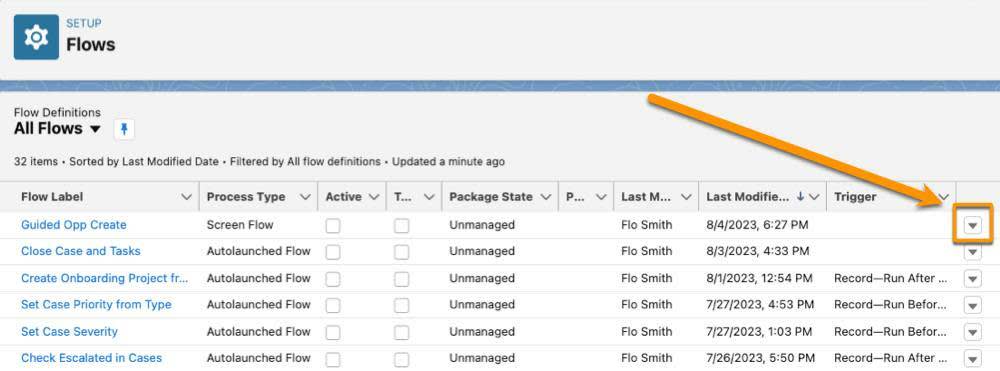
Once you’ve verified which version is the correct version, click Activate on that version’s row.
You can also view different versions of a flow from within Flow Builder. In the header bar, click  to access the current flow’s other versions.
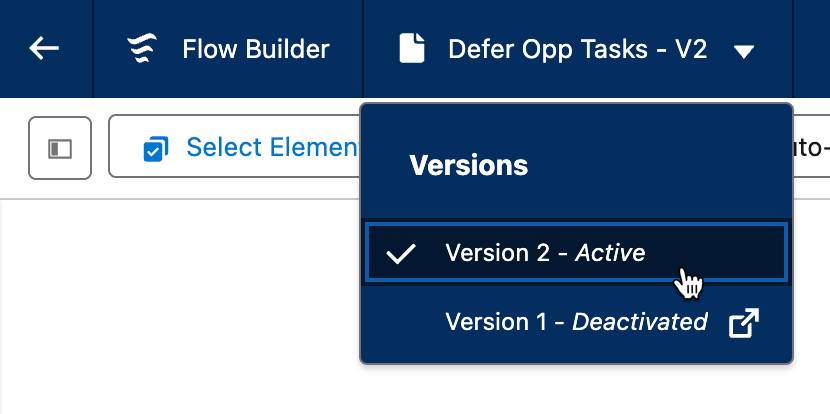
Select a version from the menu to open it in another tab.
Make Sure Users Can Start the Flow
For screen and autolaunched flows, confirm that the flow is accessible to your users. Login as at least one of your users to confirm that they can see the flow or whatever triggers it. You don’t want your automation to be all dressed up with nowhere to flow!
Let Your Users Know
Tell the flow’s intended users that the flow exists and give them instructions or documentation on how to use it. If you assume users will discover the flow on their own and intuitively know how to use it properly, you’ll likely be disappointed.
Let It Flow! Let It Flow!
After you finish these steps, your flow is done! Well, not really; a flow is never truly done. As your users use the flow, they’ll almost certainly ask for improvements or find ways to break it. Use everything you’ve learned in these Flow Implementation badges to make and test changes in a sandbox before deploying them to your production org.
Resources
- Salesforce Help: Connect Organizations for Deployment
- Trailhead: Record-Triggered Flows
- Salesforce Help: Distribute a Flow